Install JavaScript in Local Product
With Reo.Dev you can track developer activity on all your locally hosted products. Here's a step-by-step guide on how to set it up:
1. Configure Your Local Product for Tracking
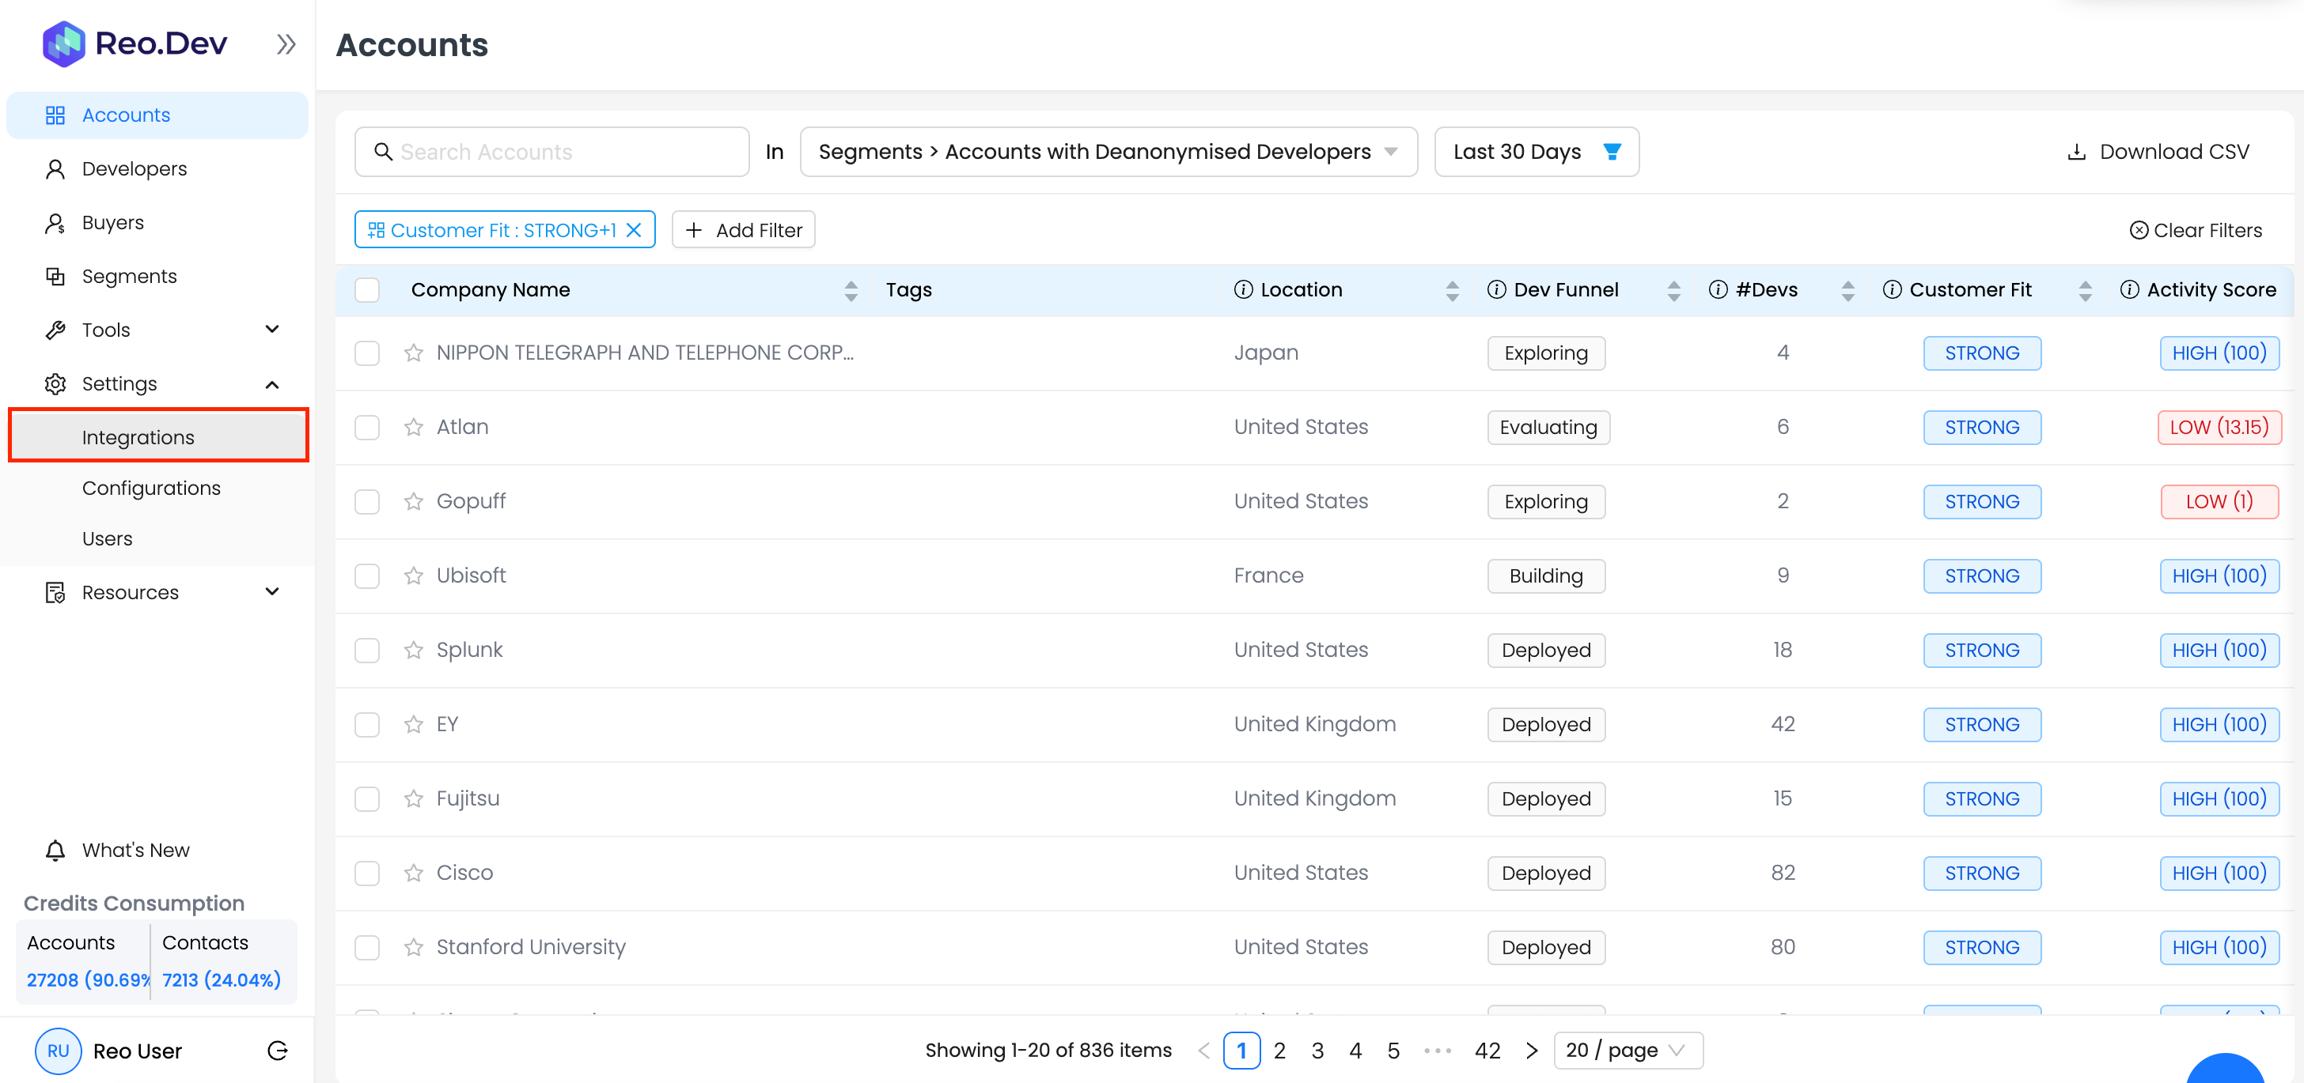
Step 1: Click on the 'Integrations' under the settings section on the left navigation panel
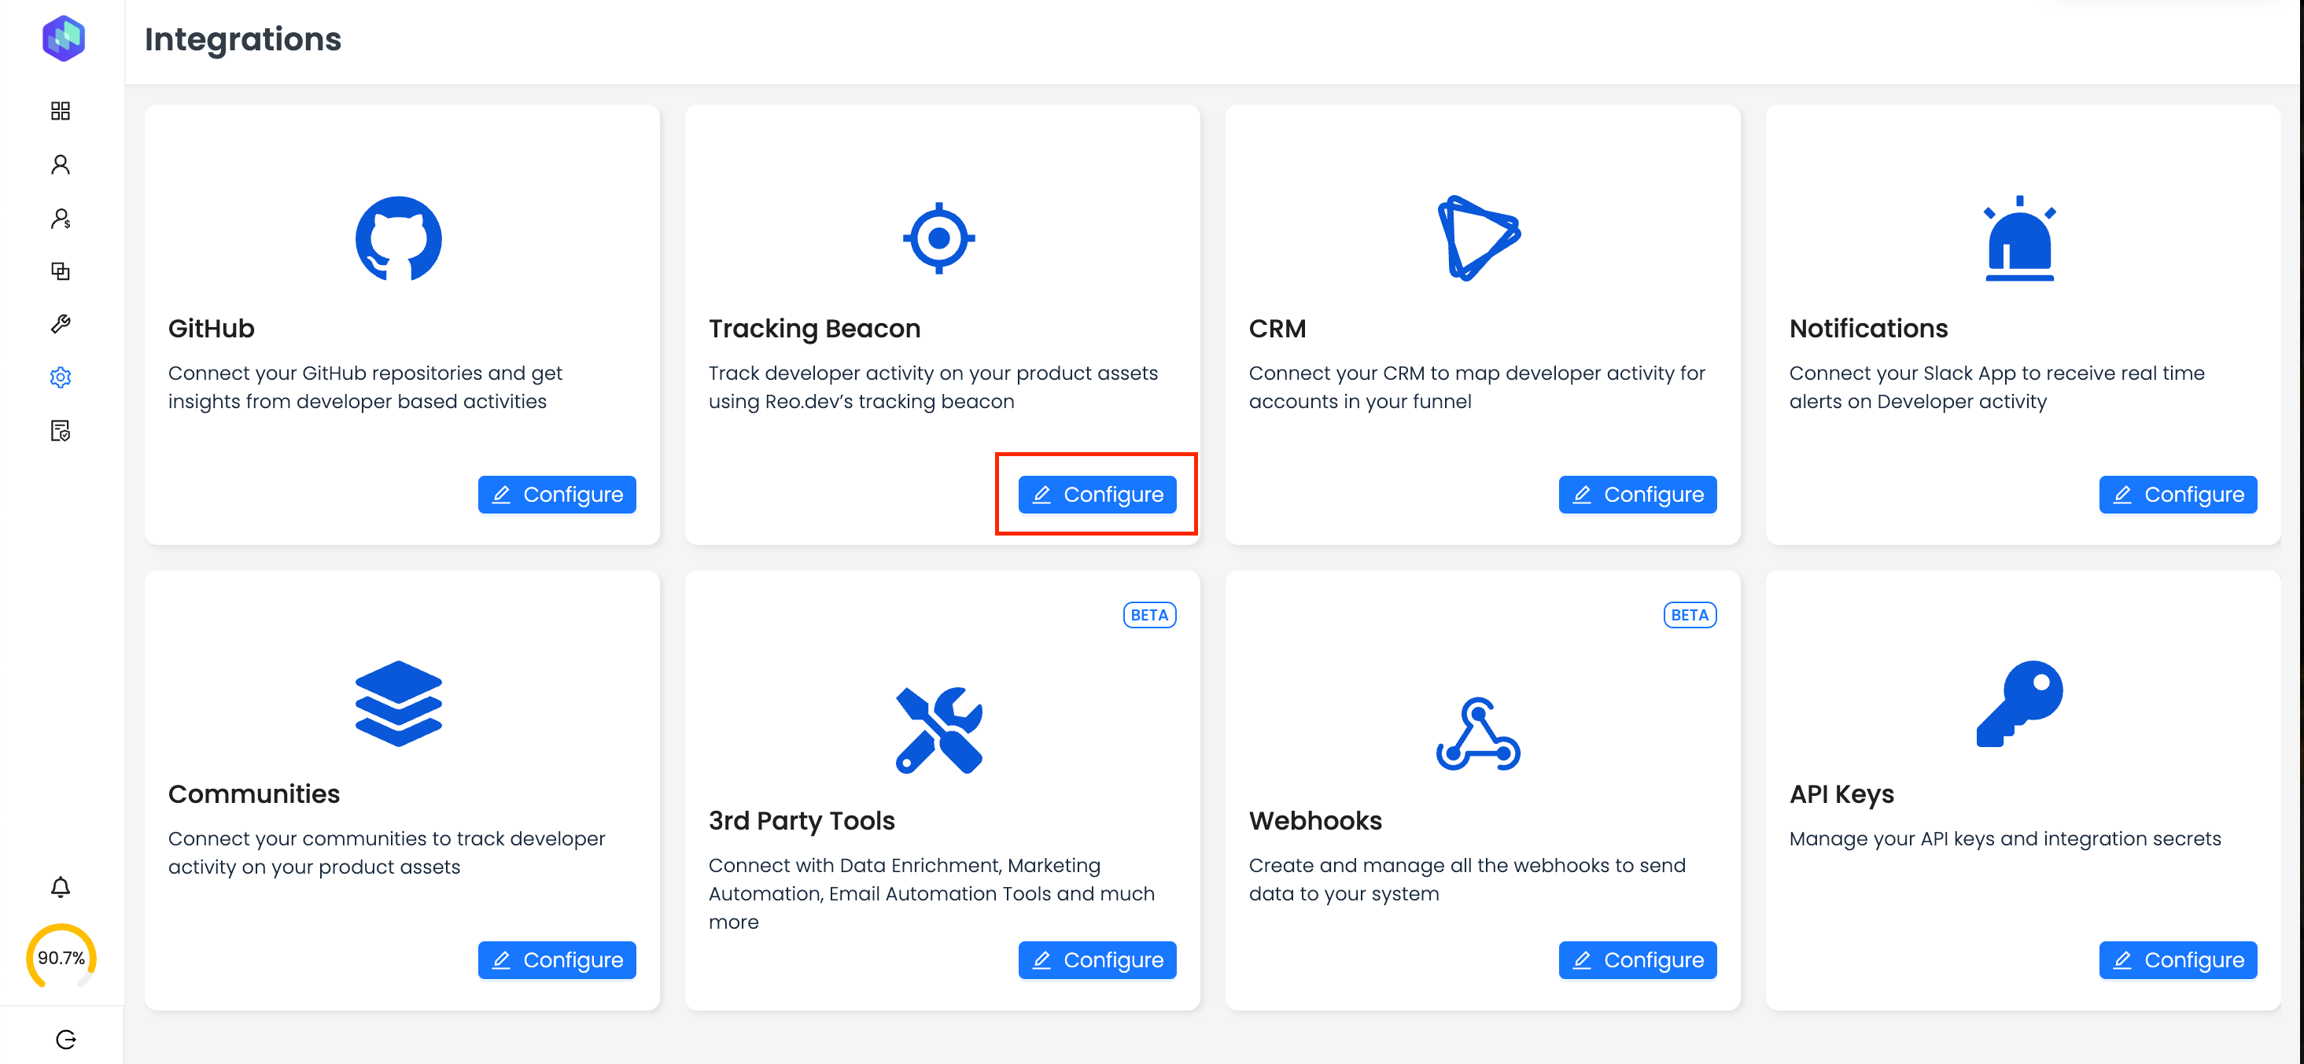
Step 2: Click 'Configure' in the Tracking Beacon section.
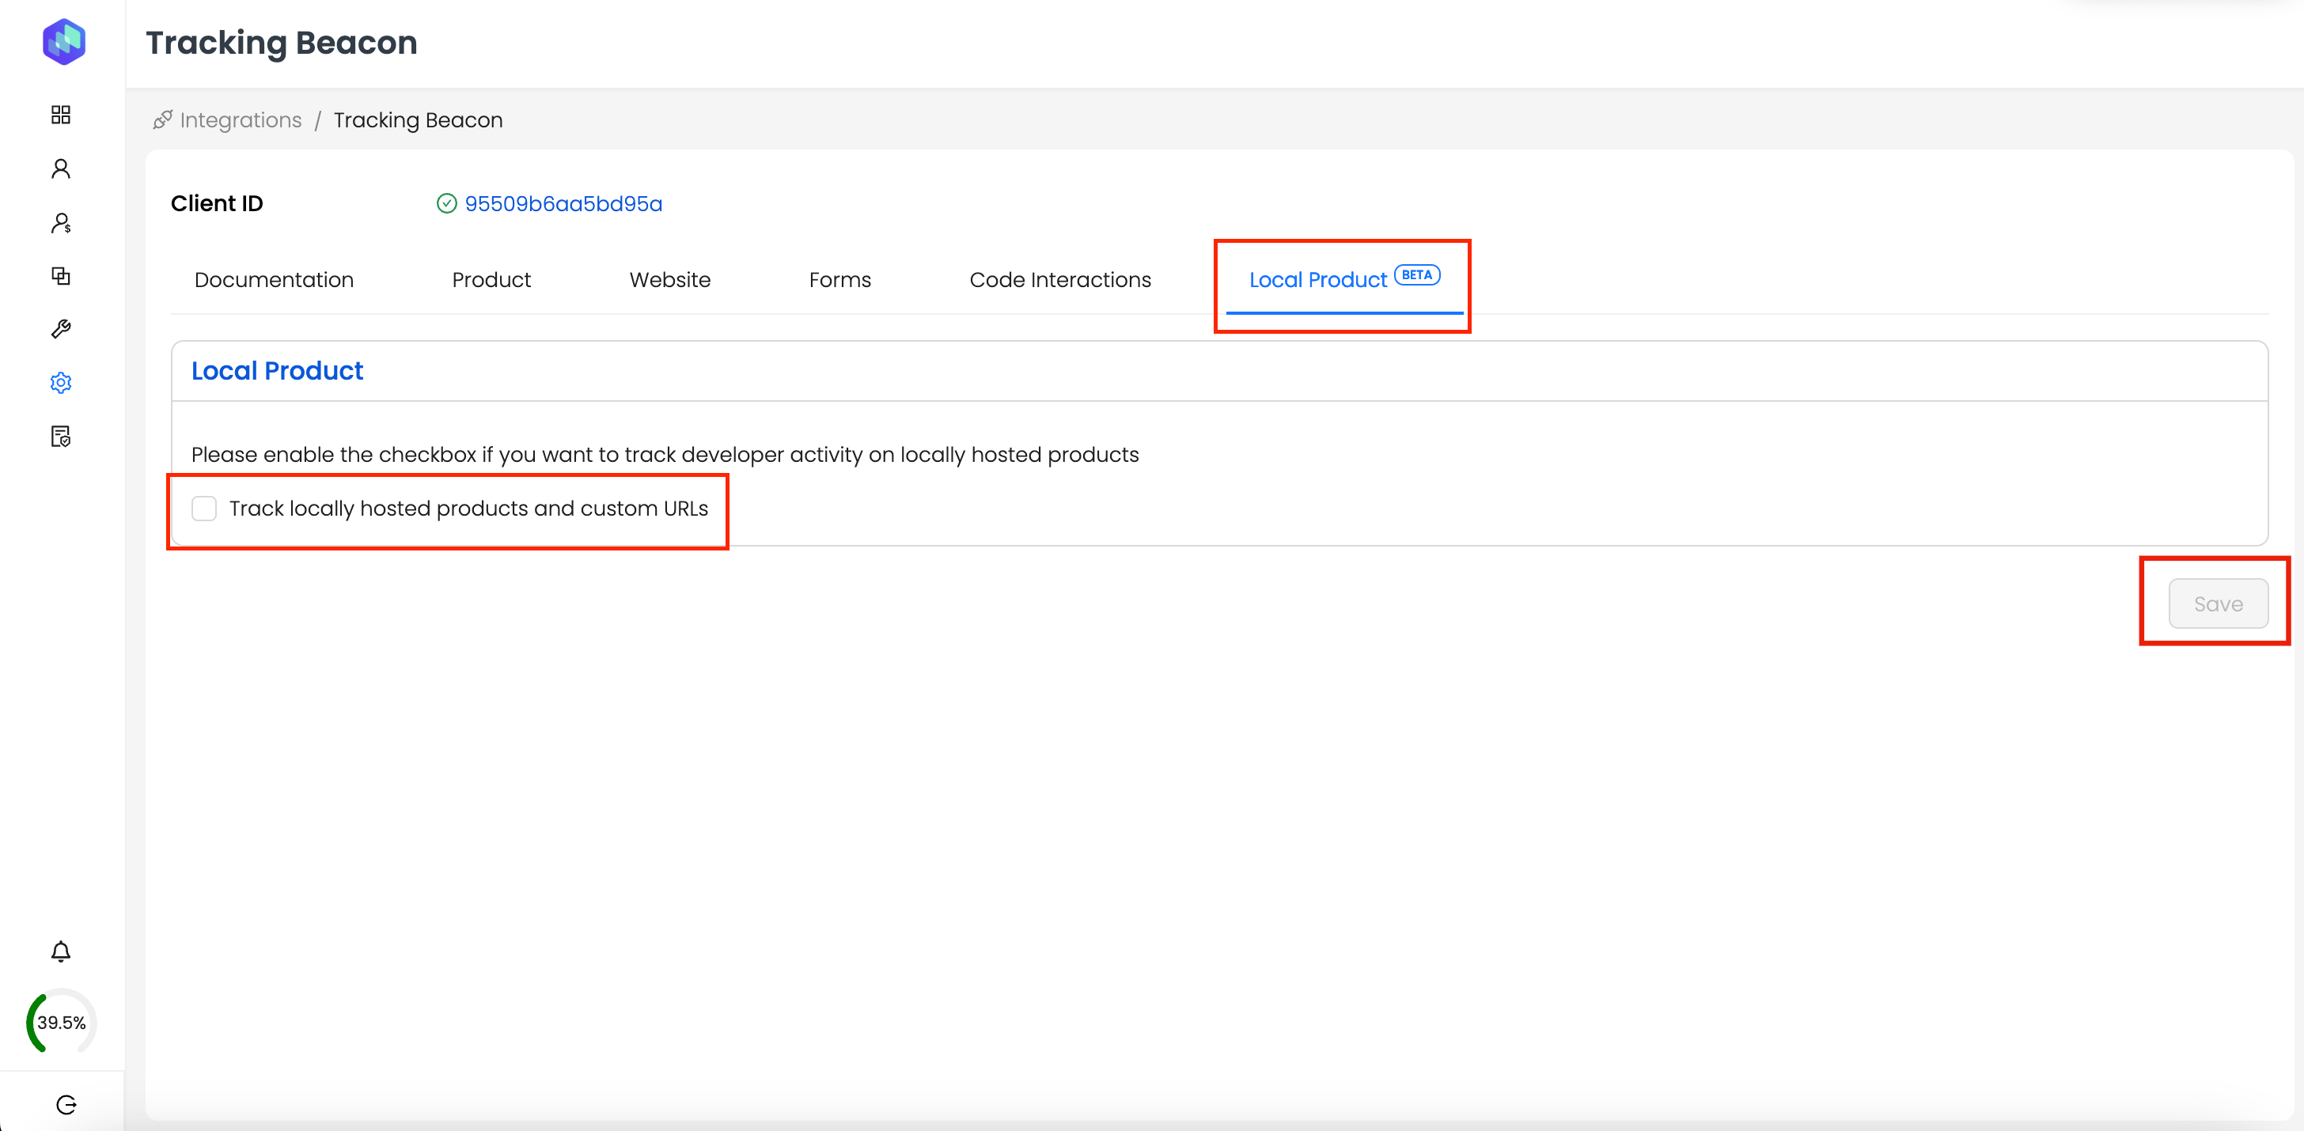
Step 3: Head to the 'Local Product' Tab.
Next - Click on the 'Track locally hosted products and custom URLs' checkbox to enable tracking and then hit 'Save'
Installation & Initiation - Code Integration
You can install JavaScript to track the user activity on your local product in two ways.
Using our CDN
As an NPM package
Note: You can only use this to track products shared externally — like public GitHub repos that external devs can fork/clone/download or docker images. The snippet should not be embedded onto own cloud products' local/dev environment.
Option 1: Using CDN
To install JavaScript code using our CDN, follow the instructions below:
1) Get the JavaScript Snippet:
Copy the JavaScript code snippet from Reo.Dev Dashboard. Go to Integrations >> Tracking Beacon >> Local Product >>Method 1: Using CDN
2) Integrate the JavaScript into Your Local Environment:
Go to the root index.html page of product web pages
3) Locate the <head> Tag:
For optimal performance, it’s recommended to place the script within the <head> tags of your HTML document. This ensures it's loaded early in the page's lifecycle.
4) Insert the JavaScript Snippet:
Insert the JavaScript snippet provided within the <head> section of your HTML file.
5) Save and Deploy:
Save the changes to your HTML file and deploy it to your server.
6) Verification:
Go to any screen after login and right-click anywhere
In the dropdown menu, select Inspect.
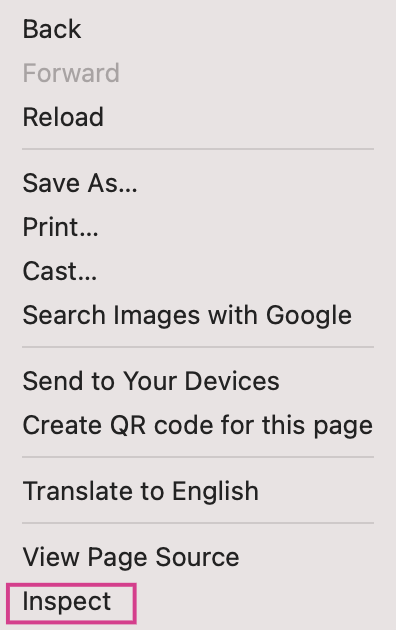
In the elements tab, Use the Ctrl + F or Cmd + F and search for “reo”

If the tracking code appears, verify that the code matches.
Option 2. As an NPM Package
To install JavaScript code as an NPM package, follow the instructions below:
Install the Package:
Open your terminal or command prompt.
Integrate the Package into Your Project:
Within your project, identify the file or module where you want to incorporate javascript.
Use with NPM:
Import the required function from the installed package and set up the script to load the Reo tracking.
Copy the JavaScript code snippet from Reo.Dev Dashboard. Go to Integrations >> Tracking Beacon >> Local Product >>Method 2: As NPM Package
Our npm package is promised-based, so we need to resolve loadReoScript before invoking the init method on it.
4) Adjust Environment Variables (if needed):
If using environment variables, make sure to set them up in your environment configuration or .env files.
5) Save Changes:
Save the file containing the updated code.
6) Build and Deploy:
Compile or bundle your project based on your build process, and deploy the changes to your server or hosting service.
7) Verification:
Go to any screen after login and right-click anywhere
In the dropdown menu, select Inspect.
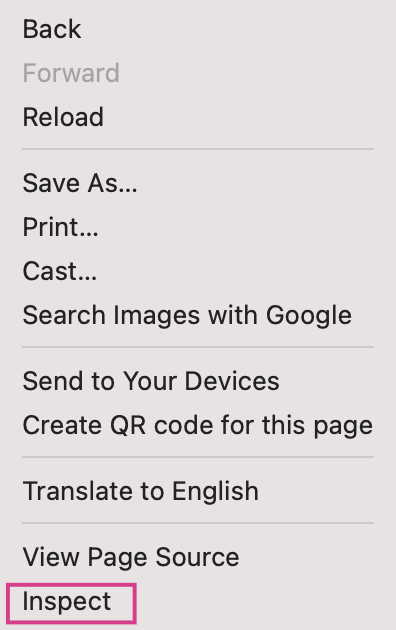
In the elements tab, Use the Ctrl + F or Cmd + F and search for “reo”

If the tracking code appears, verify that the code matches
Error Scenarios
Script initiation
Script initiation has been modified to rely on code initiation only on successful callback post download from CDN. So it will only initiate if successfully downloaded. In case the download fails, the javascript won’t get enabled but this eliminates the likelihood of an error scenario of page breaking
API failure on token delete
On deletion of all Reo tokens, the most recent event tracking data will likely fail, but subsequent API calls will work fine
Any inadvertent code failure on JavaScript
This should not be an issue since the code is wrapped in a try-catch block, the console may throw errors, which won’t be visible even on the console since logger would be disabled on the script
Cookie Management and Compliance
To learn more about Reo.Dev's cookie usage, categorization, and best practices for implementation, refer to this guide.
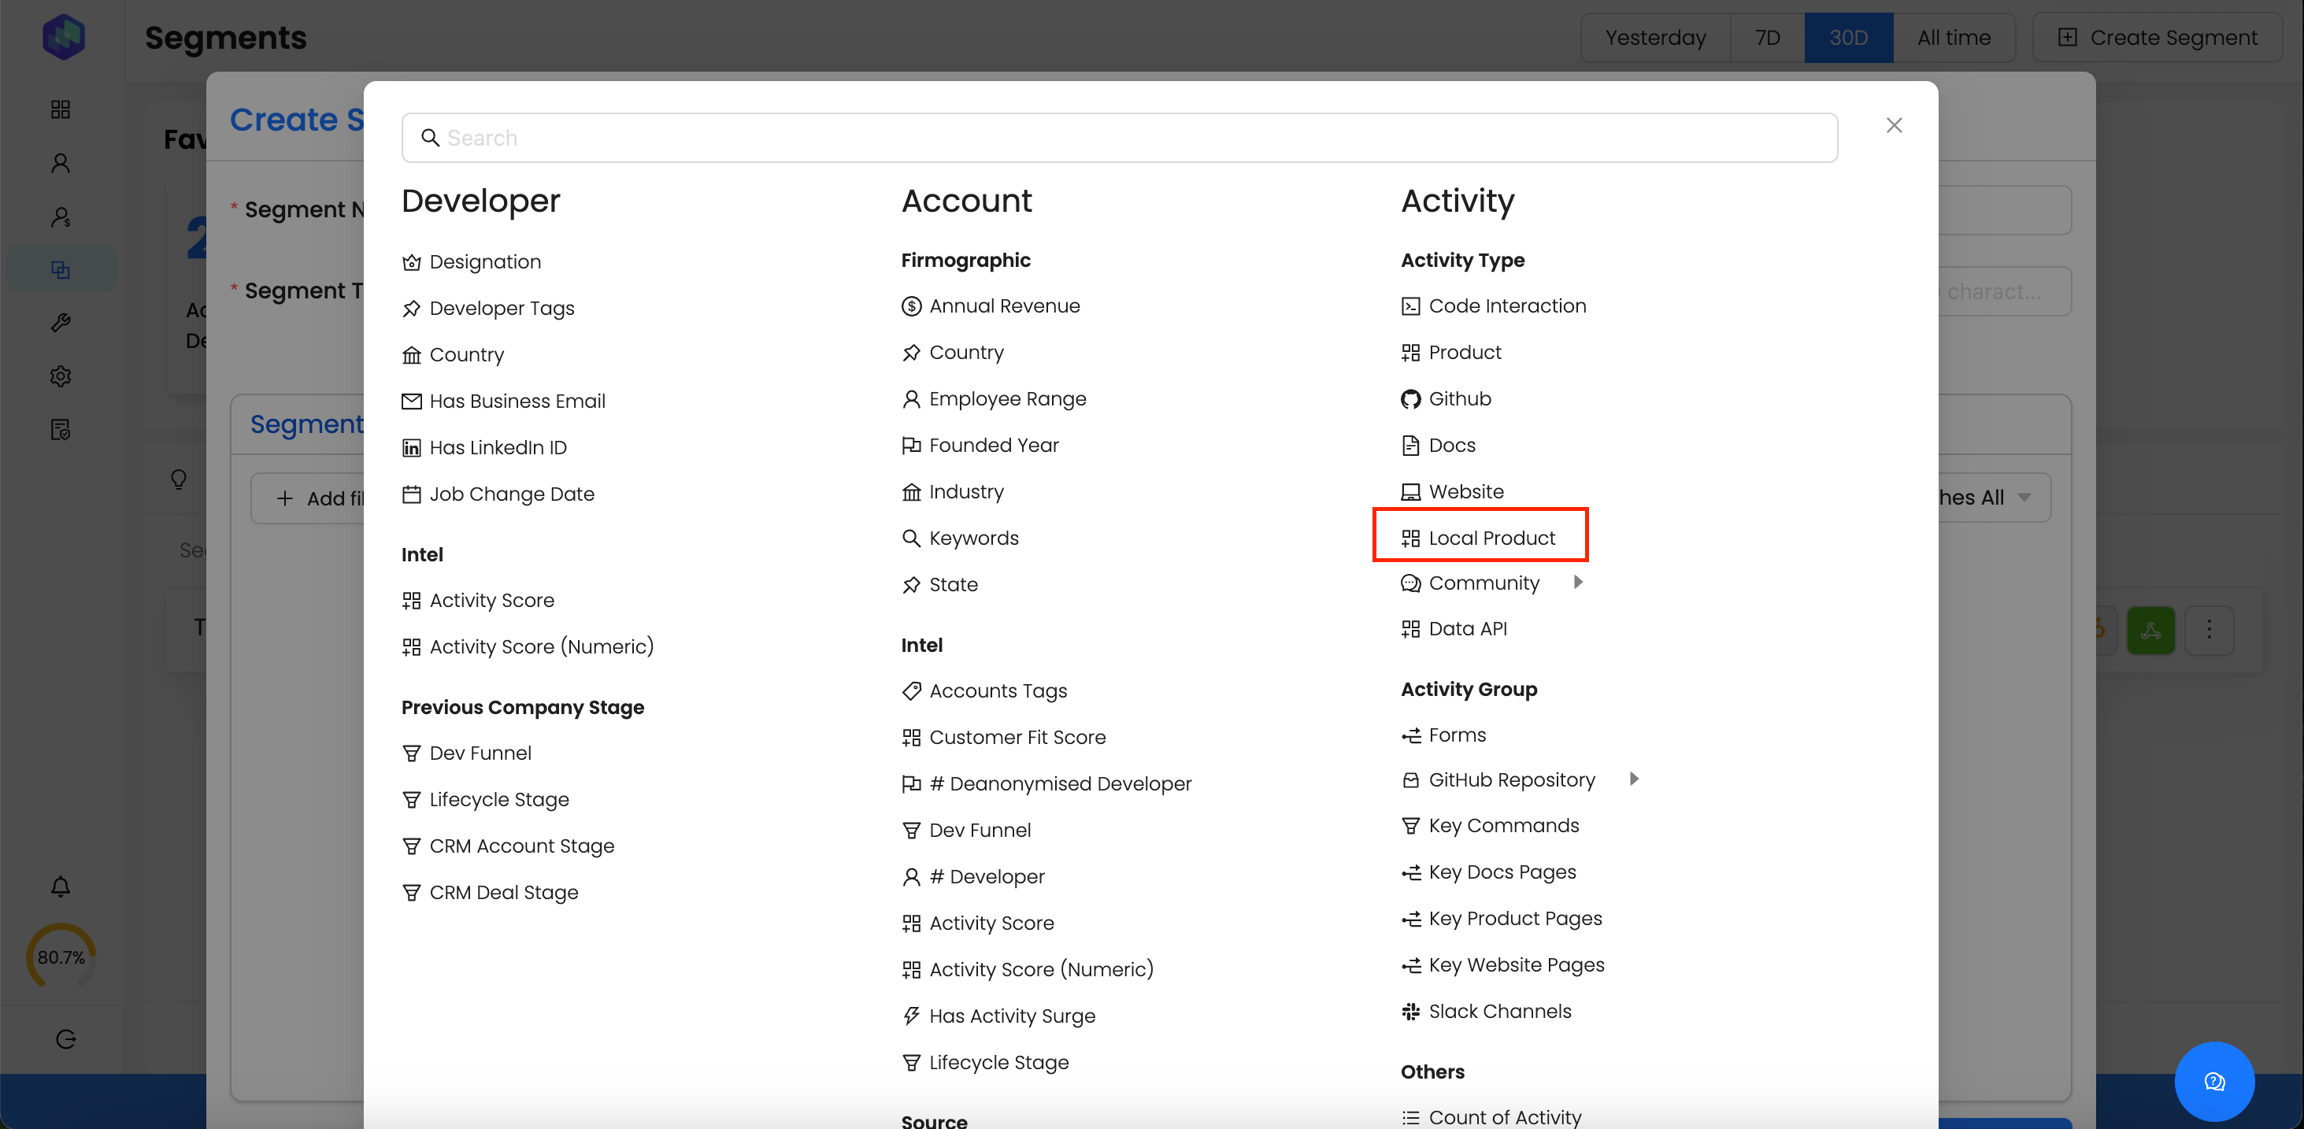
Once you've added the JS, you can create a Segment to see accounts or developers interacting with your local product. Use filter 'Local Product' from the Segment filter list.
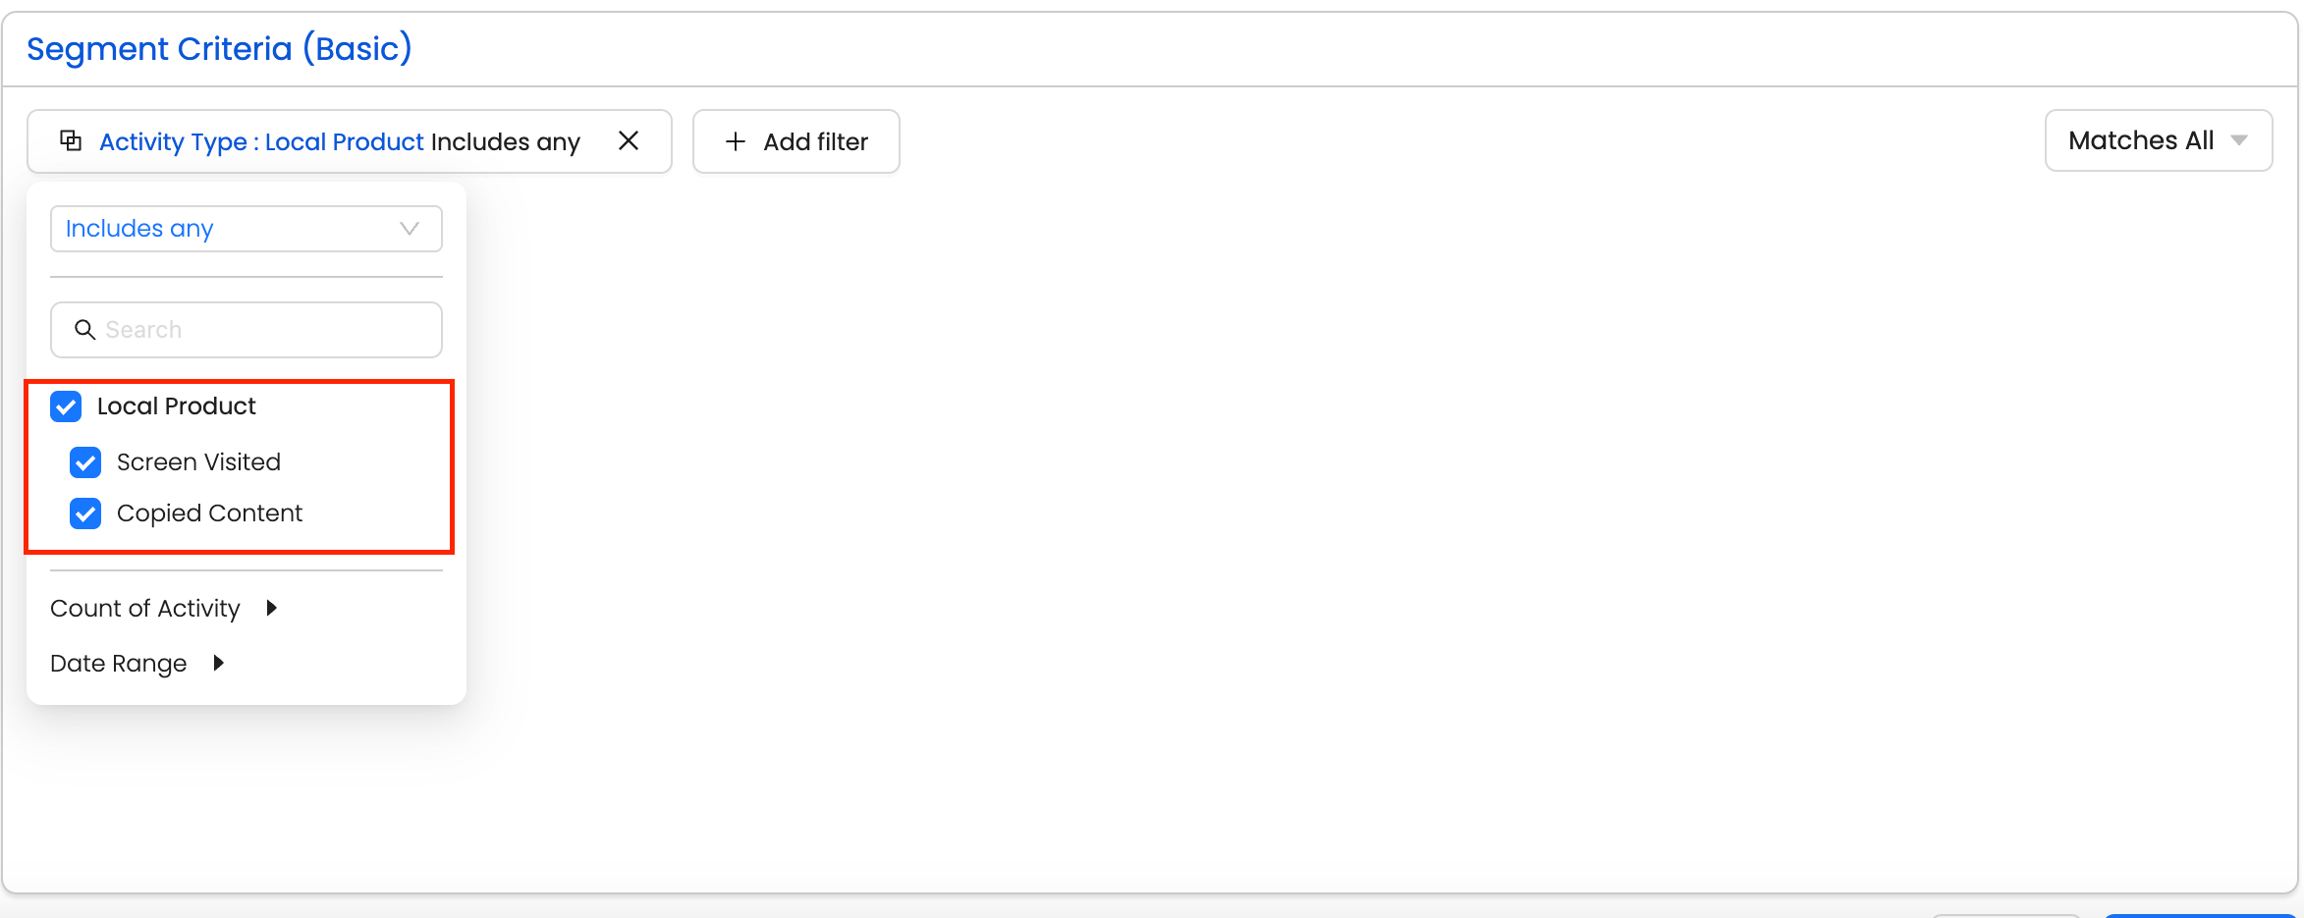
Then, select the specific activities you want to track from the Segment Criteria attribute.
Once you've save this segment, check out the activity timeline on any account or developer in this segment.
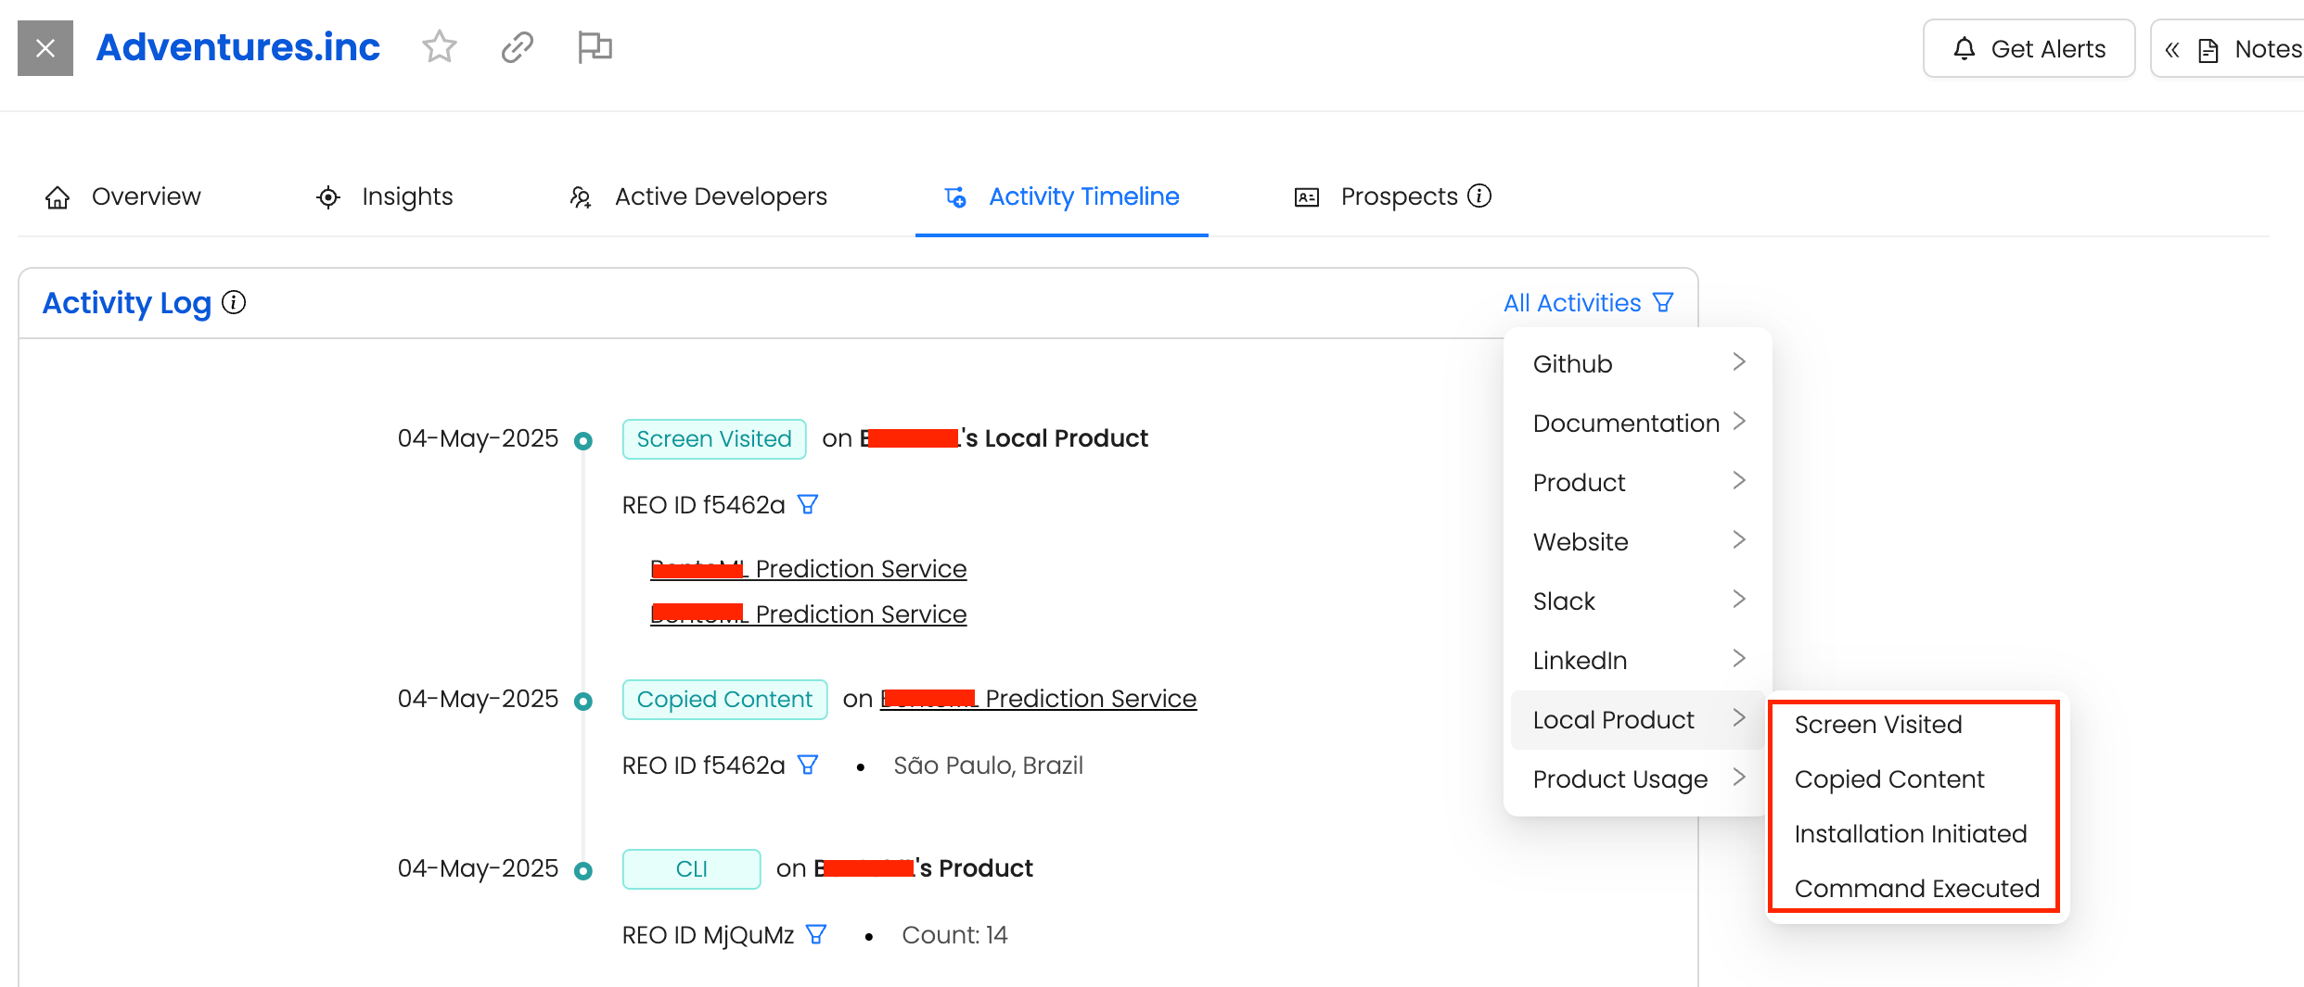
Here, you can see which developers have interacted with your local product, how often they've engaged, and gain valuable insights to tailor your messaging effectively.
Note: Key Pages aren’t supported on local hosted products.
Content Security Policy (CSP) Considerations
If your website uses a strict Content Security Policy (CSP), you may need to update it to allow our script to load and execute correctly. Please ensure the following directives are updated to include our domains:
Required CSP Directives
FAQs
Does the JavaScript code introduce any vulnerabilities or risks to the website?
The JavaScript code has been tested thoroughly to ensure that it does not introduce any vulnerabilities or risks to the website. Data sent by the JavaScript code is encrypted using the HTTPS protocol to ensure secure transmission and prevent unauthorized access.
Does the JavaScript code use external dependencies or third-party libraries?
The JavaScript code uses secure third-party libraries that have been thoroughly checked for vulnerabilities and risks.
How does JavaScript handle user privacy? Is there a potential risk of collecting personally identifiable information (PII) without proper consent?
It is designed to collect anonymous data such as browser information, page views, copy and click events without collecting any non-consented PII.
What impact will including this JavaScript have on the page load times of my app?
The code has been optimized to minimize any negative impact on page load time and performance. This code uses asynchronous loading technology so it can load independently without blocking the rendering of the screen content.
Has the JavaScript been tested on different browsers and devices to ensure cross-platform compatibility and consistent behavior?
The JavaScript code is thoroughly tested on multiple browsers (Chrome, Firefox, Safari, Edge, Brave) and devices (desktop, mobile) to ensure compatibility and consistent behavior.
Will the inclusion of this JavaScript affect the overall user experience of the product, for example, slow down UI interactions or cause unexpected behavior?
It doesn't affect the overall user experience. It will not slow down, or introduce any intrusive elements that have an impact on the experience.
Are there any fail-safe mechanisms in place to prevent scripts from disrupting critical functionality in the event of an error?
We have implemented fail-safe mechanisms in the javascript to prevent scripts from interrupting the website's critical functionality in the event of an error, thus ensuring a smooth user experience.
Will the JavaScript code continue to perform optimally as the app traffic and user base increase over time?
The code is optimized for scalability. The JavaScript code is designed to scale as your online traffic and user base grow. It will continue to work best even as traffic to your site increases. There are no significant limitations or performance bottlenecks associated with the tracking mechanism.
Last updated
Was this helpful?

