LogoLogo
API DocsChangelogPlaybooksLoginBook a Demo
  • Getting Started
    • Introduction to Reo.Dev
    • For Users
      • Step 1: Find active accounts to target
      • Step 2: Track developer activity on your target accounts
      • Step 3: Identify developers engaging with your product
      • Step 4: Build custom segments that are most likely to convert
      • Step 5: Use filters to spot high-intent leads
    • For Admins
      • Step 1: Identify active accounts to target
      • Step 2: Track developer activity on your target accounts
      • Step 3: Find developers engaging with your product
      • Step 4: Create custom segments that are most likely to convert
      • Step 5: Integrating data sources with Reo.Dev
      • Step 6: Integrate Slack and set up notifications
      • Step 7: Add Customer Fit Criteria
  • Accounts
    • Account Lifecycle Stage
    • Custom CRM Stages
    • Developer Funnel Stages
    • Account Activity Score
    • Tags
    • Customizing Tags
    • Custom Lists
    • Using the Lists API in Reo.Dev
    • Managing CRM Owners in Reo.Dev
    • Follow an Account
    • How to Set Up Notification Alerts for Accounts, Developers & Segments in Reo.Dev
    • Flag incorrect data
  • Developers
    • Interpreting Intel on the Developer view page
    • Developer Activity Score
    • How to Find Inbound Developers in Reo.Dev
  • Segments
    • Creating Segments
    • Basic & Advance Segments
    • Filters 101
    • Segment Actions
    • My Segments
    • Shared Segments
    • Magic Segments
    • Favourite Segment
    • Add notes for better collaboration and context
    • CSV Exports for Segments
    • 10 Advanced Segments to create to spot high-intent opportunities
  • Buyers
    • Find Buyer Contact
    • How to Find, Segment & Engage Decision-Makers in Reo.Dev’s Buyer Section
    • Buyer Persona Configuration in Reo.Dev
  • Enrichment
    • Enrichment
  • Audiences
    • Buyer Audience
  • Integrations
    • Connect GitHub repositories
    • Reo.Dev Zapier Integration Guide
    • Webhooks
    • Developer Docs
      • Docusaurus
      • GitBook
    • CRM
      • HubSpot
      • Salesforce
      • Pipedrive
      • Zoho
      • Freshworks
      • Leadsquared
    • Tracking Beacon
      • Install JavaScript for Documentation
      • Install JavaScript for Product
      • Install JavaScript in Website
      • Install JavaScript in Local Product
      • Track Code Interactions
      • Install JavaScript for Documentation through Google Tag Manager
      • Reo.Dev JavaScript Cookies and Consent Guide
    • Product Usage API
      • Overview
      • How to Configure Product Usage Metrics in Settings
      • Telemetry Data
      • Product API
      • Examples of Product Usage Metrics
      • Data Collected for Product Usage
    • Communities
      • Open Communities
      • Owned Communities
        • Slack
        • LinkedIn Company Page
    • Email
      • Apollo.io
      • How to Integrate and Use Outreach.io with Reo.Dev
      • How to Integrate and Use Salesloft with Reo.Dev
    • Website Tracking
      • RB2B
  • Analytics
    • Impact Dashboard
  • Campaigns
    • Run bulk email campaigns
    • Testing Your Email Integration with Reo.Dev
  • Settings
    • Add Customer Fit Score Criteria
    • Add Firmographic and Technographic Filters
    • Configure Slack & Email Notifications
  • Account and Contact Usage Limit
    • Manage Account and Contact Limit Usage
  • User Management
    • Invite a teammate to Reo.Dev
    • Manage CRM Permissions
    • Roles and Permissions: Admin vs User
    • What Happens to Data When a User Is Deleted in Reo.Dev?
  • FAQs/Troubleshooting
    • How to Exclude Competitors from My Segments in Reo.Dev?
    • How to Sync a Segment to Salesforce/HubSpot?
    • Why Is the 'Sync to CRM' Button Greyed Out?
    • I Synced My Accounts, But They Are Not Showing in My CRM – What to Do?
    • Why Am I Seeing More Accounts in CRM Than I Synced?
    • Why Can't I Find My Account in the Dashboard Search Bar?
    • Resolving Caching Issues in Reo.Dev
    • Understanding Score Discrepancies Between Account and Developer Activity Score
    • Reo.Dev Credit-Based Pricing: FAQs
Powered by GitBook
LogoLogo

Resources

  • Changelog
  • Playbooks
  • DevGTM Conversations
  • Support
  • API Docs

Company

  • Blog
  • Contact Us
  • Book a Demo

Policies

  • Privacy Policy
  • Terms of Service

© 2025 All rights reserved Reo.Dev

On this page
  • Solution 1: Creating a Segment Using the CRM owner Filter
  • Solution 2: Uploading Custom Lists for Each Salesperson
  • Summary

Was this helpful?

  1. Accounts

Managing CRM Owners in Reo.Dev

PreviousUsing the Lists API in Reo.DevNextFollow an Account

Last updated 12 days ago

Was this helpful?

For organizations where multiple sales representatives—such as SDRs and AEs—use Reo.Dev simultaneously, lead ownership can sometimes become unclear, leading to outreach conflicts and inefficiencies. To address this, Reo.Dev offers robust solutions to segregate and manage leads effectively.

By leveraging the CRM owner feature or Custom List Uploads, you can ensure clear ownership and seamless lead management, allowing your team to focus on personalized and conflict-free outreach.

This guide outlines two ways to manage CRM Owners within Reo.Dev:

  1. Using the CRM owner filter in segment creation.

  2. Uploading custom lists for each salesperson and creating segments.


Solution 1: Creating a Segment Using the CRM owner Filter

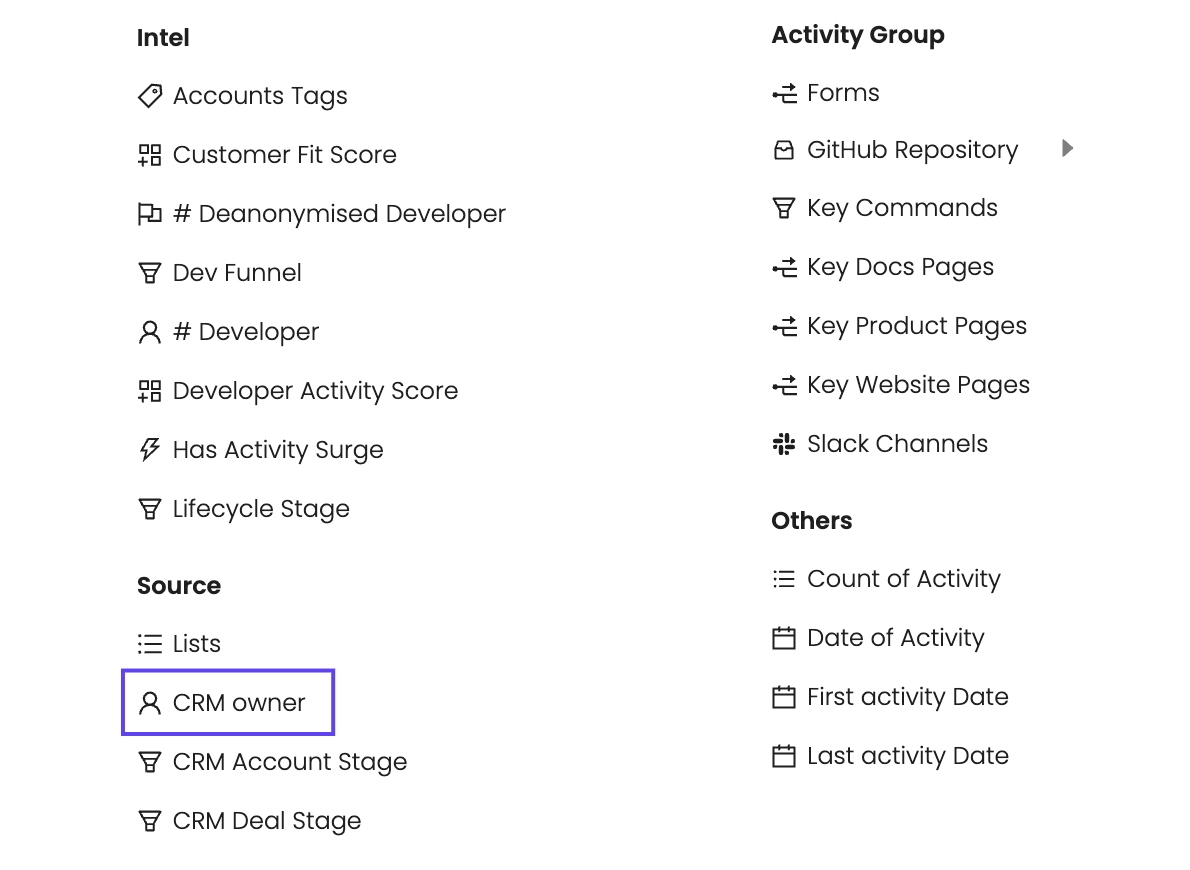
The CRM owner filter allows you to segment leads directly based on ownership within your connected CRM. This ensures that each salesperson only accesses the leads assigned to them.

Steps:

  1. Navigate to the Segments tab in Reo.Dev.

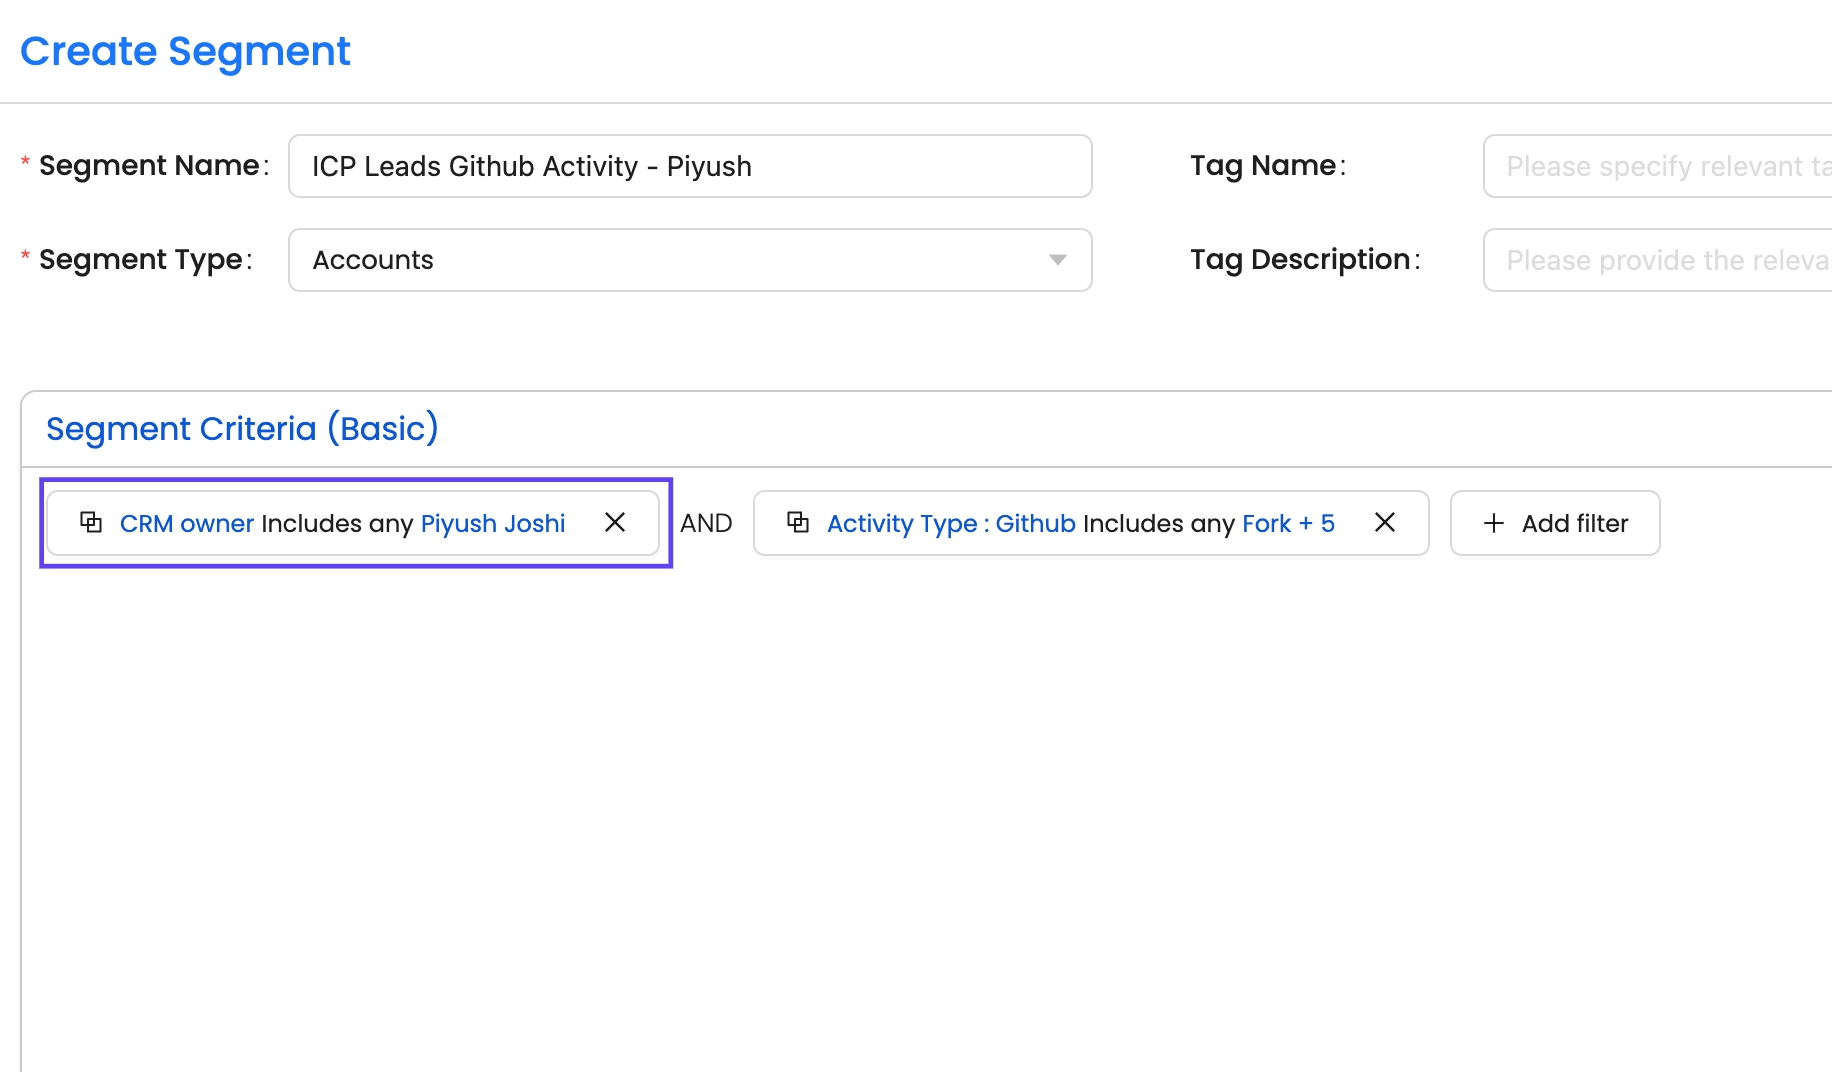
  2. Click Create New Segment and name it appropriately.

  3. Add a filter for CRM owner:

  1. Select CRM owner under the Source category.

  2. Choose the names of the sales representatives whose leads should be included in the segment (e.g., "Piyush Joshi".)

  1. Add additional filters (e.g., Customer Fit Score) to refine the segment further.

  2. Save and activate the segment.


Solution 2: Uploading Custom Lists for Each Salesperson

If you prefer to manage lead ownership manually, you can upload custom lists for each salesperson and then create segments from those lists.

Steps:

  1. Prepare a CSV file containing the leads for each salesperson.

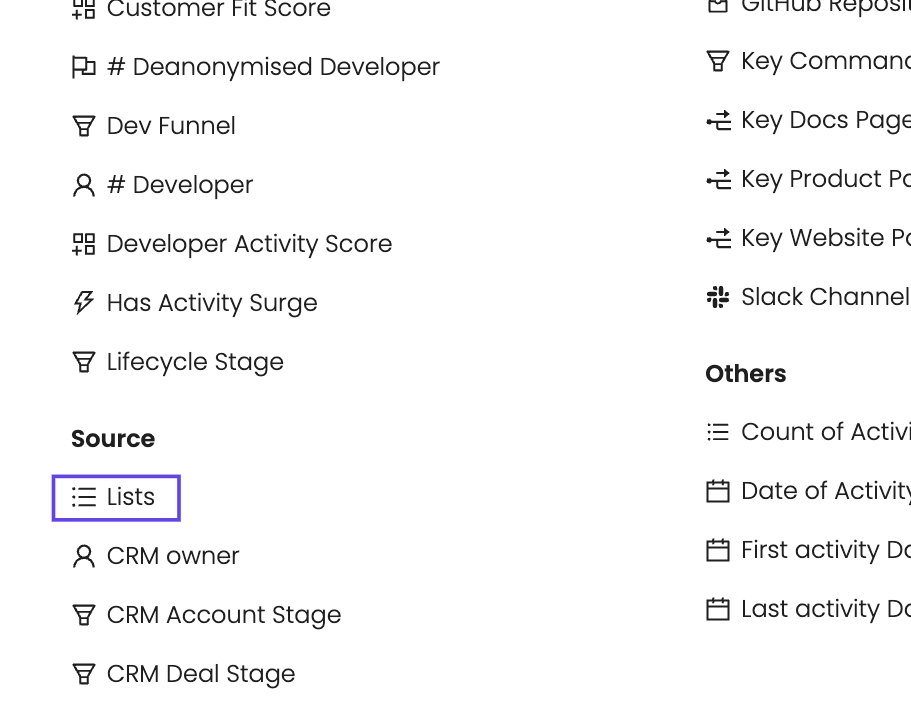
  2. Navigate to the Lists section in Reo.Dev.

  3. Click Upload List and select the appropriate CSV file.

    • Assign a clear, descriptive name to each list (e.g., "US ICP Leads for Nitin S").

  4. Once uploaded, create a new segment:

    • Add a filter for Source and select the uploaded list.

    • Combine additional filters (e.g., activity type or fit score) to refine the segment.

  5. Save and share the segment with the assigned salesperson.


Summary

Managing lead ownership in teams with multiple sales representatives is critical for effective and conflict-free prospecting. Reo.Dev offers two straightforward methods to ensure clarity:

  • Use the CRM owner filter to segregate leads based on CRM-assigned ownership.

  • Upload Custom Lists to assign leads to individual sales team members manually.

By implementing these strategies, your team can optimize outreach efforts, prevent overlap, and maintain a streamlined sales process.

Reference: for more details on uploading lists in Reo.Dev.

Custom List Upload Guide