Salesforce
Integration with Salesforce allows Reo.Dev to send data to Salesforce as well as read lifecycle stage for contacts and accounts in Salesforce. You can connect your Salesforce App with Reo.Dev from the Integrations section.
Requirements
You must be admin of Reo.Dev app
You must be an admin of your Salesforce CRM instance
Create Custom fields in Salesforce
Before we begin the Salesforce integration, we should create the following fields in Salesforce in Accounts, Contacts and Leads object respectively.
Important Note: When creating the fields in Salesforce, ensure that:
Field Names must be written in lowercase. If not, the fields will not map correctly during integration.
Follow the specified structure and naming conventions outlined below to avoid integration errors. We recommend copy-pasting the values from the table directly below.
Accounts
Date
REO: Last Activity Date
reo_account_last_activity_date
-
Yes
-
Picklist
REO: Customer Fit Score
reo_customer_fit
STRONG, MODERATE, WEAK
Yes
-
Picklist
REO: Developer Activity Score
reo_developer_activity_score
HIGH, MEDIUM, LOW
Yes
-
Text Area (Rich)
REO: Segment Name
reo_segments_list
-
Yes
-
URL
REO: Account Link
reo_account_link
-
Yes
-
Text Area (Rich)
REO: Account Summary
reo_company_summary
-
Yes
-
URL
REO: LinkedIn Company Page
reo_account_linkedin
-
Yes
-
Text Area (Rich)
REO: Account Tag Summary
reo_tag_summary
-
Yes
-
Number
REO: Activity Score
reo_activity_score
-
Yes
-
Text Area (Rich)
REO: Audience Name
reo_audiences_list
-
Yes
-
Text
REO: COMPANY SOURCE
reo_company_source
-
No
-
Date
REO: COMPANY CREATED AT
reo_company_created_at
-
No
-
Date
REO: COMPANY UPDATED AT
reo_company_updated_at
-
No
-
We recommend copying and pasting the values directly from the table above during field creation.
Contacts
Date
REO: Last Activity Date
reo_contact_last_activity_date
-
Yes
-
Text Area (Rich)
REO: Developer Summary
reo_contacts_summary
-
Yes
-
URL
REO: LinkedIn Profile
reo_dev_social_linkedin_link
-
Yes
-
Text Area (Rich)
REO: Developer Segment Name
reo_developer_segments_list
-
Yes
-
Text Area (Rich)
REO: Contact Tag Summary
reo_tag_summary
-
Yes
-
Number
REO: Activity Score
reo_activity_score
-
Yes
-
Text Area (Rich)
REO: Audience Name
reo_audiences_list
-
Yes
-
Text
REO: CONTACT SOURCE
reo_contacts_source
-
No
-
Date
REO: CONTACT CREATED AT
reo_contacts_created_at
-
No
-
Date
REO: CONTACT UPDATED AT
reo_contacts_updated_at
-
No
-
We recommend copying and pasting the values directly from the table above during field creation.
Leads
Date
REO: Last Activity Date
reo_leads_last_activity_date
-
Yes
-
Text Area (Rich)
REO: Developer Summary
reo_leads_summary
-
Yes
-
URL
REO: LinkedIn Profile
reo_leads_social_linkedin_link
-
Yes
-
Text Area (Rich)
REO: Developer Segment Name
reo_leads_segments_list
-
Yes
-
Text Area (Rich)
REO: Contact Tag Summary
reo_leads_tag_summary
-
Yes
-
Number
REO: Activity Score
reo_activity_score
-
Yes
-
Text Area (Rich)
REO: Audience Name
reo_audiences_list
-
Yes
-
Text
REO: LEAD SOURCE
reo_leads_source
-
No
-
Date
REO: LEADS CREATED AT
reo_leads_created_at
-
No
-
Date
REO: LEAD UPDATED AT
reo_leads_updated_at
-
No
-
We recommend copying and pasting the values directly from the table above during field creation.
Connect Salesforce
Step 1: Navigate to Integrations → CRM and click Configure.

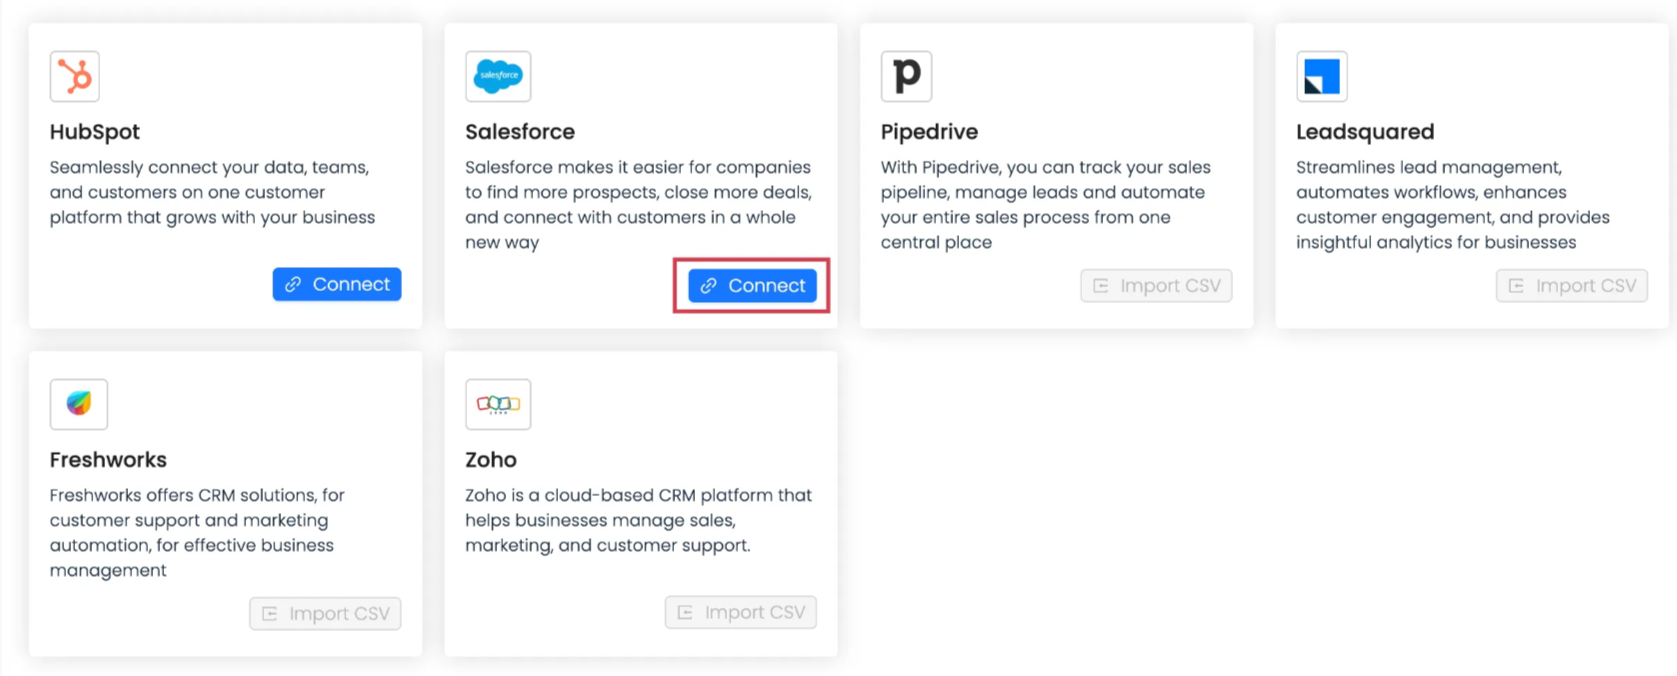
Step 2: Click Connect under Salesforce.
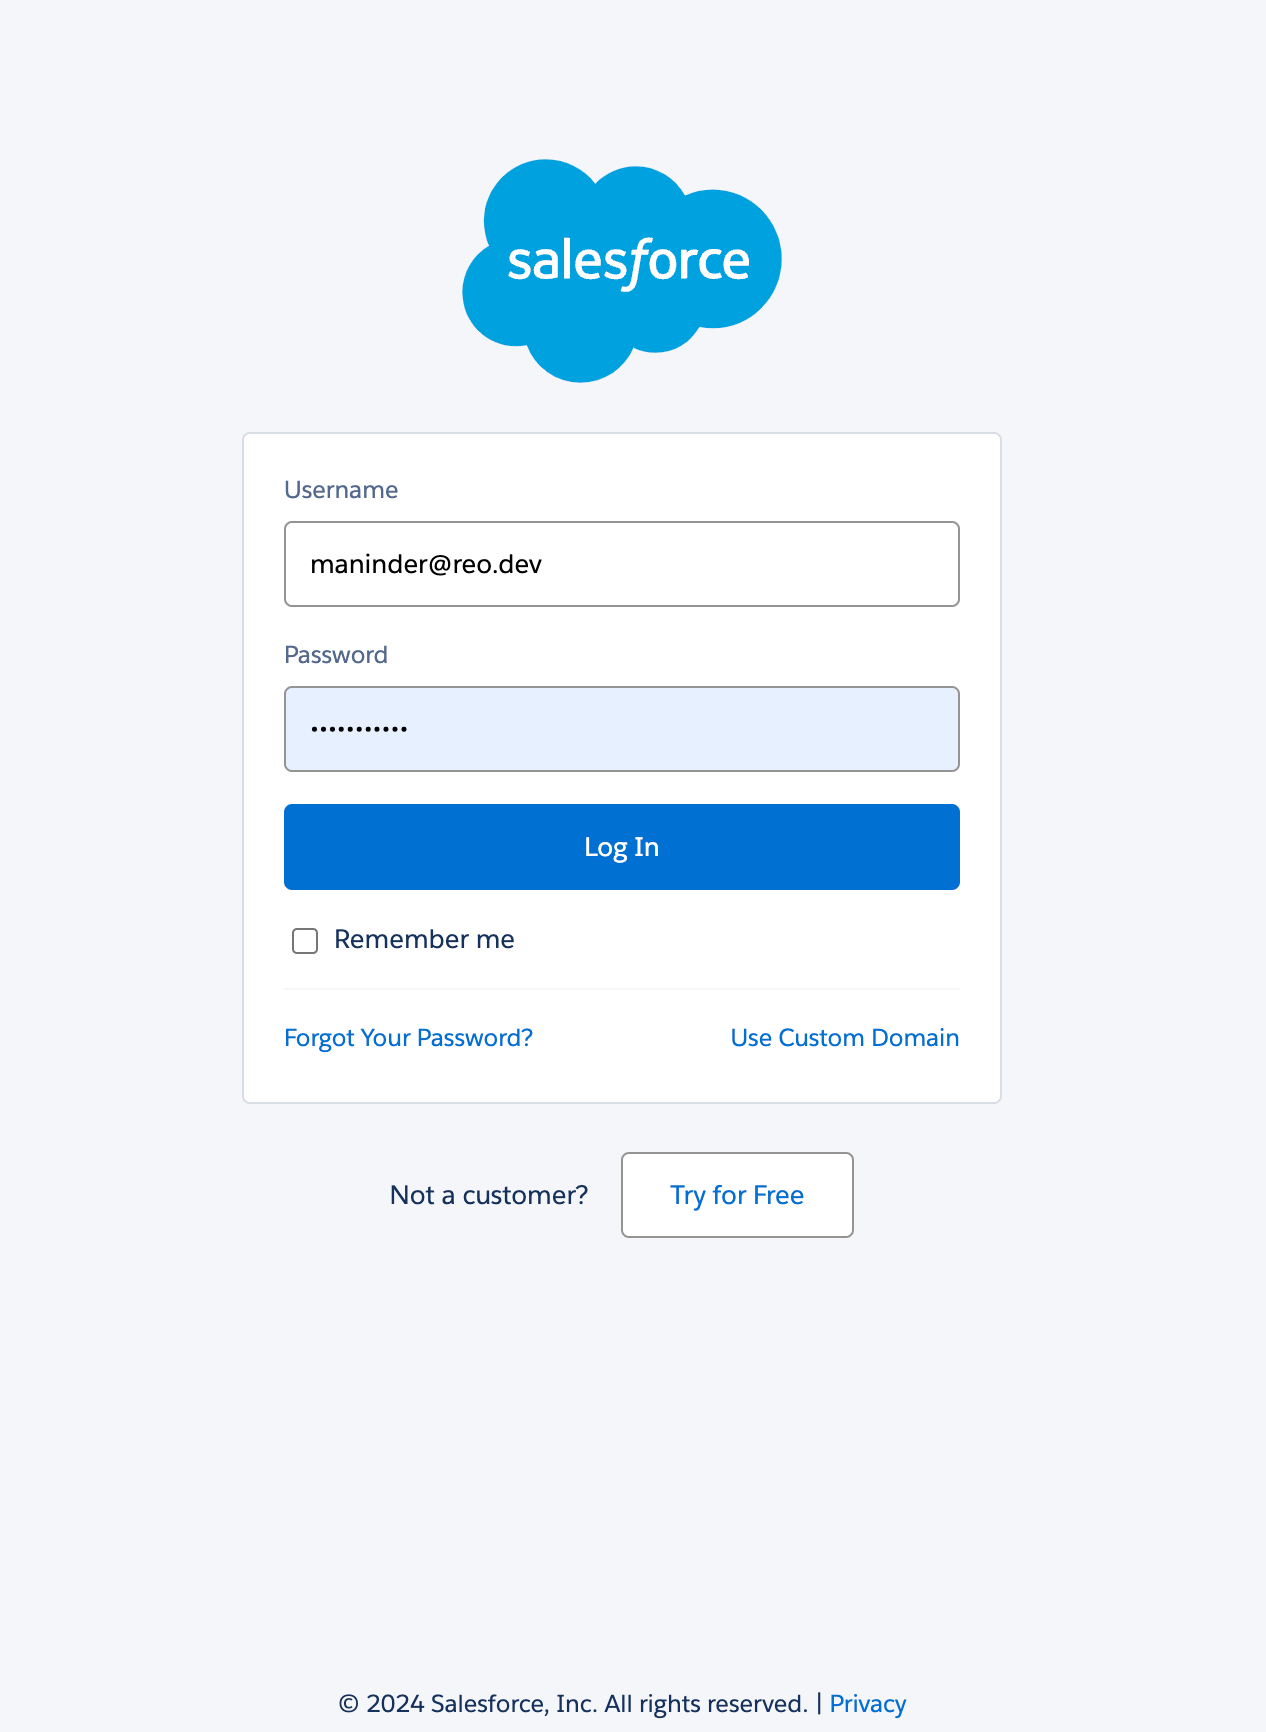
Step 3: You will be redirected to the Authorization flow of Salesforce wherein you will need to provide your Salesforce Admin credentials. After that you will need to select the Salesforce App to connect and provide permission to Reo.Dev app to access Salesforce.
Salesforce Export settings
After the Salesforce App is connected, you will be redirected to Salesforce settings screen to configure the Export and Sync settings.
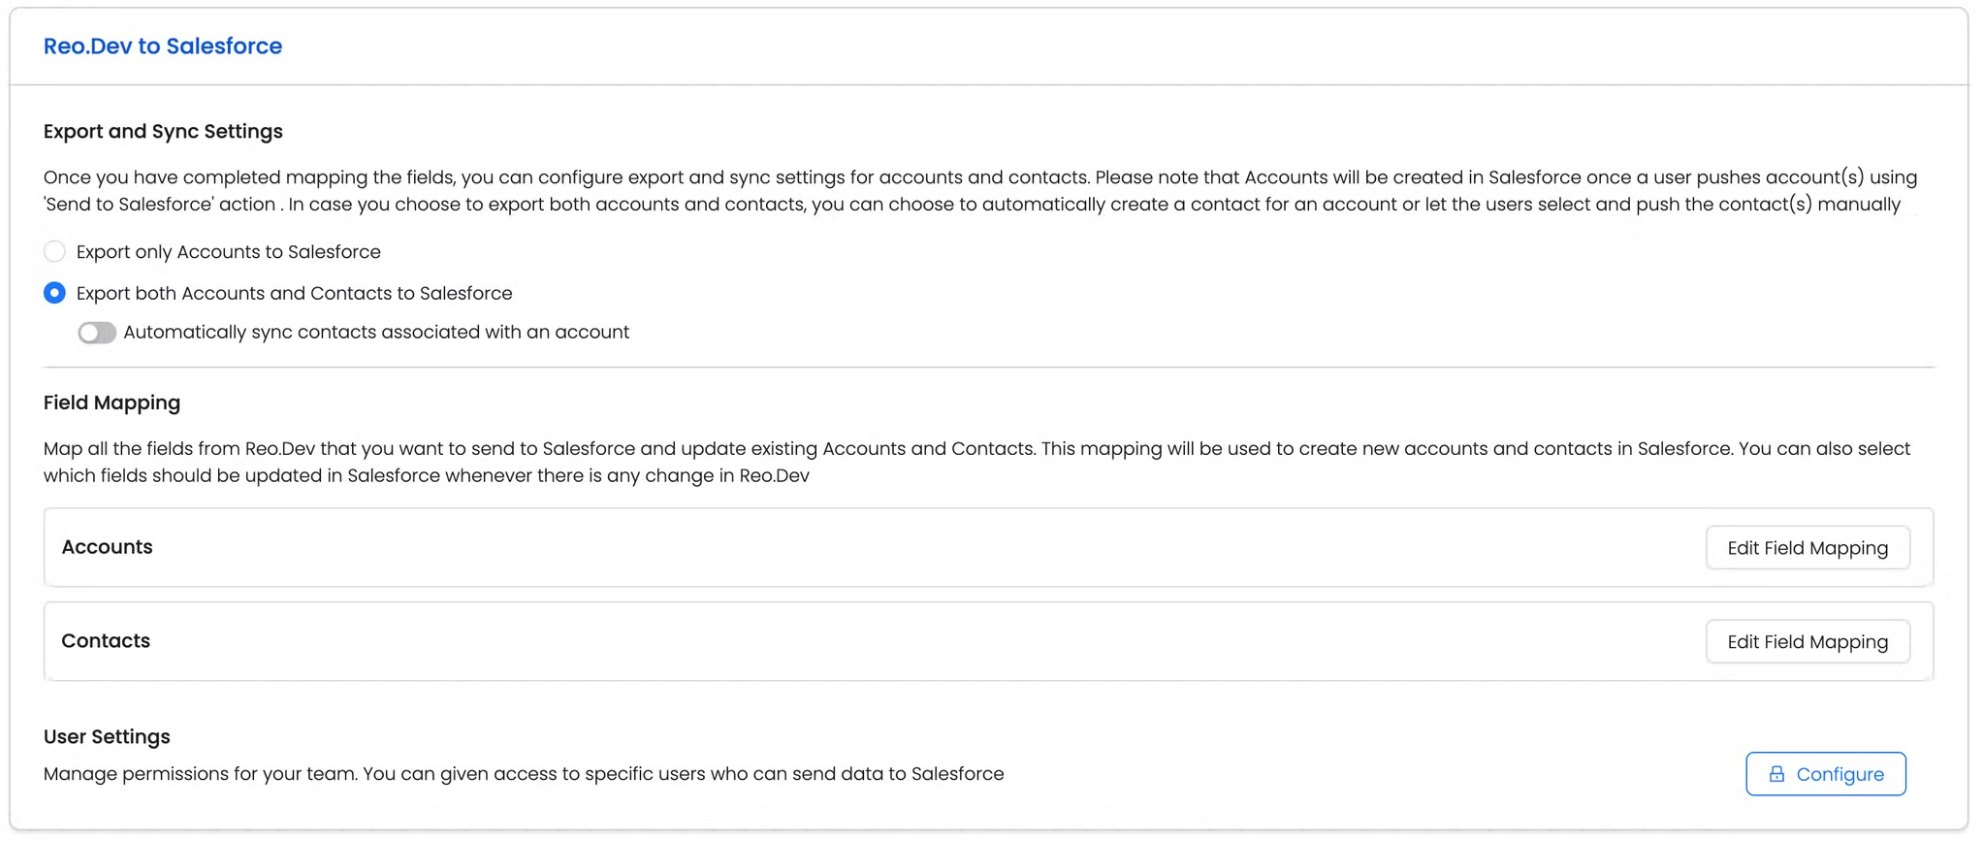
There are two options to Export data from Reo.Dev:
Accounts
You can select Accounts if you want to only export accounts from Reo.Dev to Salesforce.
Accounts and Contacts
You can select Accounts and Contacts if you want to only export accounts from Reo.Dev to Salesforce. Under Accounts and Contacts, you have an option to sync contacts associated with an account automatically or manually. If you select manually, the users will have need to select contacts from the developers tab for each account and click on Send to Salesforce.
Salesforce Field Mapping
Map all the fields from Reo.Dev that you want to send to Salesforce and update existing Accounts, Contacts and Leads. This mapping will be used to create new accounts, contacts and leads in Salesforce. You can also select which fields should be updated in Salesforce whenever there is any change in Reo.Dev
Please note that when we export data from Reo.Dev, we check if the company or contact exists in the Salesforce record or not. If the record is present, we update the corresponding fields based on the mapping preference selected by you and in case the record is not present, we create a new record.
We use the following fields as unique identifiers to prevent duplication:
Accounts → Company Domain Name
Contact → email ID
Accounts Field Mapping
We have provision to export the following fields for the Accounts object to Salesforce.
Reo.Dev Field
Salesforce Field
Company Name
Company Name
Company Domain
Company Domain Name
Country
Country/Region
State
State
City
City
Employee Range
Employee Range
Annual Revenue
Annual Revenue
Founded In
Year Founded
Last Activity Date
REO: Last Activity Date
LinkedIn Company Page
LinkedIn Company Page
REO Customer Fit Score
REO: Customer Fit
REO Developer Activity Score
REO: Developer Activity Score
REO: Activity Score
REO: Activity Score
REO Segment Name
REO: Segment Name
REO Account Link
REO: Account Link
REO Account Summary
REO: Account Summary
REO Tags
REO: Account Tags
REO: Company Audience
REO: Audience Name
Company Domain is a mandatory field and is already mapped.
Fields with the prefix REO are automatically created in Salesforce and mapped to the corresponding Reo.Dev field.
For the Rest of the fields, you can map the corresponding field in Salesforce from the dropdown. If you select the Auto Overwrite checkbox, then we will overwrite the existing data in Salesforce during creation and sync operations.
Recommendation: Fields with the prefix REO should always have the Auto-Overwrite checkbox as TRUE.
Contacts Field Mapping
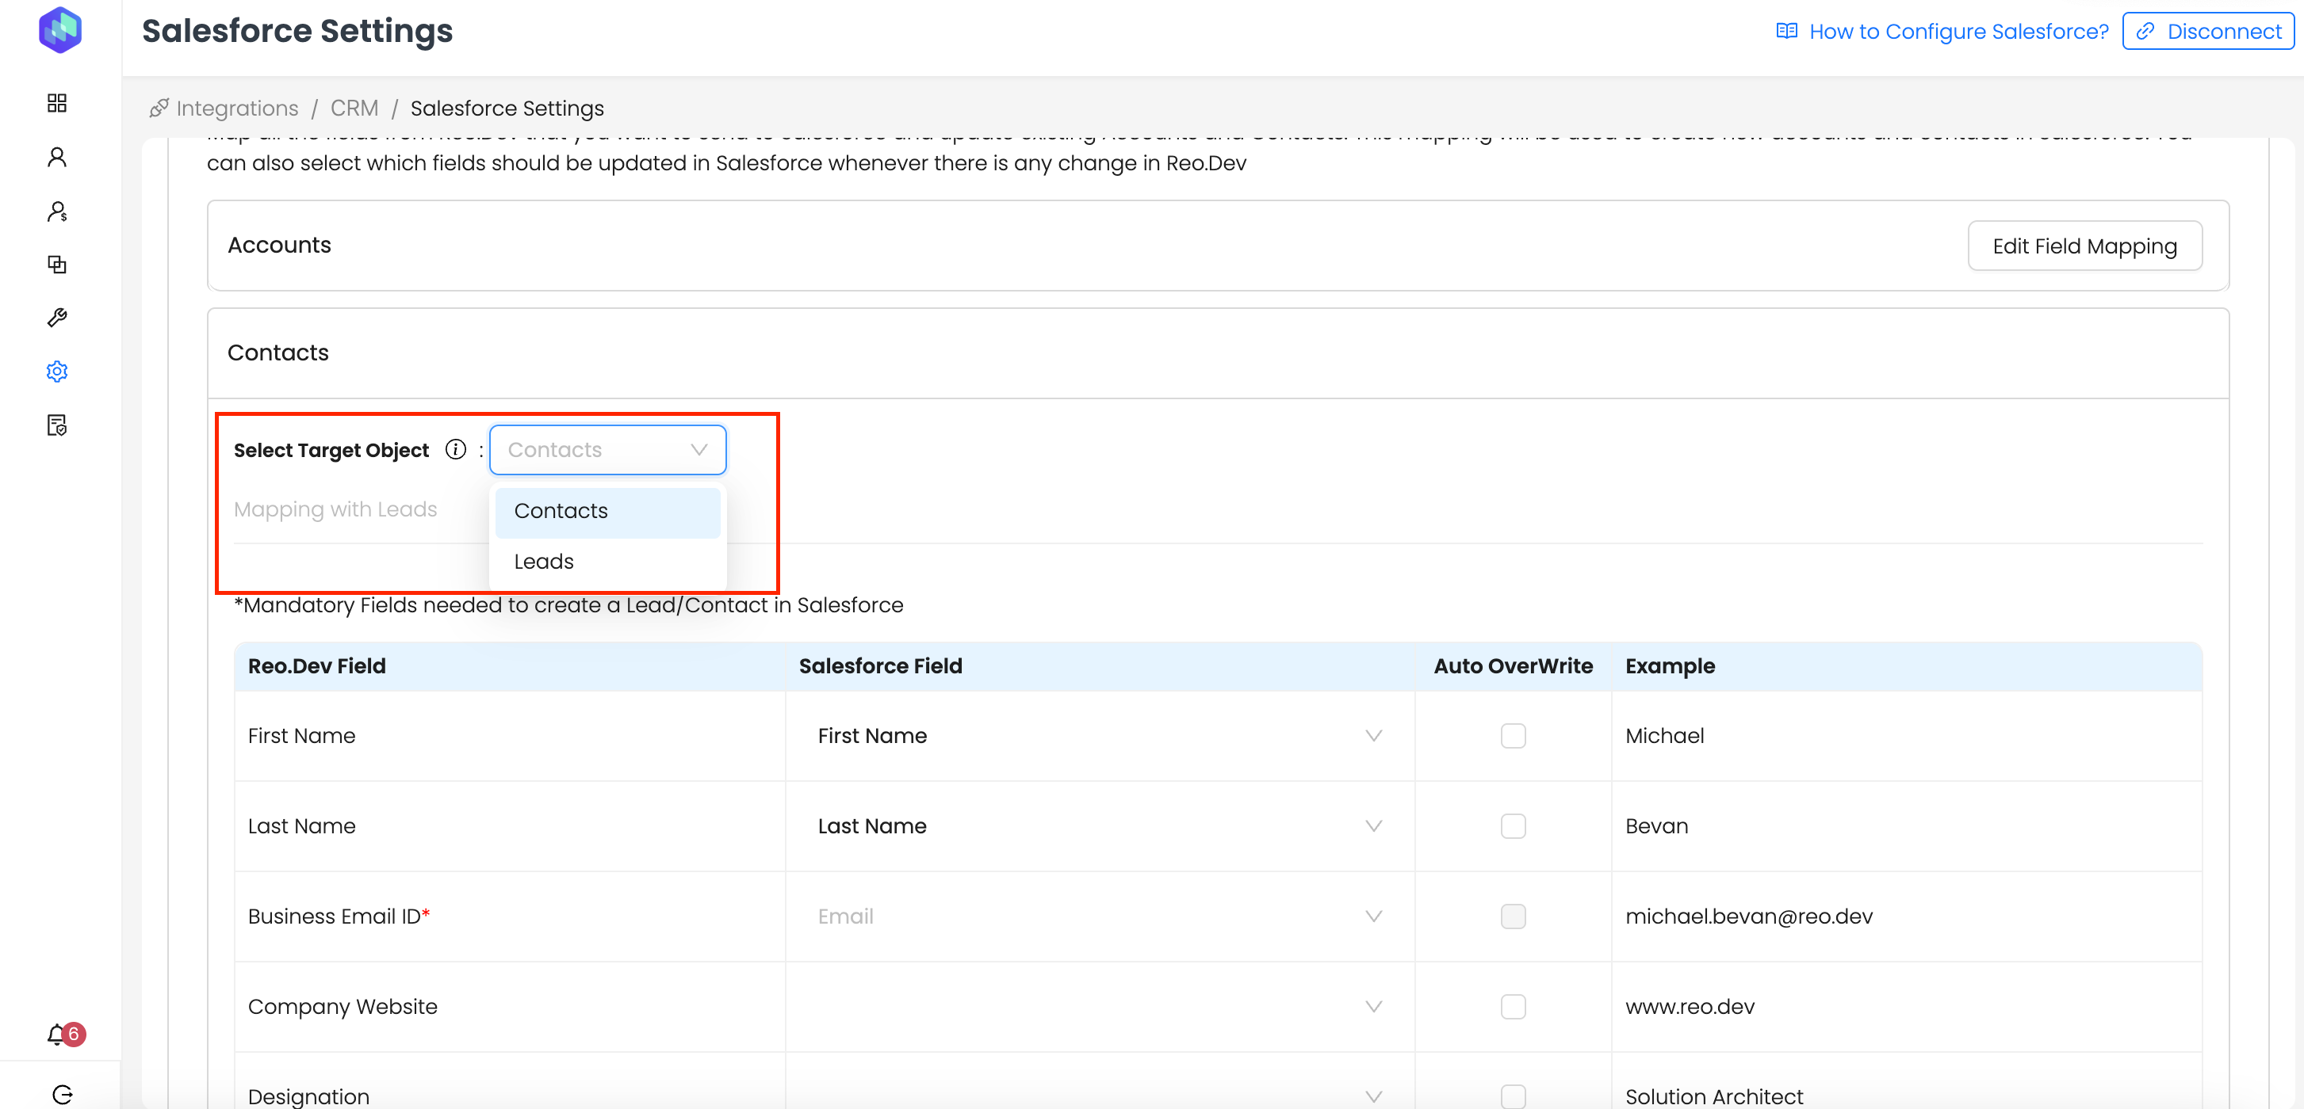
Step 1: Select the target object.
Reo.Dev has one Contact type but since Salesforce has two Objects - Leads and Contacts, you can select the object where the Reo.Dev contact should be created.
Step 2: Map fields
You’ll see 2 tabs here - mapping for leads object and mapping for contact object.
If you select leads as the target object —> you will need to provide mapping for both leads and contacts object.
If you select contact as the target object —> The mapping with leads tab is automatically disabled and you need to provide the mapping only for the contacts object.
Note: Once a lead is converted into a contact on Salesforce then Reo.Dev will no longer treat that record as a lead. Instead, Reo.Dev will update the contact record directly and not create a duplicate lead for the same developer.
We have provision to export the following fields for Contacts and Leads object to Salesforce.
For Contact object:
Reo.Dev Field
Salesforce Field
First Name
First Name
Last Name
Last Name
Business Email ID*
Company Website
Website URL
Designation
Job Title
Country
Country/Region
State
State
City
City
LinkedIn ID
REO: Linked In Profile
Last Activity Date
REO: Last Activity Date
REO: Developer Summary
REO: Developer Summary
REO: Segment Name
REO: Developer Segment Name
REO: Tags
REO: Developer Tags
REO: Activity Score
REO: Activity Score
REO: Audience Name
REO: Audiences List
For Lead Object:
Reo.Dev Field
Salesforce Field
First Name
First Name
Last Name
Last Name
Business Email ID*
Company Website
Website URL
Designation
Job Title
Country
Country/Region
State
State
City
City
LinkedIn ID
REO: Linked In Profile
Last Activity Date
REO: Last Activity Date
REO: Developer Summary
REO: Developer Summary
REO: Segment Name
REO: Developer Segment Name
REO: Tags
REO: Developer Tags
REO: Activity Score
REO: Activity Score
REO: Audience Name
REO: Audiences List
Note: If the admin changes the preferred target object in the future, all existing mappings and settings will be lost. However, any data previously sent to the CRM will remain as-is and will not be updated. Once the new setting is applied, all future data will be sent to the newly selected object.
Business email ID is a mandatory field and is already mapped. We fetch the Business email ID of the developers from third part enrichment service providers.
In addition to the Business Email ID, Personal Email IDs will also be synced if collected through first-party sources, including:
Signup Forms on your website or documentation pages
Product login or signup forms.
In the Reo.Dev UI, when users hover over the email icon on a profile, if a Personal Email has been enriched and mapped to that profile, it will be displayed alongside the Work Email.
Fields with the prefix REO are automatically created in Salesforce and mapped to the corresponding Reo.Dev field
For the Rest of the fields, you can map the corresponding field in Salesforce from the dropdown. If you select the Auto Overwrite checkbox, then we will overwrite the existing data in Salesforce during the creation and sync operations.
How Reo.Dev Handles Multiple Email Records in Salesforce
For each unique email ID we treat it as a separate record in Salesforce. Depending on whether an email already exists in the CRM, the record is either updated or created as per the following scenarios:
Scenario
Action in Salesforce
One Email ID exists in CRM
Update existing contact with latest REO data
One Email ID does not exist in CRM
Create a new contact record
Two Email IDs → First exists, second does not
Update existing contact for first email, create a new contact for second email
Two Email IDs → Neither exists
Create two separate contact records (one for each email)
Two Email IDs → Both exist in CRM
Update both contacts separately with latest REO data
Send developers only with LinkedIn ID to CRM
You can send contacts/leads with only LinkedIn IDs to Salesforce. If the email ID is not available for a developer, Reo will match contacts/leads by the LinkedIn profile to avoid duplicates and create/update contacts and leads.
To enable this, click on the LinkedIn tab under contacts in Field Mapping.

Next, select your custom LinkedIn profile field to map the contacts and leads. And in case you are using the custom field created by Reo as the preferred field for mapping the LinkedIn profile - then choose REO:LinkedIn Profile as the field from the drop-down.
Note: You will need to map this field for both contacts and leads

Once done, click on save.
Quick Note on how this works:
Scenario 1: If LinkedIn Profile Mapping is not present:
Only developers with a valid email ID (business or First party) are created/updated in CRM
LinkedIn profile is updated to REO: LinkedIn Profile field
Scenario 2: If LinkedIn Mapping is present:
In case, email and LinkedIn ID are both available:
Sync is done using only the email ID of the developer
In case, only Email is available
Sync is done using the email ID of the developer
In case, only LinkedIn is available
The System checks for the LinkedIn ID present in Reo in the LinkedIn profile field mapping
If the LinkedIn ID is found
Developer is synced to the existing profile
If the LinkedIn ID is not found
A new contact is created in Hubspot with the LinkedIn ID as the unique identifier. From the next sync, the same contact is updated
Do We Delete Data from Your CRM?
Reo.Dev does not delete any data from your connected Salesforce CRM instance with Reo.Dev — with the only exception being occasional cleanups of records that were originally created by Reo.Dev.
These cleanups are rare and limited strictly to Reo.Dev-originated data, and are performed to maintain data accuracy and reliability. For example, if a developer contact's work email becomes invalid (e.g., they’ve switched jobs), and a new valid email is identified, Reo.Dev may update or clean up the outdated email to ensure your CRM reflects the most current information.
Rest assured, no third-party or manually added CRM data is ever deleted by Reo.Dev.
What Happens When a Contact is Updated?
If an email already exists in Salesforce, Reo.Dev updates the mapped fields (as configured in CRM settings) with the latest developer data.
Updates do not overwrite existing CRM data outside the mapped REO fields.
How New Contact Records Are Linked to the Same Company/Account
When Reo.Dev creates new contacts, all the captured data—including the Company Website (Domain Name), job title, LinkedIn profile, and other mapped fields—remains the same across contact records associated with the same company.
This ensures that:
You can easily identify multiple contacts belonging to the same organization in Salesforce.
Company-wide insights remain consistent, regardless of whether contacts have different email IDs.
Your CRM data stays structured and organized, preventing fragmented company records.
By maintaining consistent company-level details, Reo.Dev enables seamless account-based contact tracking, helping sales and marketing teams engage with all relevant stakeholders.
Note: Fields with the prefix REO should always have the Auto-Overwrite checkbox as TRUE.
Send Tags to Your CRM
You can now send Account Tags and Developer Tags directly to your CRM. These tags are fully customizable and provide quick context and insights on already enriched data.
Why it matters: Tags make it easy to:
Identify key account traits or developer activities at a glance.
Segment and prioritize accounts more effectively.
Provide your sales team with richer, actionable insights to drive better conversations.
Want to learn more? Check out our Tags Handbook — a comprehensive guide to tagging and segmenting developers in Reo.Dev. It includes 15+ use case examples designed to help DevTools GTM teams prospect smarter, increase pipeline, and close deals faster.
CRM to Revenue Playbooks
Explore the Playbooks Now → View All
User Settings
You can manage permissions for your team by defining specific users who can send data to Salesforce.
Click on Configure in User Settings.
You will be redirected to User Management Section. You can mark the toggle button as active for all the users who can send data to CRM.

Export and Sync Frequency
Users will have options to send:
Segments to Salesforce
Users can create a segment and click on Send to Salesforce.
Accounts to Salesforce
Users can select an account(s) from the Account list and Send to Salesforce.
Developers to Salesforce
If Manual contact sync is selected for contacts, users can select developer(s) from the developer tab under Account Details screen and Send to Salesforce.
In the case of Accounts and Developer, the export happens in real-time and the Salesforce icon will appear against the record on UI immediately but for segments, it may take some time depending on the size of the segment.
Once the Accounts and Developers are exported, Reo.Dev will sync data back to Salesforce daily. All the accounts and developers that have been synced with Salesforce, will have a Salesforce Icon next to the name.
Map and Tag Custom CRM Account and Deal Stages
Map Account Stages
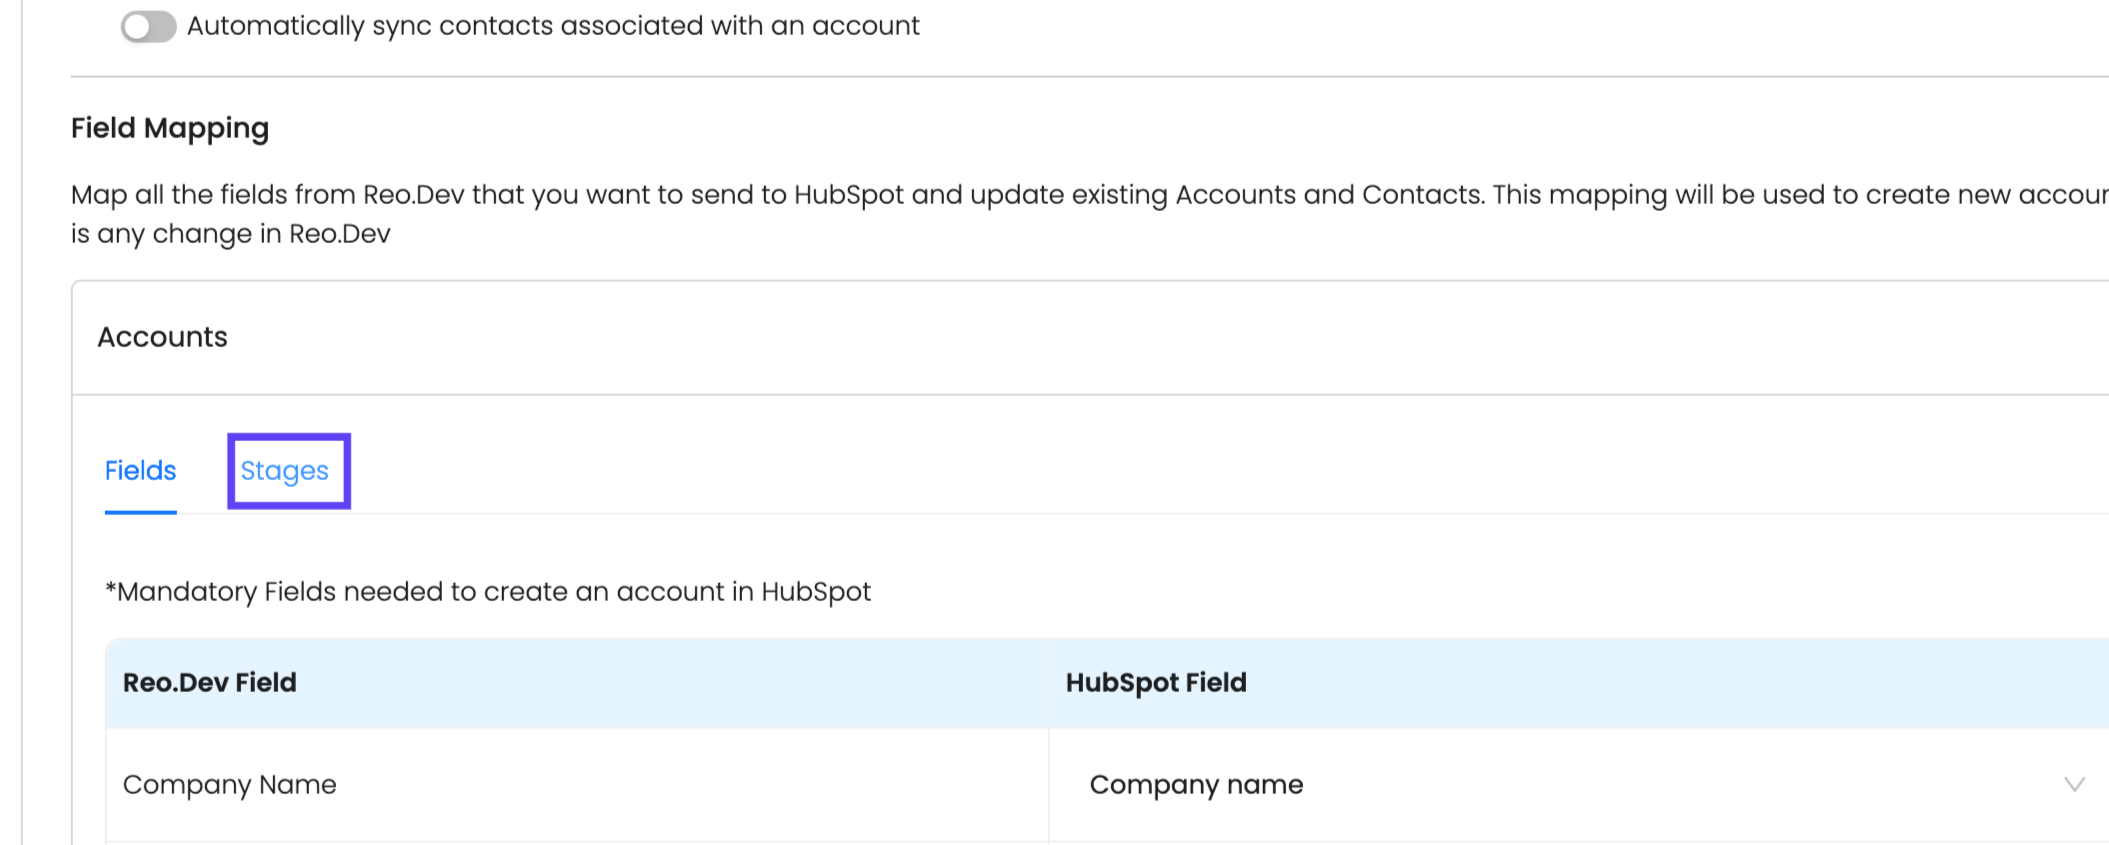
Select the "Stages" subtab in the Account Mapping section.
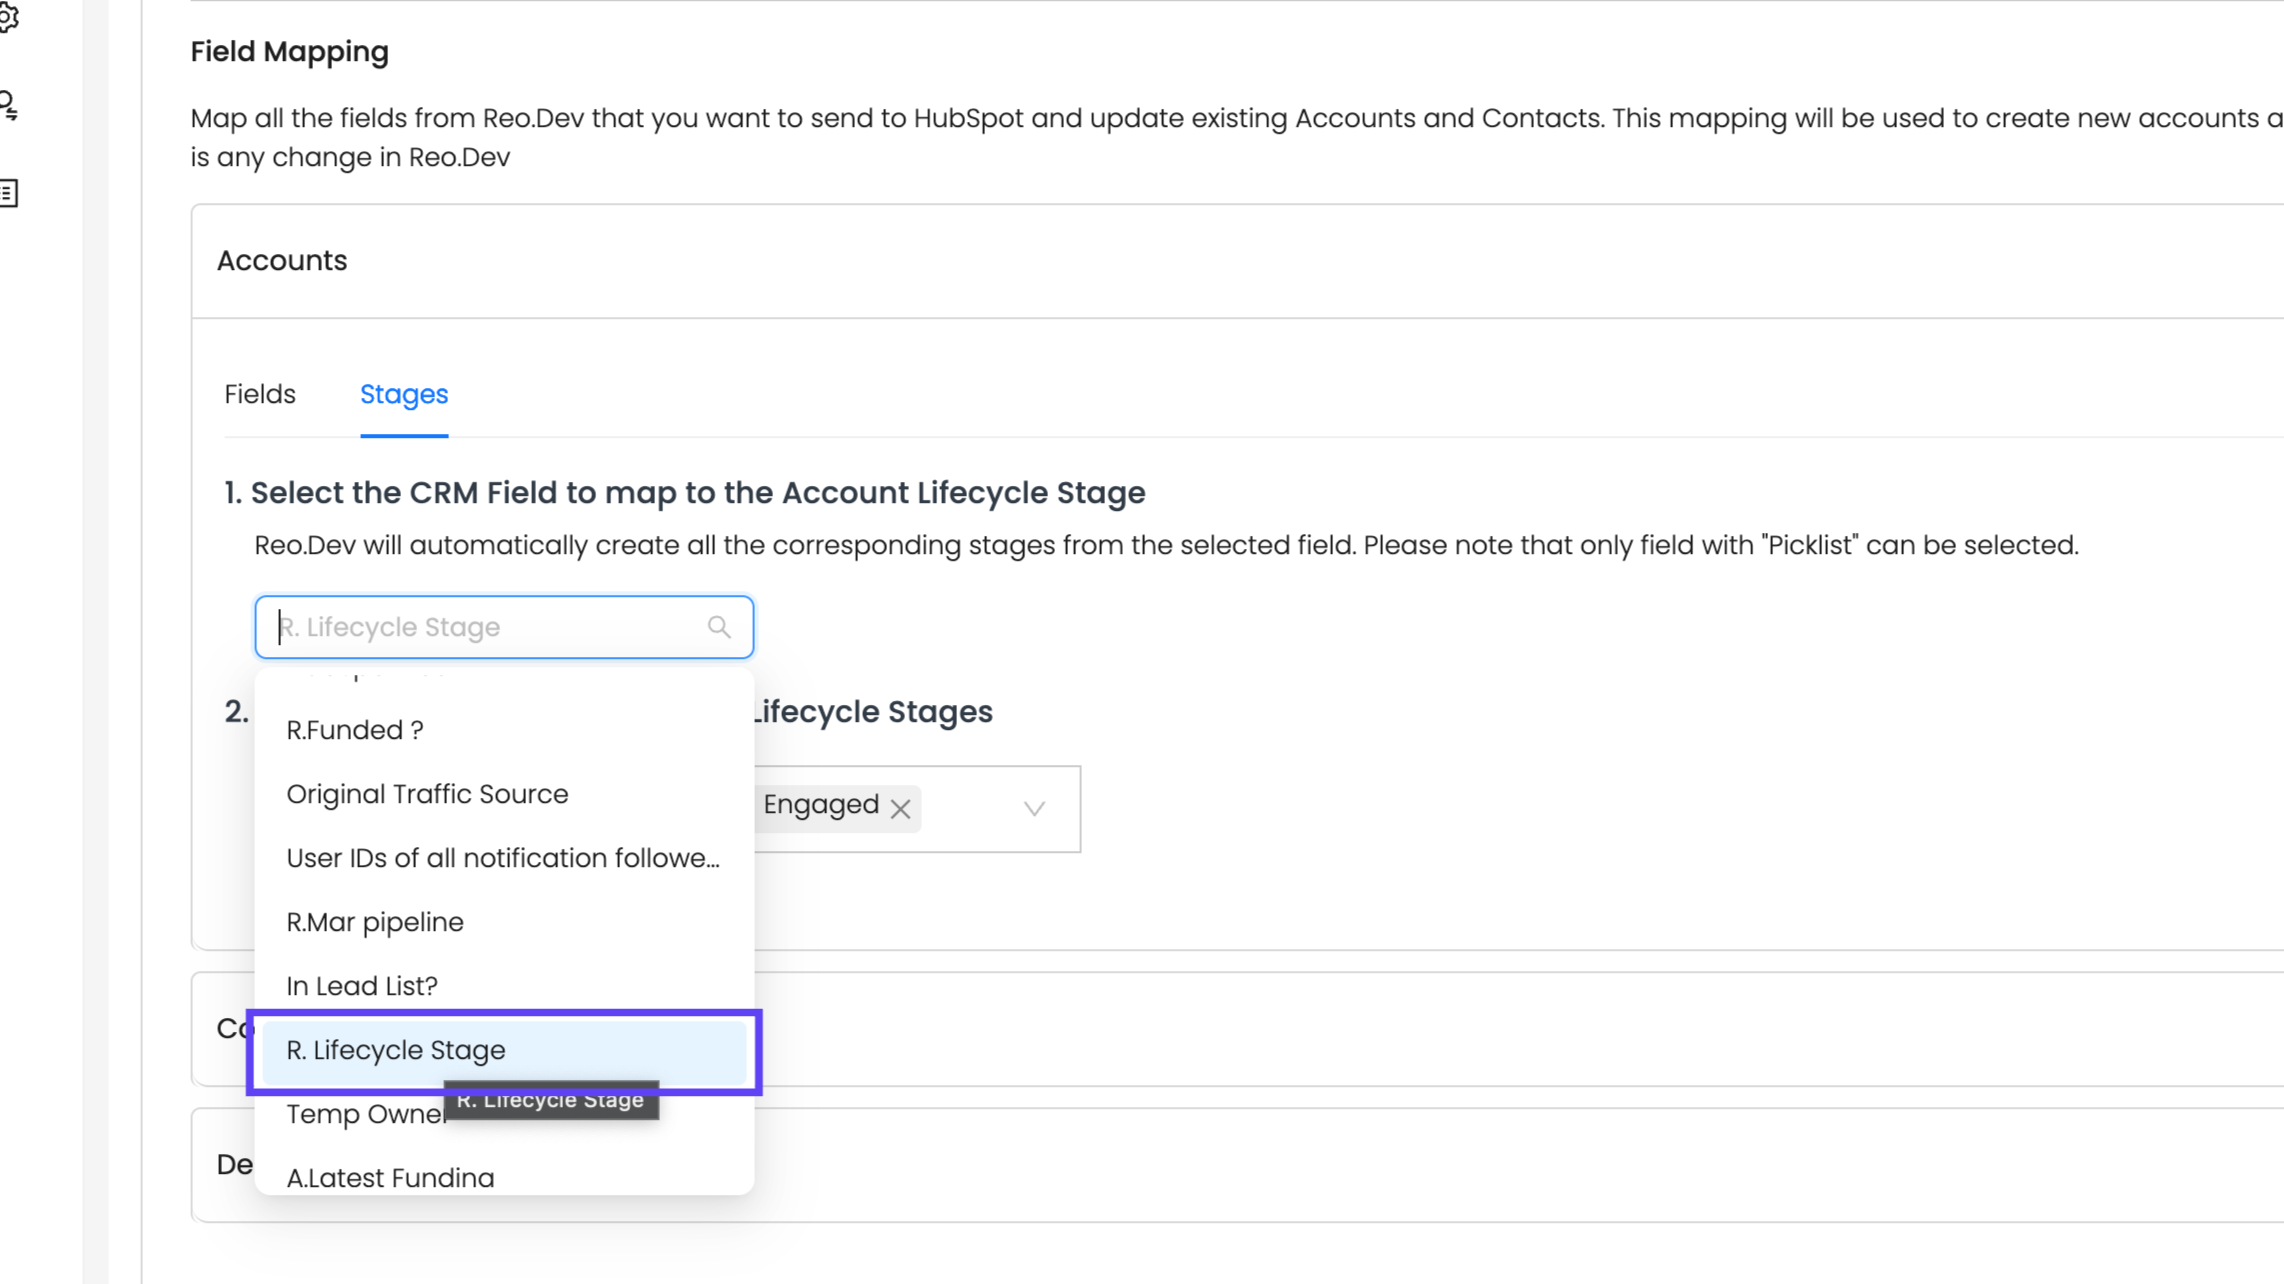
Choose a Custom Account CRM field to map as the Account Lifecycle Stage.
Note: Only fields classified as "Picklist" in your CRM are available for selection.
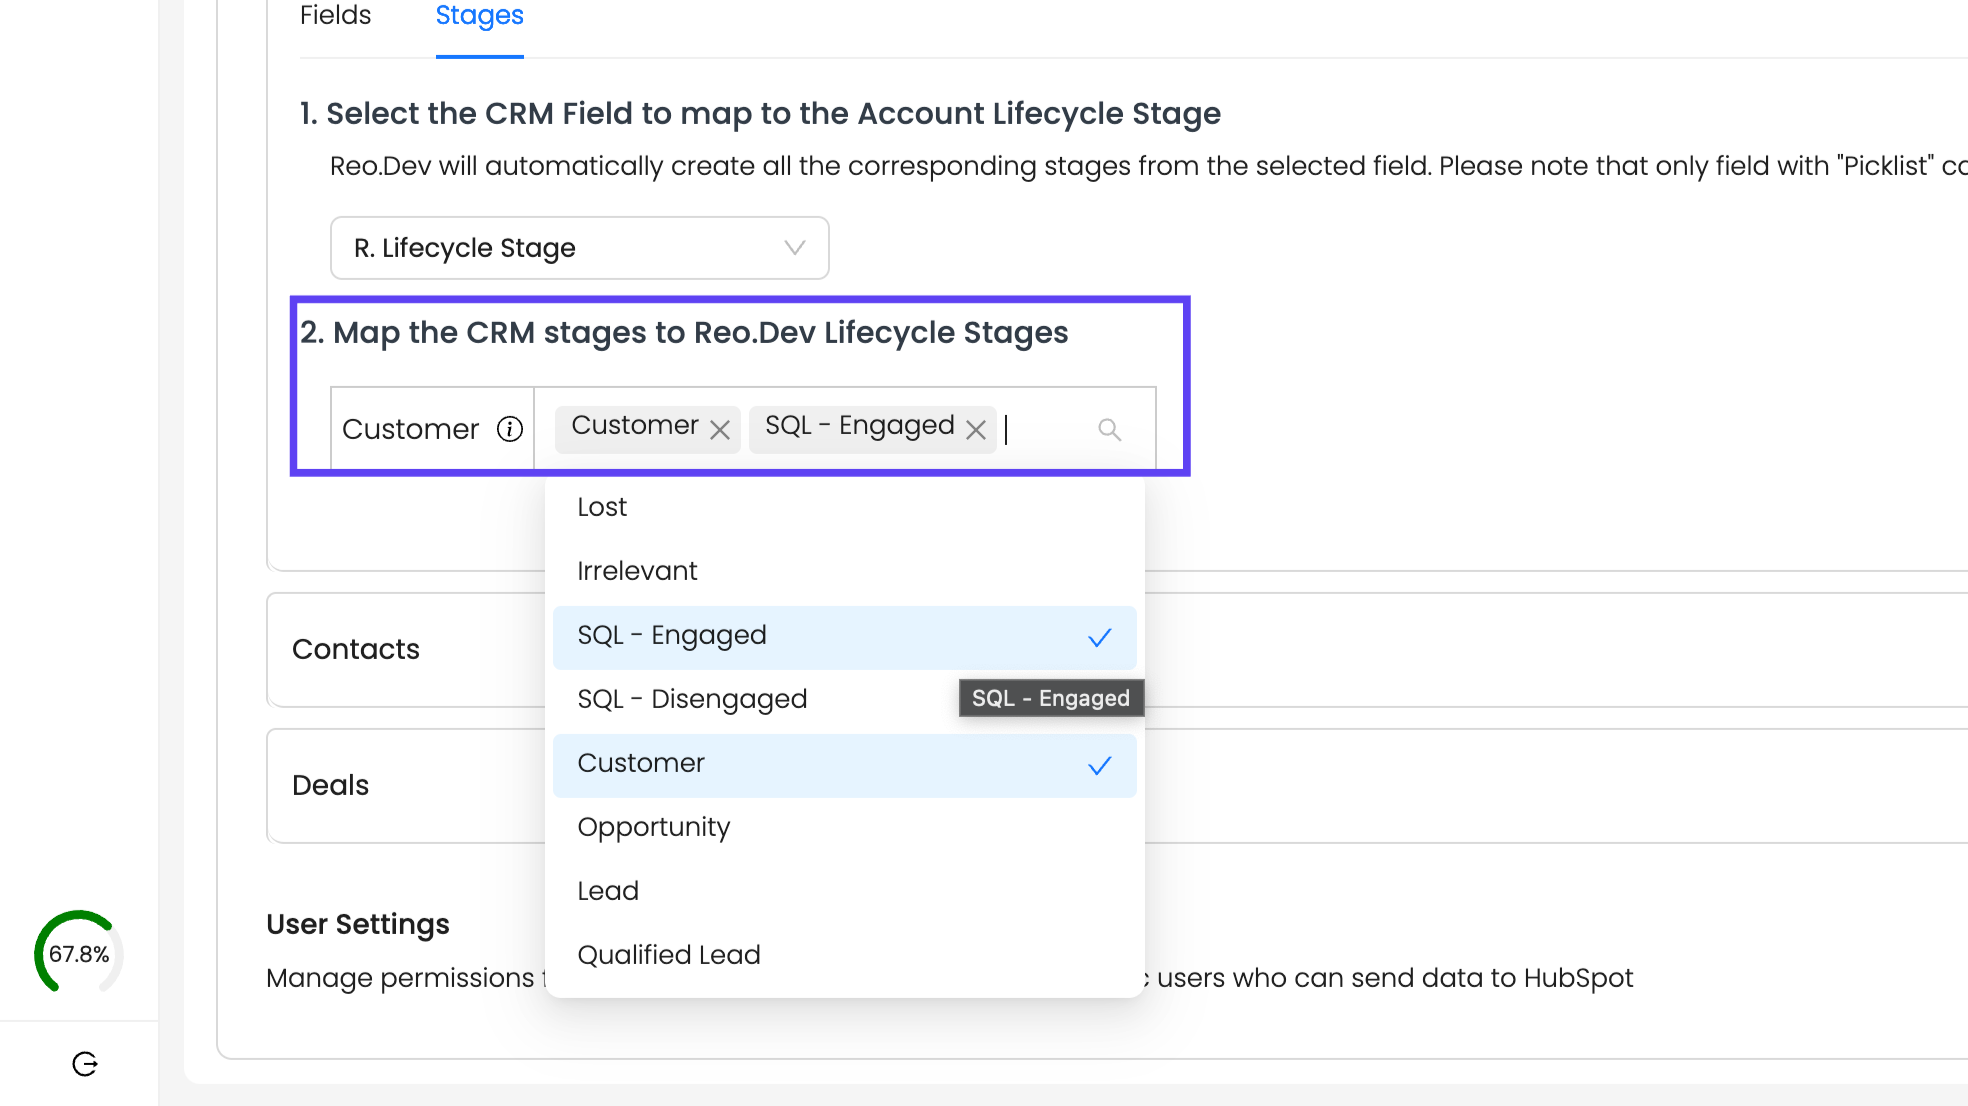
Pick all Custom CRM Account Stages you want to define as "Customer" in Reo.Dev. Multiple stages can be mapped as "Customer" to fit your sales cycle. For example, classify accounts by product line (Cloud vs. Open Source) or customer size (Enterprise vs. SMB).
Save the Configuration
After mapping, click Save.
Note: Backend updates are applied immediately, but changes in the UI reflecting the new mappings will take up to 24 hours to refresh.
Map Opportunity Stages
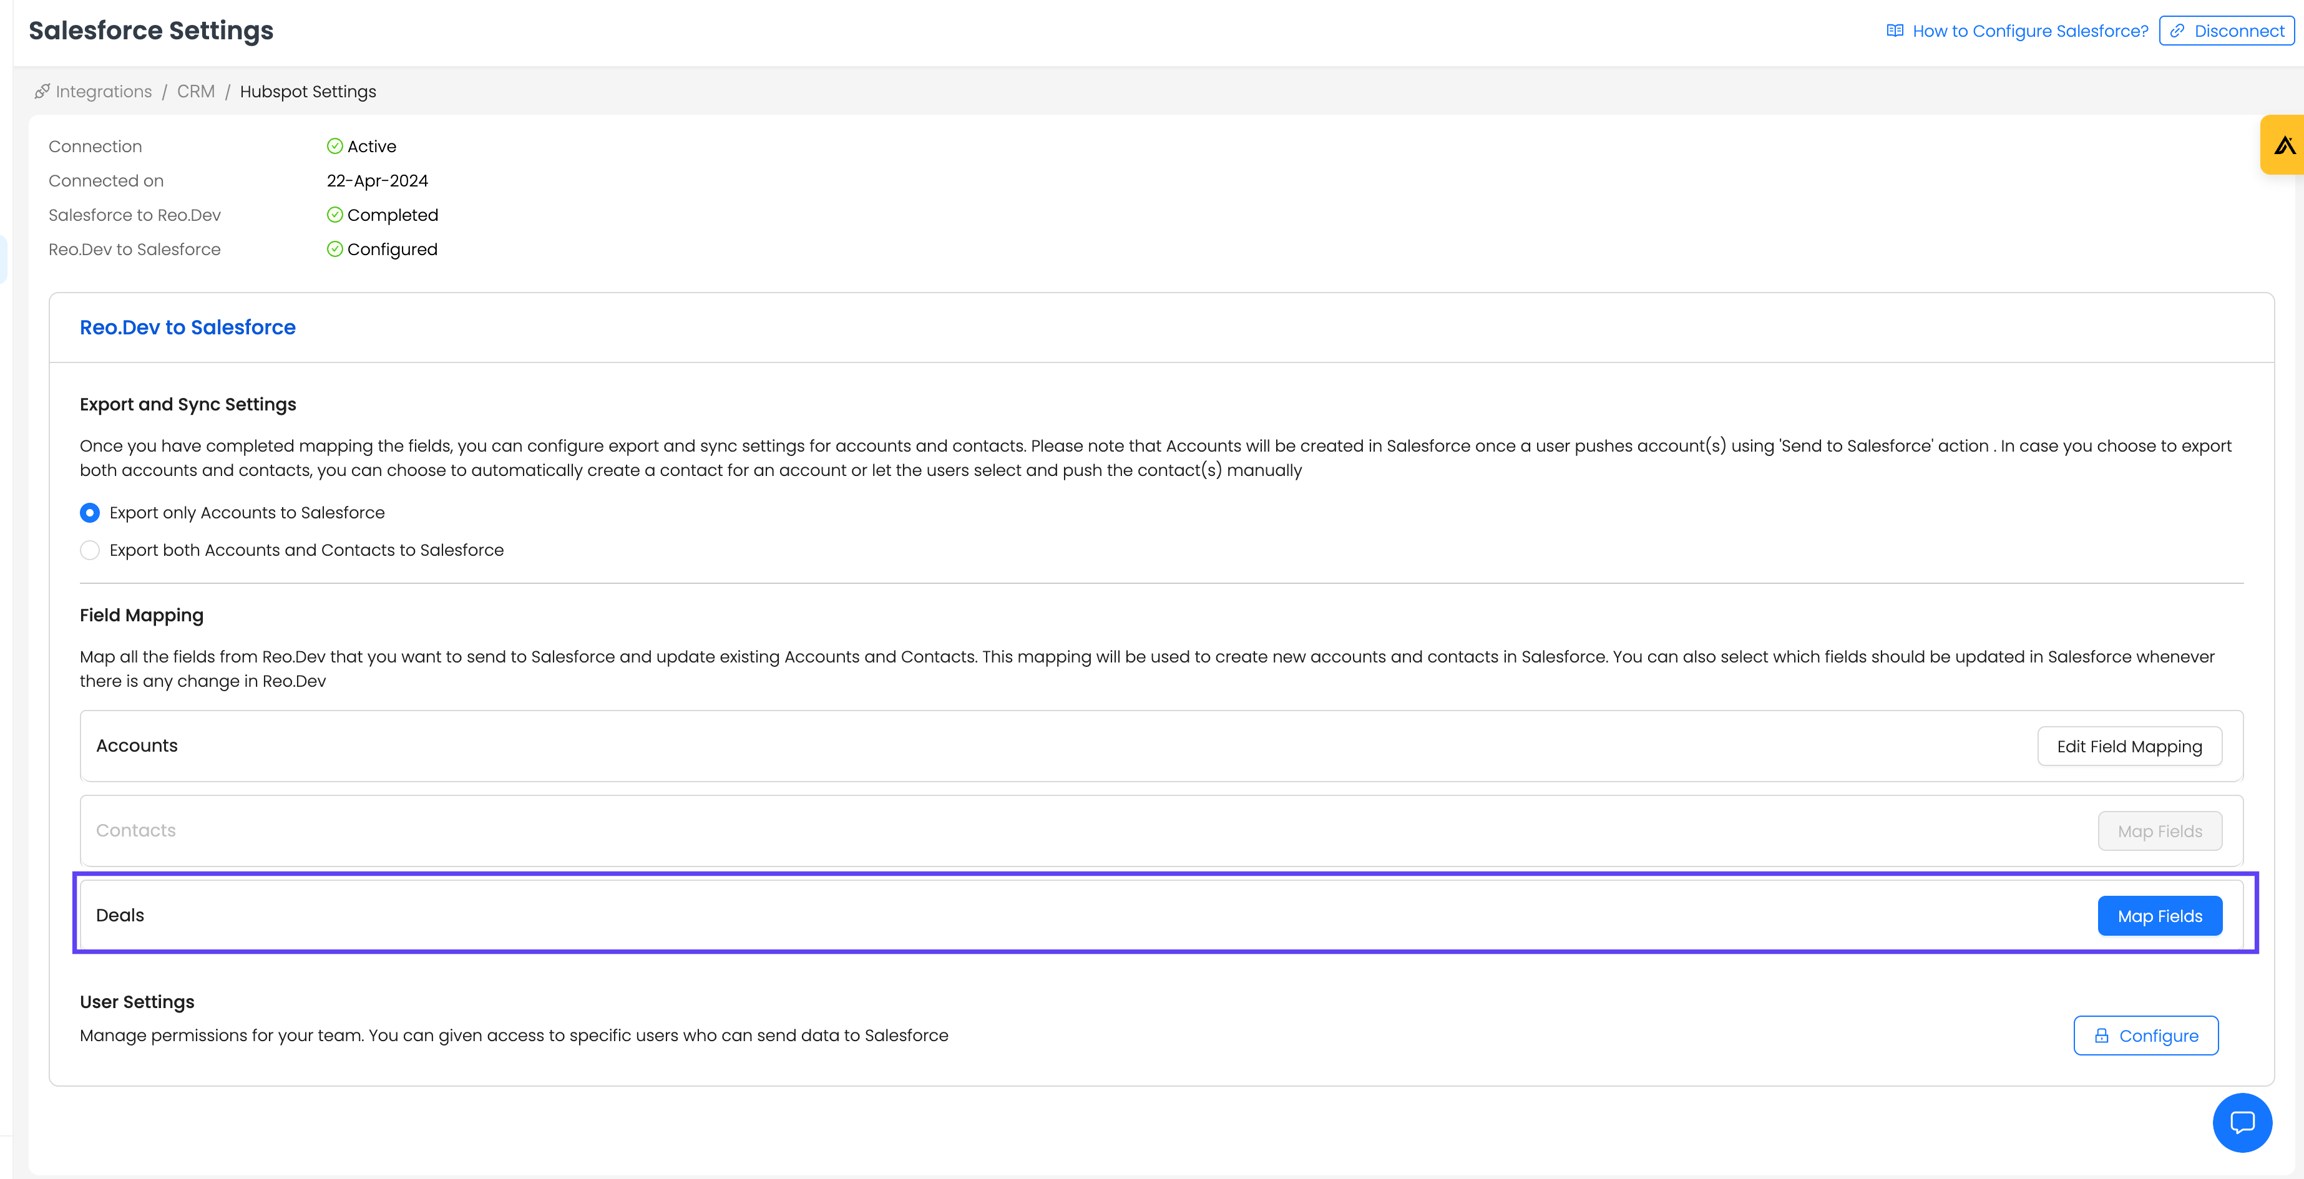
Select the custom deal/opportunity stage field from your Salesforce CRM.
Note: Only fields classified as "Picklist" in your CRM are available for selection.
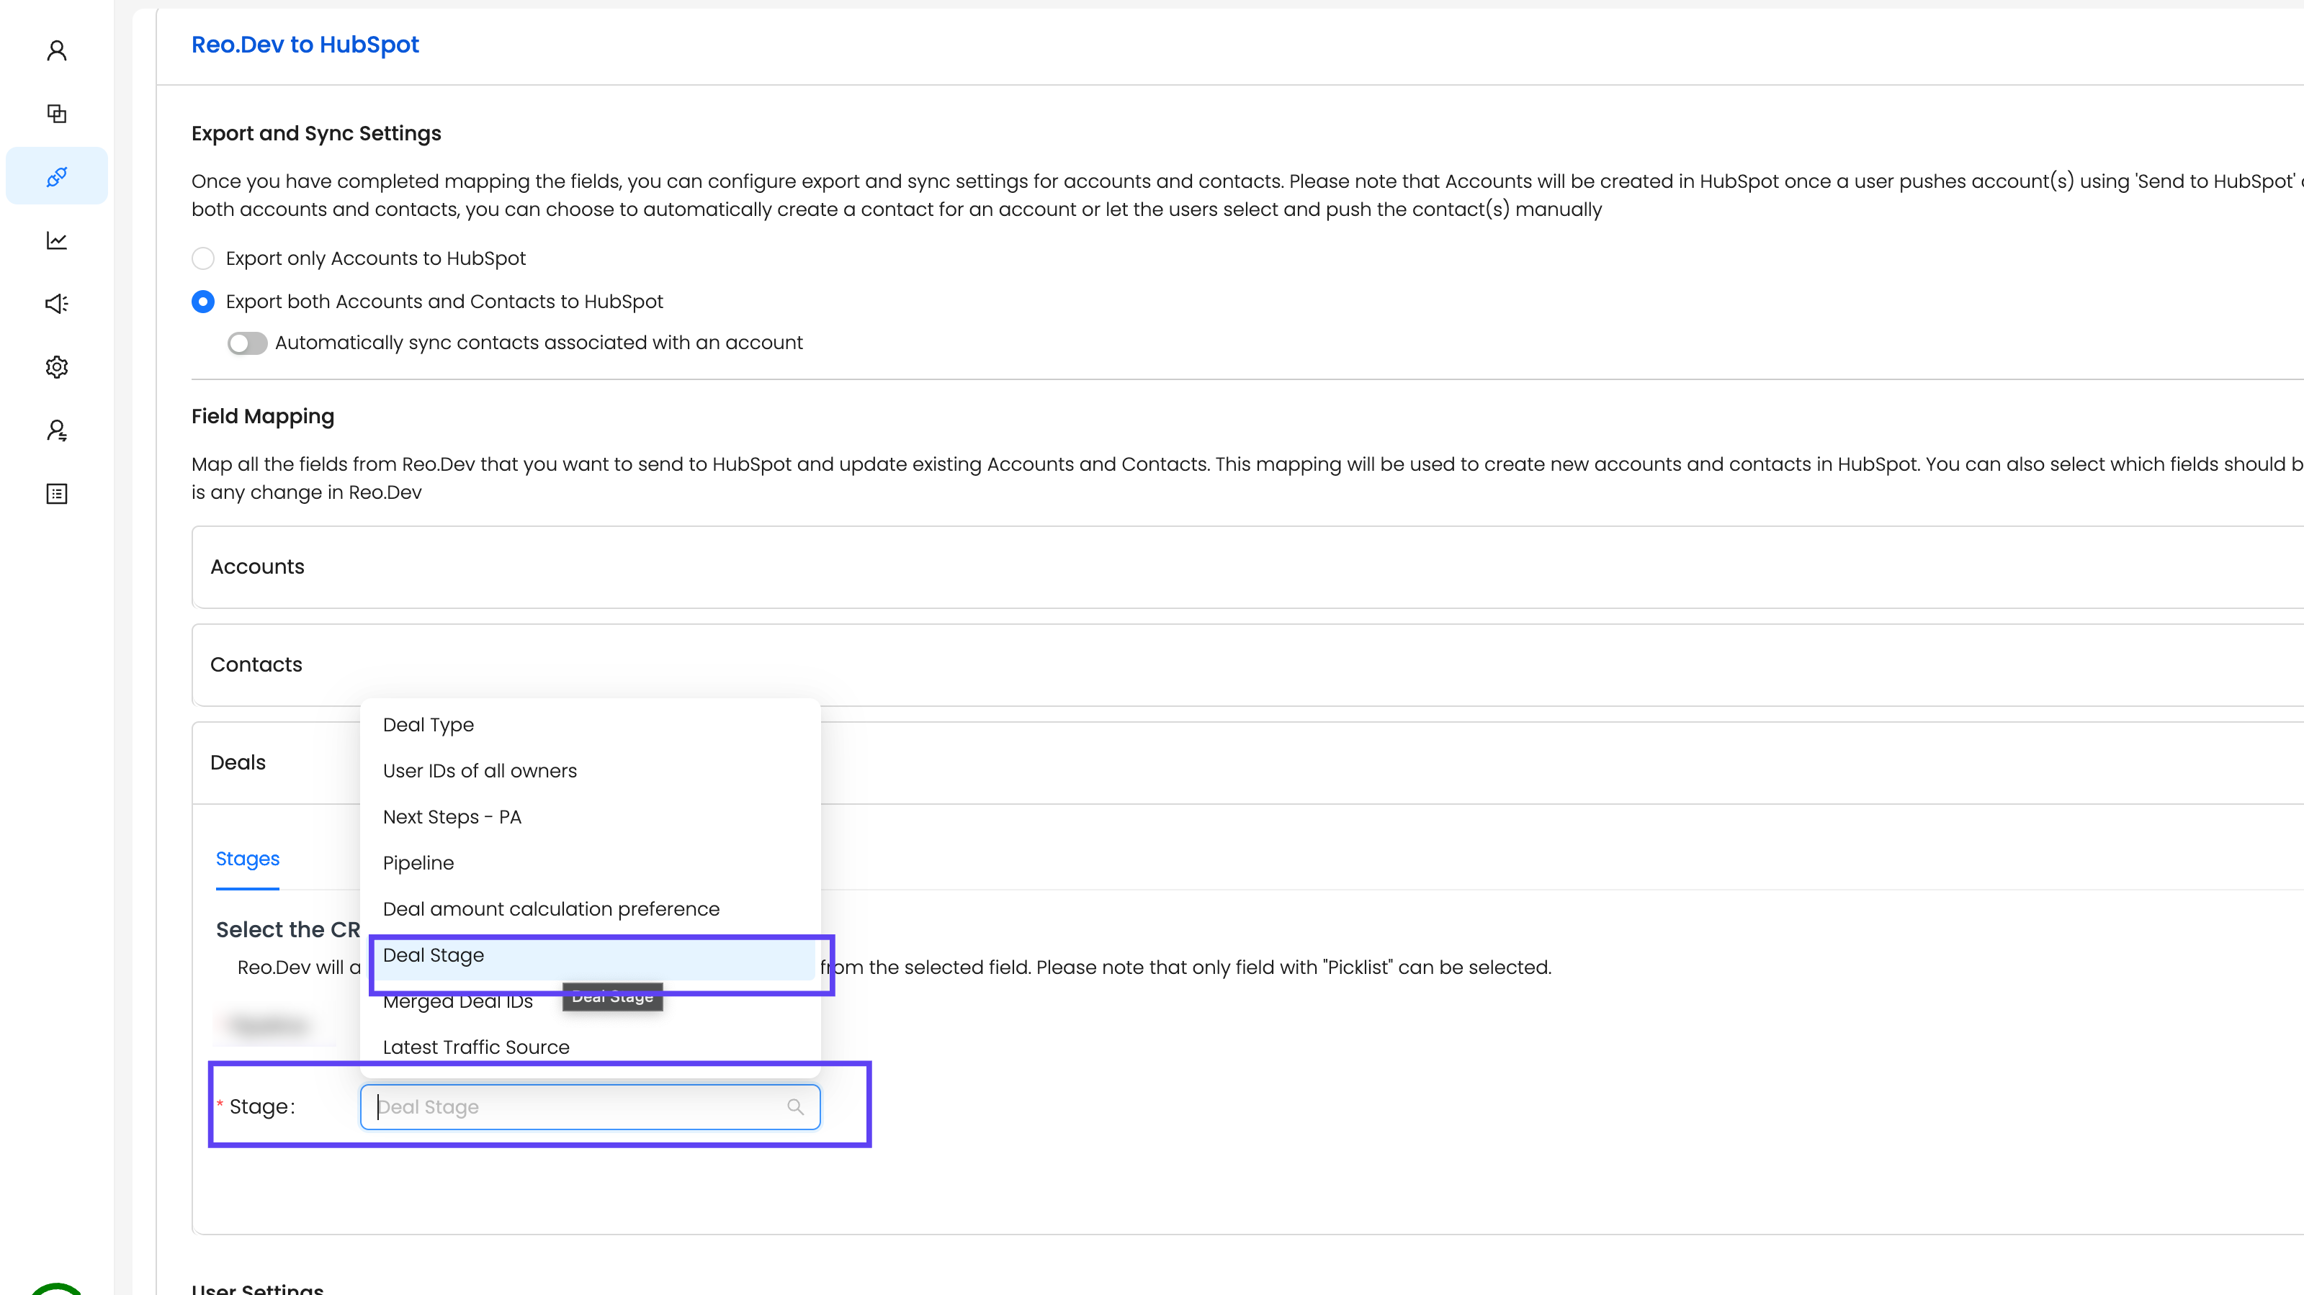
Save the Configuration
After mapping, click Save.
Note: Backend updates are applied immediately, but changes in the UI reflecting the new mappings will take up to 24 hours to refresh.
Learn More About Custom CRM Stages
To dive deeper into setting up and leveraging Custom CRM Account and Opportunity Stages, refer to our detailed Custom CRM Stages guide for step-by-step guidance, use cases, and advanced tips to maximize the value of your Salesforce CRM integration with Reo.Dev.
Disconnect Salesforce
You can disconnect Salesforce from the Integrations section:
Navigate to Integrations → CRM and click Configure
Under Salesforce and click on Disconnect at the top right corner
Please note that all the field mappings and user permissions will be lost.
Last updated
Was this helpful?

