Reo.Dev Zapier Integration Guide
The Reo.Dev x Zapier integration lets you build automated workflows by syncing accounts, developers, and buyers from your Reo.Dev segments to any of the 5,000+ apps supported by Zapier.
Refer to the section below to find out how to connect your Reo.Dev instance to your Zapier account.
Note: Currently Reo.Dev is an Invite only app on Zapier. Use this link to connect the Reo.Dev app
Step 1: Click on Accept and Build a Zap.
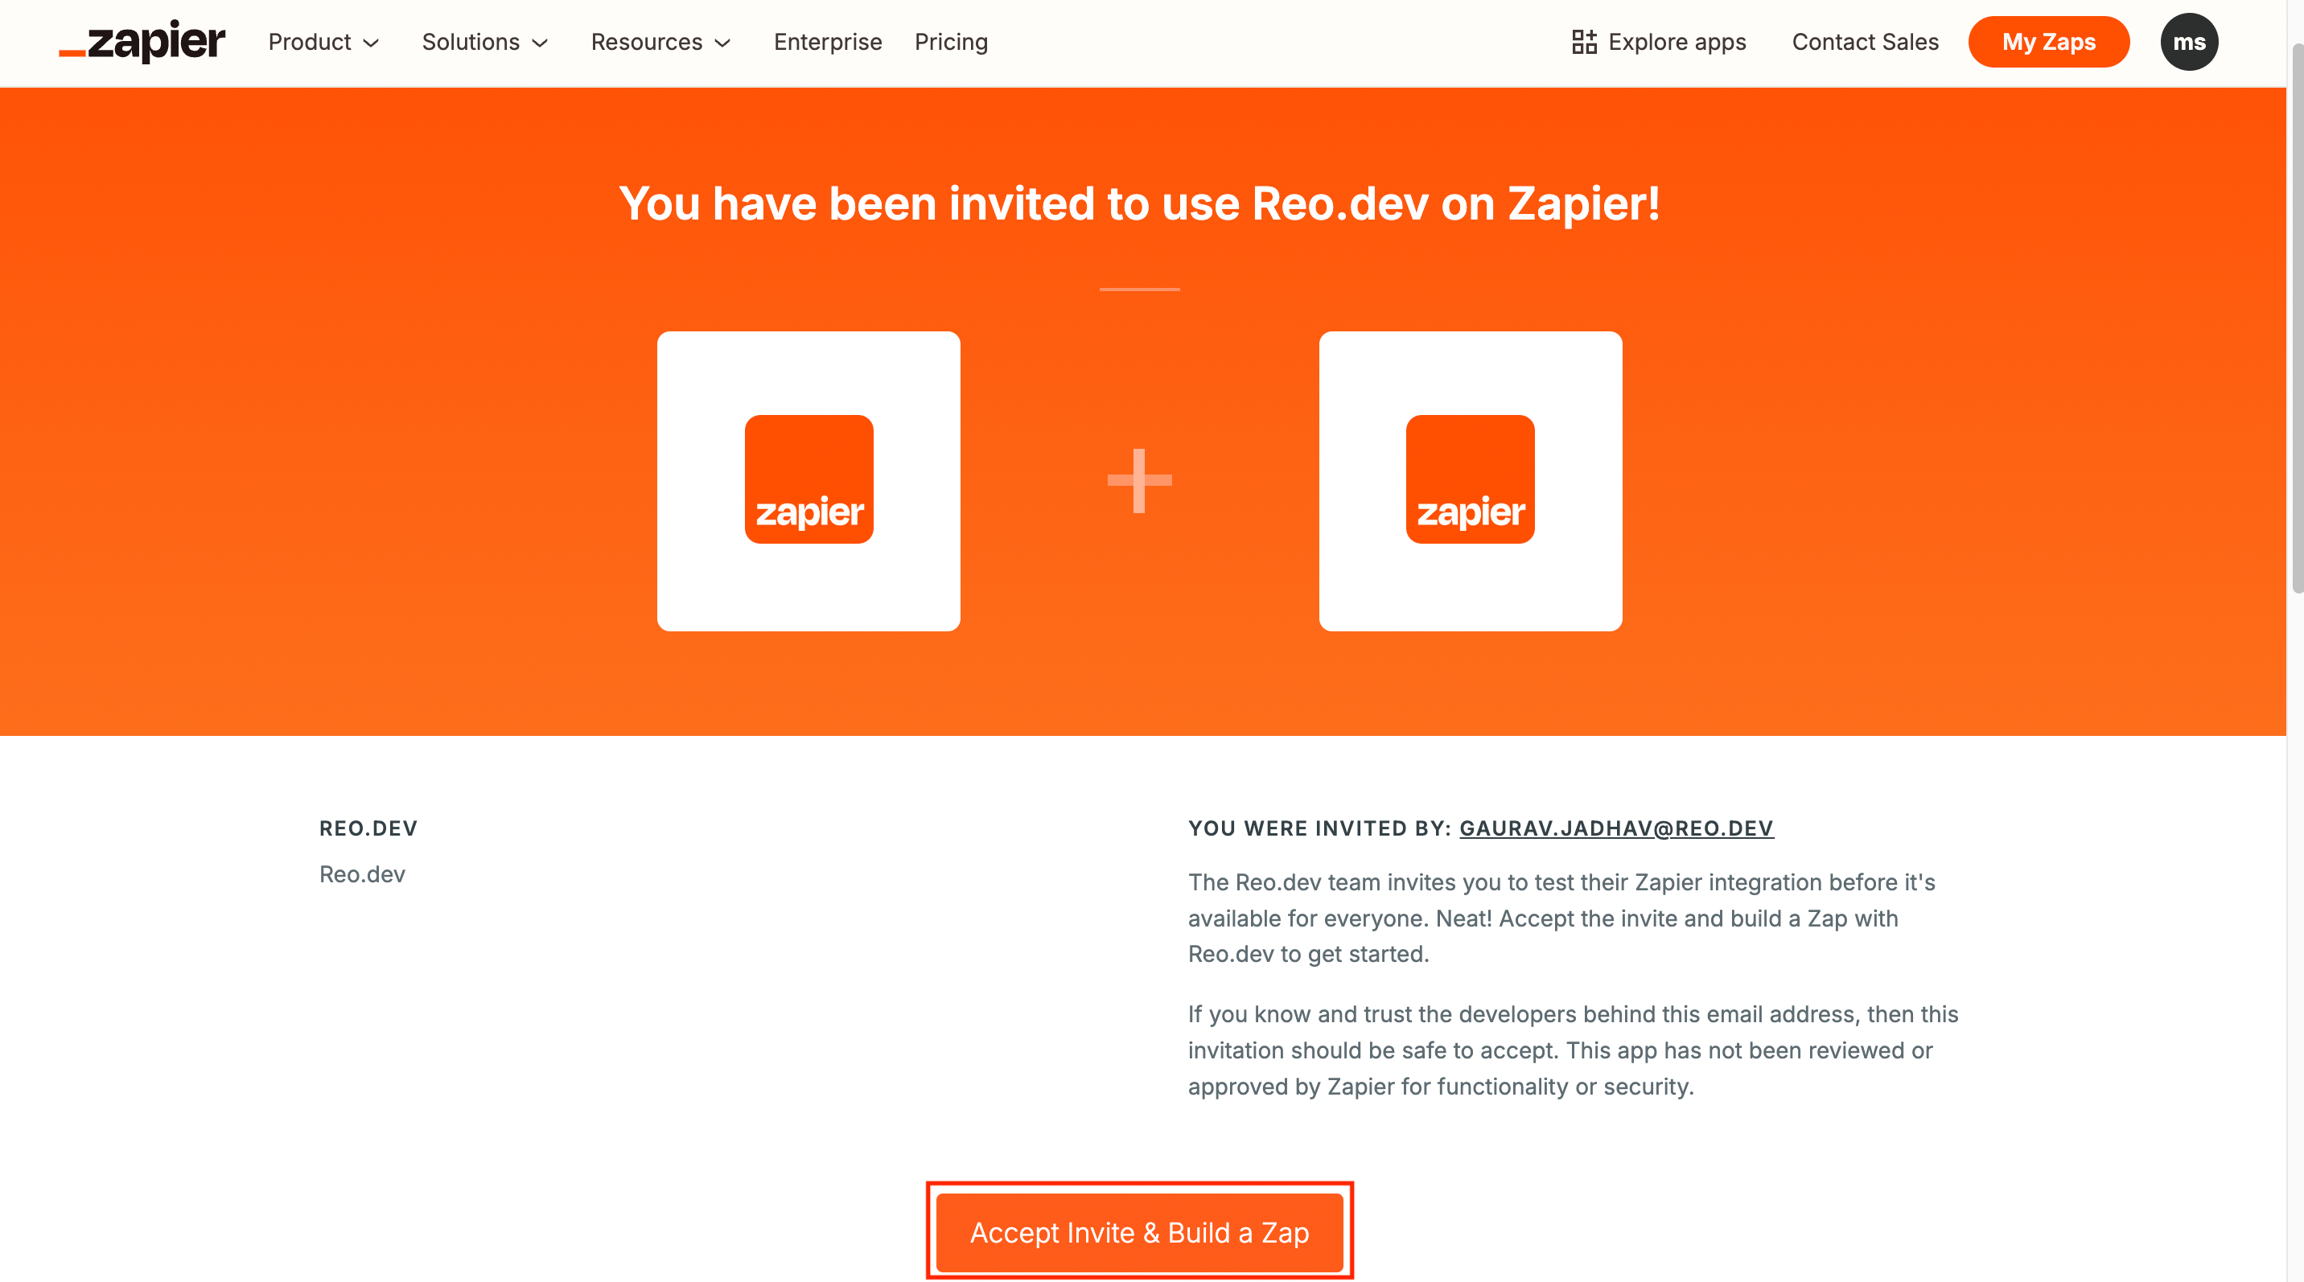
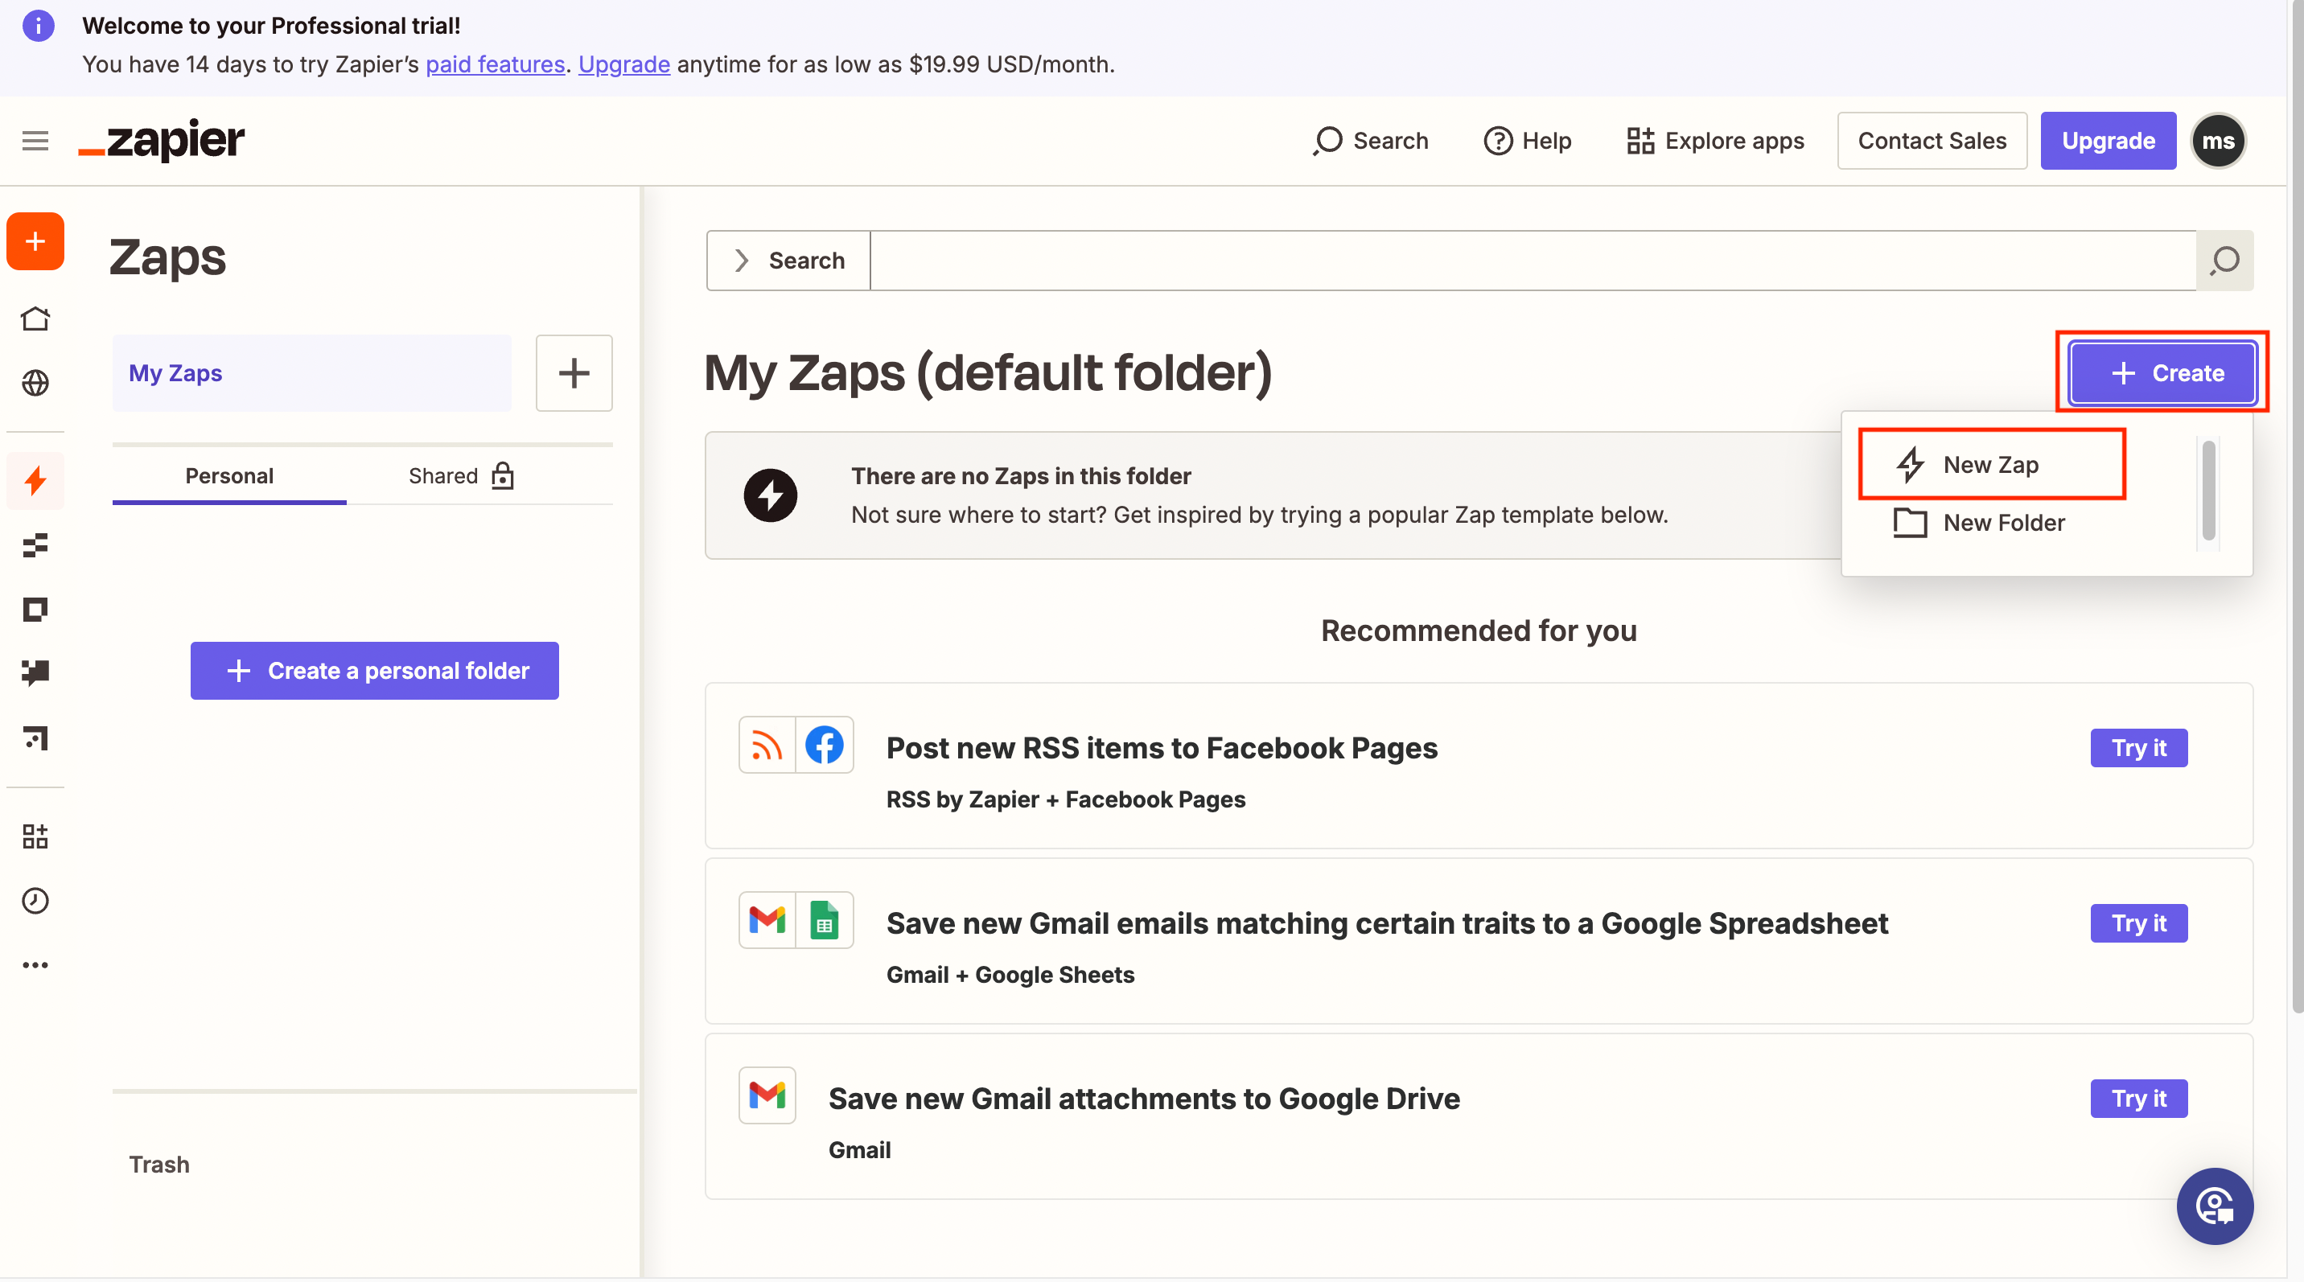
Step 2: You’ll be redirected to the Zapier webpage. Here, click Create and then click New Zap.
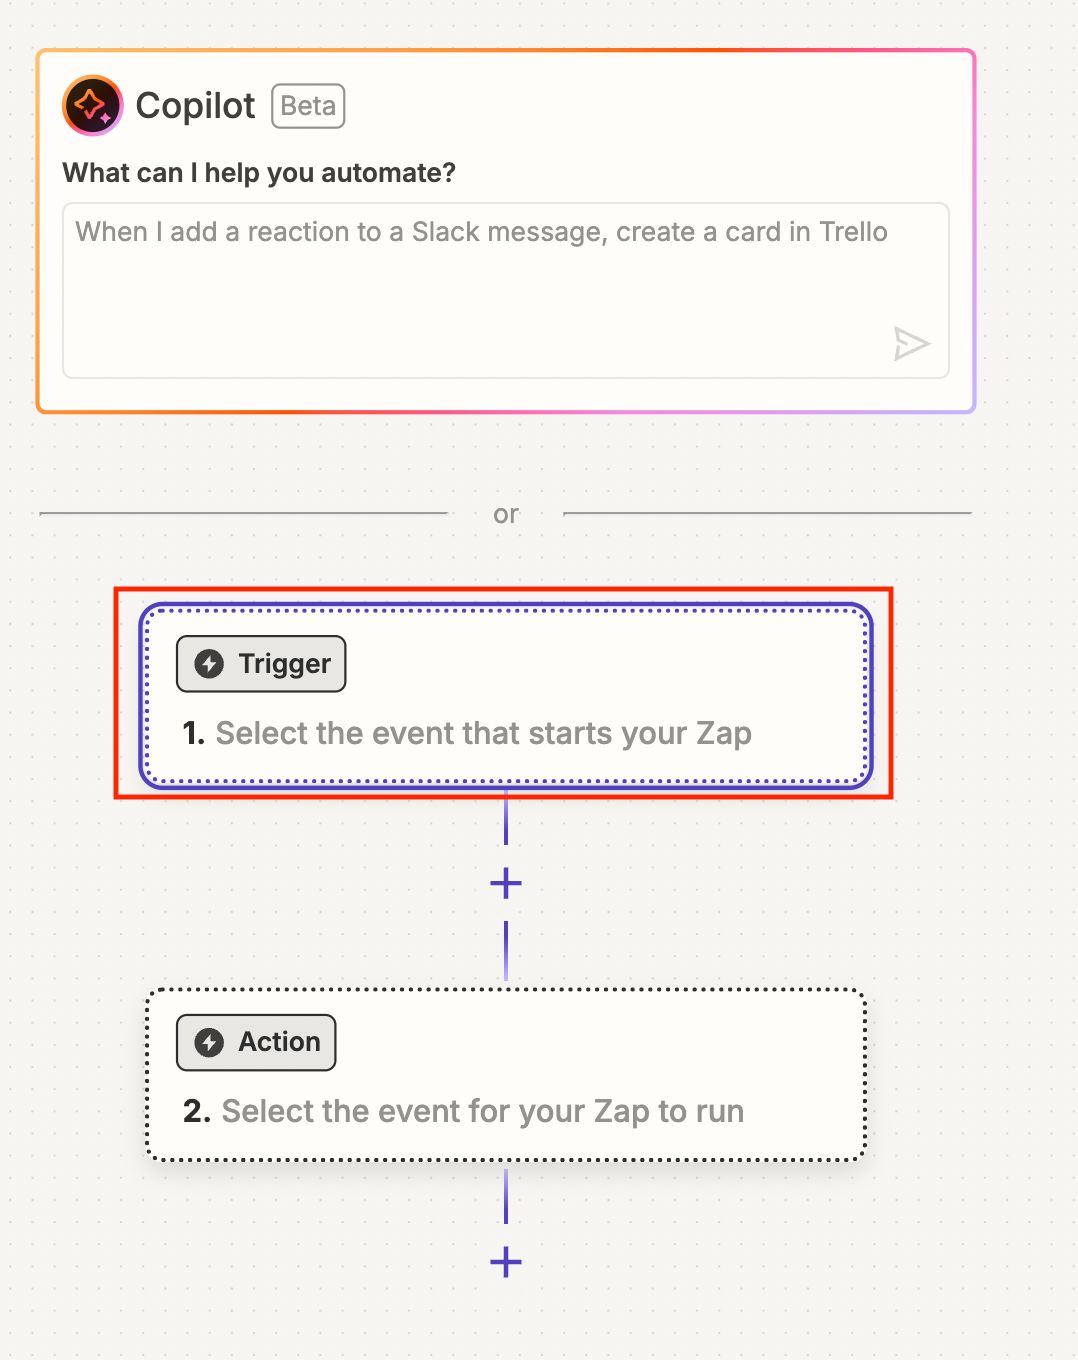
Step 3: Click on the Trigger panel to first add and authenticate the Reo.Dev app
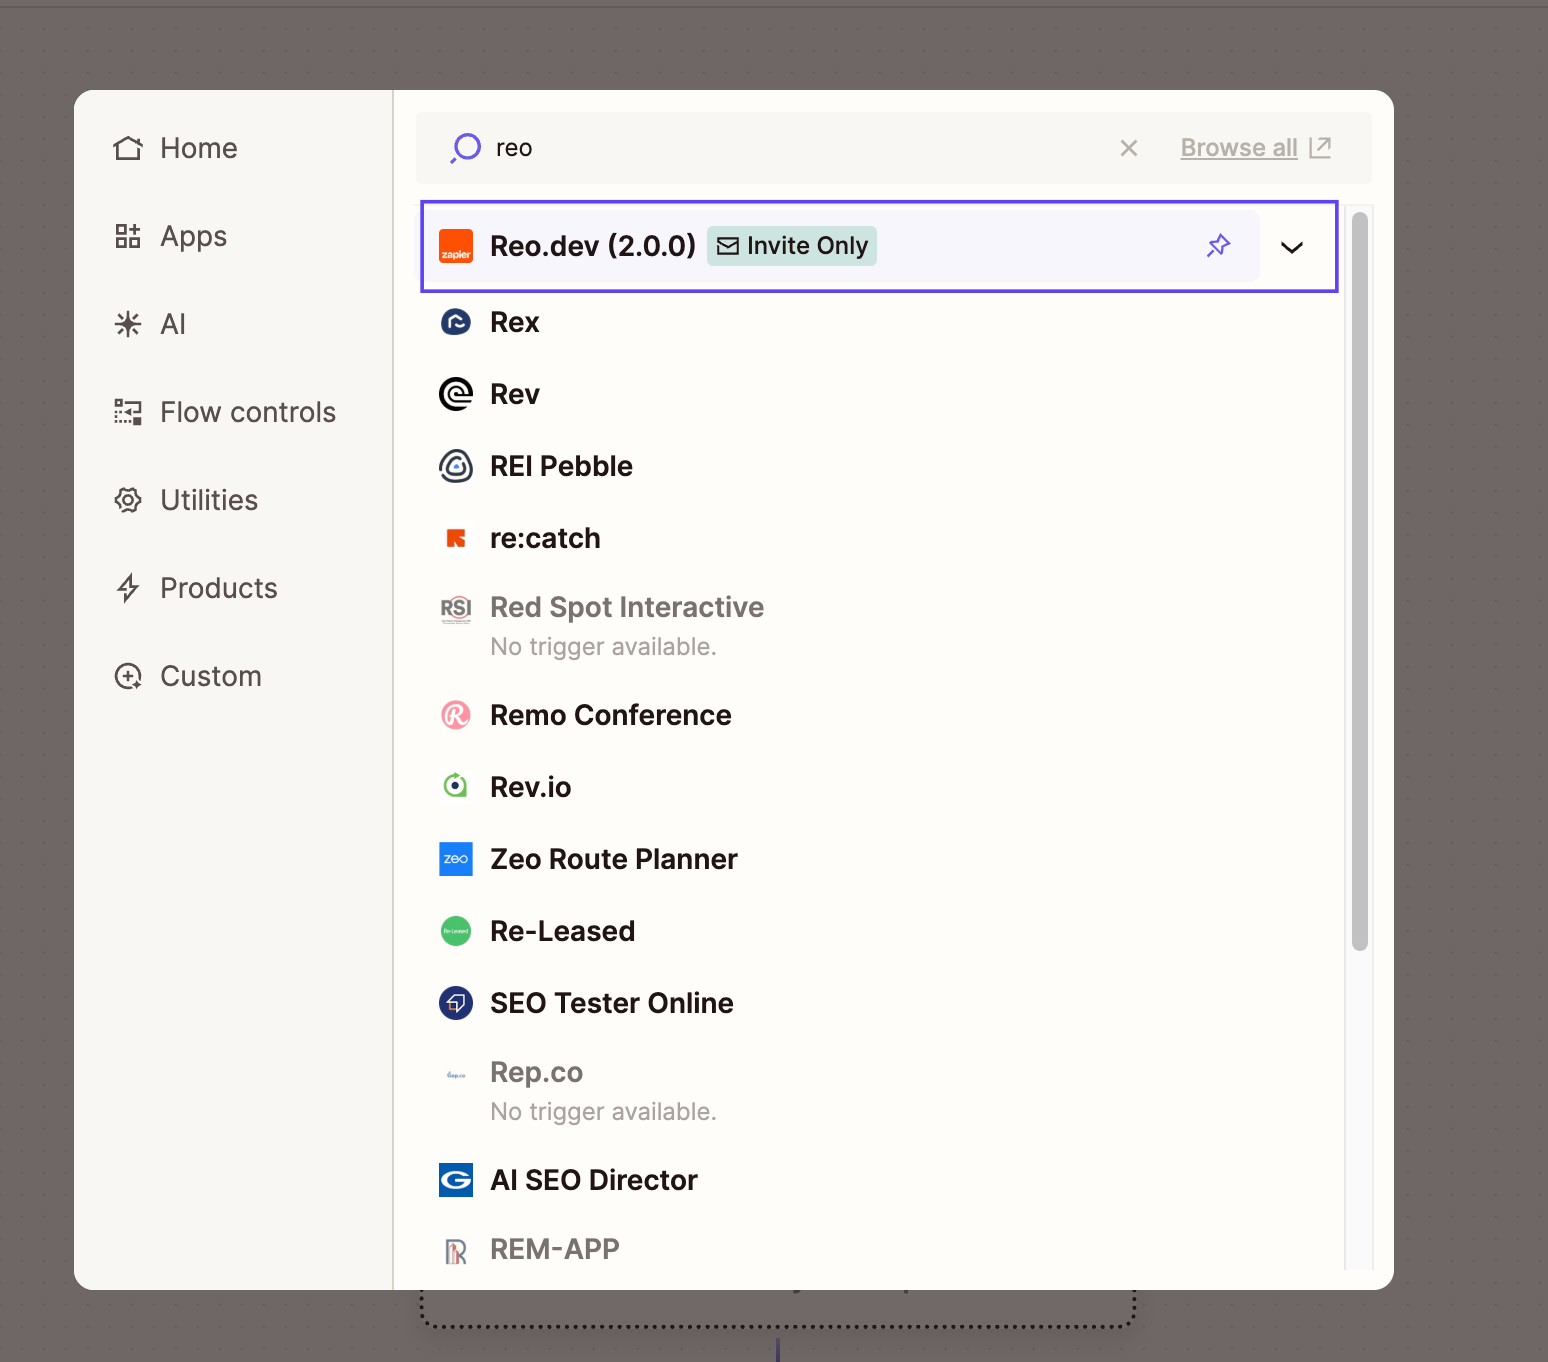
Step 4: Search for the Reo.Dev app.
Choose a Trigger Event
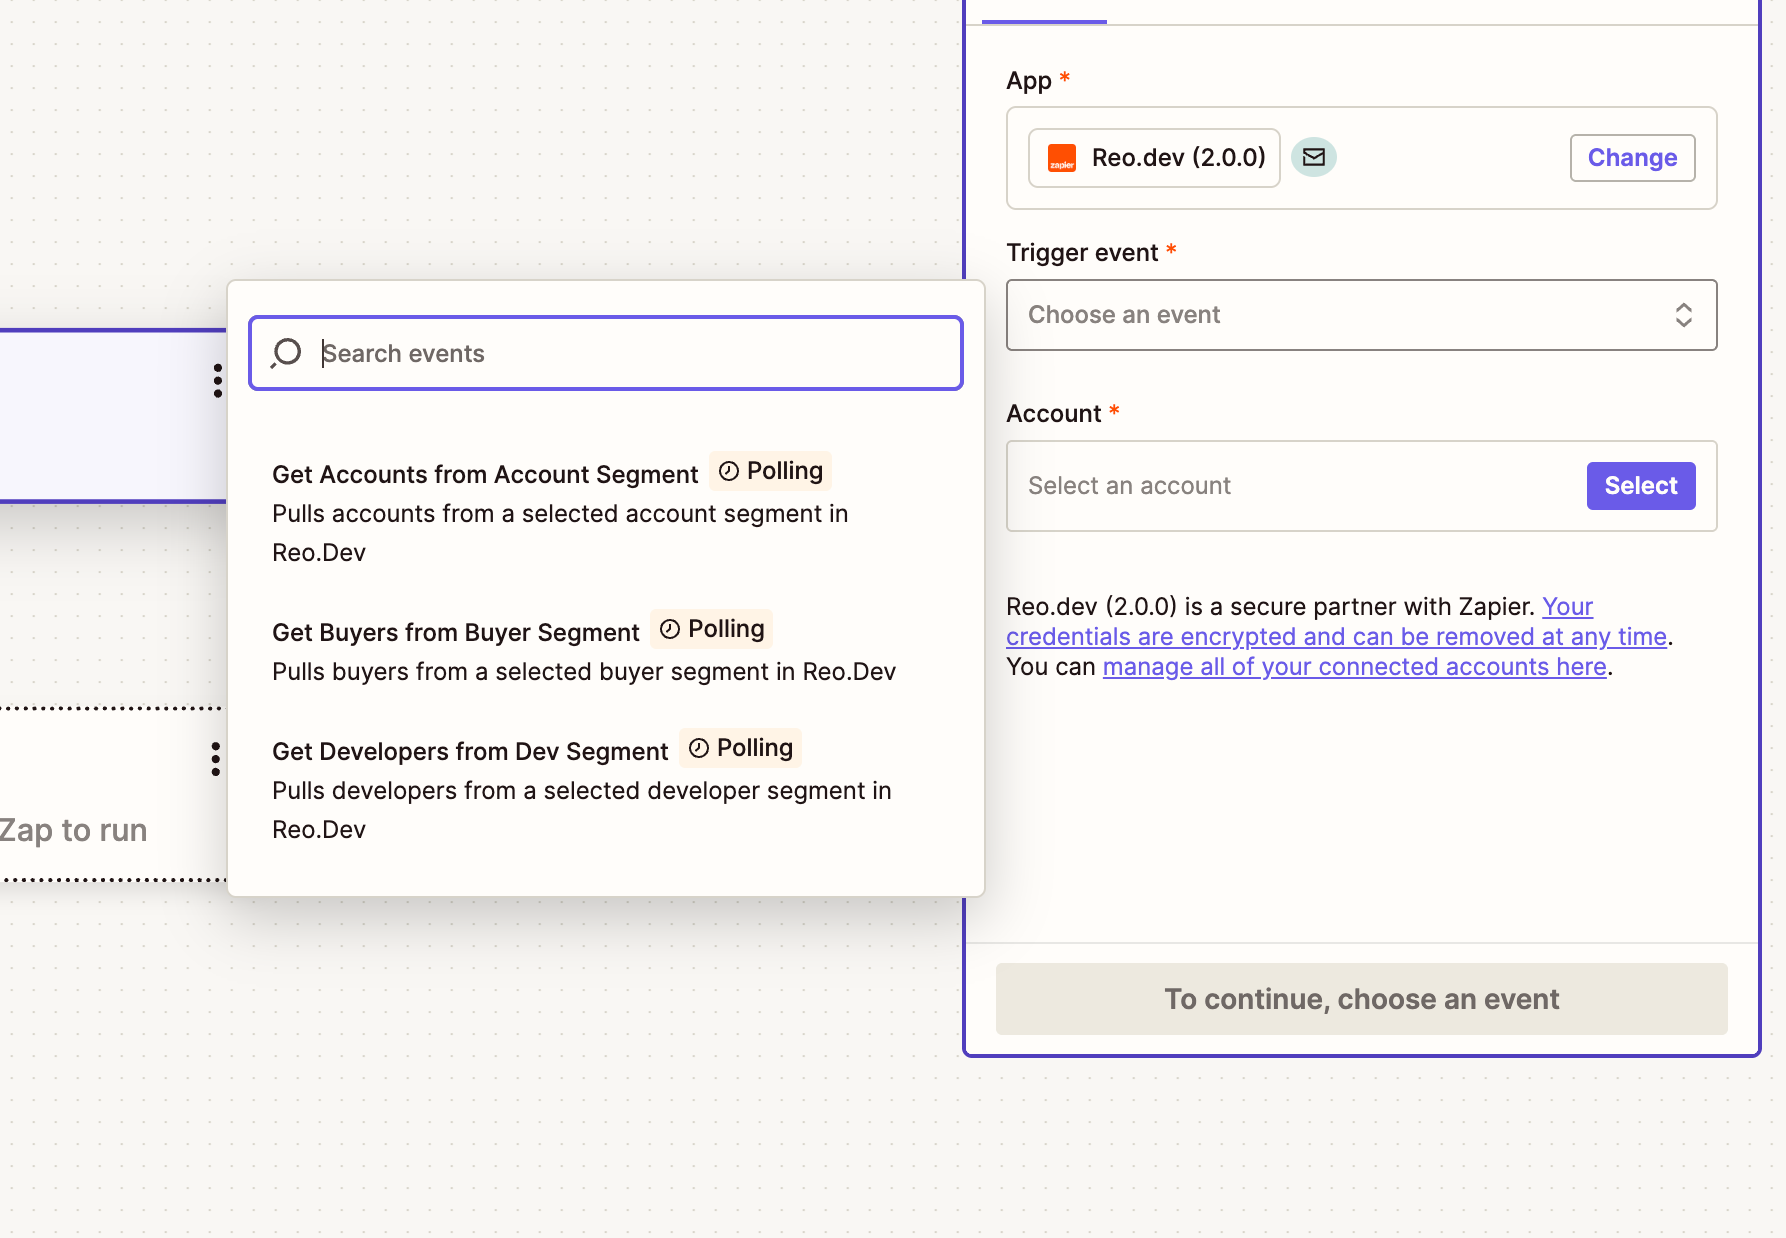
Step 5: In this step, you’ll select the event in Reo.Dev that will trigger the Zap.
Supported Triggers
These are polling-based triggers. Zapier checks for new entries every 15 minutes.
Trigger
Description
Get Accounts from Account Segment
Pulls accounts from a selected account segment
Get Developers from Dev Segment
Pulls developers from a selected developer segment
Get Buyers from Buyer Segment
Pulls buyers from a selected buyer segment
Once you've selected the trigger, click Continue.
Step 6: Connect Your Reo.Dev Account
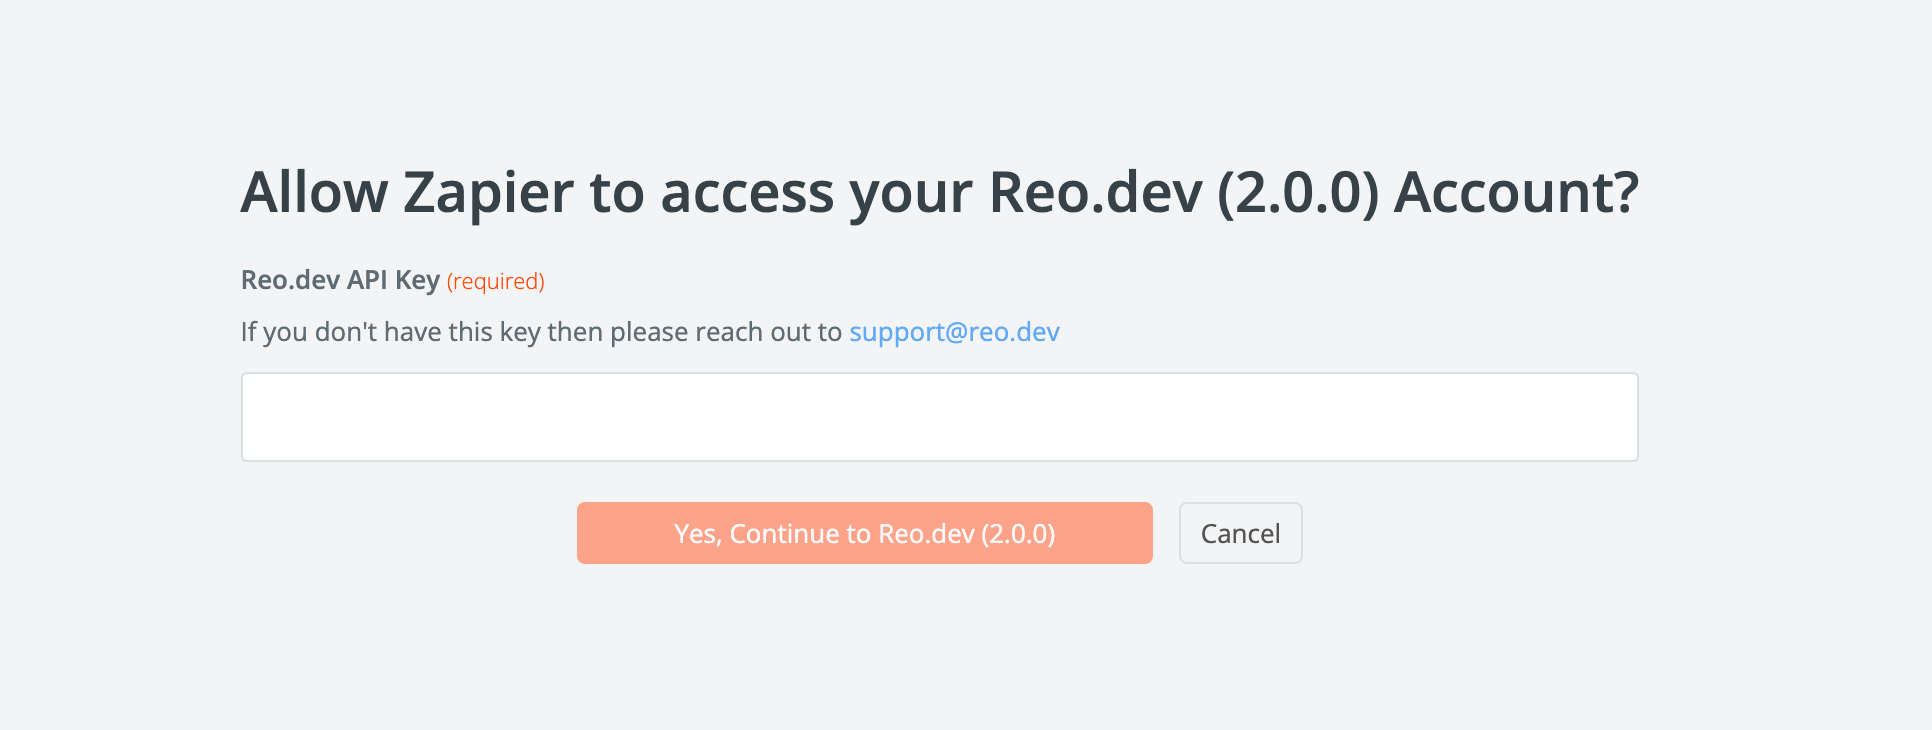
Next, you’ll be prompted to authenticate your Reo.Dev account.
Click Select Account, then click Connect a new account. This will open a screen asking for your Reo.Dev API Key.
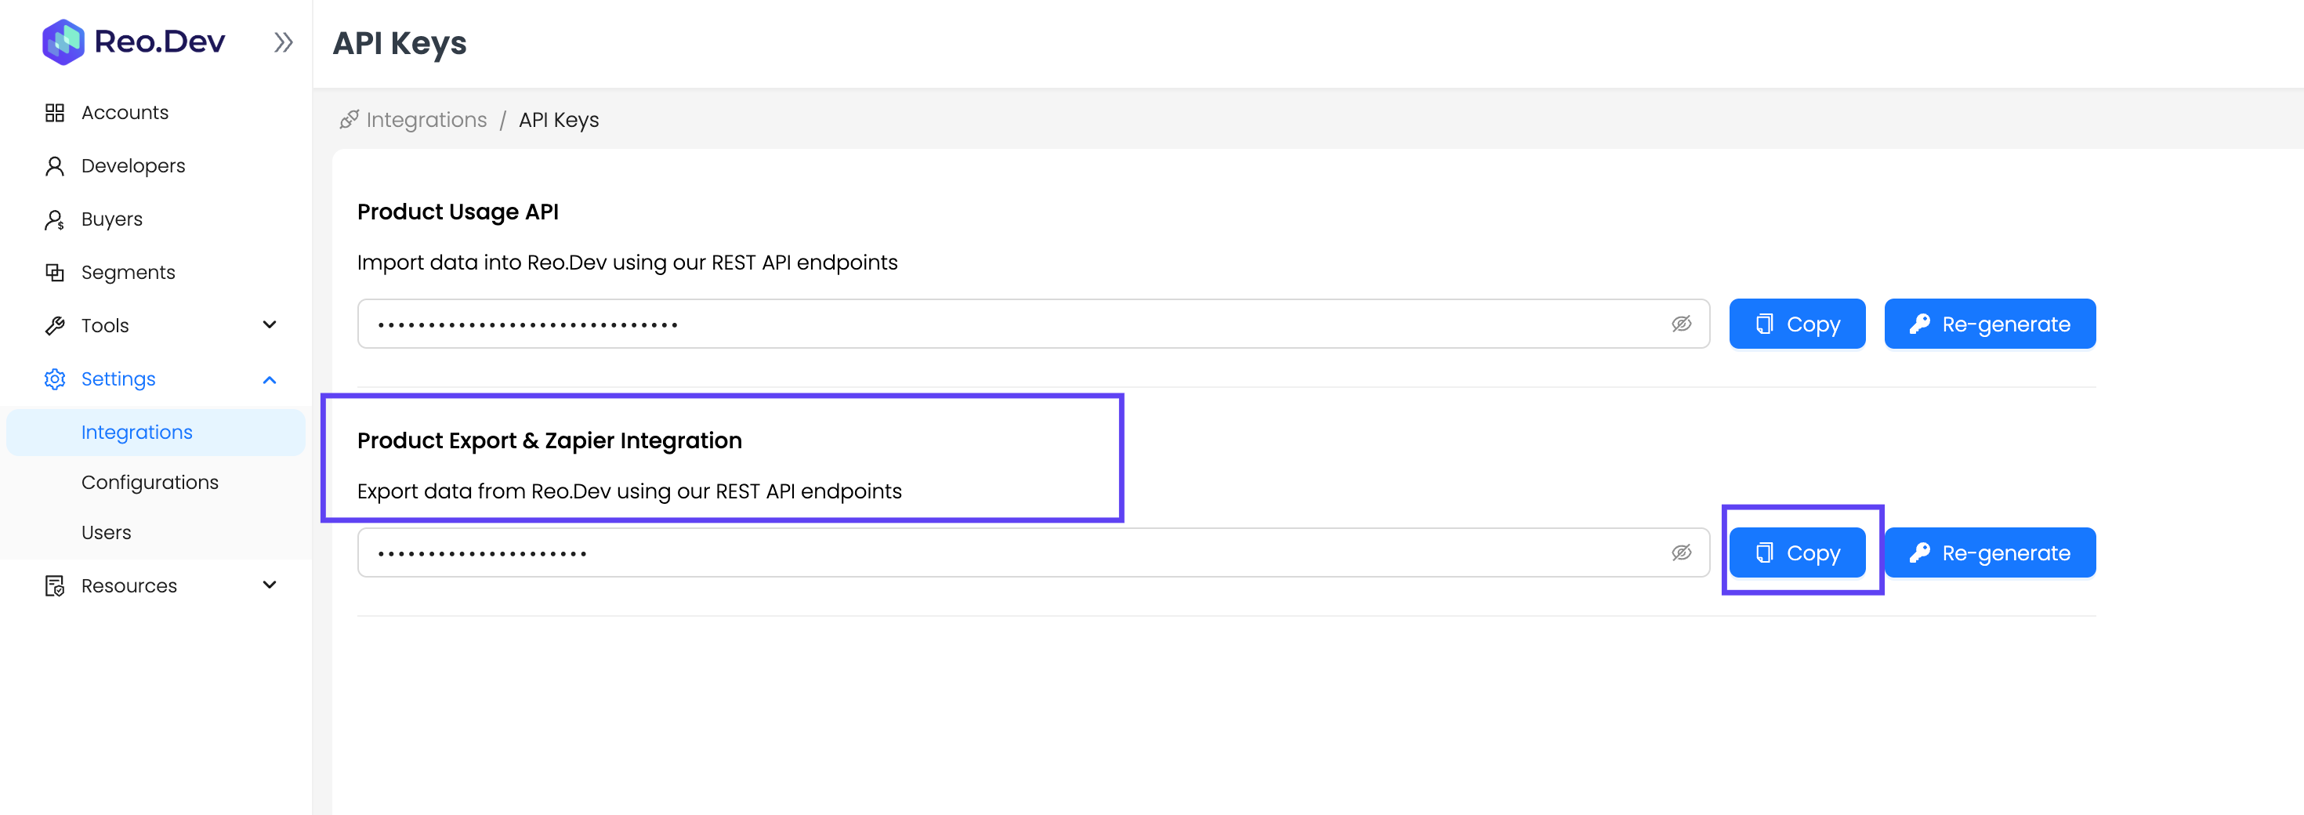
To access your API key:
Navigate to Settings → Integrations → API Keys.
Locate the Product Export & Zapier Integration section.
Click Copy to use the key, or Re-generate if needed.
Note: Only Admin users in Reo.Dev have permission to generate API keys. Other users can still view and copy an existing key.
Paste the key into the Zapier prompt and click Yes, Continue to Reo.Dev (2.0.0).
Step 7: Click Continue to complete the Setup.
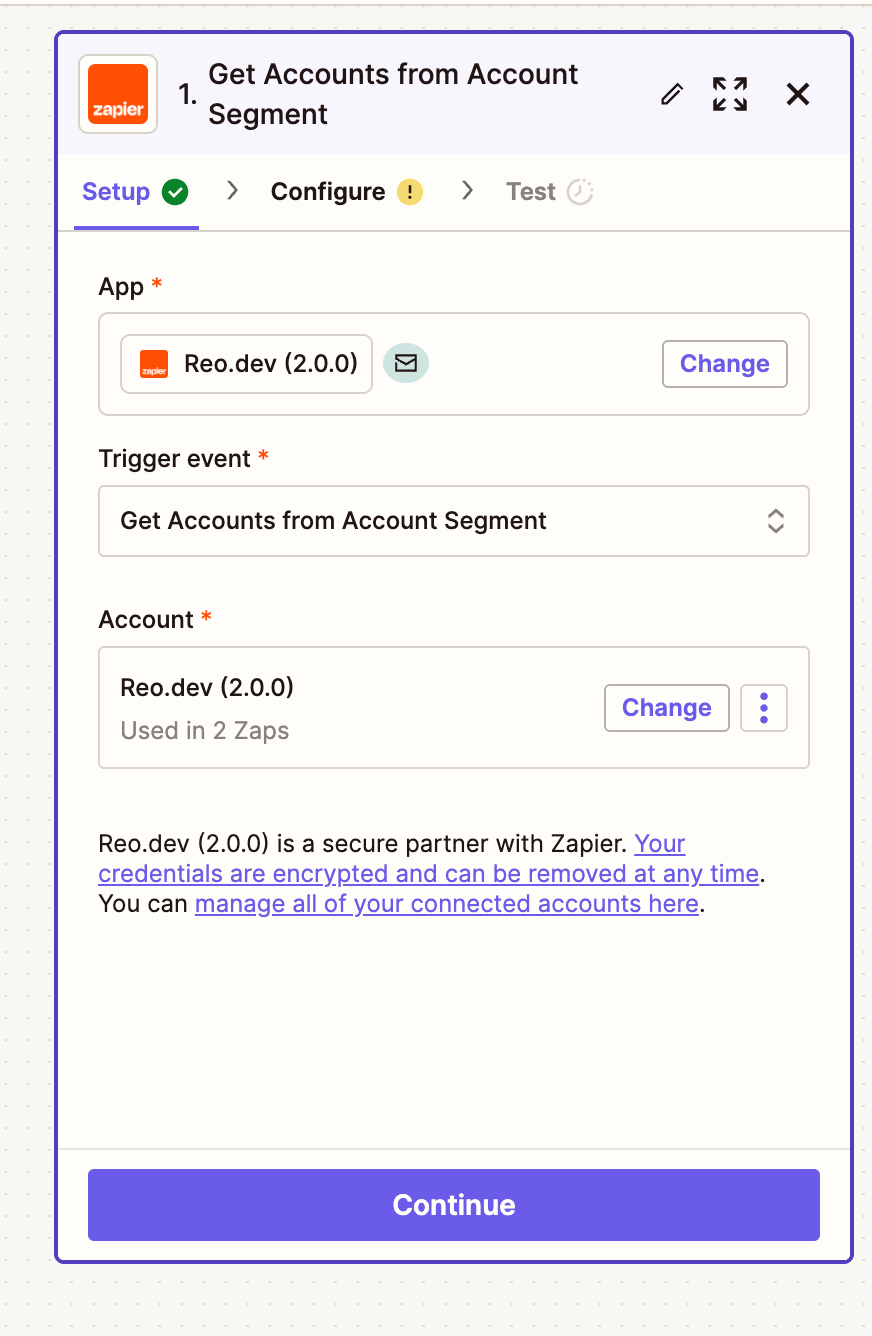
Step 8: Select the segments you’ve created from which you want data to flow to trigger the Zap and click Continue.
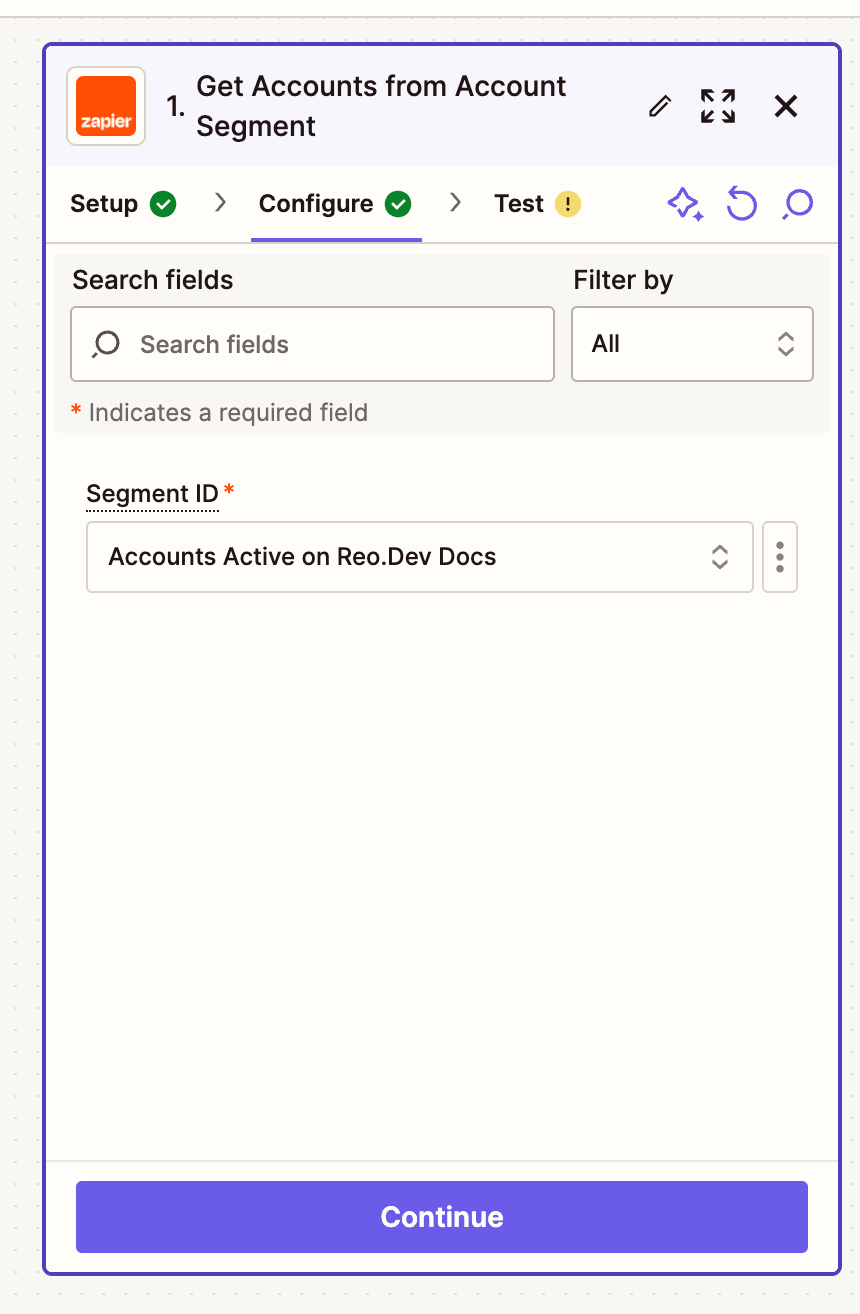
Step 9: Zapier allows you to test whether the data from the selected segment is flowing correctly.
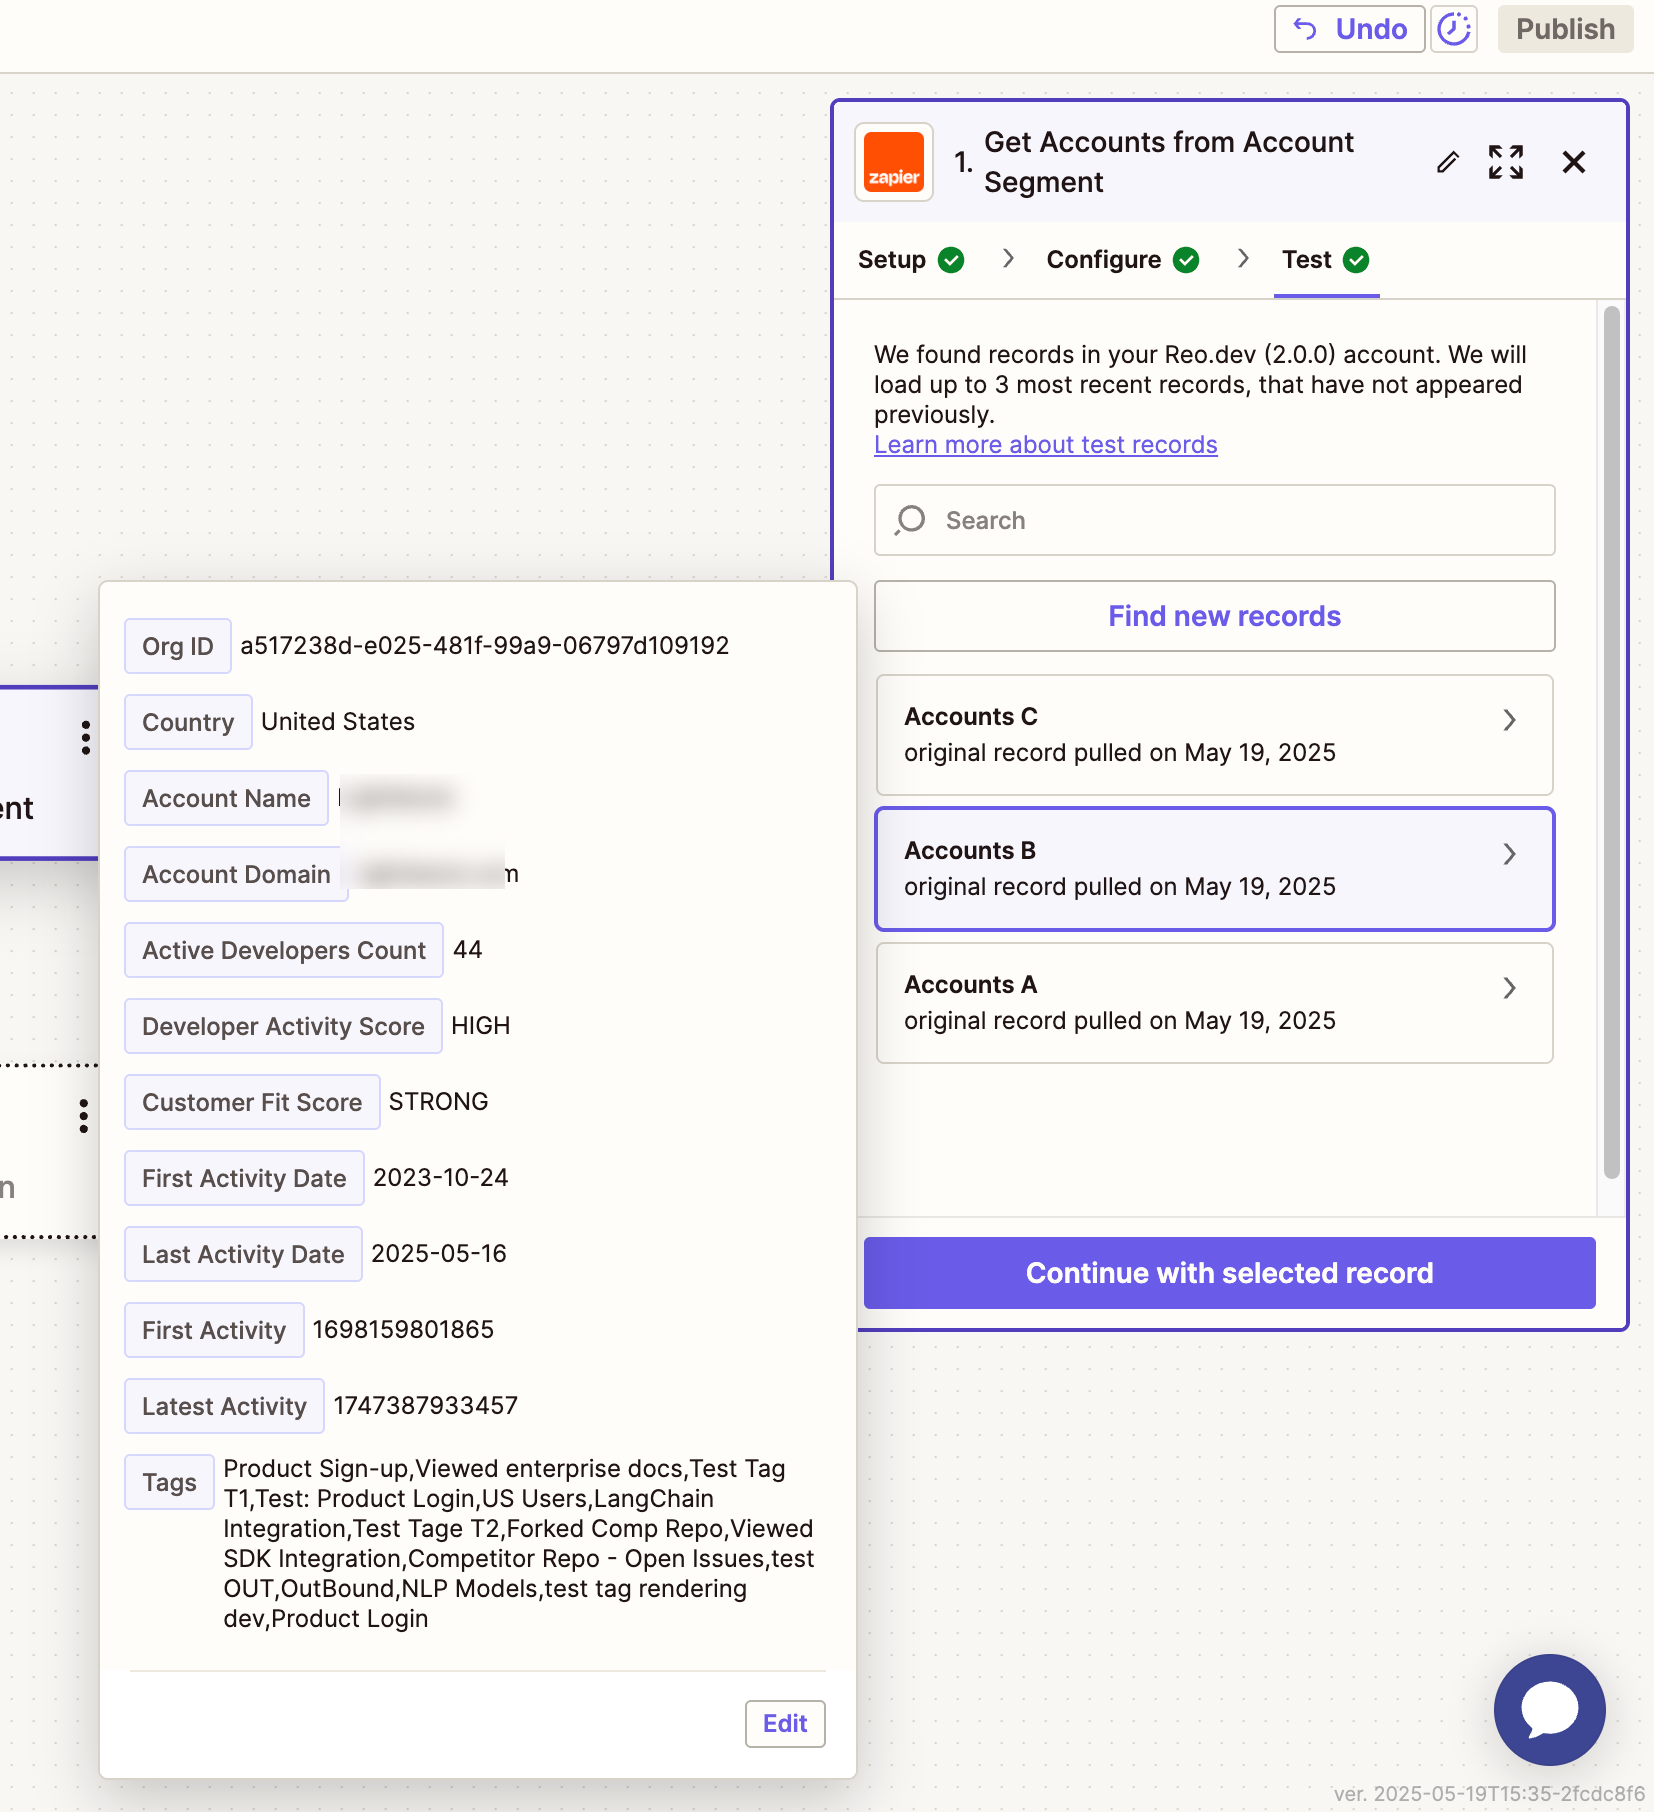
Metadata You’ll Receive
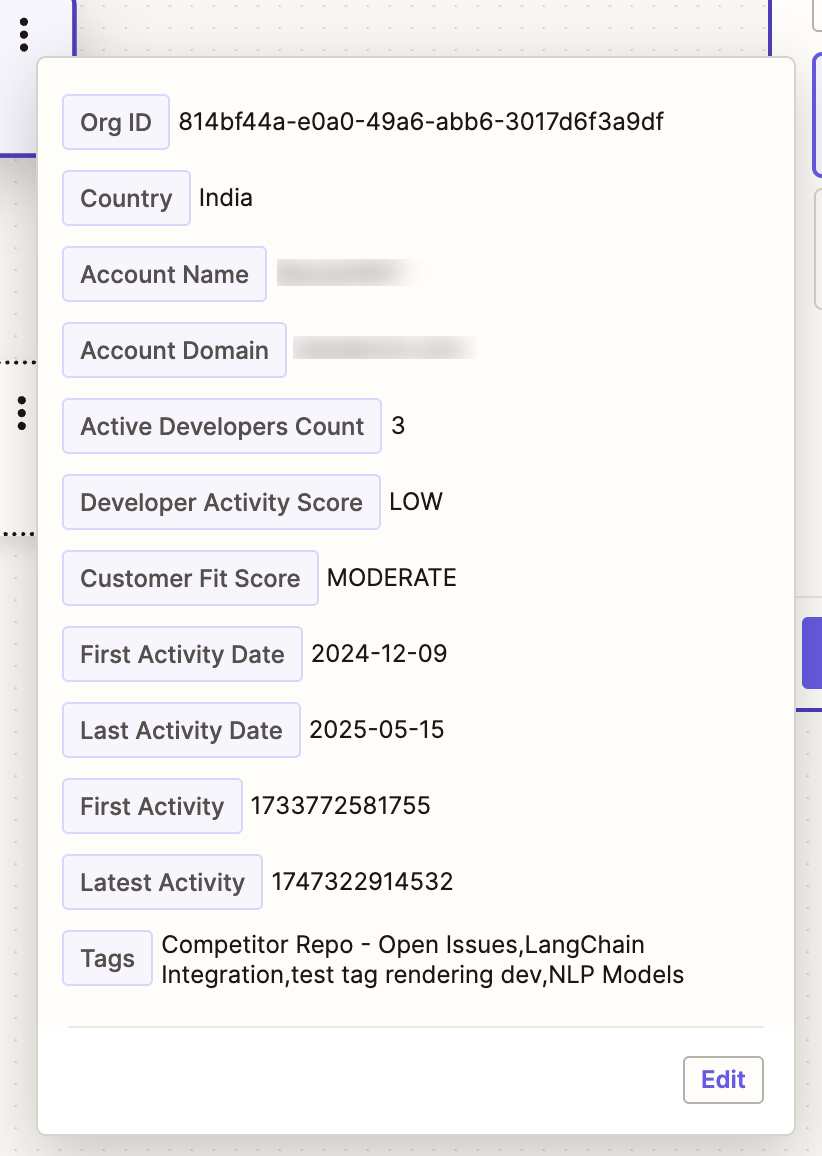
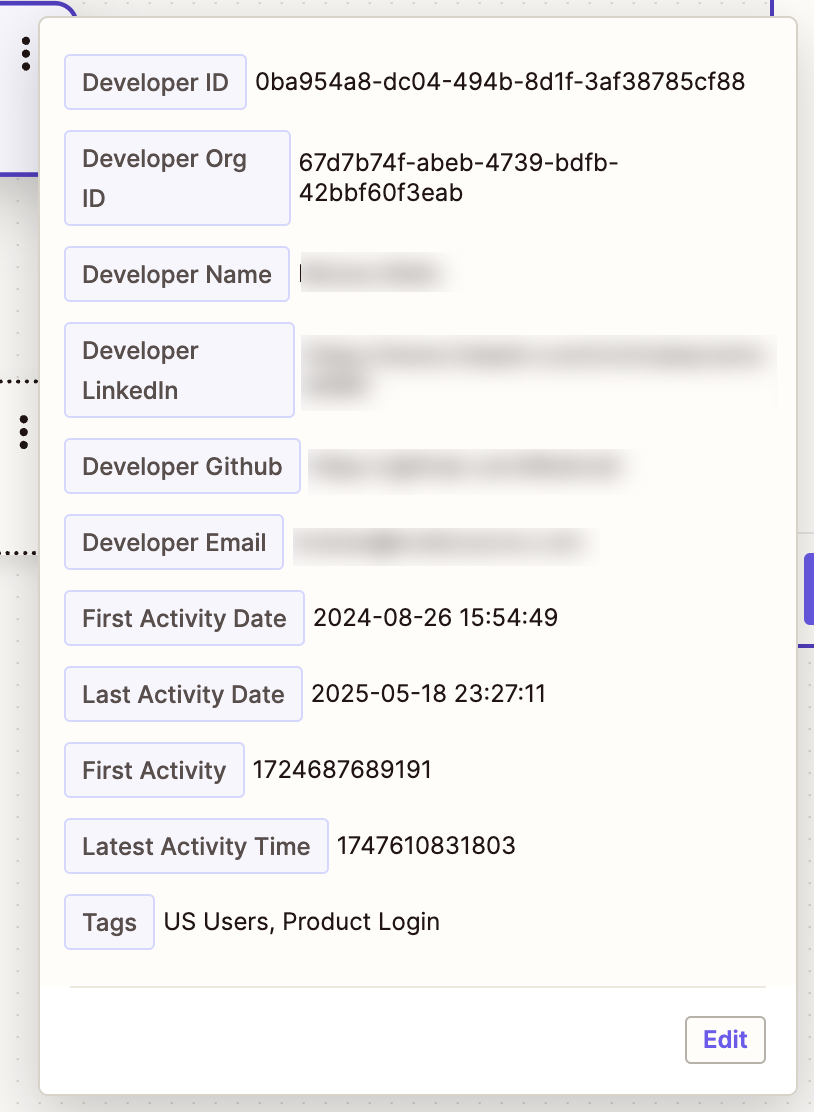
Each Zap triggered by Reo.Dev includes detailed metadata. Below are the fields returned for each entity:
Account Fields
Field
Example
Org ID
814bf44a-e0a0-49a6-abb6-3017d6f3a9df
Country
United States
Account Name
Acme Co.
Account Domain
acme.com
Active Developers Count
3
Developer Activity Score
LOW
Customer Fit Score
MODERATE
First Activity Date
2024-12-09
Last Activity Date
2025-05-15
Tags
Competitor Repo - Open Issues, LangChain Integration, NLP Models
Activity Score
HIGH
Activity Score Numeric
70
City
San Francisco
State
California
Developer Funnel
DISCOVER
Developer Fields
Developer ID
1146c672-c0b3-4161-82dd-be32e58be6df
Developer Org ID
6227136f-49bd-4956-bd67-d6b6cec0129c
Developer Name
John Doe
Developer LinkedIn
LinkedIn URL
Developer GitHub
GitHub URL
Developer Business Email
First Activity Date
2025-03-28 15:54:03
Last Activity Date
2025-05-17 17:13:24
Tags
Checked Playbook, Product Login
Activity Score
HIGH
Activity Score Numeric
70
Developer Designation
Software Engineer
Reo Developer Link
State
California
City
San Francisco
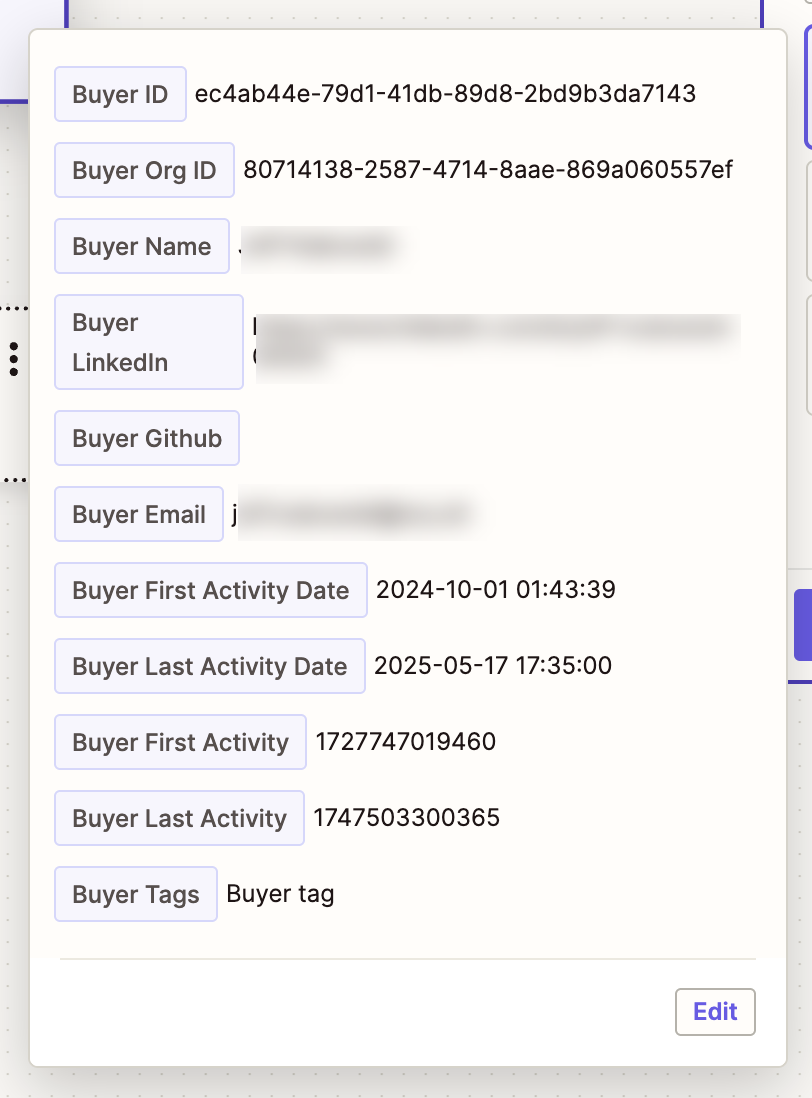
Buyer Fields
Buyer ID
ec4ab44e-79d1-41db-89d8-2bd9b3da7143
Buyer Org ID
80714138-2587-4714-8aae-869a060557ef
Buyer Name
John Doe
Buyer LinkedIn
LinkedIn URL
Buyer GitHub
GitHub URL
Buyer Email
Buyer First Activity Date
2024-10-01 01:43:39
Buyer Last Activity Date
2025-05-17 17:35:00
Tags
Buyer tag
Understanding Zap Behavior: Net New Data Only
By default, the Reo.Dev Zapier integration only triggers when a new account, developer or buyer is added to a segment. This means:
The Zap does not backfill historical data already present in the segment at the time the Zap is turned on.
Only net new entries to the segment (after the Zap is active) will trigger and be sent to the connected app.
Why This Matters
If your Reo.Dev segment already includes a large set of accounts or developers (e.g., 3000+), Zapier will not push those existing records to your connected app (e.g., LinkedIn Ads, Apollo.io, etc.). You’ll only see new entries added after the Zap is live.
Recommended Best Practice: Upload Historical Data via CSV
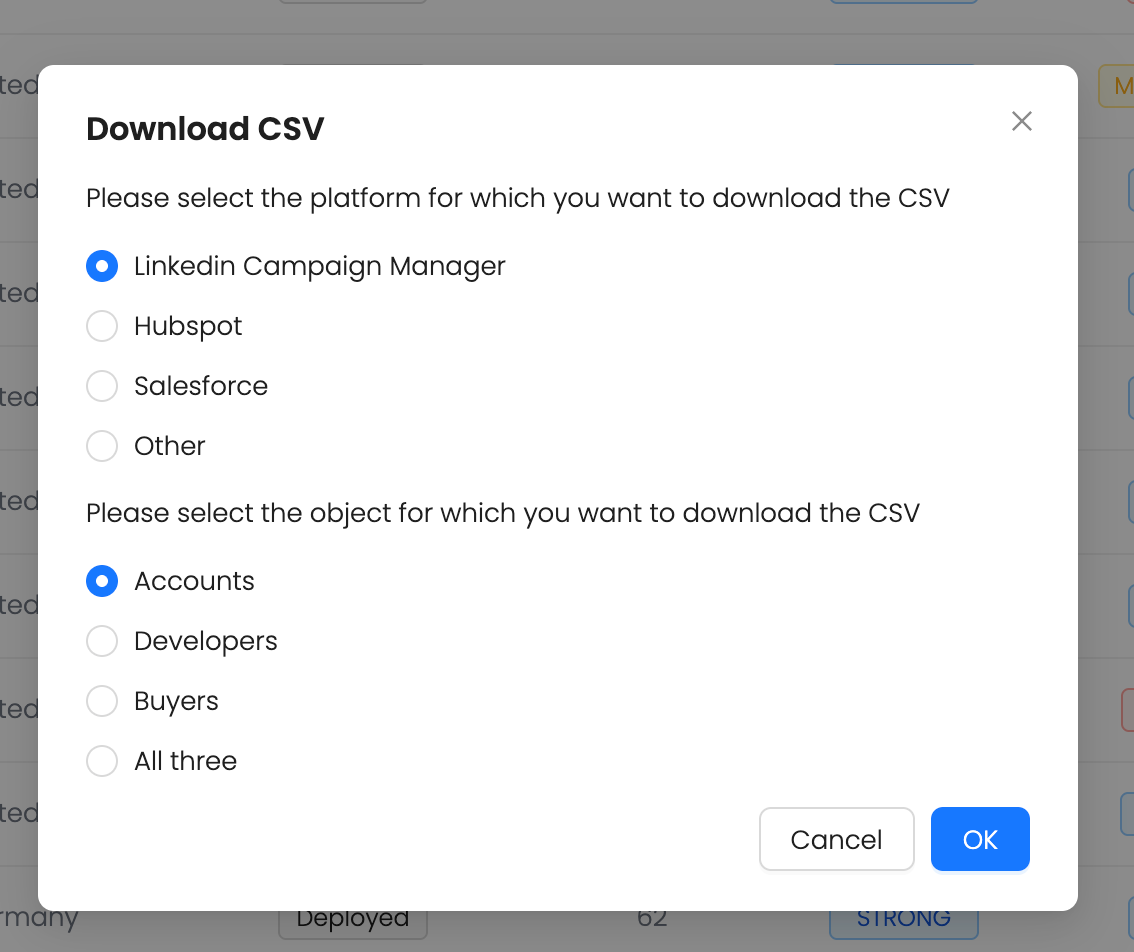
If your use case requires all existing segment data (not just new additions) to be sent through Zapier, follow these steps:
How to Backfill Using CSV Upload
Export the data from your existing Reo.Dev segment as a CSV file.
Re-upload the CSV to your platform (e.g. LinkedIn Ads, Salesloft, etc.) using native import functionality or a separate Zap that processes CSV rows.
Then activate the Zap, so future additions to the segment are automatically handled.
This hybrid approach ensures:
You don’t miss out on historical data.
Zapier picks up only net new entries going forward—keeping workflows efficient and lightweight.
Last updated
Was this helpful?

