> For the complete documentation index, see [llms.txt](https://docs.reo.dev/llms.txt). Markdown versions of documentation pages are available by appending `.md` to page URLs; this page is available as [Markdown](https://docs.reo.dev/integrations/input-sources/developer-insights/github.md).
# GitHub
Connecting GitHub repositories to Reo lets you track developer activity, including forks, pull requests, issues, watches, comments, and stars.
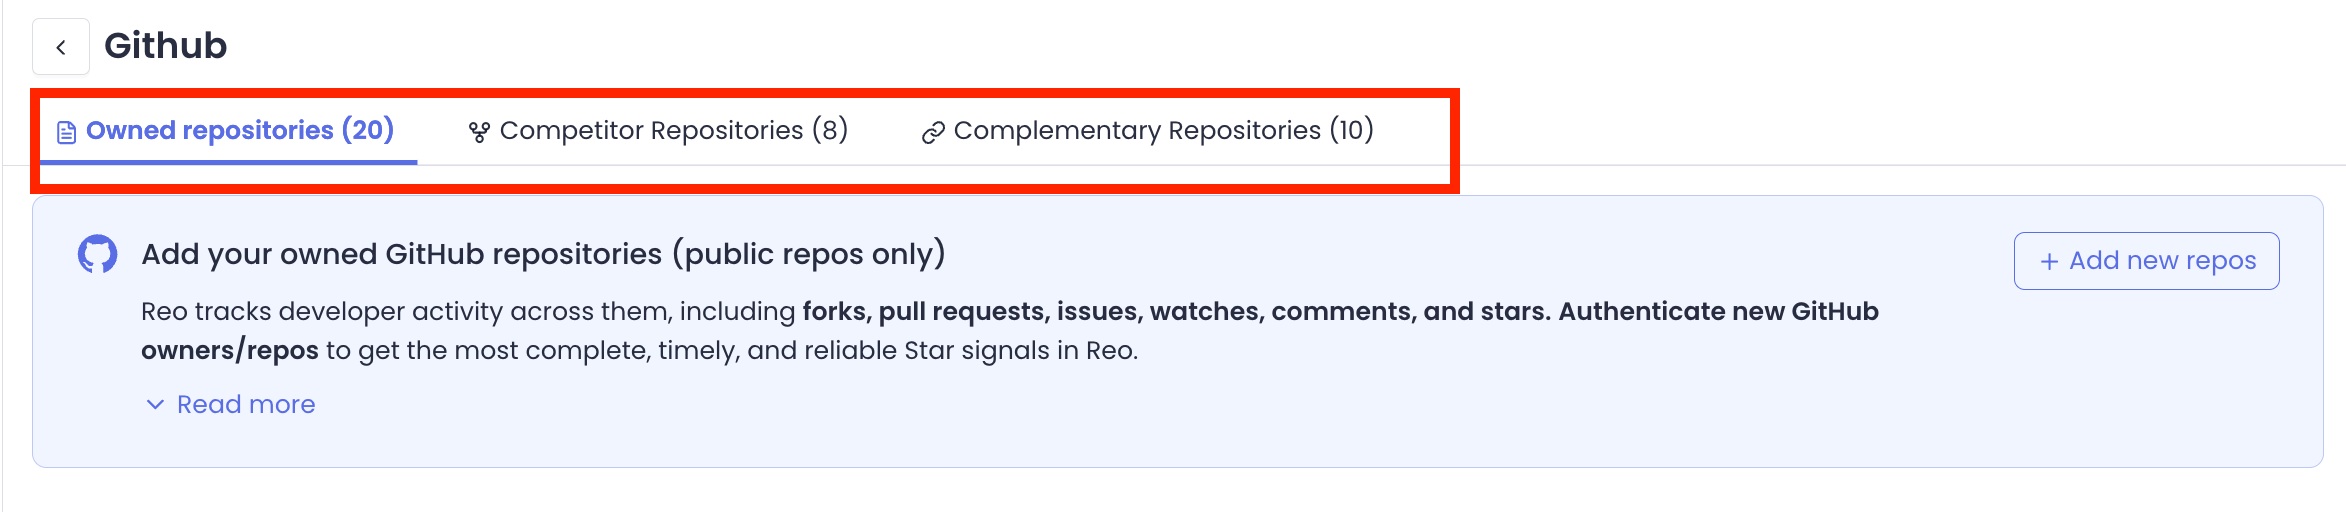
You can connect 3 kinds of repositories. Reo tracks developer activity across the following:
* **Owned repositories**: repositories your organization manages and maintains
* **Competitor repositories**: repositories managed by organizations that compete with you
* **Complementary repositories**: repositories for tools or resources that work alongside your product
{% hint style="info" %}
**Note**: Only Admins can connect GitHub repository
{% endhint %}
There are two parts to setting up GitHub:
* **Adding** your repositories: this connects a repository to Reo ([covered in Part 1 below](#part-1-adding-your-repositories))
* **Authenticating** your owned repositories: this is a separate, optional step that keeps star activity as complete and current as possible ([covered in Part 2 below](#part-2-authenticating-your-owned-repositories))
***
## Part 1: Adding your repositories
**Step 1:** From the left navigation, click on **Settings > Integrations**
**Step 2:** Find the GitHub card and click '**Configure**'
**Step 3:** Choose which type of repository you're adding, **Owned**, **Competitor**, or **Complementary**, using the tabs at the top of the page
**Step 4:** Click **Add new repos**
**Step 5:** **Paste the repository's GitHub URL**. To add more than one, click **Add more** each additional repository.
**Step 6:** After adding all the repositories, click **Save and close**
***
### What happens after you save
Reo checks each repository you entered against GitHub:
* a repository is **valid** if it's public and still exists in its organization
* if it's been deleted, or its access has been restricted, it's **invalid**, and Reo won't add it
**Based on that check, you'll see one of three outcomes** *(check the tabs for the corresponding outcomes):*
{% tabs %}
{% tab title="All repos are valid" %}
**If all repositories are valid:**
you'll see a confirmation that they were all added successfully, and the new data will reflect within 24 hours.
{% hint style="info" %}
**Note:** For owned repositories specifically, if any of the repositories you just added may need authentication to track star activity, you'll see a note about it, with a **Review repo list** button.
Click on the **Review repo list** button. This takes you straight to the authentication flow ([check Part 2](#part-2-authenticating-your-owned-repositories) for step-by-step guide on how to proceed).
{% endhint %}
{% endtab %}
{% tab title="Some repos are invalid" %}
**If some repositories are invalid:**
you'll see a count of how many were added and how many were not, along with a list of the invalid repos.
{% endtab %}
{% tab title="All repos are invalid " %}
**If all repositories are invalid:**
you'll see that none of them were added - along with the list of all the repos that you tried adding
{% endtab %}
{% endtabs %}
***
## Part 2: Authenticating your owned repositories
### Why this matters
**Starring a repository is usually the first sign of developer interest**, often before a developer forks it, opens an issue, or leaves a comment.
A star happens the moment a developer looks at your repo. A week-old star tells you what happened last week, by which point the developer may have already moved on or gone with a competitor.
**Authenticating is what lets Reo surface that interest the moment it happens.** It's optional, and takes under a minute if you do.
Forks, pull requests, issues, watches, and comments always update in real time. Authentication only changes how current your star data is.
### Who's involved
Two roles are involved - they can be either the same person or two different people.
* **Reo Admin:** Has admin access to your Reo account
* **GitHub Admin:** Has admin rights on the specific GitHub repository being authenticated
If you're the Reo Admin but not the GitHub Admin, you'll need to loop in whoever is. The steps below show you how.
***
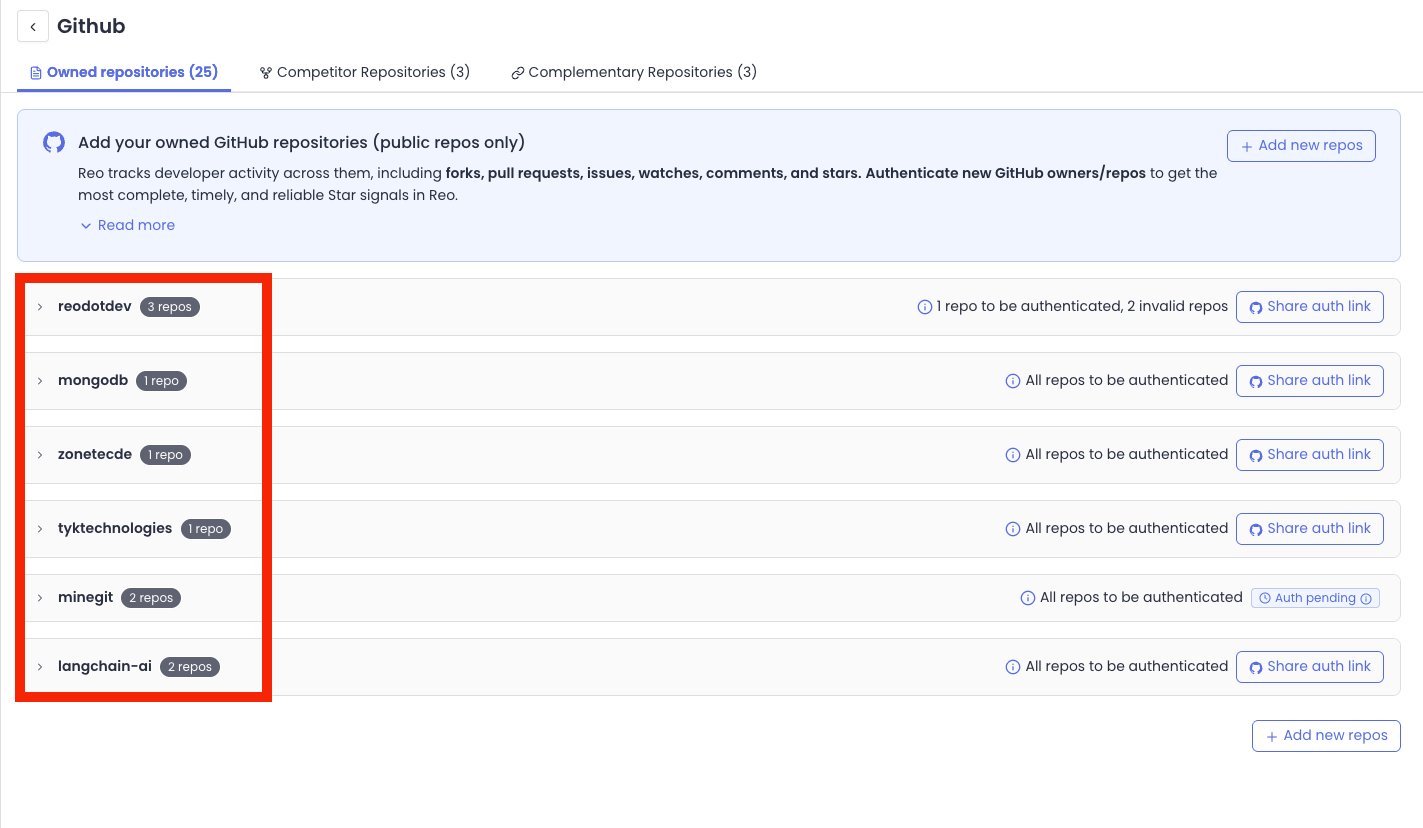
### Repositories are grouped by owner
**Authentication happens at the owner level:**
* If you're the admin for an owned repository, **you only need to authorize once** to cover every repository you've already added to Reo
* Any repository you add (that you own on GitHub) connects automatically too, no separate authentication needed
* This includes a repository you remove and add back later
Hence, Reo groups all the owned repositories by owner and shows **one authentication link per owner**
***
## How to authenticate an owner
{% hint style="info" %}
**Note:** Authentication applies only to repositories you own, not competitor or complementary repositories.
{% endhint %}
**Step 1:** From the left navigation, select **Settings** → **Integrations** → **GitHub** card → open **Owned GitHub Repositories** tab
**Step 2:** Once you add your repos ([refer to Part 1](#part-1-adding-your-repositories)), **your repos will be grouped into expandable sections, based on the owner.** Find the owner group and click **Share auth link**.
**Step 3:** A window opens confirming what this authenticates, how many repositories, and under which owner.
* If you have admin rights on these repositories yourself, enter your own email address
* If you don't, enter the GitHub Admin's email address instead
{% hint style="info" %}
**Note:** The person you send this to doesn't need a Reo account. They just need admin rights on the repositories.
{% endhint %}
**Step 4:** Click **Email auth link**
**Step 5:** **You'll see a confirmation that the email was sent.** The same window also shows the link itself, which **you can copy and share directly**, for example over Slack, instead of relying on email.
{% hint style="info" %}
**Note:** The link is valid for 7 days. If it expires before it's used, you can regenerate the authentication link.
{% endhint %}
**Step 6:** The GitHub Admin opens the link *(either from the email or from copying and pasting the link in a new tab)* and signs in to GitHub if needed
**Step 7:** Click **Authorize reodotdev**
**Step 8:** GitHub may ask you to verify your identity with a code sent to your email. This is a standard GitHub step, not something specific to Reo
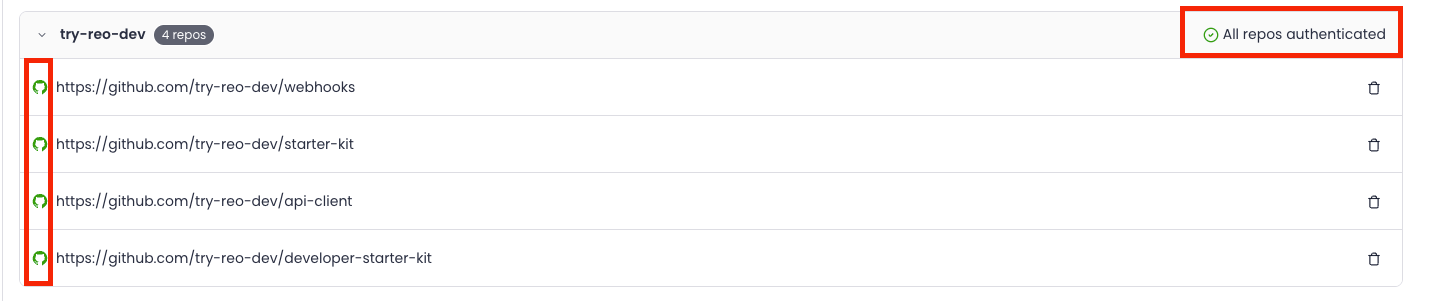
**Step 9:** After verifying, you will be redirected back to the GitHub configuration screen in Reo. The owner group now shows a green **Connected** status, and every repository under it is marked **Authenticated**
**Step 10:** In case the authentication link expires, at a repo-level, you will see an **Auth pending** status. Hover over it to see who it was sent to, when, and when it expires, along with a **Resend auth link** button if you need to send it again.
***
### Owner and repository statuses
| Status | What it means | What to do |
| -------------------------------------------------------------------- | ---------------------------------------------------------------------------- | ----------------------------------------------------------------------- |
| **Share auth link** (button visible, no status) | This owner hasn't been authenticated yet | Click **Share auth link** to start the authentication process |
| **Auth pending** | A link has been sent and Reo is waiting on the GitHub Admin | No action needed yet. Hover for details, or resend if it's been a while |
| **Connected** | Every repository under this owner is authenticated | No action needed |
| **Connected, with a partial count** (for example, 4/5 authenticated) | Most repositories under this owner are authenticated, but one or more aren't | Check out the ‘When authentication is partial’ section below |
| **Auth failed** | Authentication wasn't completed for this repository | Click **Share auth link** next to that repository to try again |
{% stepper %}
{% step %}
### When authentication fails
A repository shows **Auth failed** for one of three reasons:
* The user doesn't have admin access to that repository
* The authorization request was canceled or declined
* The wrong GitHub account was used, for example a personal account instead of the correct one
{% endstep %}
{% step %}
### When authentication is partial
Sometimes **an owner authenticates successfully overall, but one or two repositories under it don't come through**, often because that specific repository has a different admin than the rest of the owner's repositories.
Here's what you'll see, and what to do about it:
* The count of repos authenticated, to be authenticated, and invalid - appears next to the owner, so you know it's not fully complete
* The repositories that succeeded are marked **Authenticated**
* The repository that didn't come through is marked **Auth failed**, with its own **Share auth link** button right next to it
{% endstep %}
{% step %}
### When a repository becomes invalid
Occasionally, **a repository that was public and valid when you added it later gets deleted or turns private**. Reo detects this, usually within a day, and marks it **Invalid repo**.
Hovering over the status tells you why:
* The repository may have been deleted, or is no longer available in your organization
* The repository's public access has been restricted or removed
If this happens and the repository should still be tracked, make it public again on GitHub, then add it back to Reo.
{% endstep %}
{% endstepper %}
***
## Adding a new owned repository later
If you've already authenticated an owner, **anything you add under that same owner afterward connects automatically**, no separate authentication needed.
If you add a repository under an owner you haven't authenticated yet, a new owner group is created for it, with its own **Share auth link** button.
[Follow the steps in Part 2 to authenticate it](#part-2-authenticating-your-owned-repositories).
{% hint style="info" %}
**Note:** Sometimes the new repository's actual admin is a different person than whoever authenticated the rest of that owner's repositories. When that's the case, it won't connect automatically, it shows **Auth failed** instead, with its own **Share auth link** you can send to the right person.
{% endhint %}
***
## **What to expect if Reo's team helps you authenticate**
If your Customer Success contact is helping you get your repositories authenticated, here's what that looks like:
* They'll ask you who has admin access on GitHub for each of your owned repositories.
* If they already know who that is, they'll email the authentication link straight to that person.
* If they don't, they may generate the link using their own email address first, then share the link with you to pass along or will share with the admin directly over Slack.
* The person receiving the link doesn't need a Reo account. They just need admin access to the repository on GitHub.
* Since authentication is grouped by owner, this usually means one link per owner, not one per repository.
---
# Agent Instructions
This documentation is published with GitBook. GitBook is the documentation platform designed so that both humans and AI agents can read, navigate, and reason over technical content effectively. Learn more at gitbook.com.
## Querying This Documentation
If you need additional information that is not directly available in this page, you can query the documentation by asking a question.
Perform an HTTP GET request on the following URL with the `ask` and `goal` query parameters:
```
GET https://docs.reo.dev/integrations/input-sources/developer-insights/github.md?ask=&goal=
```
`ask` is the immediate question: it should be specific, self-contained, and written in natural language.
`goal` is what the user is ultimately trying to achieve, the reason they need the answer. Sharing it helps GitBook give you a better, more relevant answer. A goal is most helpful when it describes the outcome the user wants rather than restating the question. For example, with `ask=how do I create an API token`, a goal like `automate deployments from our CI pipeline` lets GitBook tailor the answer to that use case.
The response will contain a direct answer to the question and relevant excerpts and sources from the documentation.
Use this mechanism when the answer is not explicitly present in the current page, you need clarification or additional context, or you want to retrieve related documentation sections.