Step 4: Create custom segments that are most likely to convert
Segments in Reo dev are cohorts of accounts and developers categorized based on specific attributes. In this article, we will guide you on creating segments to find high-intent accounts.
Step 1: Click on Segments.
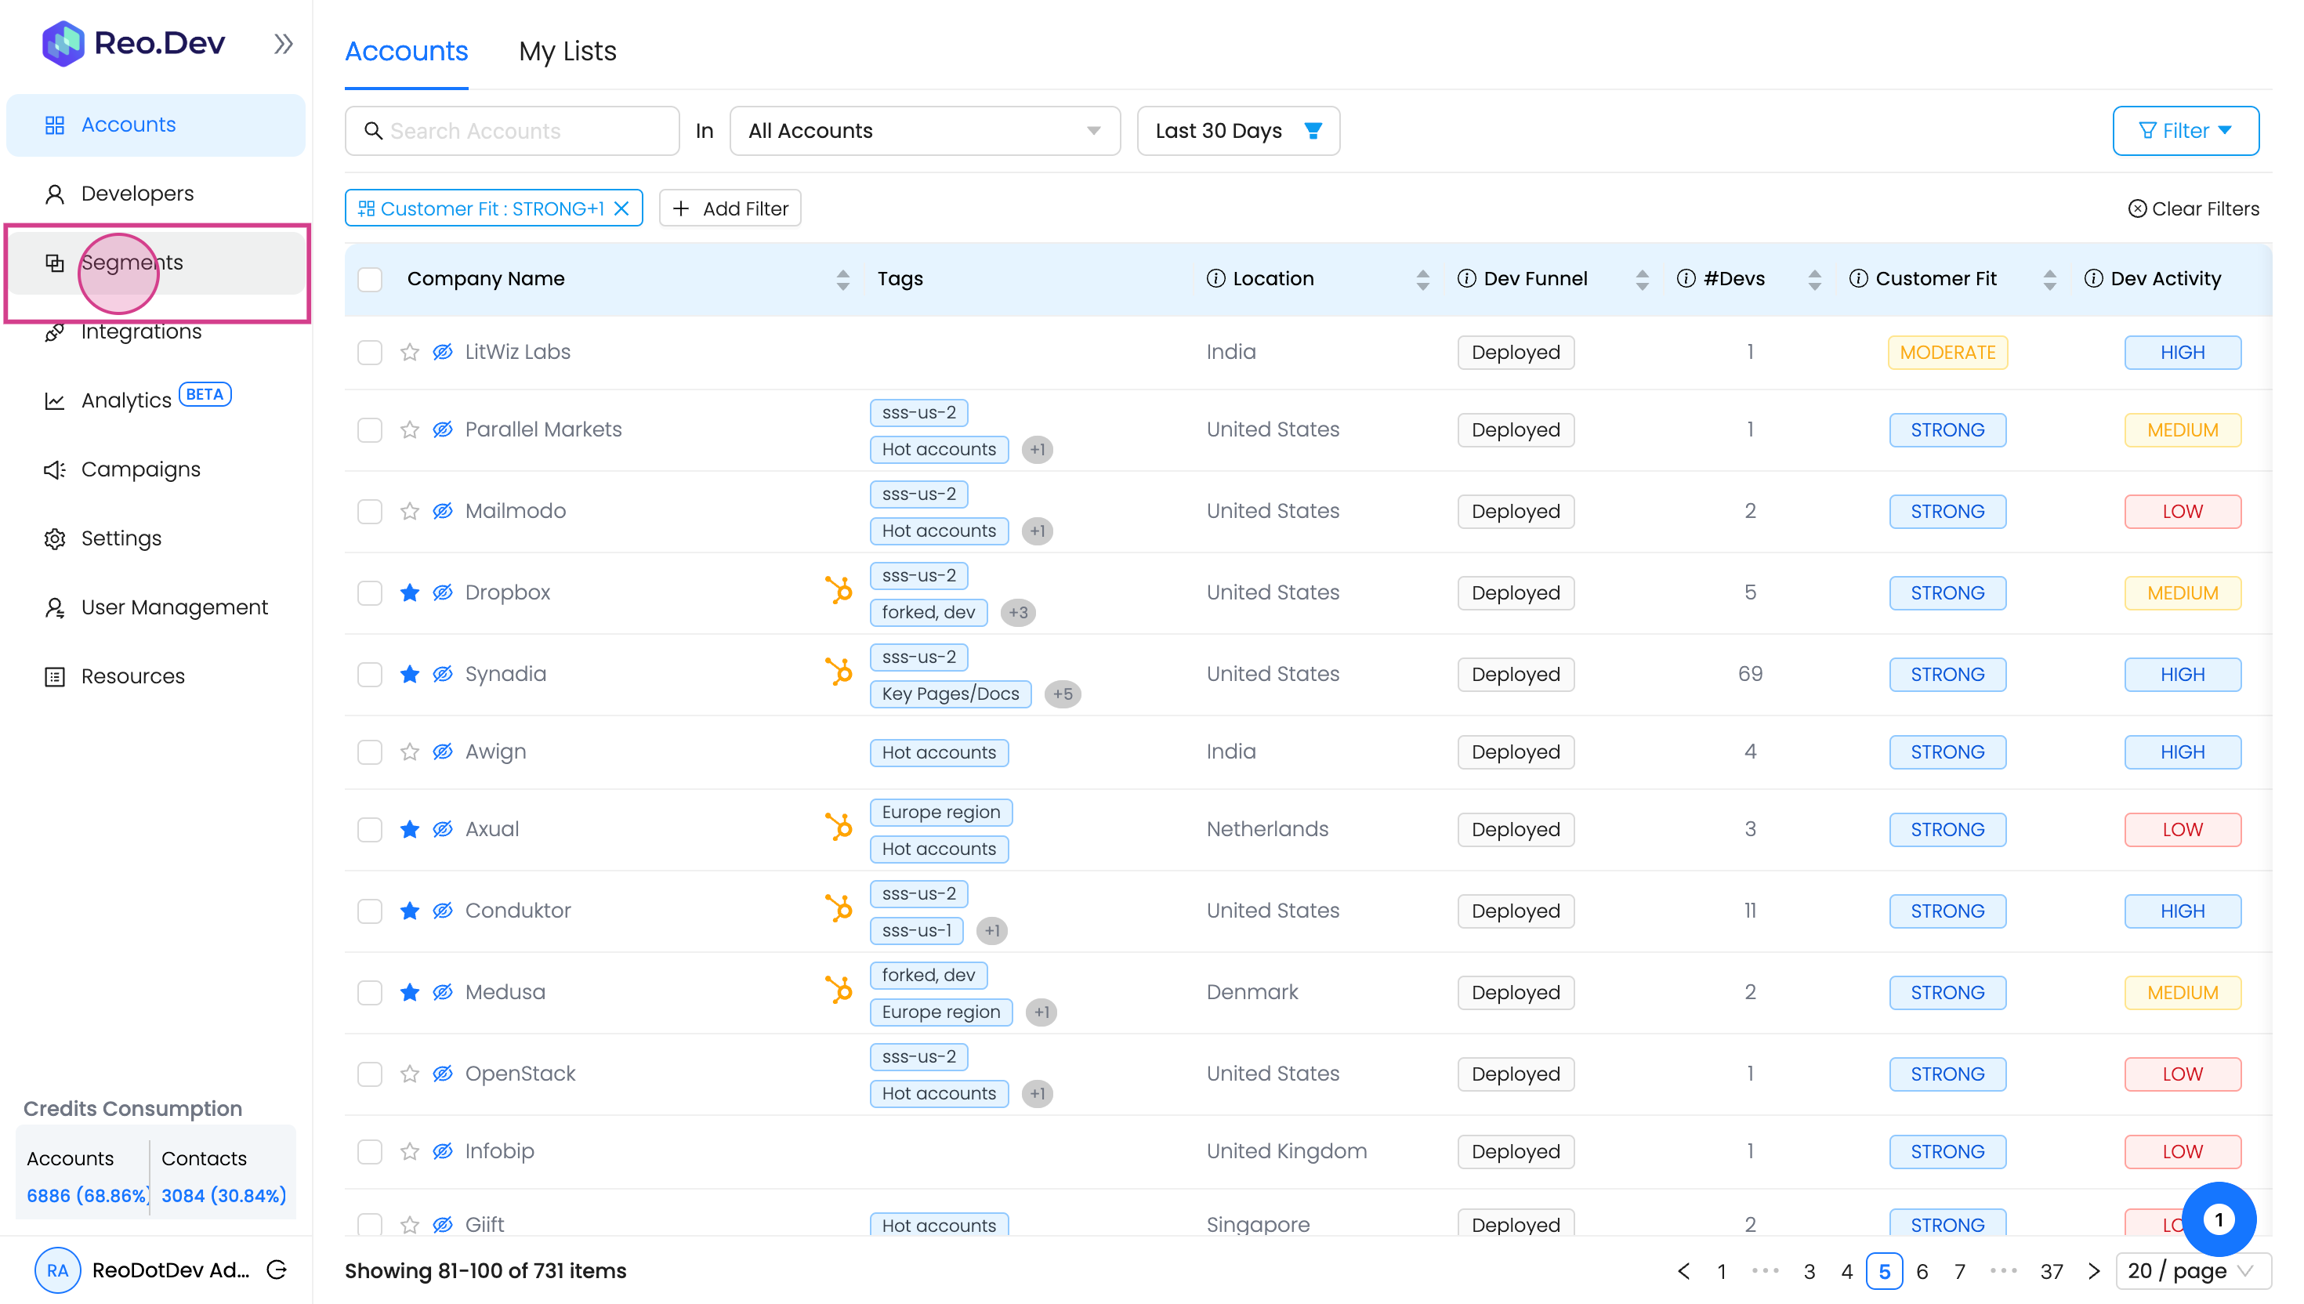
When you're getting started on Reo.Dev and want to quickly find some high-intent accounts, magic segments is a great feature to explore.
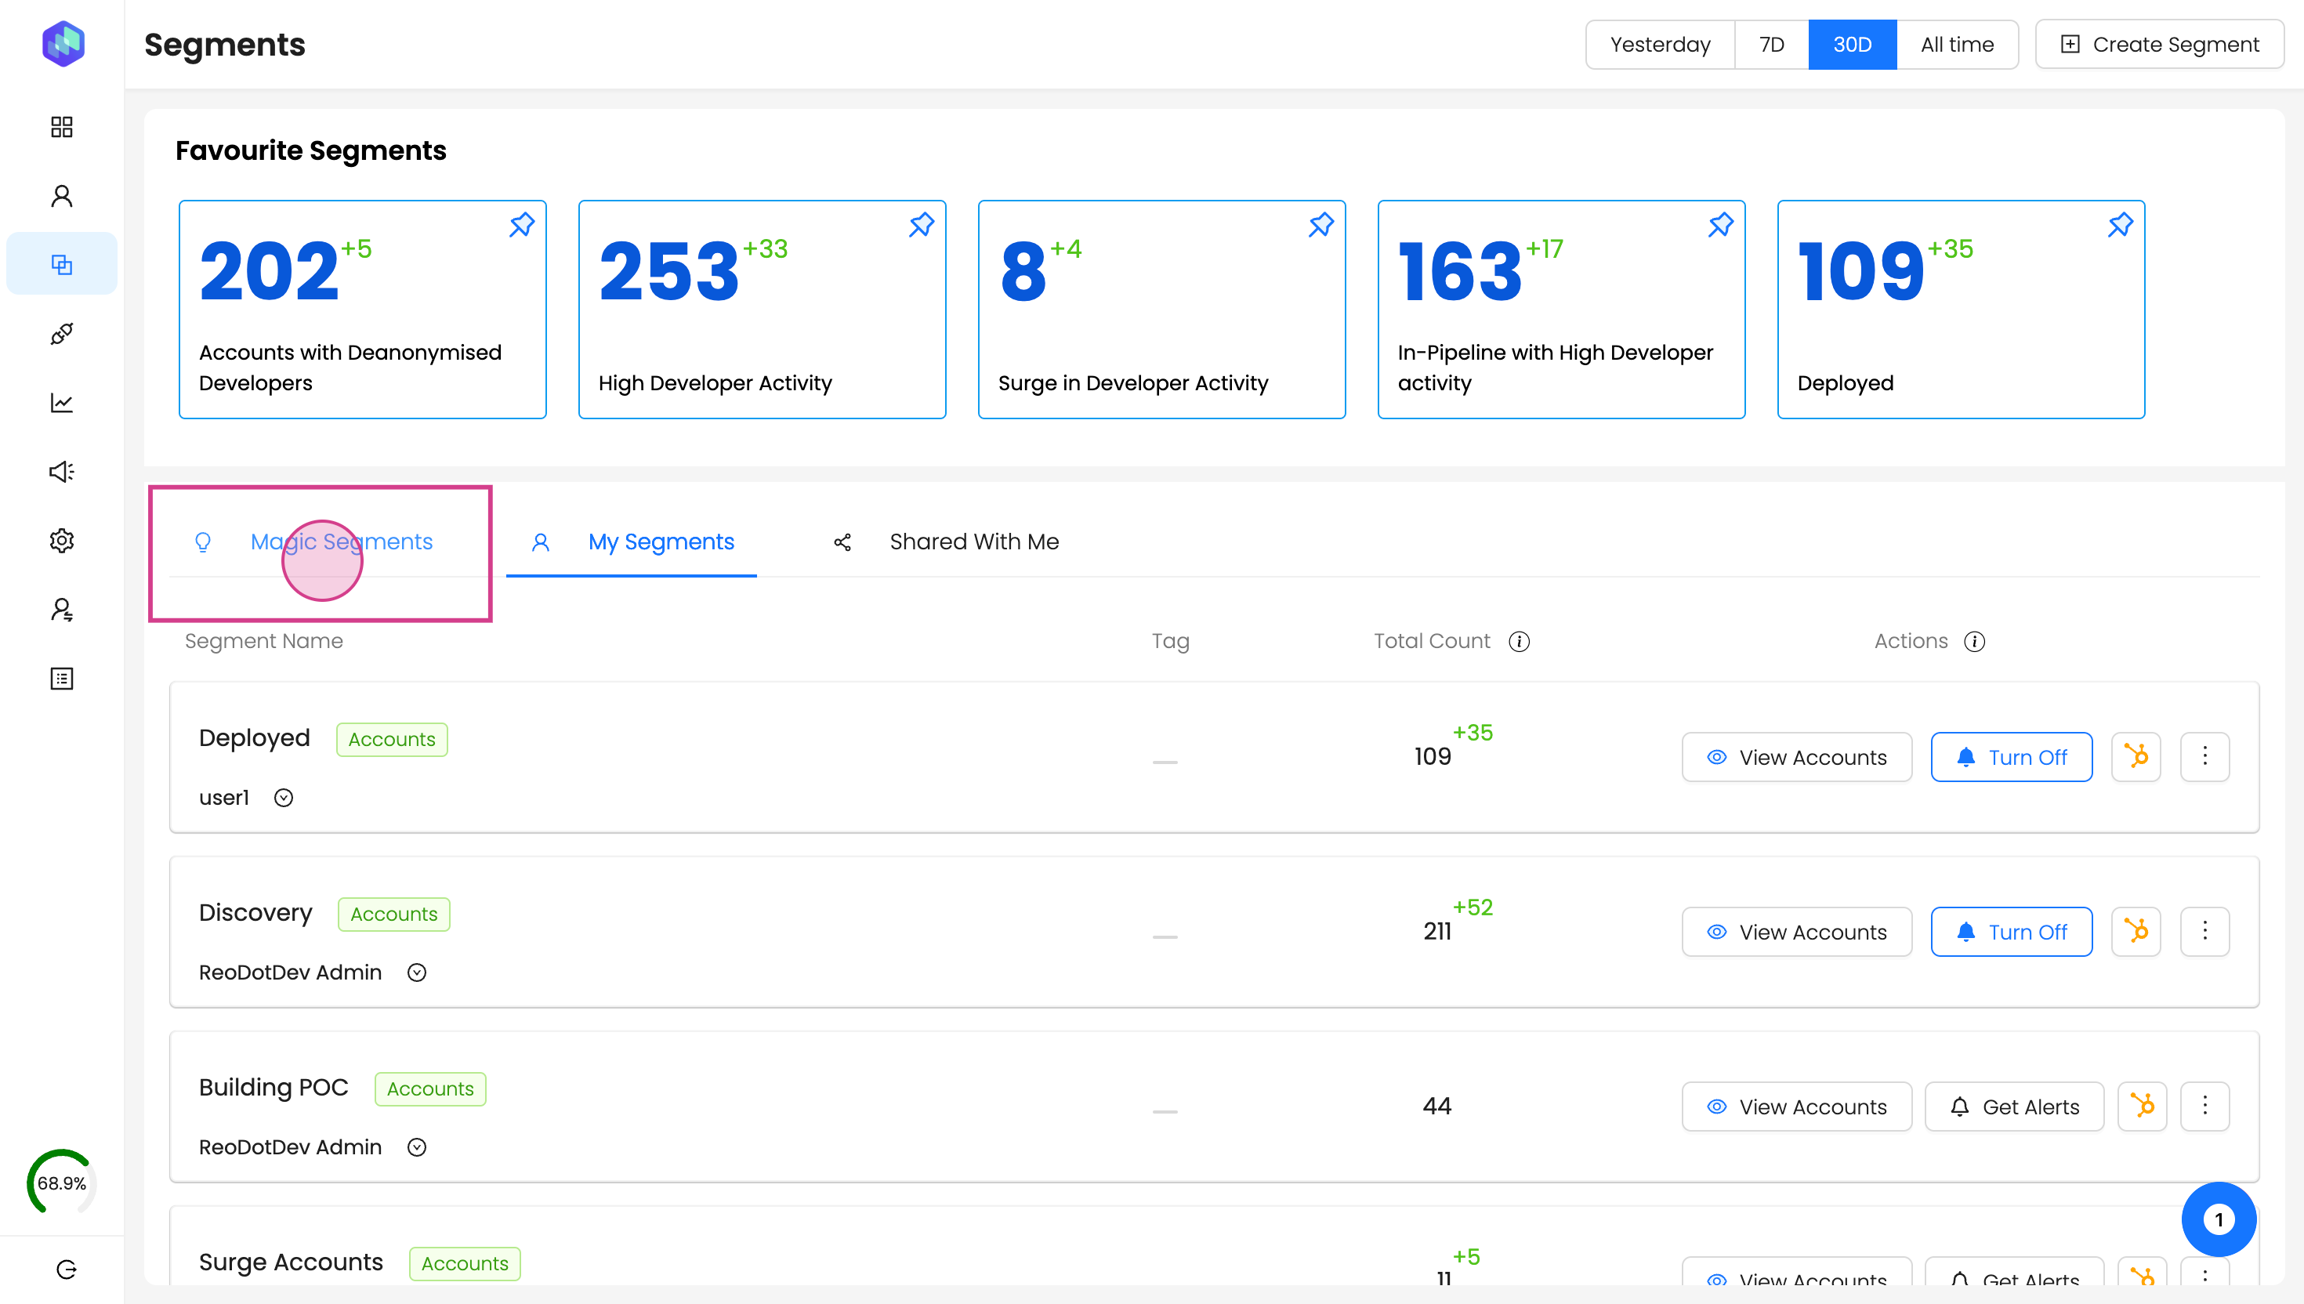
Step 2: Click on 'Magic Segments'
These are pre-built segments by Reo.Dev to help you easily find the high-intent accounts.
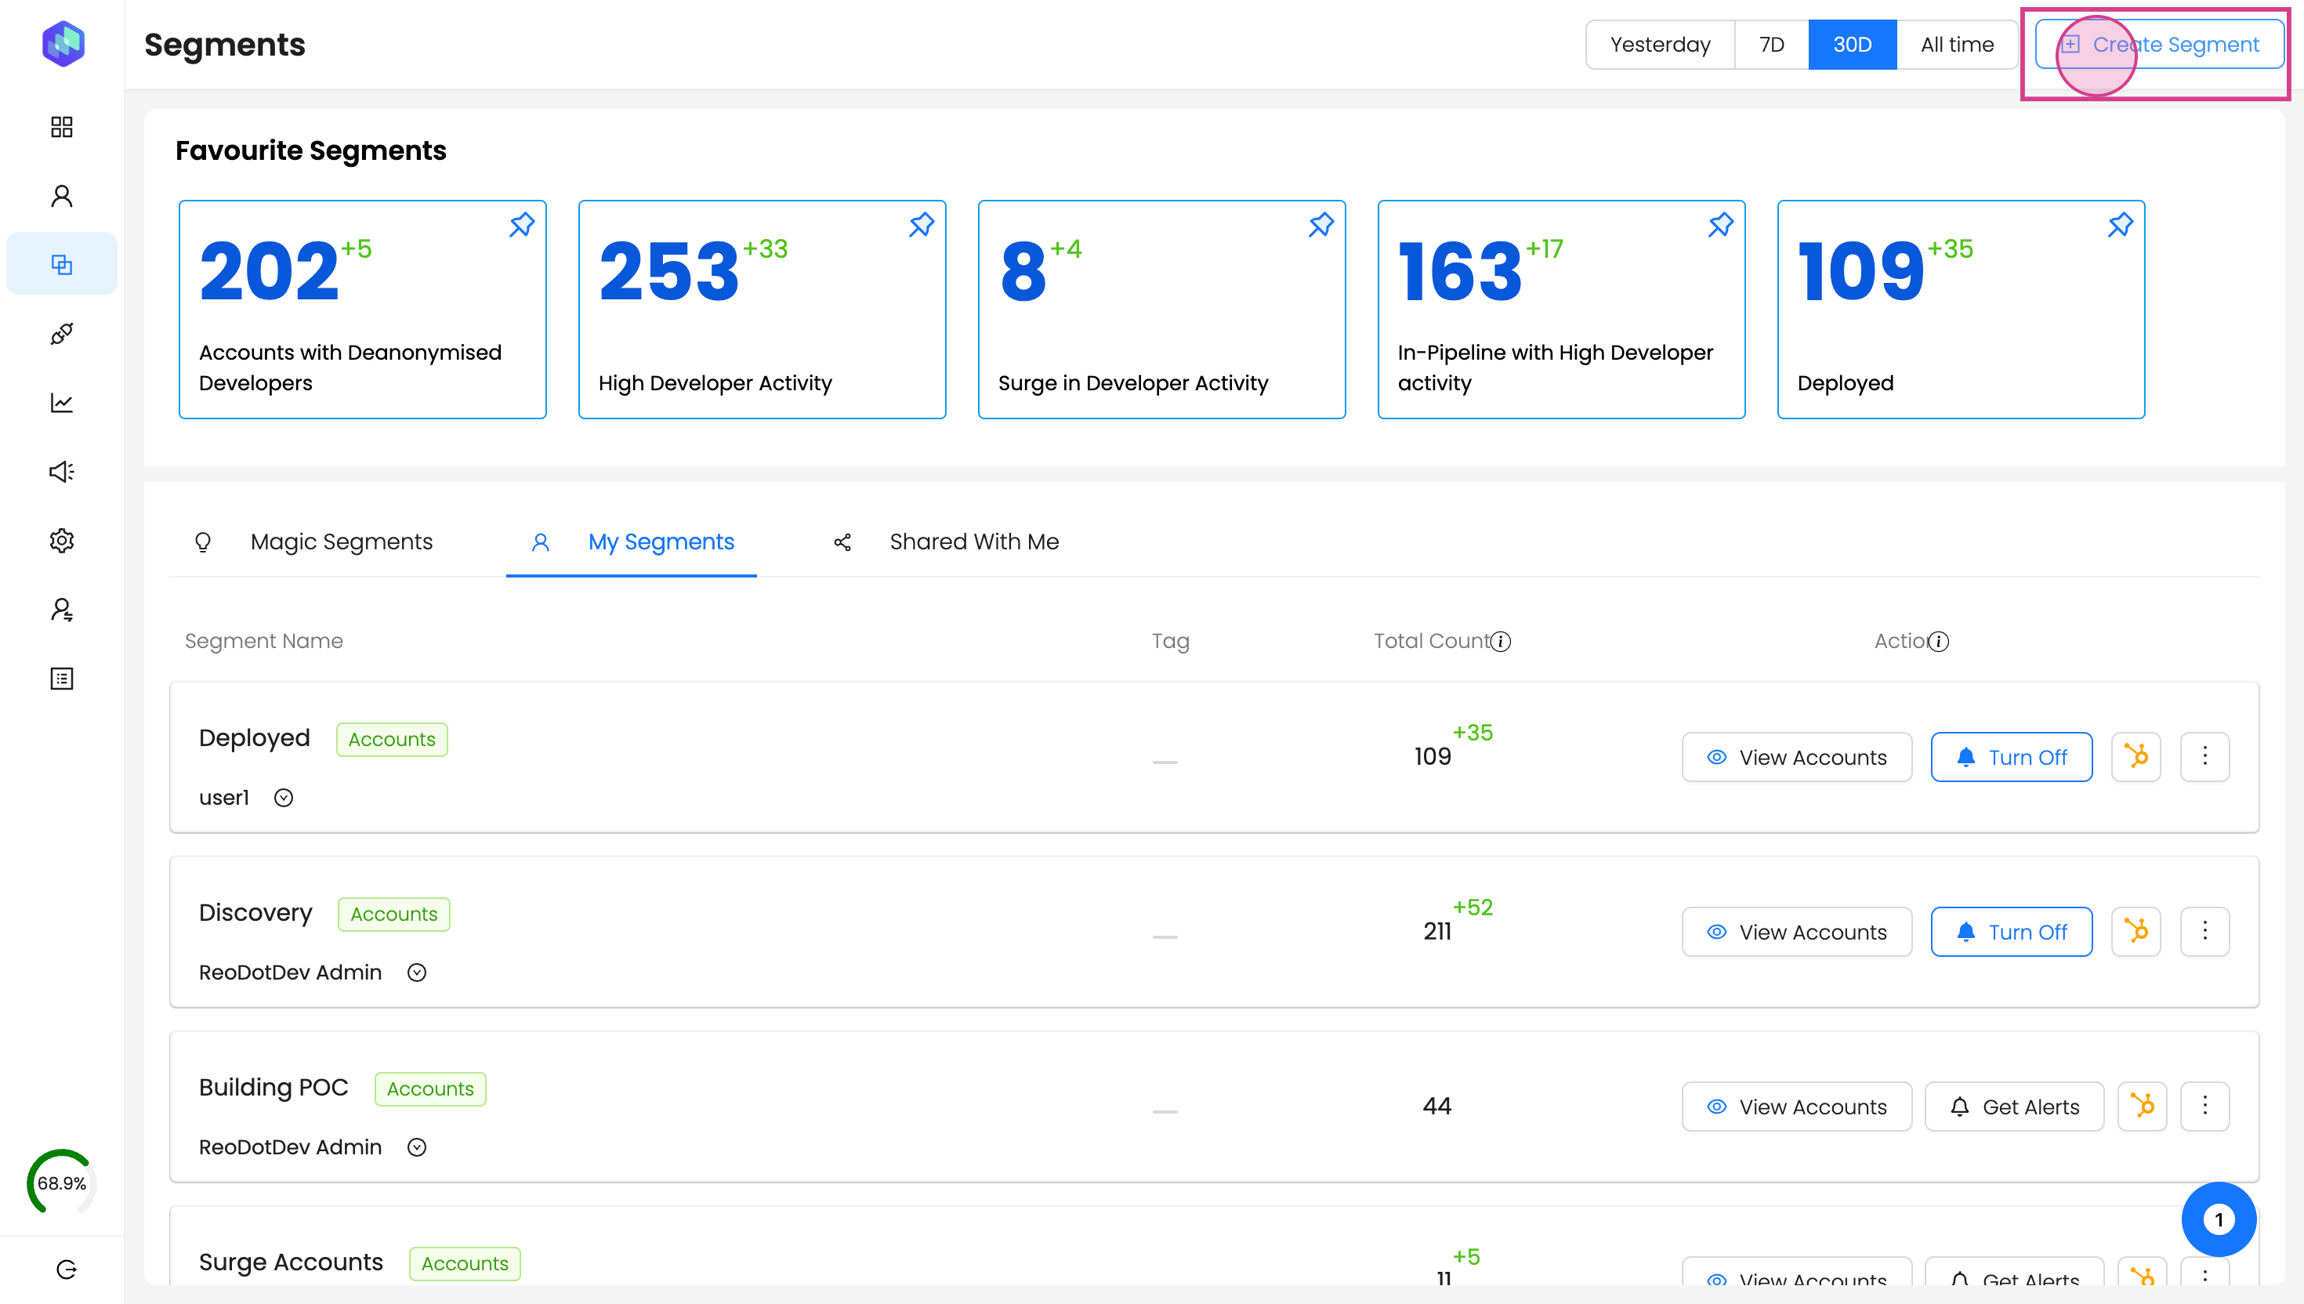
Step 3: To create a new segment, click on create segment.
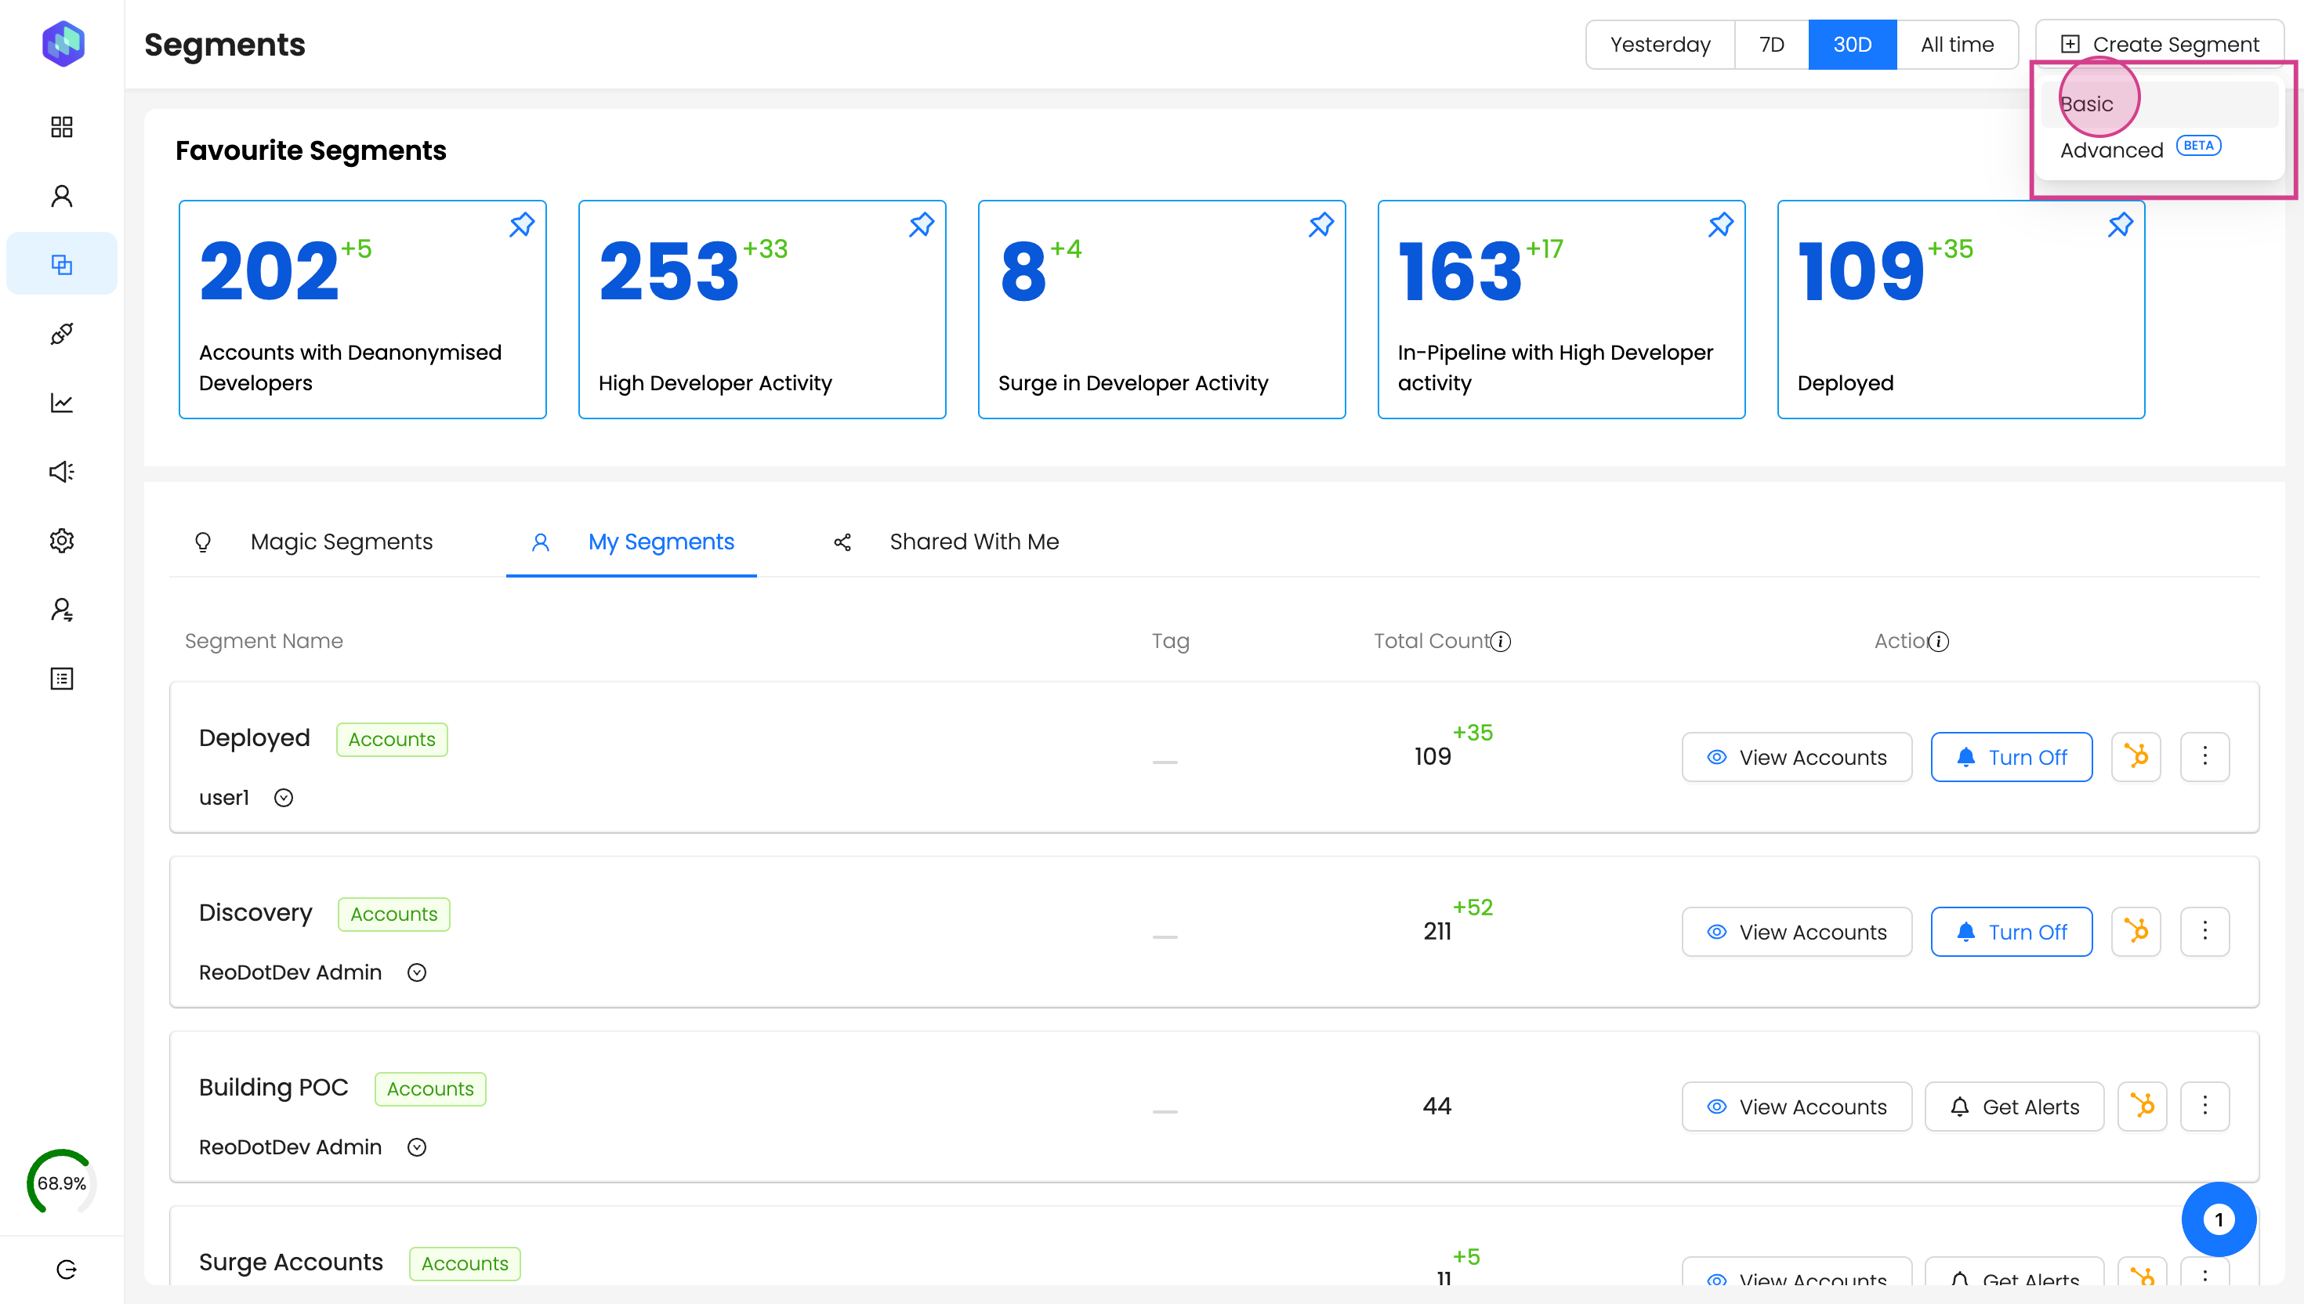
Step 4: Based on your filter critera - choose whether to create a basic or an advanced segment.
Step 5: Decide whether to create a segment for accounts or developers.
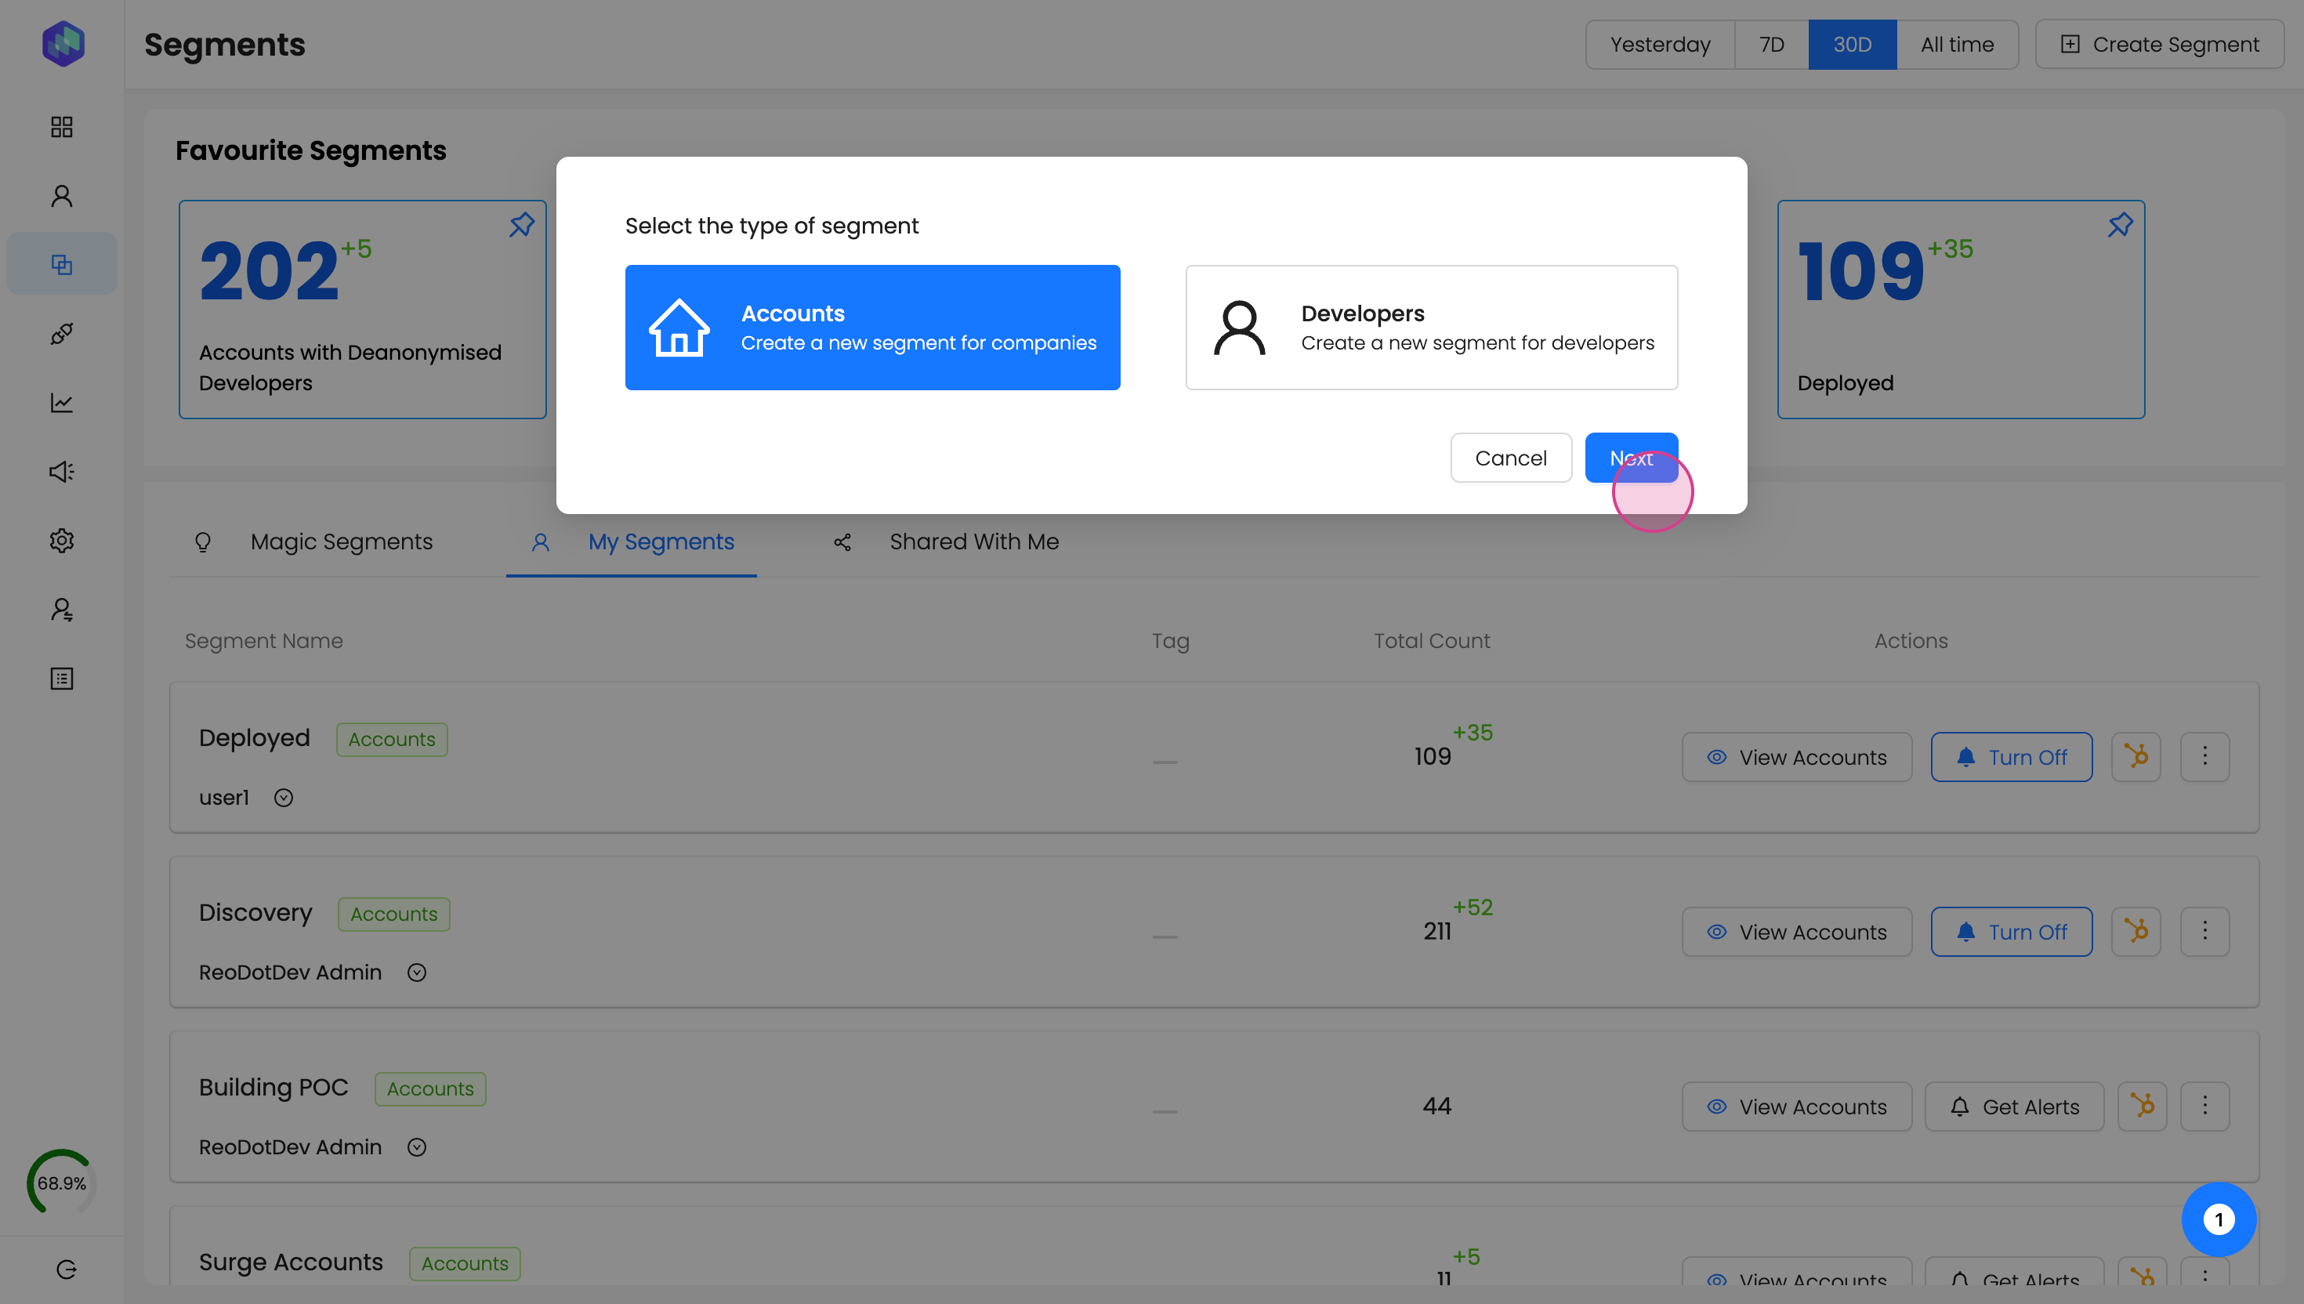
As an example - we will create a segment for accounts that have been 'Active on your competitors Github repositories'
Step 6: Name the segment
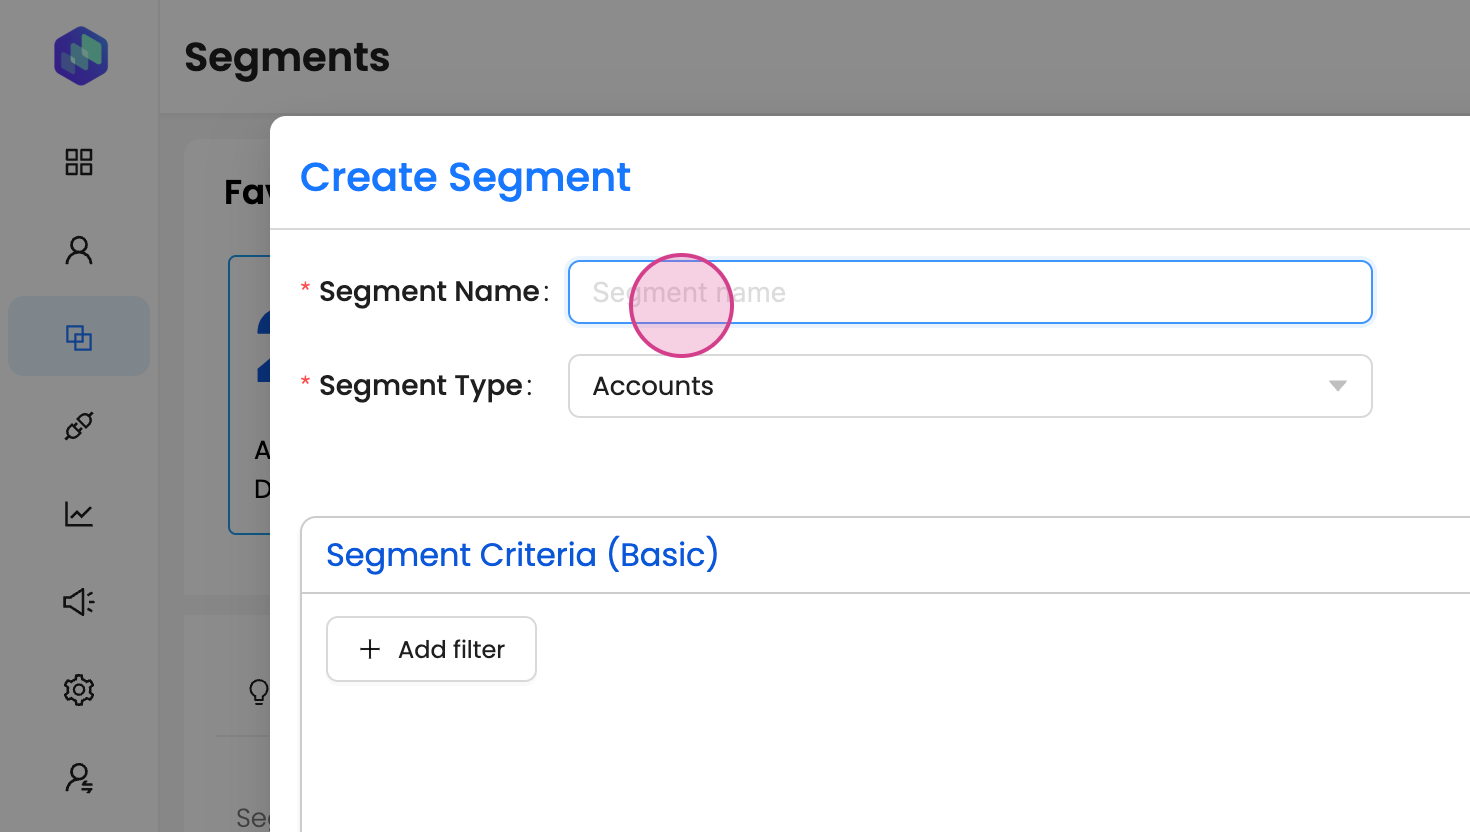
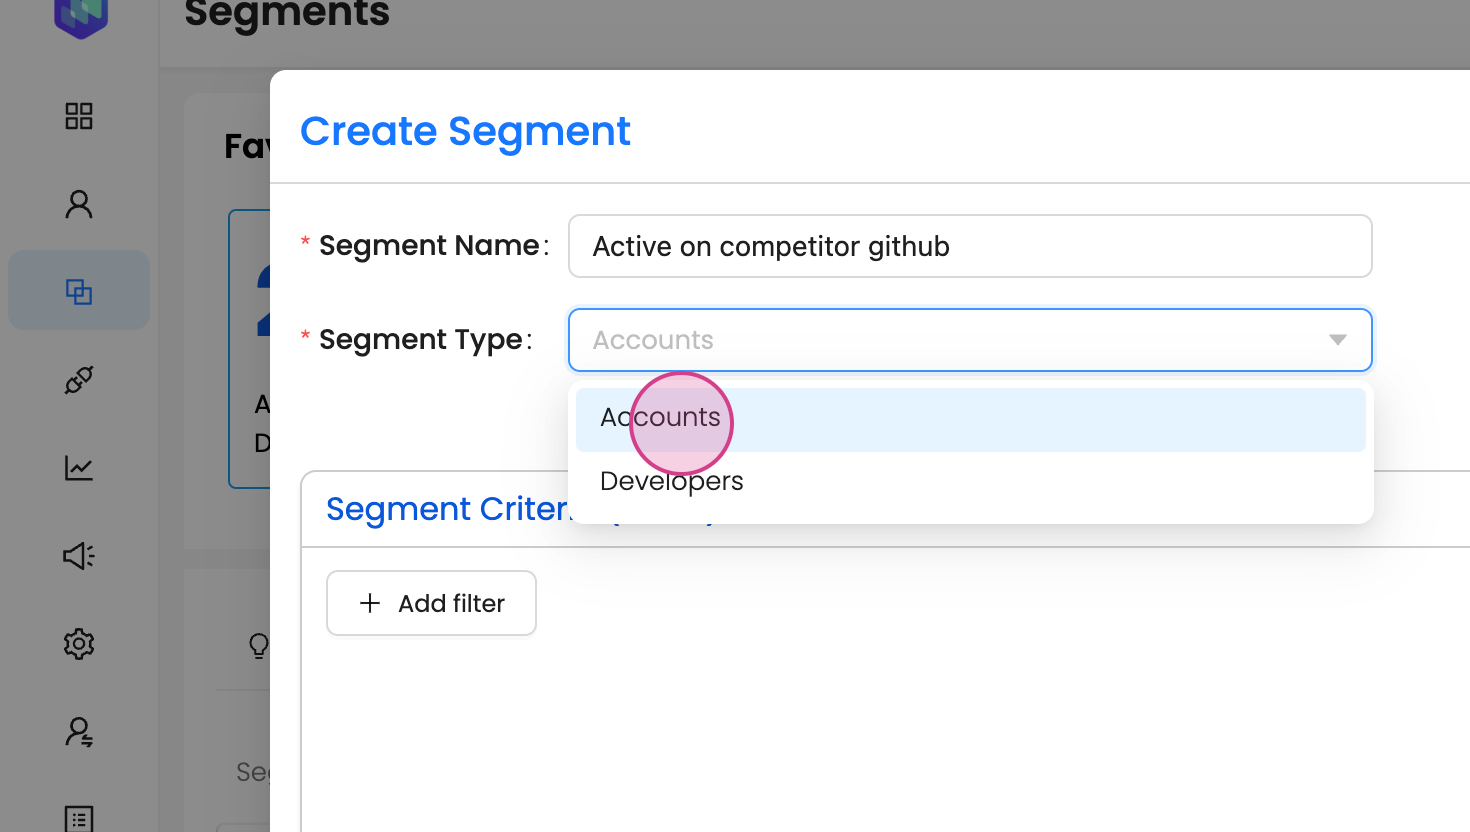
Step 7: Choose segment type as accounts
Step 8: Add a customized tag name.
It helps you quickly identify and filter these accounts.
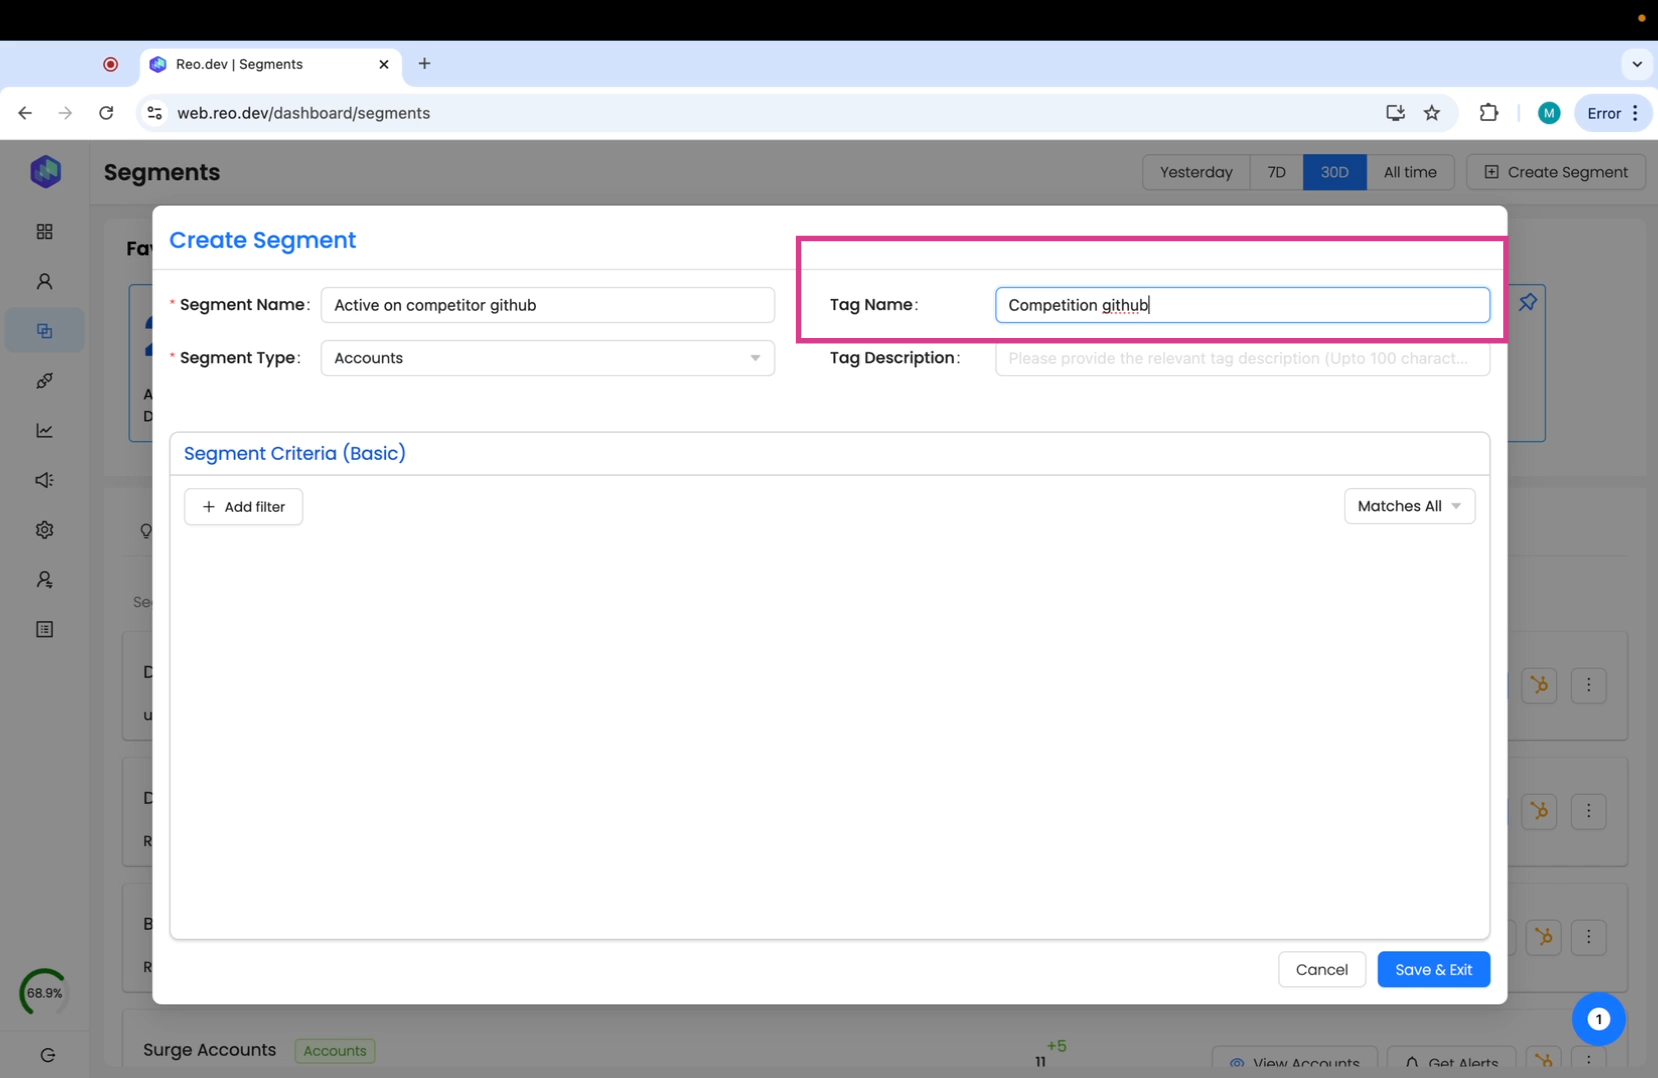
Step 9: Add a short tag description. This gives your team more context on the segment.
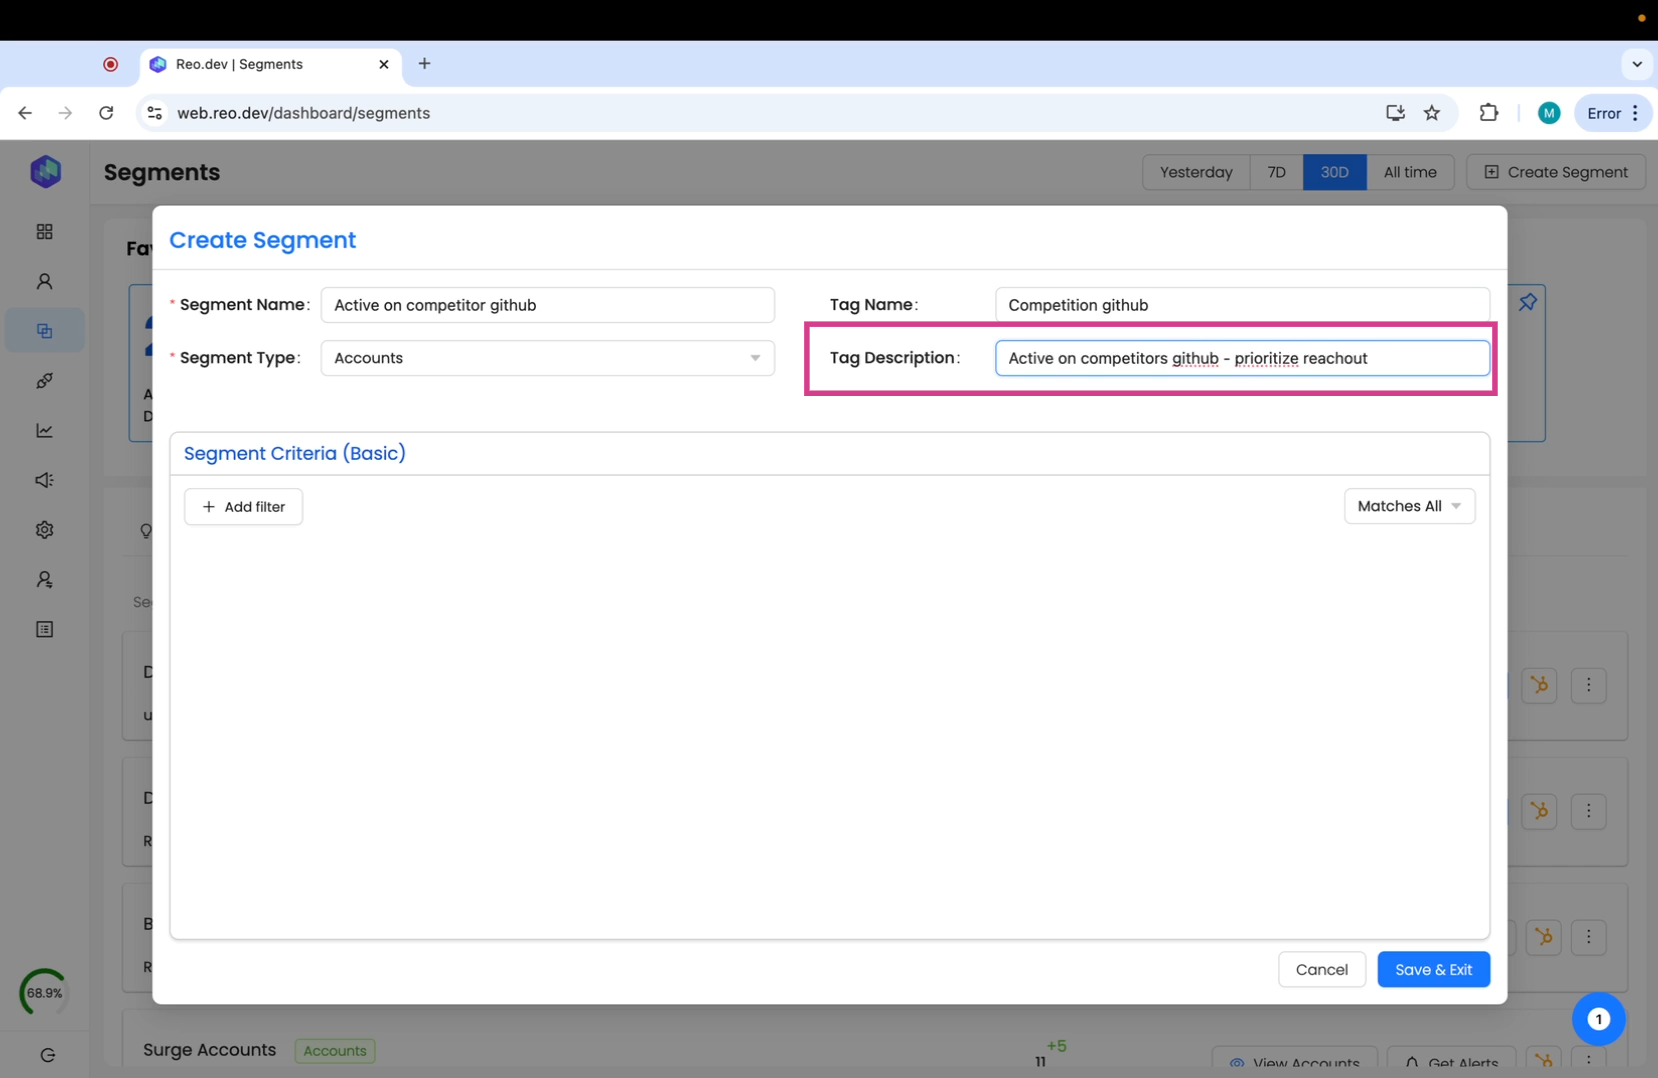
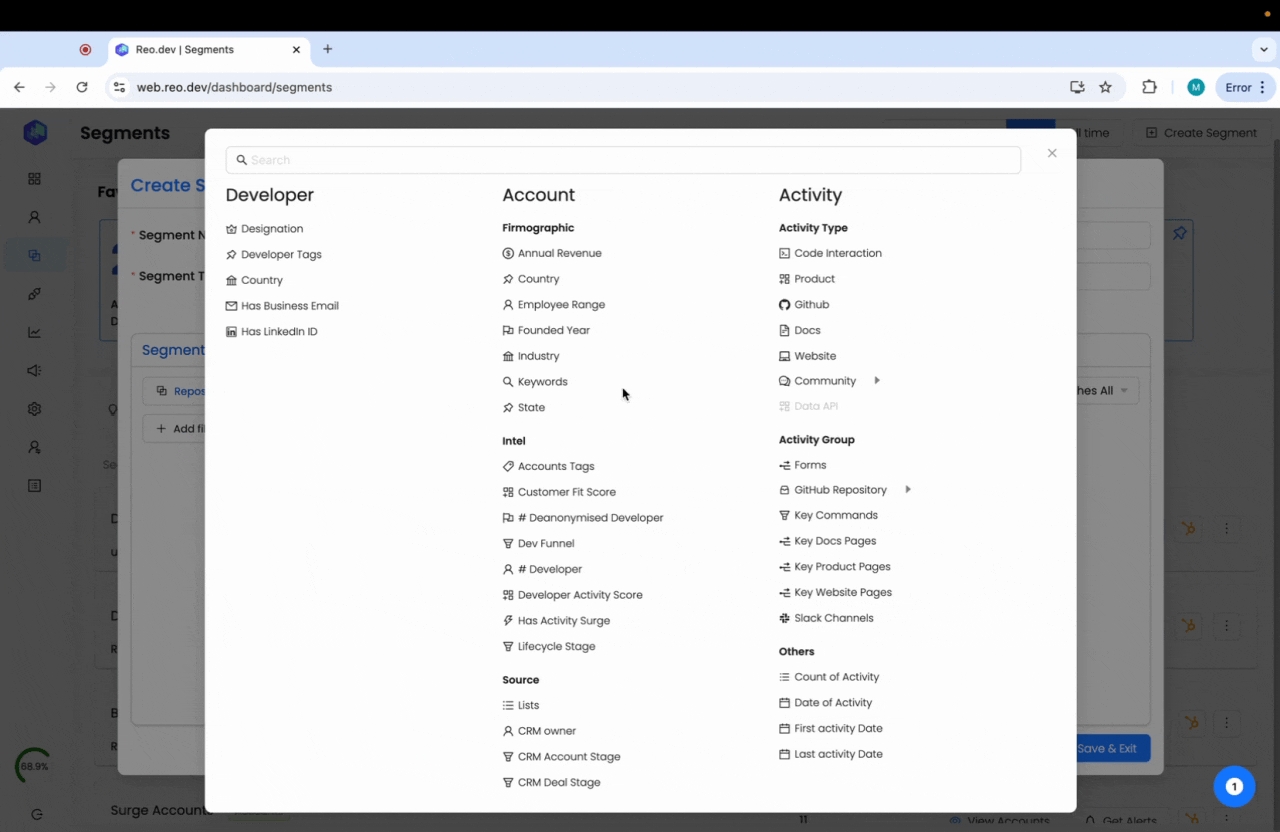
Step 10: Add filters
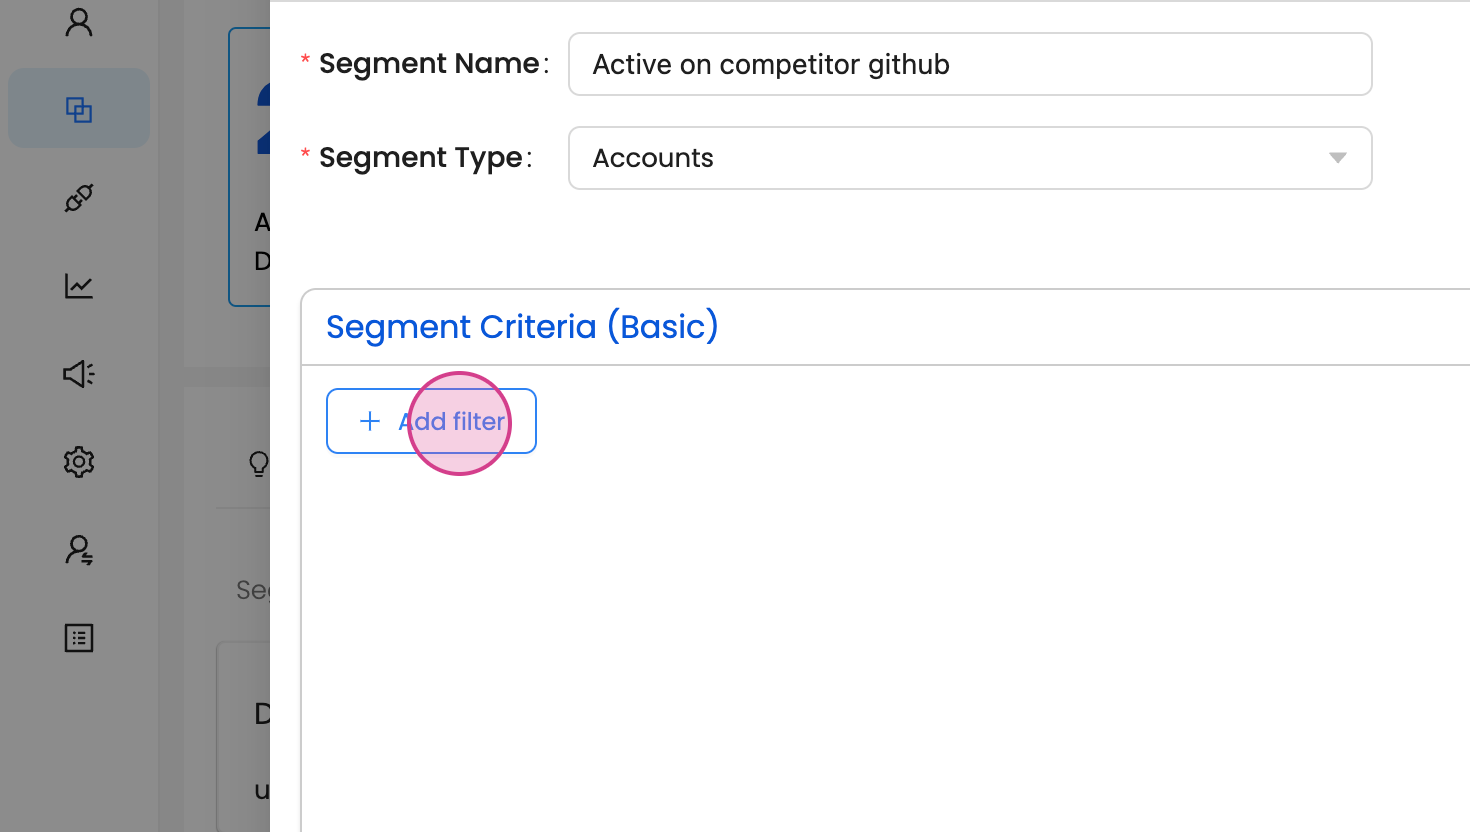
For this segment we will add the following filters:
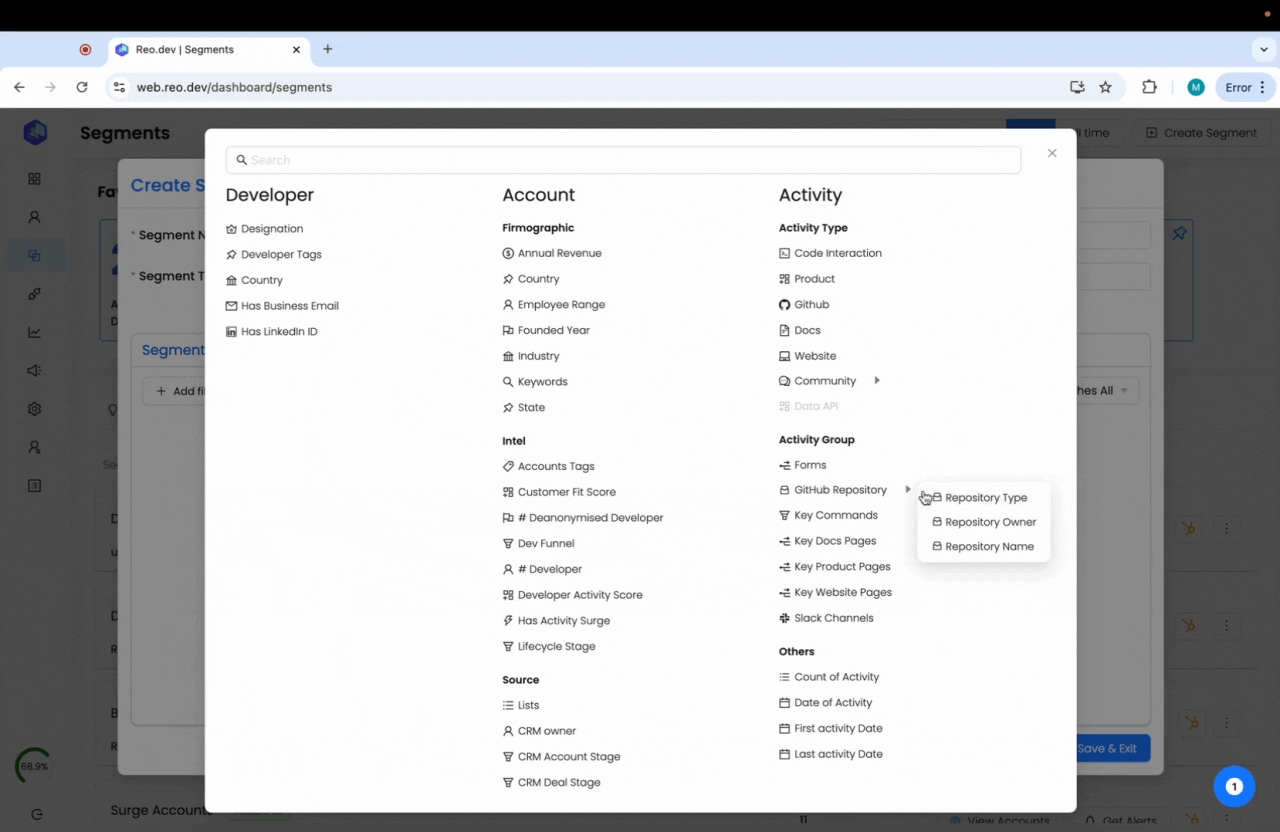
Activity Group —> Github Repository —> Repository Type —> 'Competition'
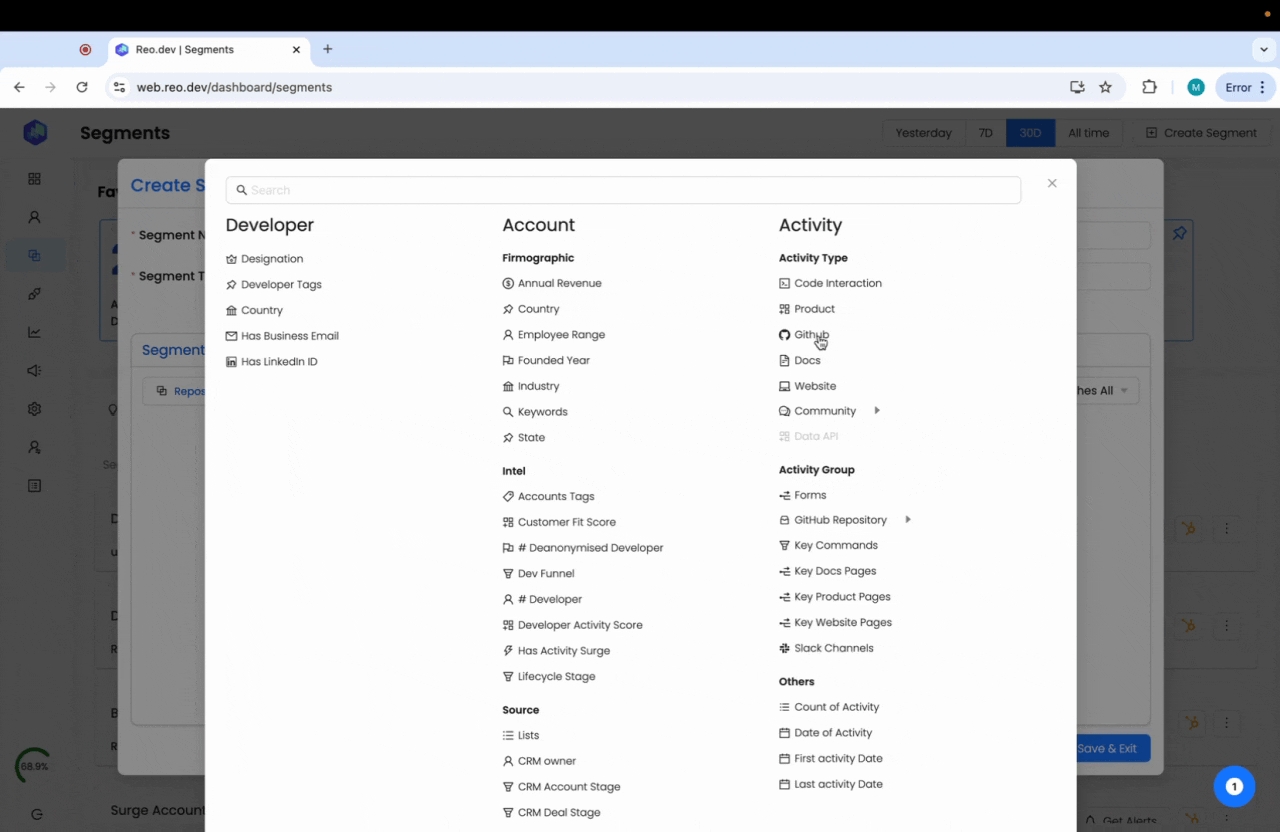
Activity Type —> Github —> Fork, Pull Request, Opened Issue, Comment. Here we will also set the data range as 'last 180 days'
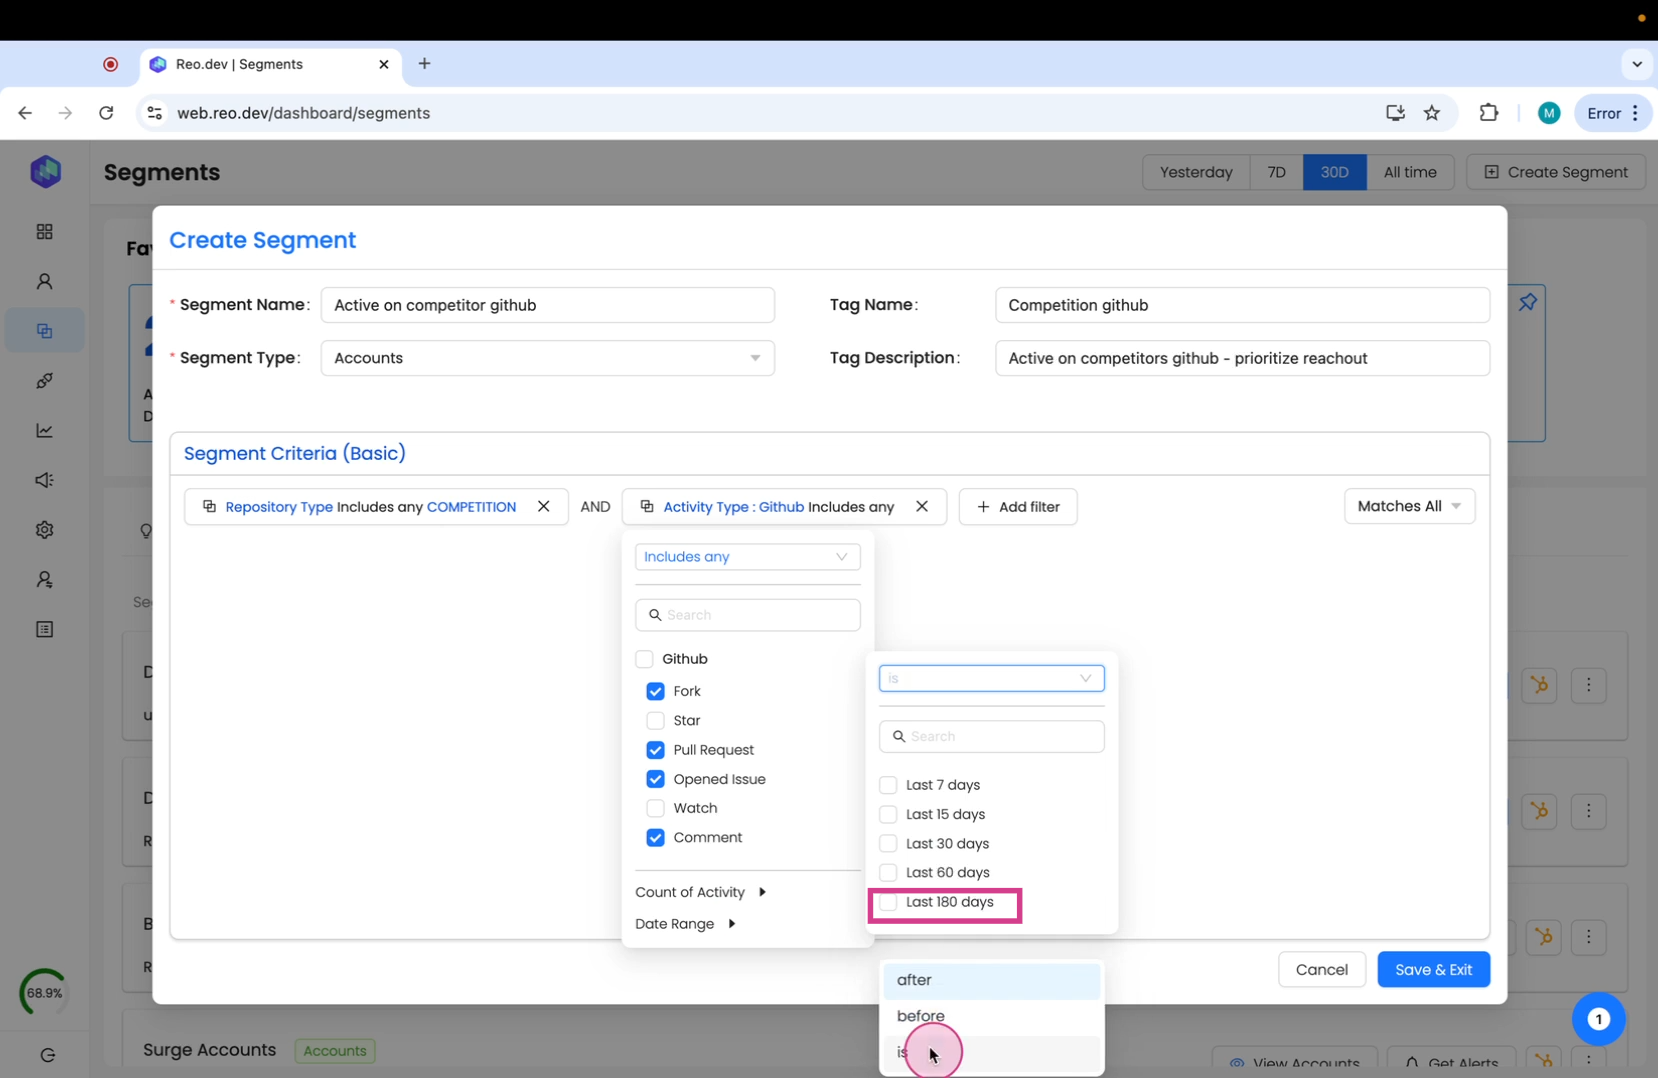
Account Intel —> Customer fit score → Strong, Moderate
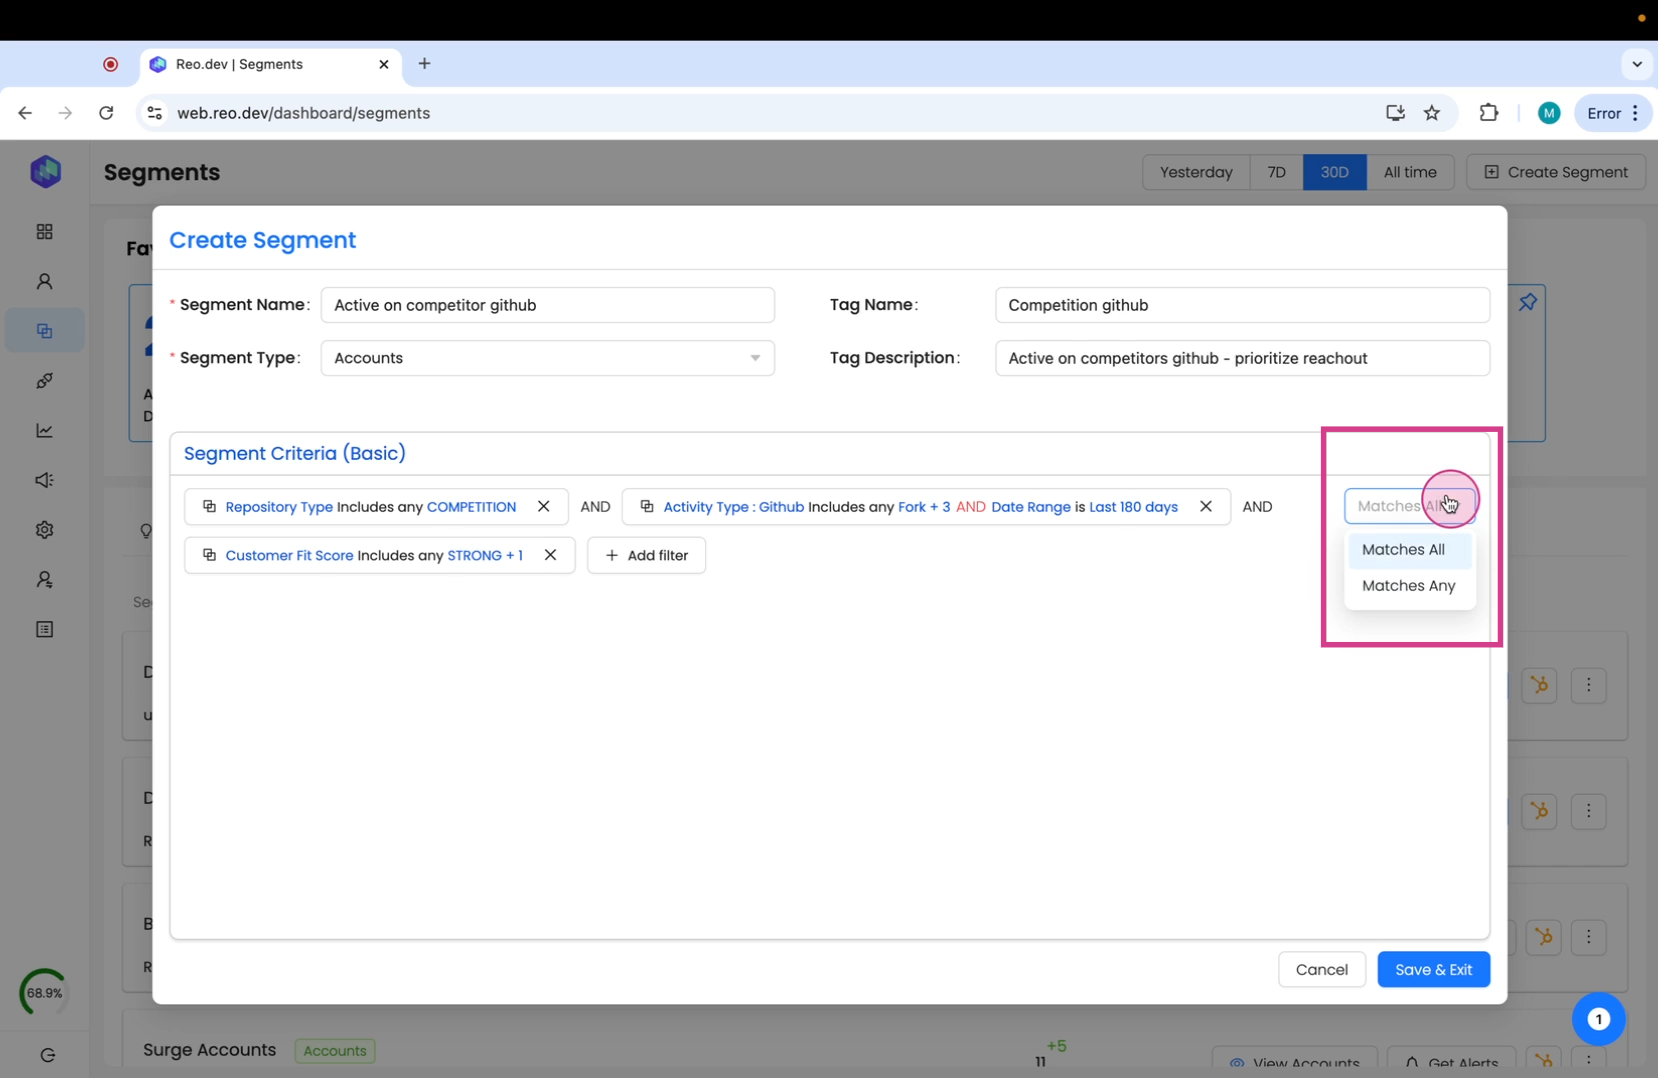
Note: When you have multiple criterias you can use 2 conditional operators - The 'matches all' function acts as an "and" function and includes only those accounts that match all the criterias. The 'matches any' is an or fucntion and would include accounts that match any of the given criterias.
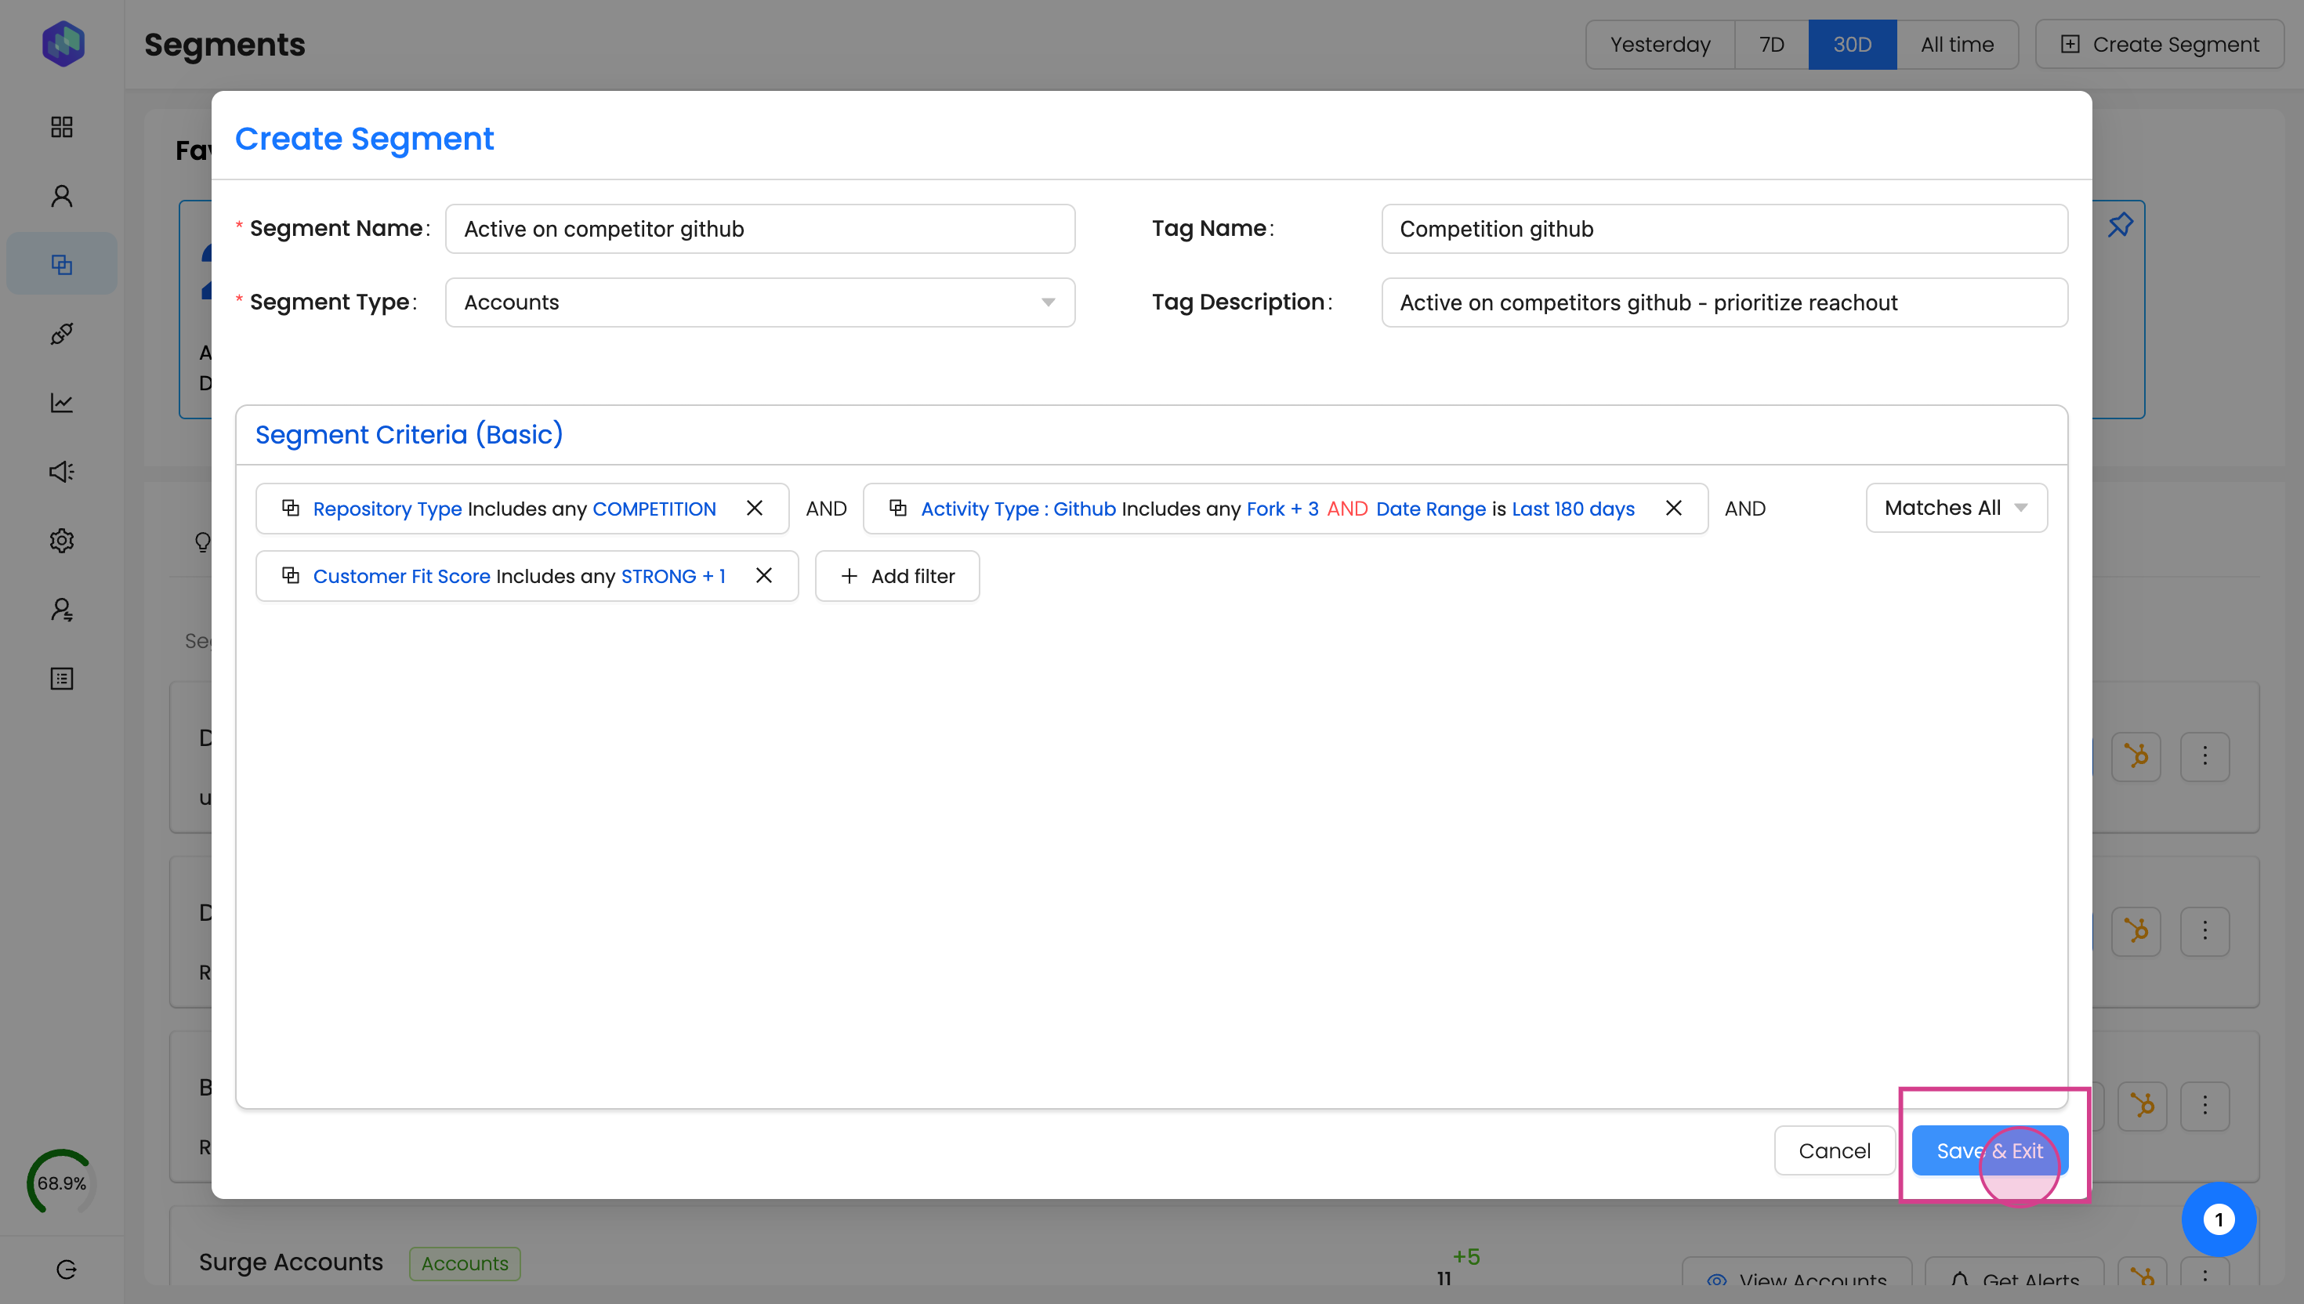
Step 11: After adding the filters, click on Save and Exit.
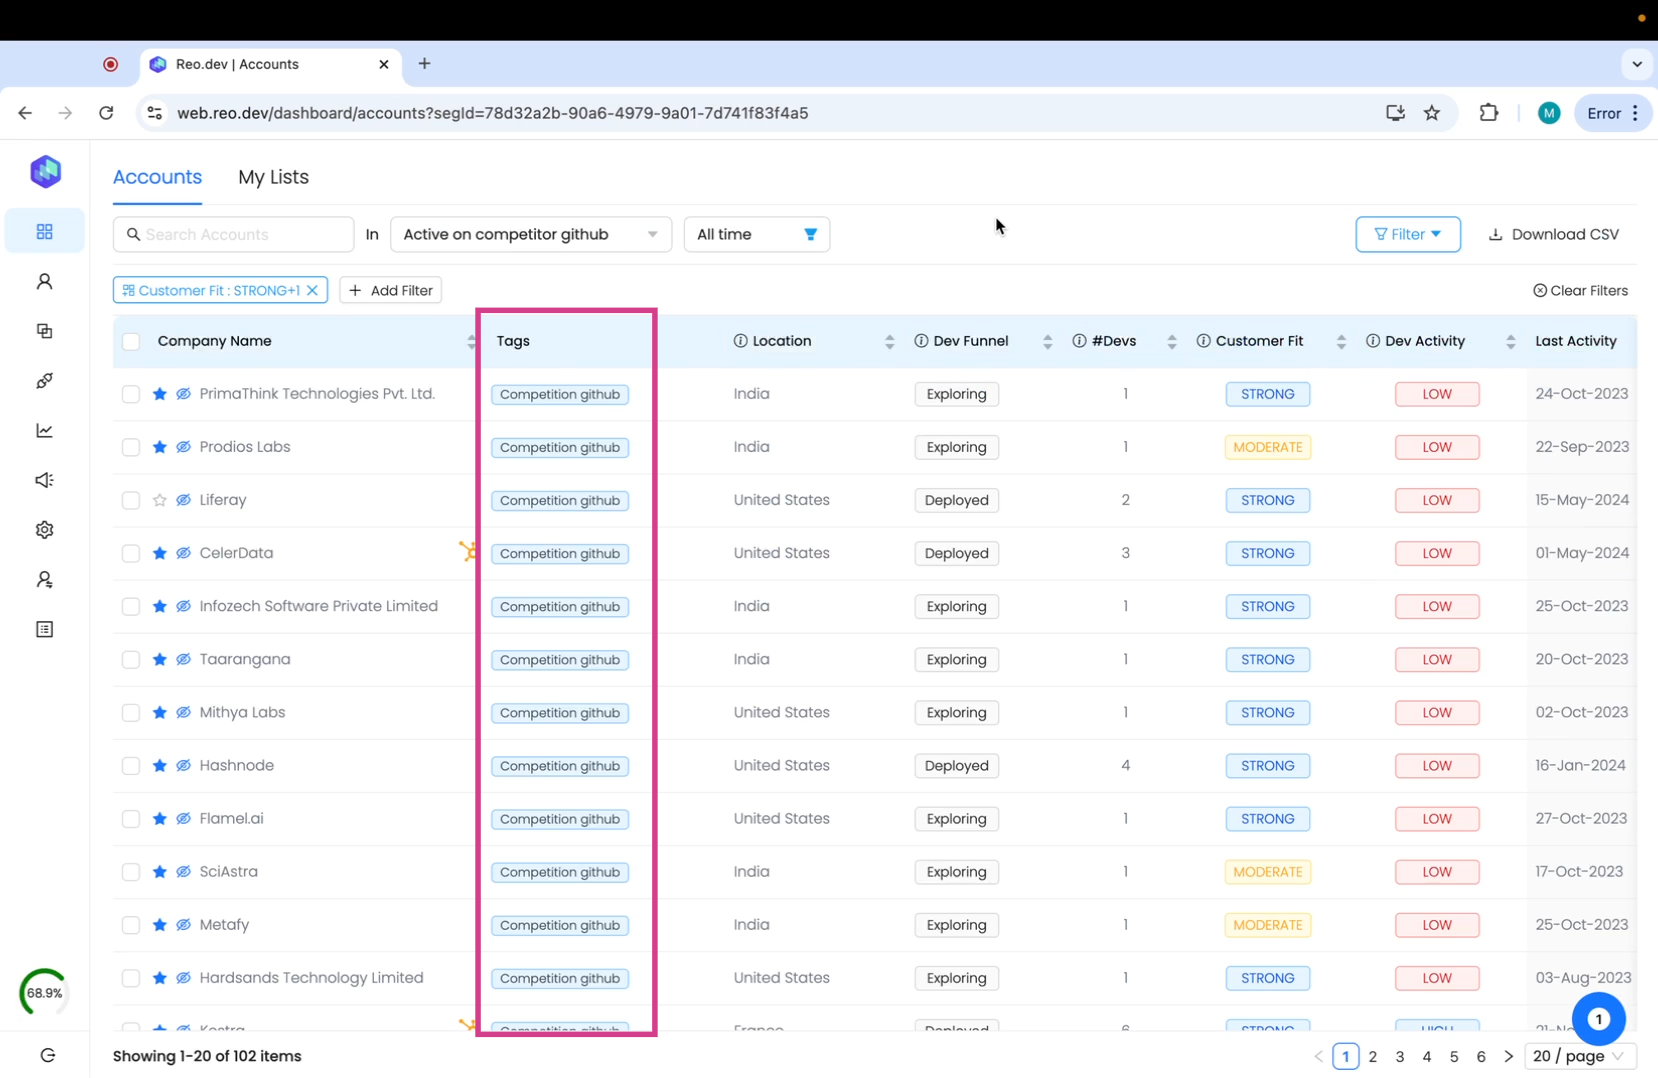
In the accounts section you can view all the accounts in this segment. The tag appears beside the account.
You can also view the segment you created under the 'my segments' tab
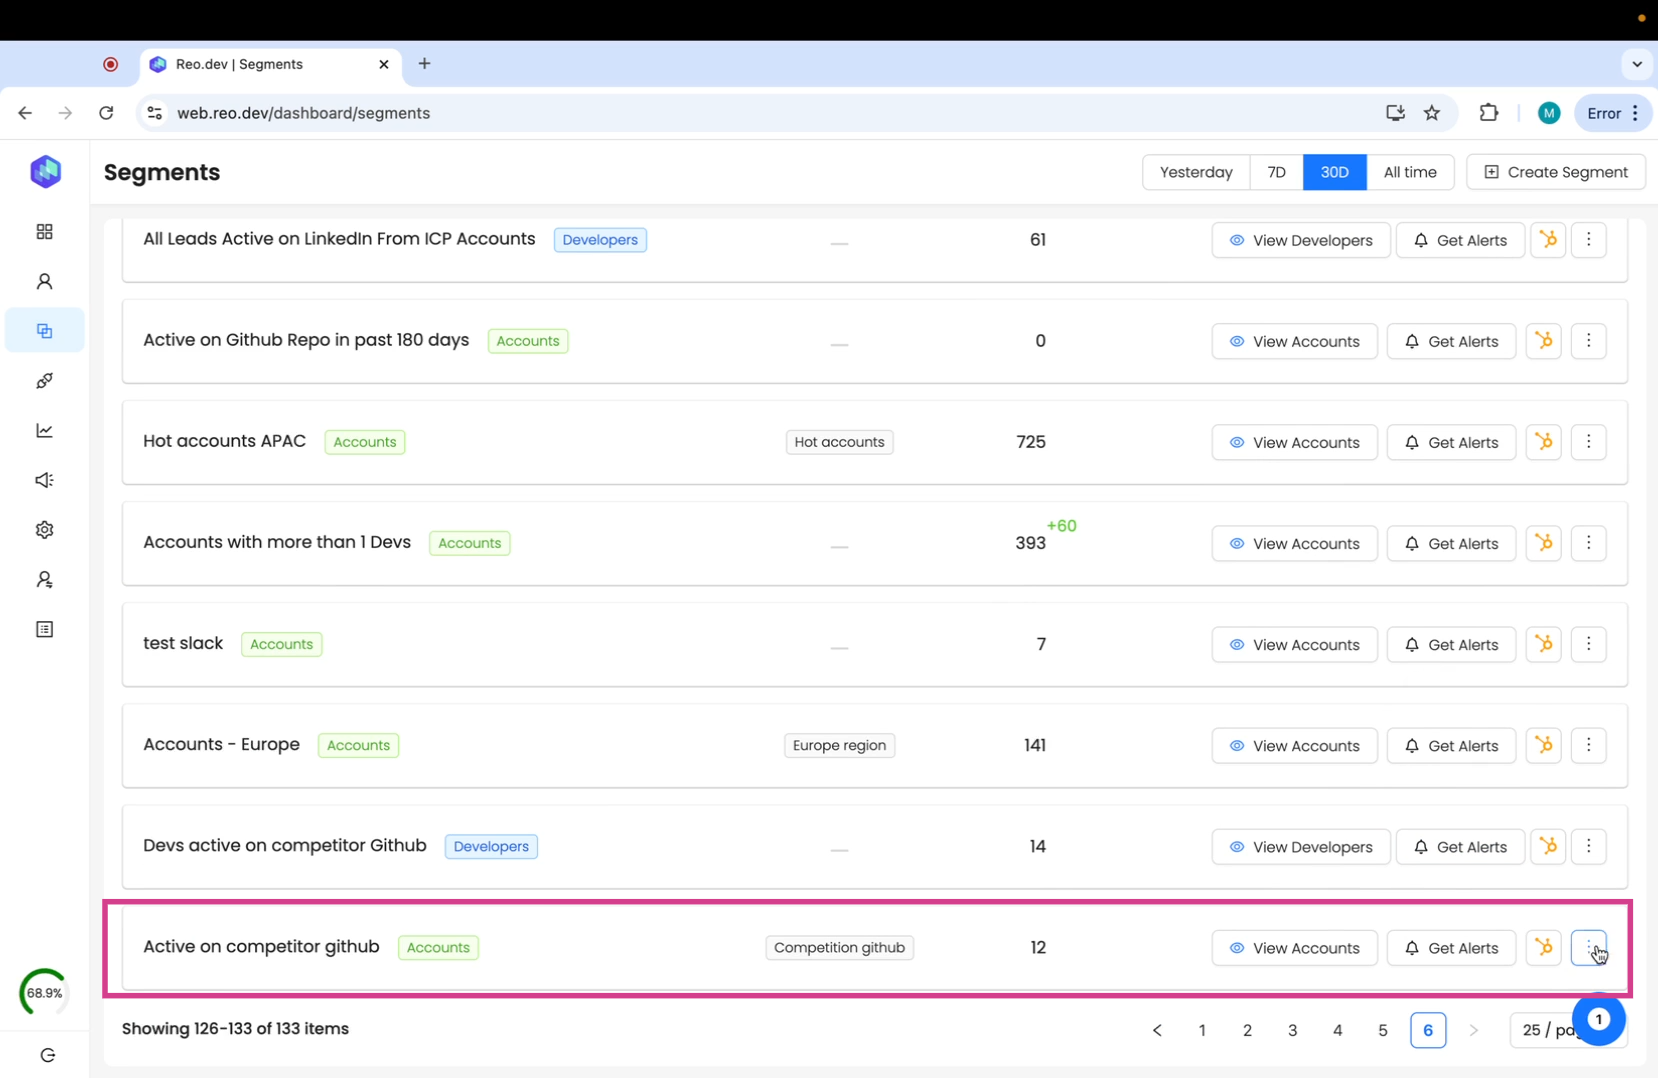
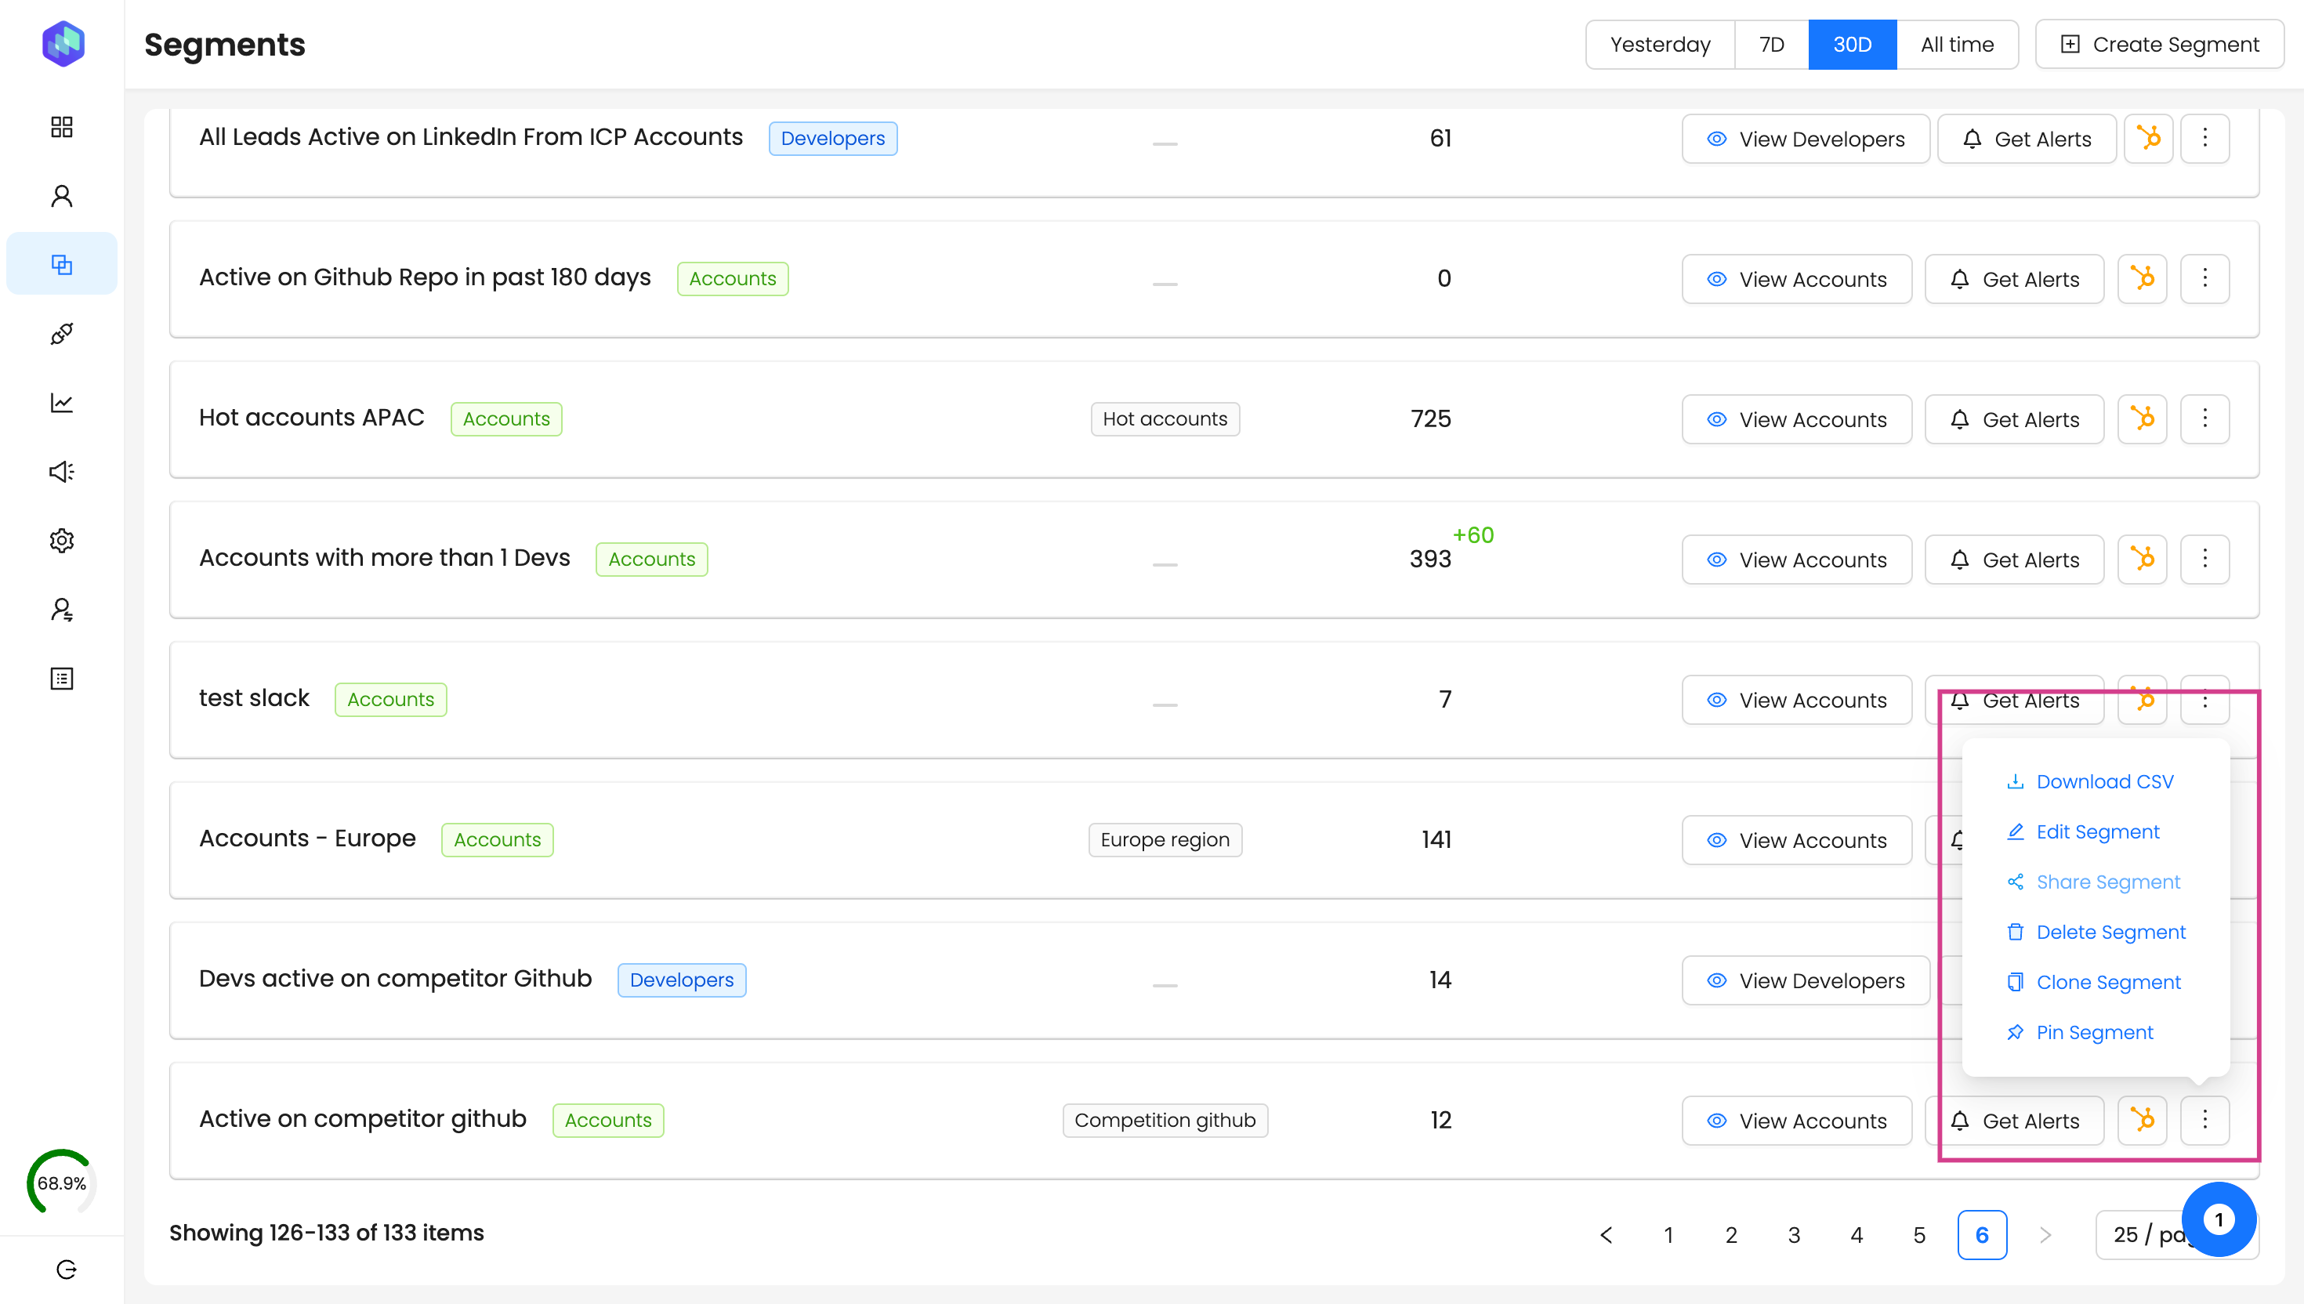
Step 12: Click on the burger menu and then click on share segment.
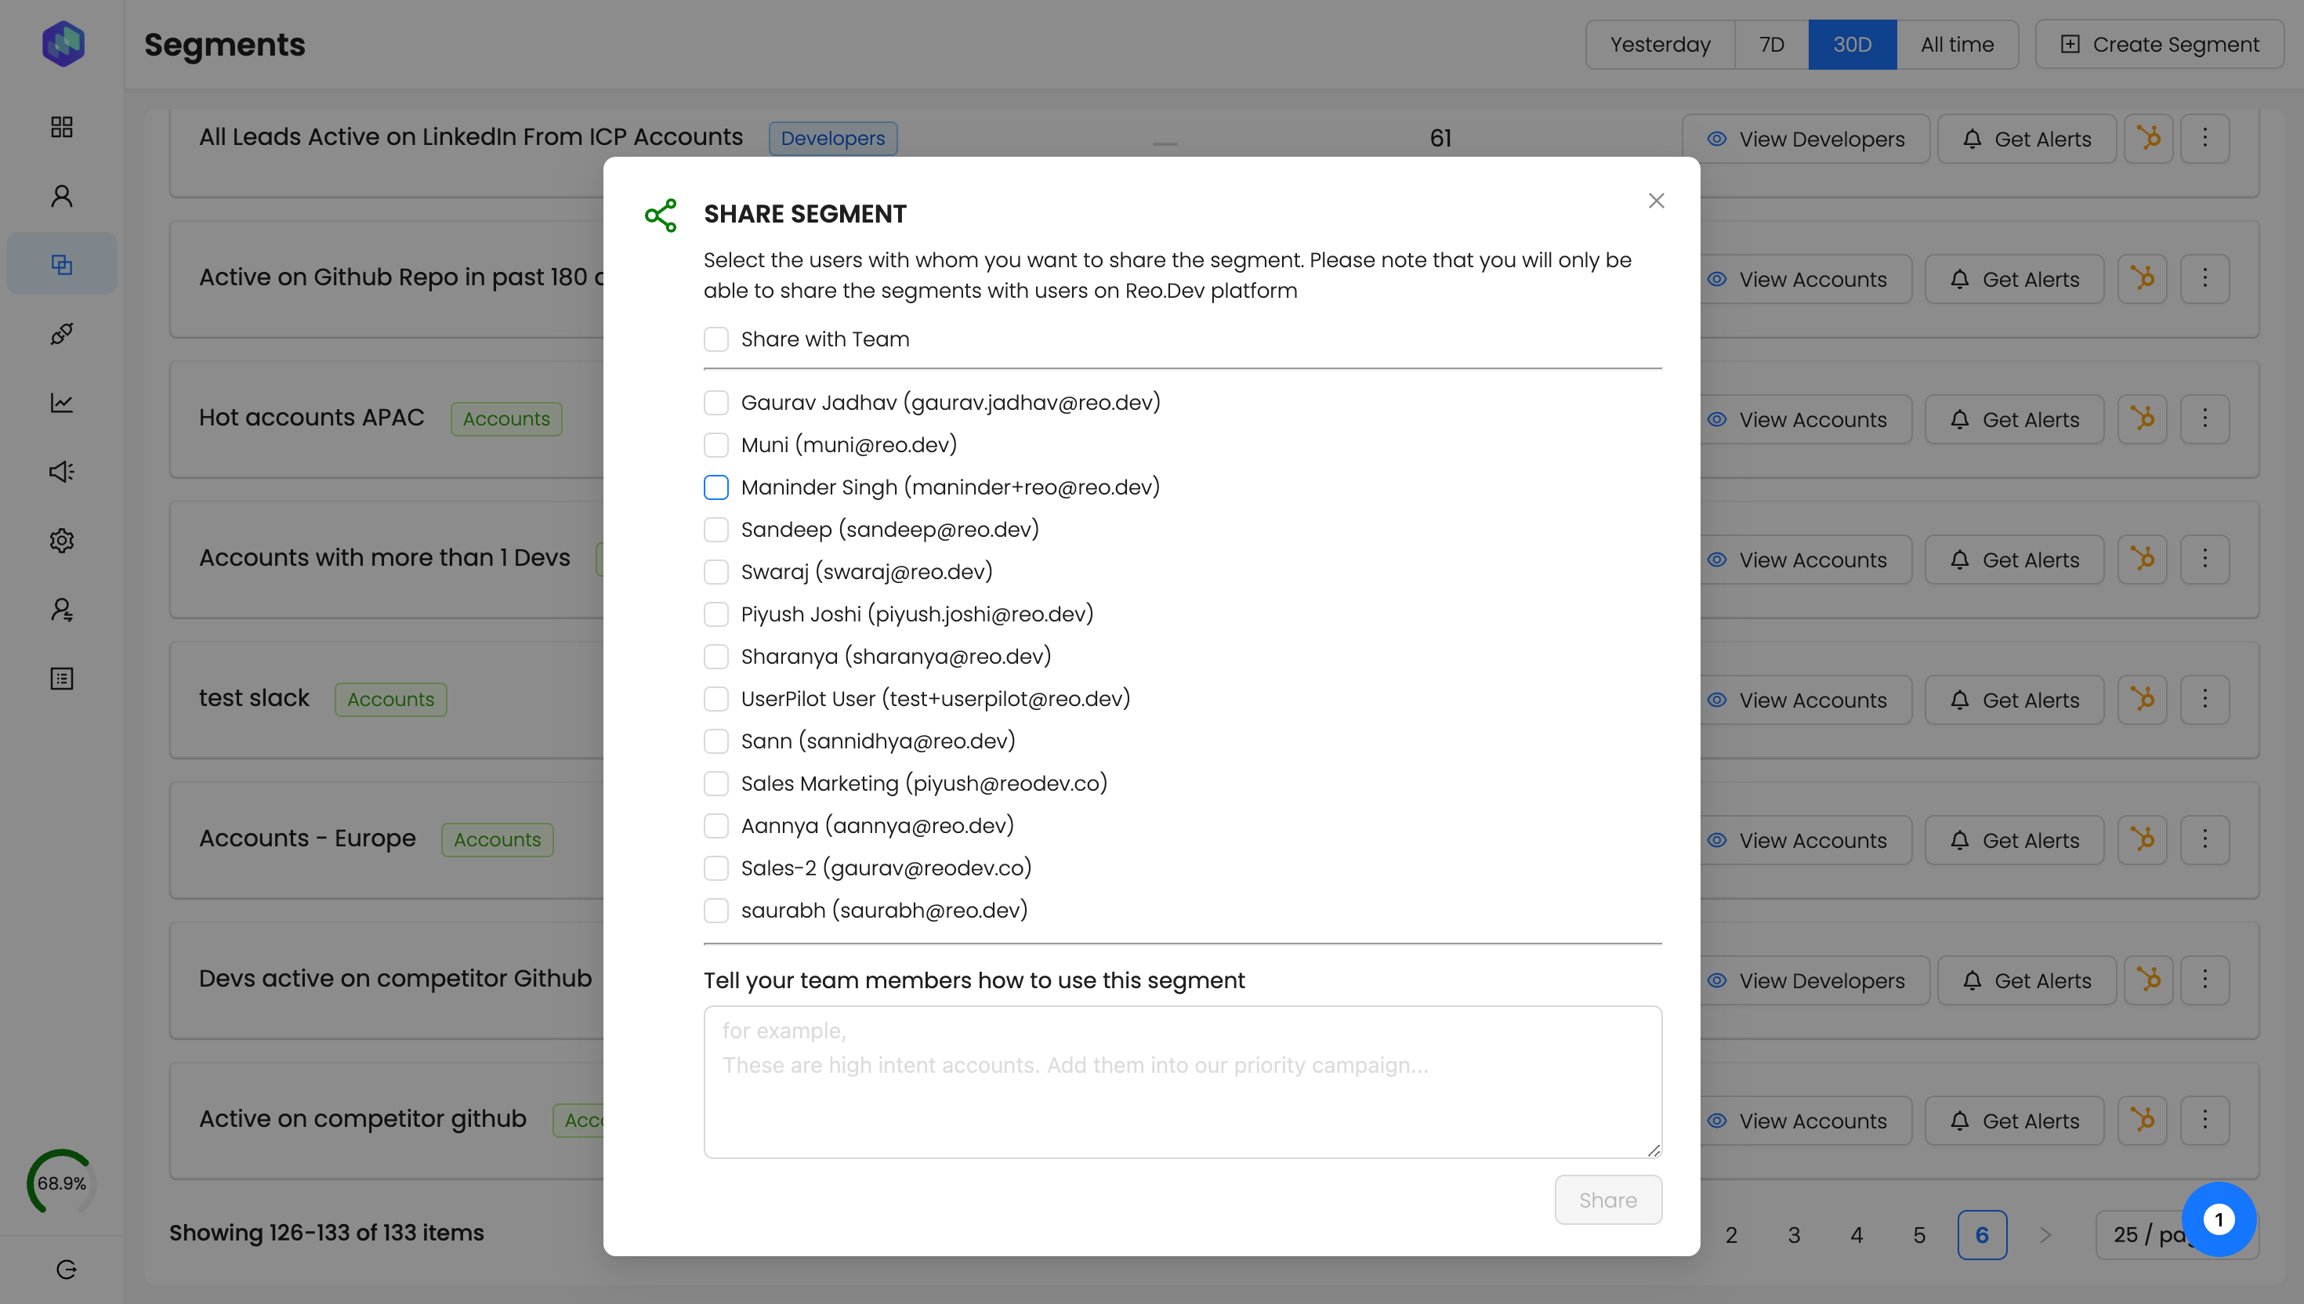
Step 13: Choose the members you want to share the segment with and add notes to give them more context about the segment. And hit the share button.
Last updated
Was this helpful?

