> For the complete documentation index, see [llms.txt](https://docs.reo.dev/llms.txt). Markdown versions of documentation pages are available by appending `.md` to page URLs; this page is available as [Markdown](https://docs.reo.dev/getting-started/for-admins/step-6-integrate-slack-and-set-up-notifications.md).
# Step 6: Integrate Slack and set up notifications
This guide explains how to integrate Reo.Dev with Slack, and set up alerts for specific developer activities in an account or segment.
### Integrating Slack with Reo.Dev
Reo.Dev provides seamless integration with Slack to deliver real-time alerts on developer activity from an account, developer profile, or segments directly within your Slack channel.
**Alert Sharing Options in Slack**
There are two ways in which you can share alerts to a Slack channel:
* **Share alerts with others on a Slack channel:** Get notified of all developer activities from corresponding accounts in your preferred **public Slack channel**. *Private Slack channels are not supported due to Slack’s restrictions for unapproved apps, ensuring user privacy and security.* This allows you to share updates with your teammates in public channels only.
* **Receive alerts to self through the Reo.Dev App:** Receive key updates on developer activity from a single or multiple accounts that you choose to follow in Reo.Dev. These alerts will be visible only to you.
### User Roles
Please note that we’ve bifurcated user roles for Slack integration.
As an **Admin,** you can:
1. Setup the connection/integration for Reo.Dev’s Slack app
2. Select a Slack channel to share alerts with teammates
As an **Admin and non-admin**, you can:
1. Enable alerts for an account/developer on the Slack App. These alerts will be visible only to you.
For Admins: How to integrate with the Slack App
**Step 1:** Go to **Integrations > Notifications** and then click **Configure** on the notifications card.
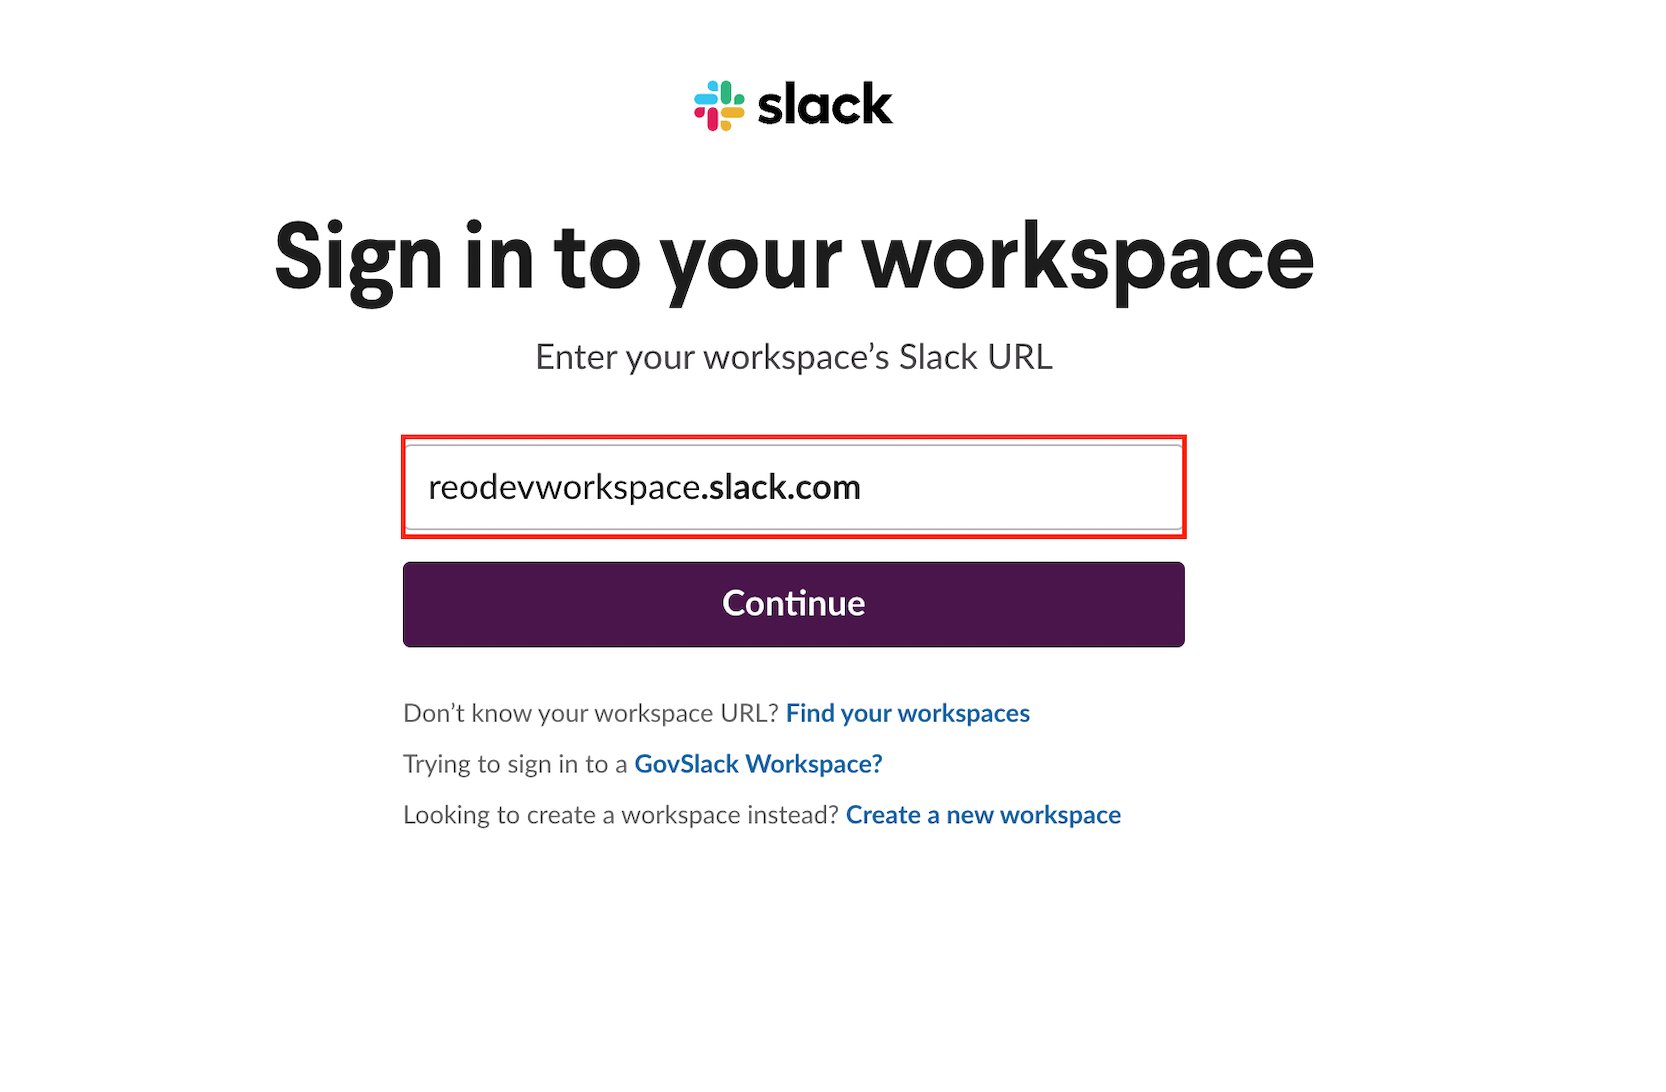
**Step 2:** Enter your workspace URL and click **Continue**.\
\*\*
**Step 3:** This will take you to the authorization page. Click **Allow**.

And you’re connected!
### Configuring Slack Channels
**Step 1:** On the success message page, click **Configure Slack Channel**.
**Step 2:** From the dropdown menu, select the preferred channel to receive alerts. Then, click on **Share to Slack**.
{% hint style="info" %}
**Important Note**:\
\
**Private channels are not supported** due to Slack’s restrictions on unapproved apps. Notifications can only be sent to public channels displayed in the dropdown menu. You can select an existing **public Slack channel** to share alerts with your team members. Reo.Dev will display only public Slack channels in the dropdown menu.
{% endhint %}
**Step 5:** Open Slack. Check the configured channel. You'll start receiving alerts on the channel you've configured.
***
### Setting up Notifications
Notifications enable you to track developer activity in key accounts, developers or segments. You can set up notifications for specific activities and configure to which channel (Slack or email) these should be delivered.
**Notification Preference**
You can choose on which channel you want to receive notifications from Reo.Dev.
* **Email**
* **Slack**
* As Direct message
* On Slack Channel
For accounts and developers, you will get the notifications as direct message. For a segment, you can choose to receive the notifications as direct message or on a Slack channel
**Activity Type**
You can configure the set of activities for which you want to receive the notifications. For Example, you have selected Fork and Product Login as preferred activities for which notifications should be sent, then based on the channel you have selected, you will get the notification as an when Fork and Product activity is recorded for any segment, account or developer for which alerts is subscribed
You can set up notifications for an account, developer or segment by clicking on `Enable Alerts` button
* **Accounts**: To set up notification for an account, click into any account and then click on the Enable Alerts button in the top-right of header section
* **Developers**: To set up notifications for a developer, click into a developer name in the list and then click on the Enable Alerts button in the top-right of header section
* **Segments**: To set up notifications for a segment, click on the bell icon
---
# Agent Instructions
This documentation is published with GitBook. GitBook is the documentation platform designed so that both humans and AI agents can read, navigate, and reason over technical content effectively. Learn more at gitbook.com.
## Querying This Documentation
If you need additional information that is not directly available in this page, you can query the documentation dynamically by asking a question.
Perform an HTTP GET request on the current page URL with the `ask` query parameter, and the optional `goal` query parameter:
```
GET https://docs.reo.dev/getting-started/for-admins/step-6-integrate-slack-and-set-up-notifications.md?ask=&goal=
```
`ask` is the immediate question: it should be specific, self-contained, and written in natural language.
`goal` is optional and describes the broader end goal you are ultimately trying to accomplish on behalf of the user. GitBook uses it to tailor the answer towards what is most useful for that goal.
The response will contain a direct answer to the question and relevant excerpts and sources from the documentation.
Use this mechanism when the answer is not explicitly present in the current page, you need clarification or additional context, or you want to retrieve related documentation sections.