Custom Lists
Import, Enrich & Segment with your custom CSV lists in Reo.Dev
Reo.Dev Lists 2.0 introduces the ability to import lists with custom columns for both Accounts and Developers. This feature enhances segmentation, prioritization, and team collaboration by enabling:
Custom CSV Imports with additional columns beyond standard data.
Advanced Segmentation based on custom column values.
List Sharing & Team Collaboration for personalized outreach strategies.
1. Creating Lists in Reo.Dev
A. Importing a List (CSV Upload with Custom Columns)
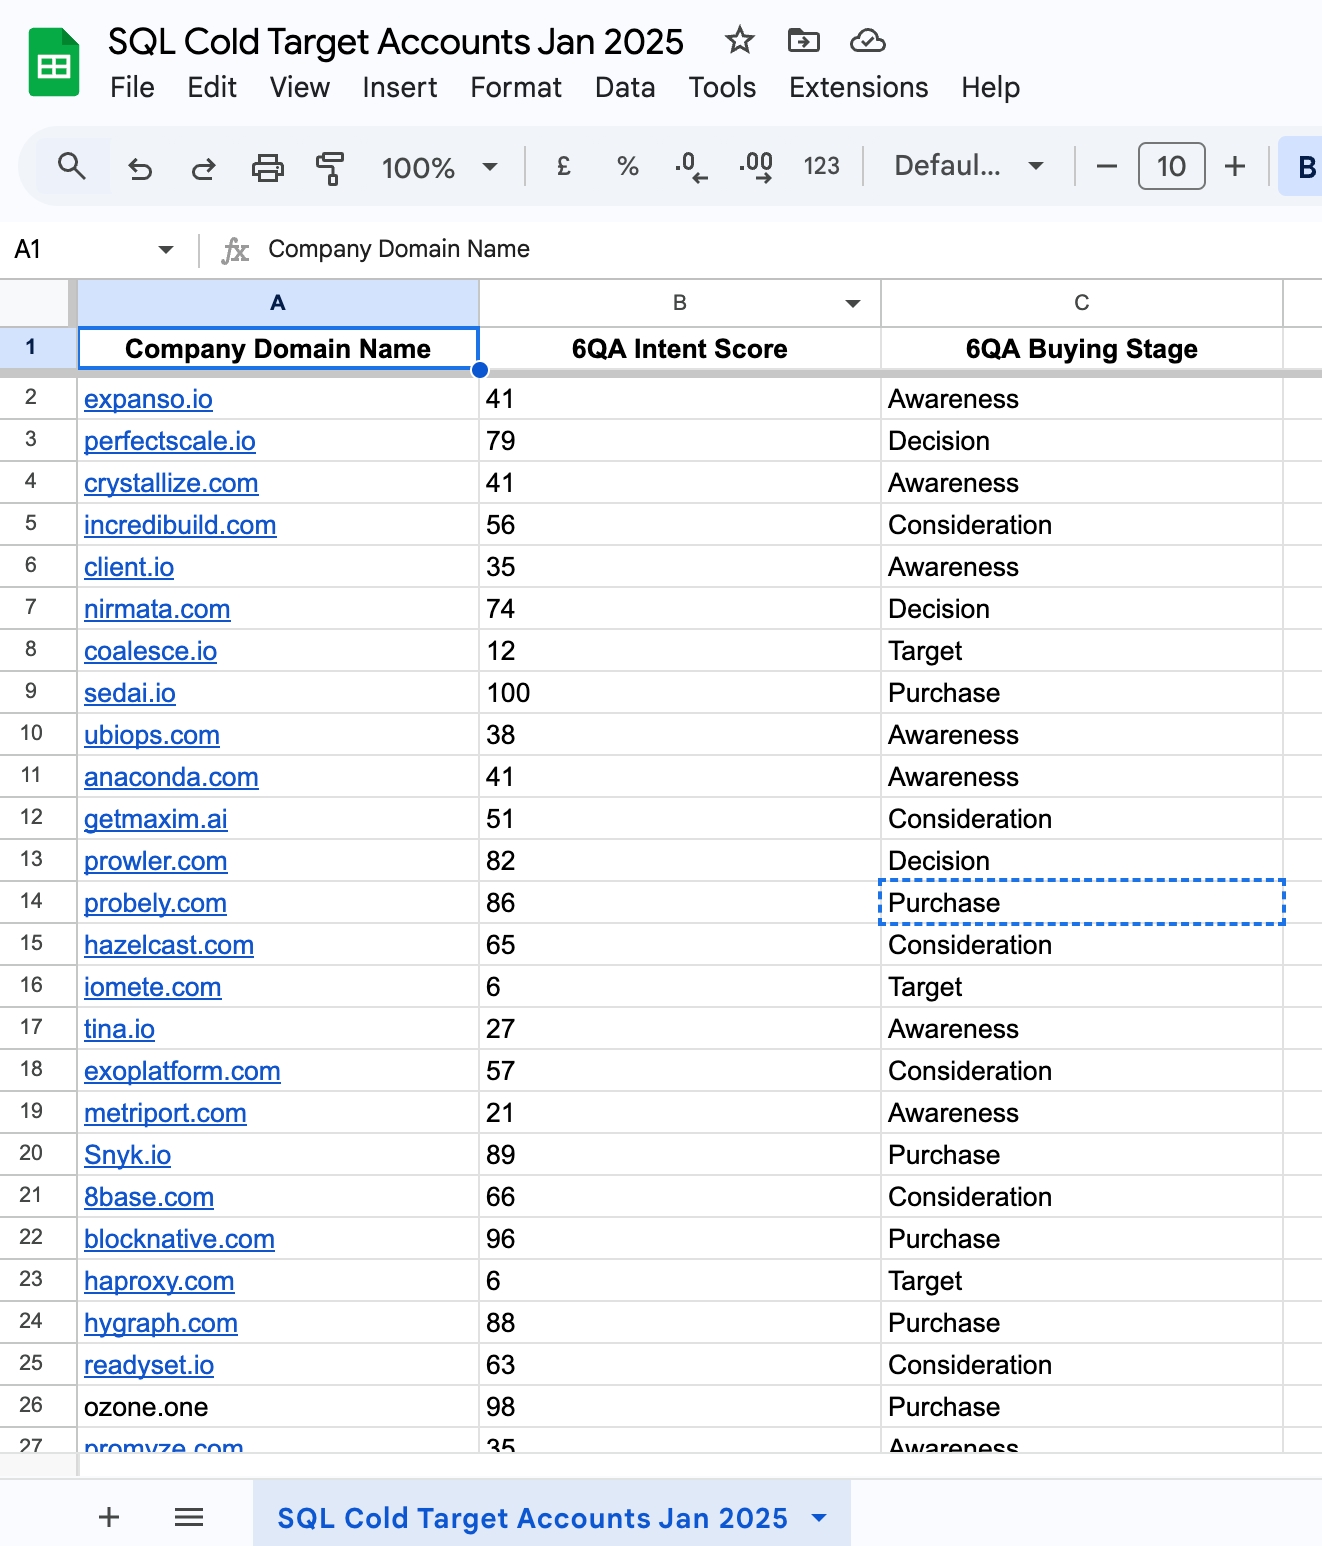
Reo.Dev supports CSV file uploads for list creation. The platform allows users to import custom columns that can later be leveraged in segmentation and targeting.
Steps to Import a List:
Navigate to Lists
Go to Tools → Lists from the sidebar.
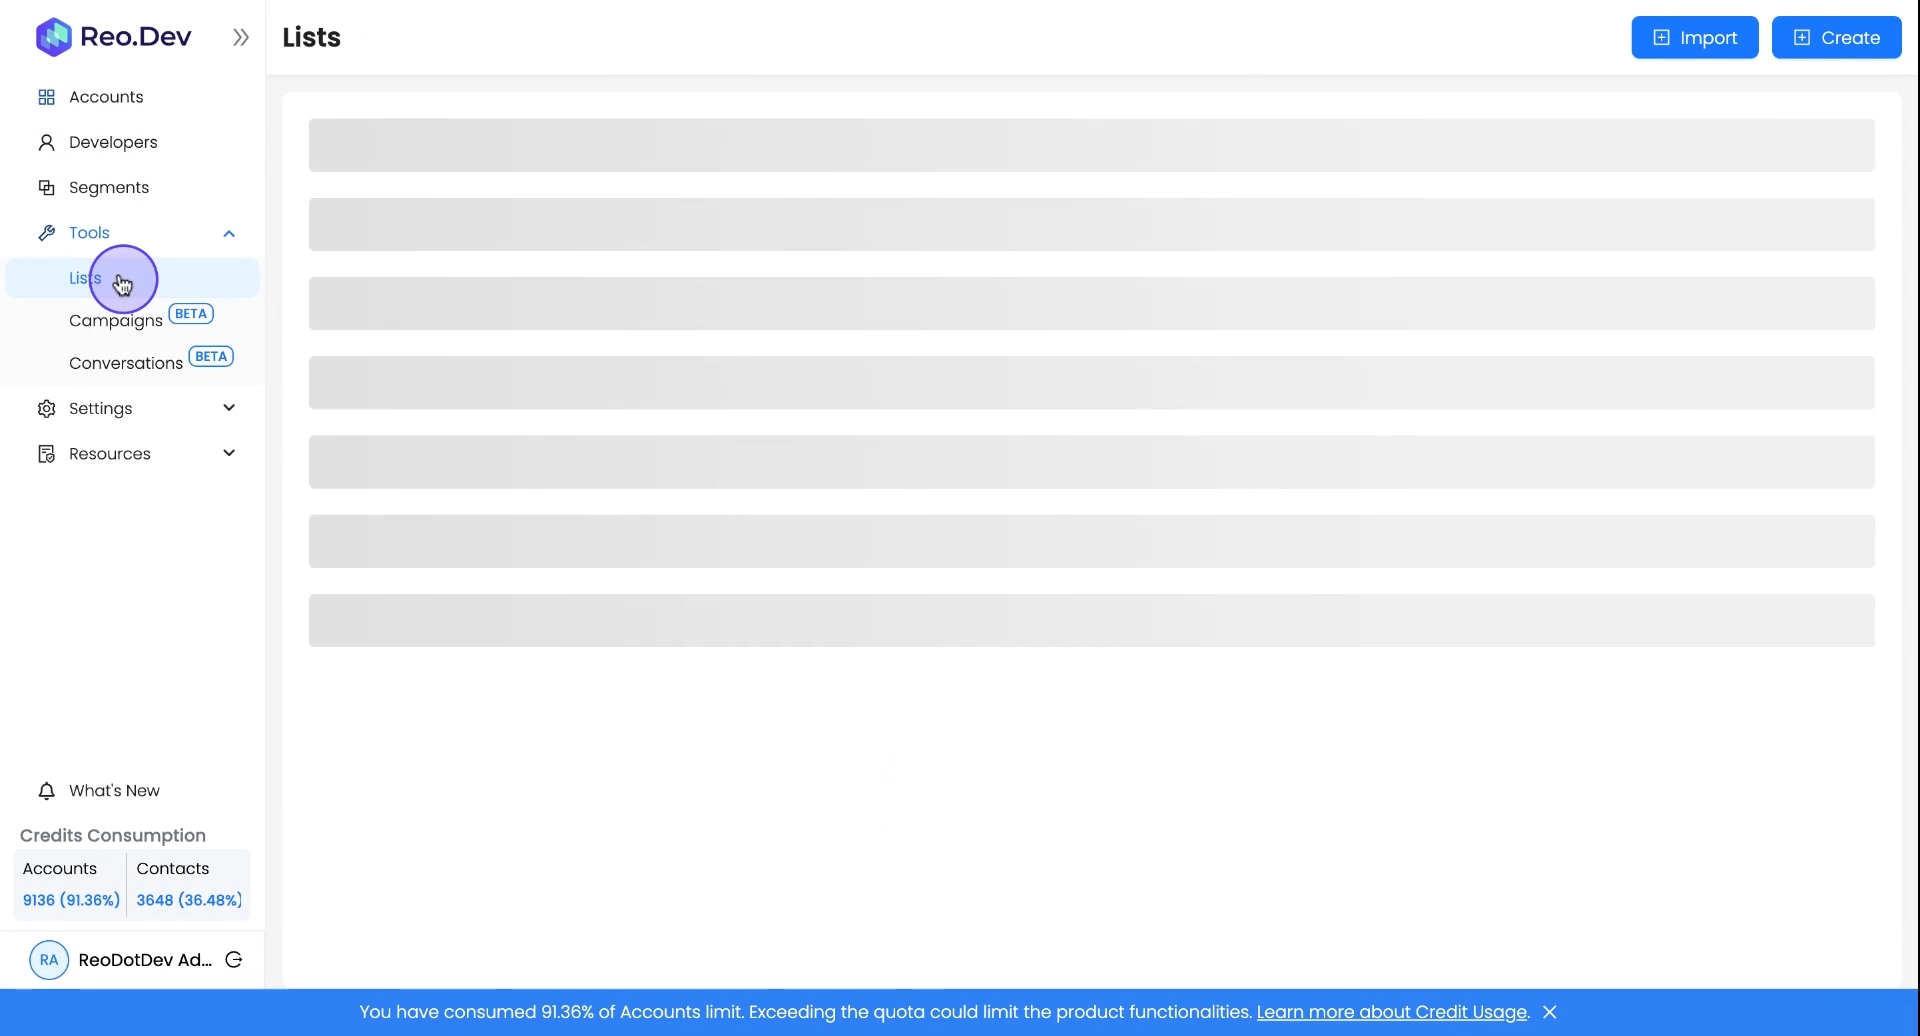
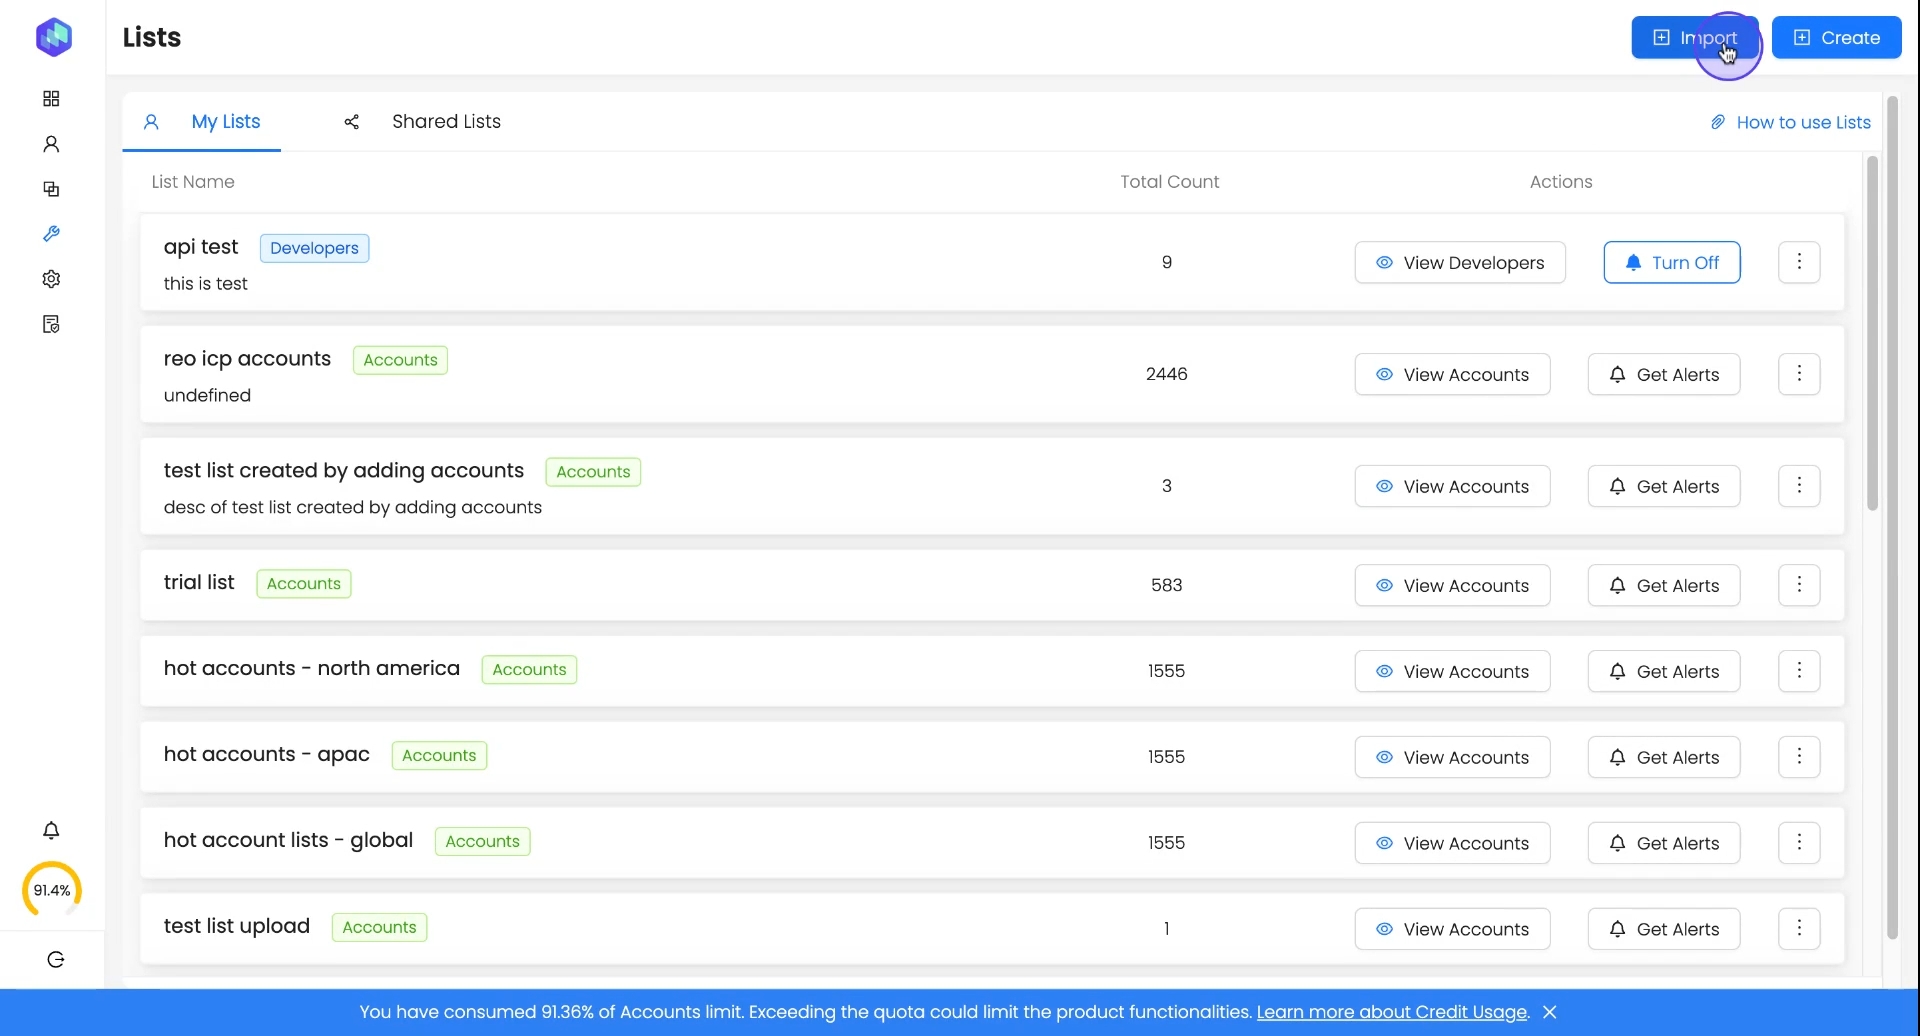
Click on Import.
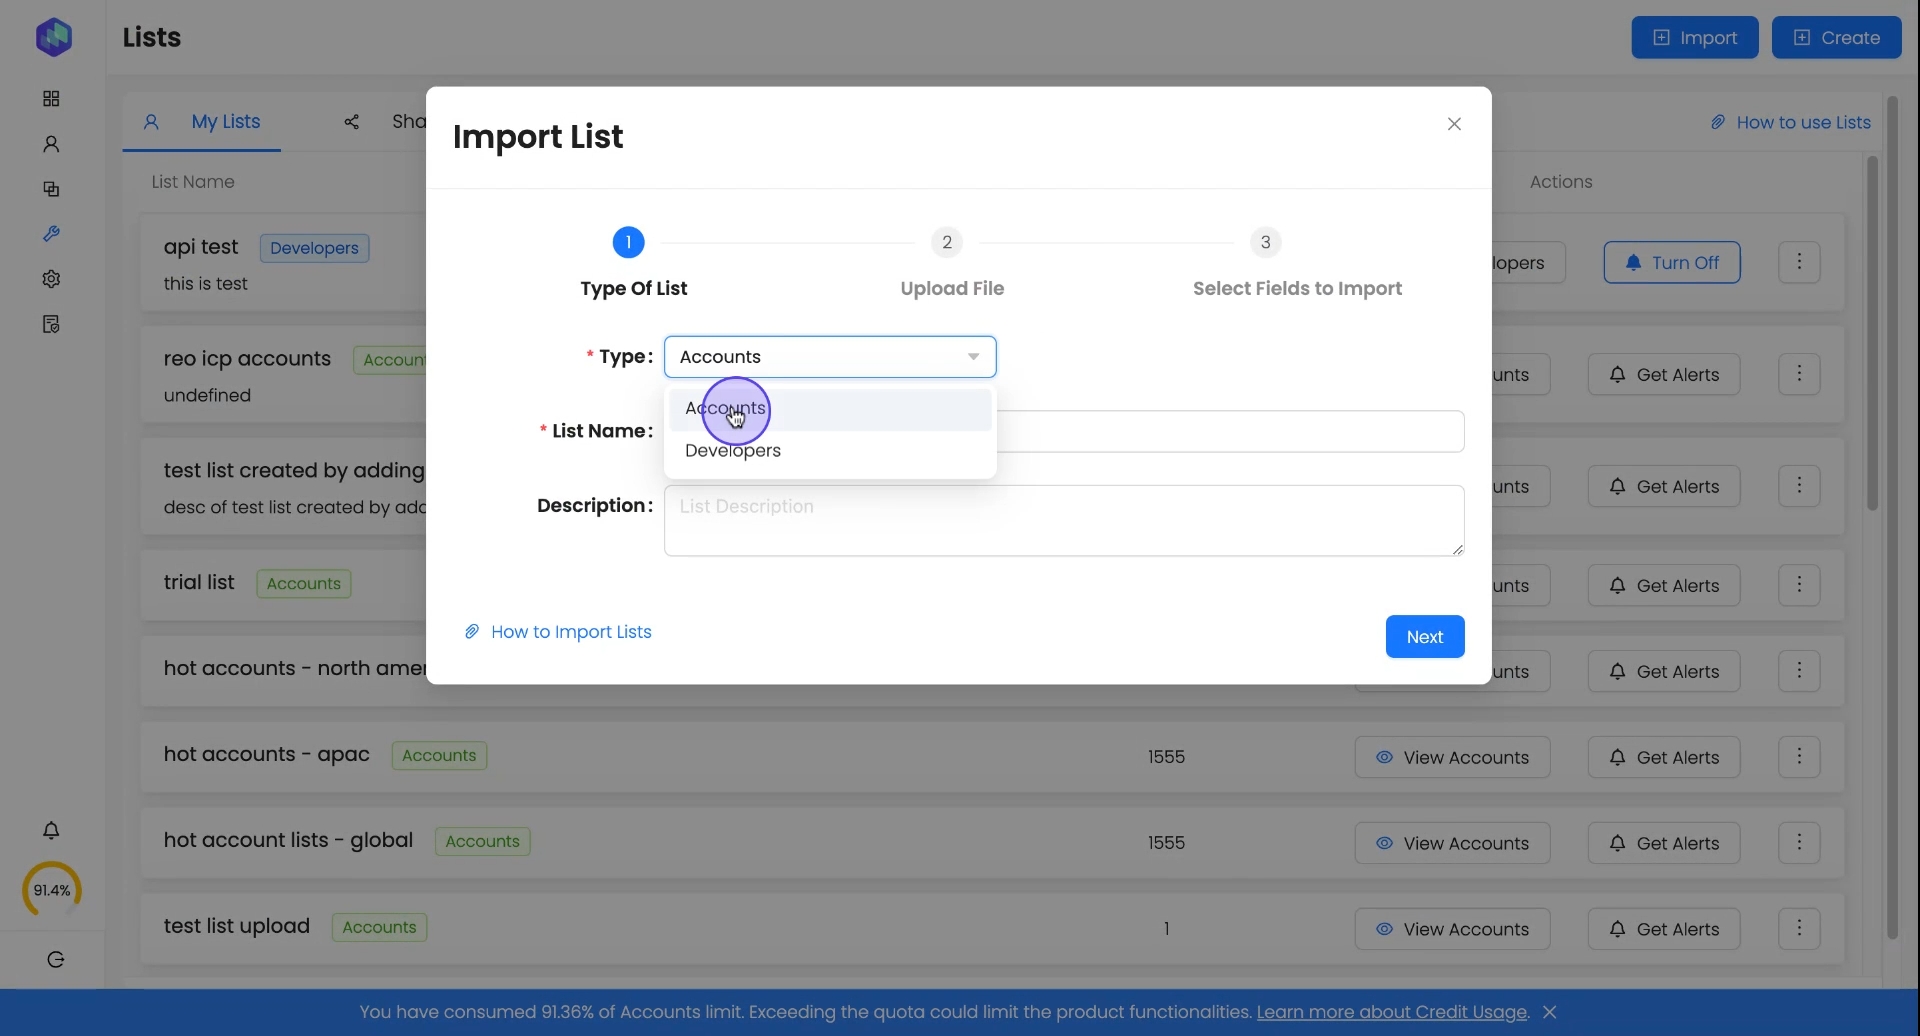
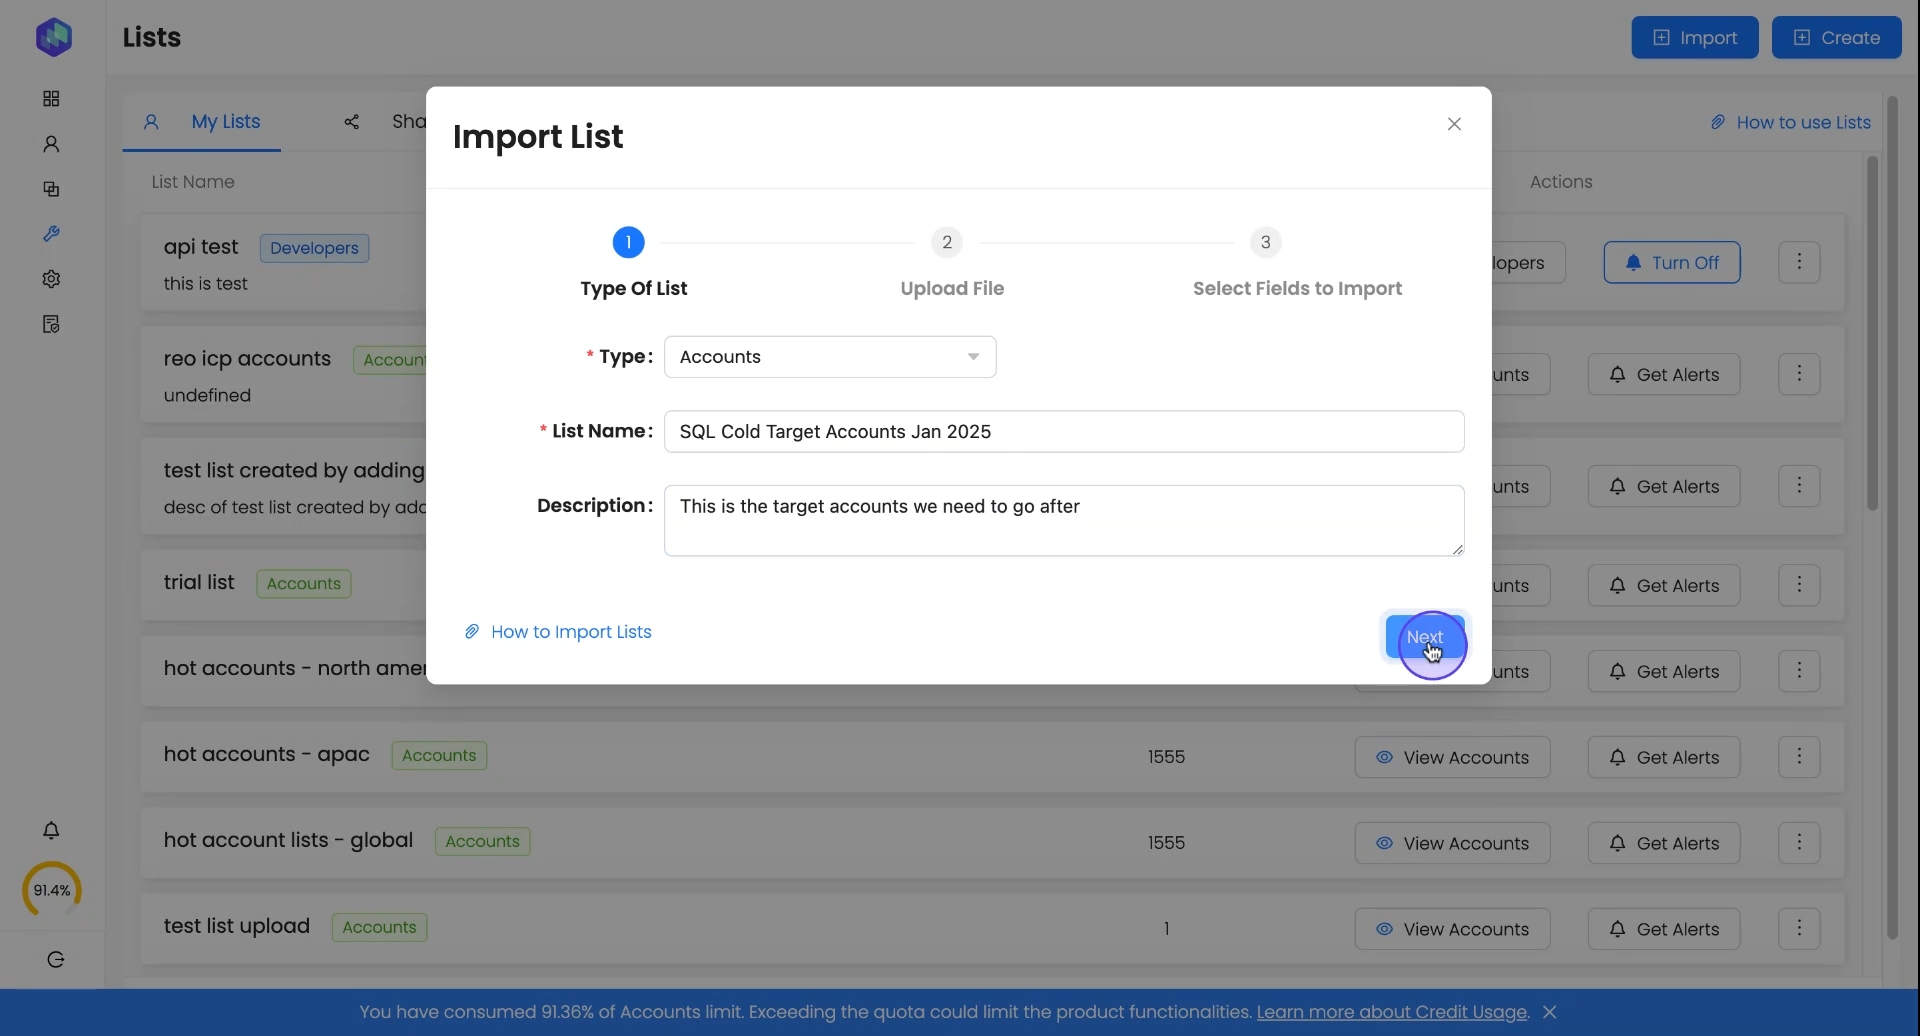
Choose List Type
Select whether the list is for Accounts or Developers.
Provide List Details
Enter a List Name (e.g., "SQL Cold Target Accounts - Jan 2025")
(Optional) Add a Description for context.
Click Next.
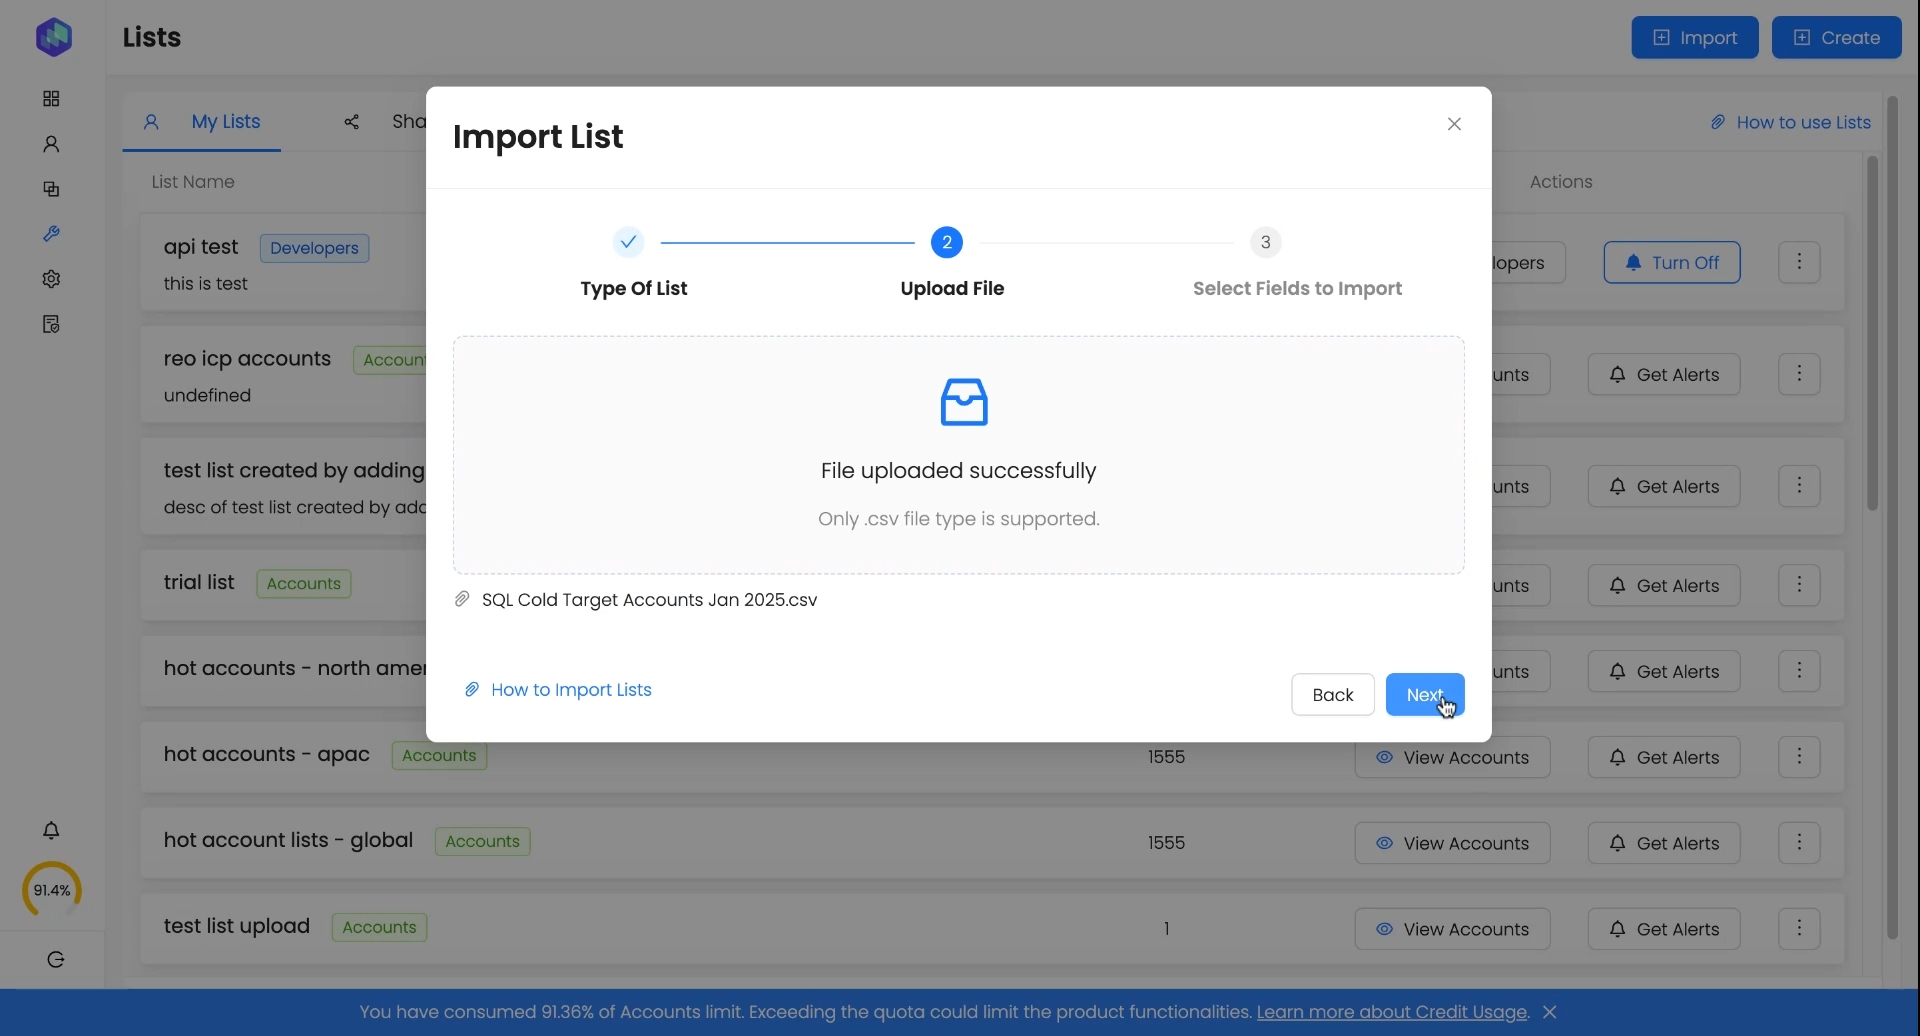
Upload CSV File
Click Upload and select the CSV file.
Click Next after a successful upload.
B. Mapping Columns for Data Enrichment
1. Selecting the Primary Key Column (Mandatory for Import Success)
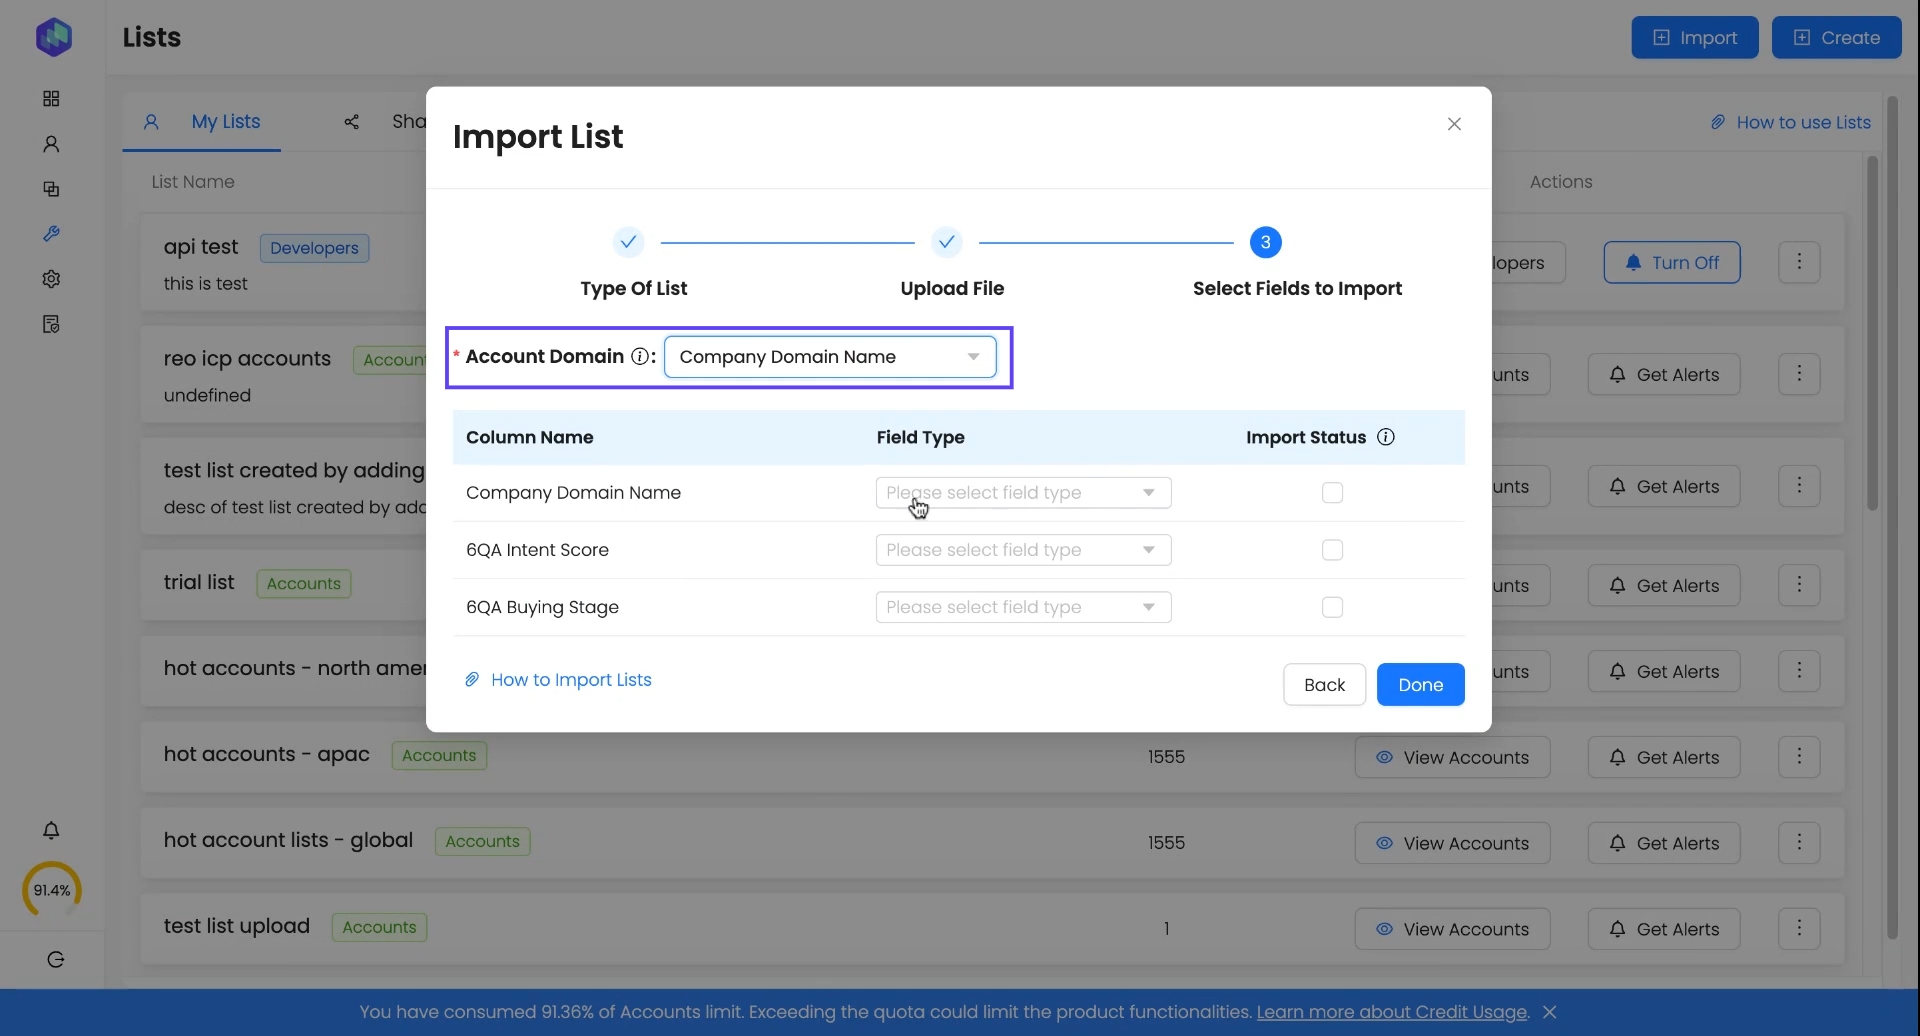
For Account Lists → Choose Company Domain Name
For Developer Lists → Choose LinkedIn Profile URL, GitHub ID, or Email
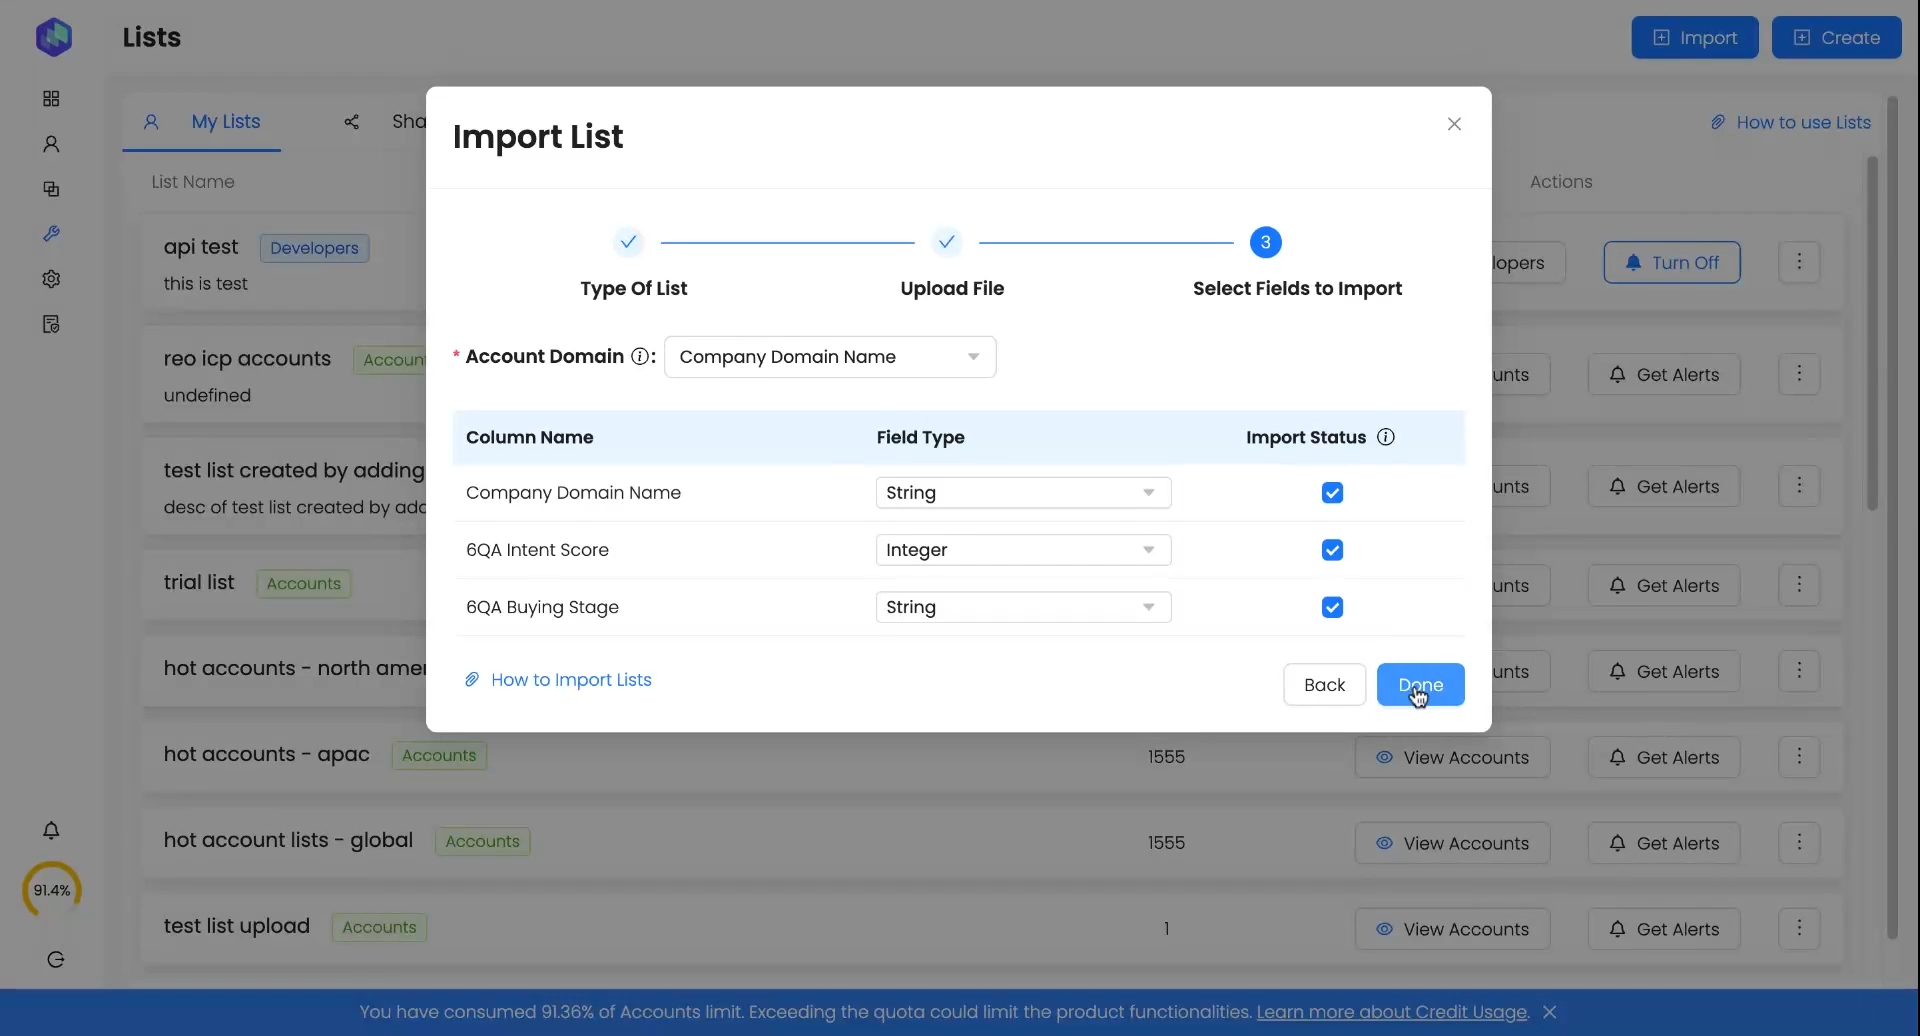
2. Mapping Custom Columns to Field Types
Each column in your uploaded CSV needs to be mapped to a specific field type to ensure accurate data processing. Below is a sample dataset illustrating how different types of fields are mapped during the import process:
6QA Intent Score
Integer
85
Numerical data
6QA Buying Stage
String
Awareness
Categorical text values
Last Contact Date
Date
25/01/2025
Must be in DD/MM/YYYY format
Best Practices for Field Mapping:
For numerical values, map as Integer.
For text-based values or links, map as String.
For date fields, use the DD/MM/YYYY format.
Columns left unmapped and checked won’t be imported.
Select Columns to Import
You can exclude unnecessary columns.
The primary key column must always be checked.
Click Done to proceed.
Import Summary & Processing Time
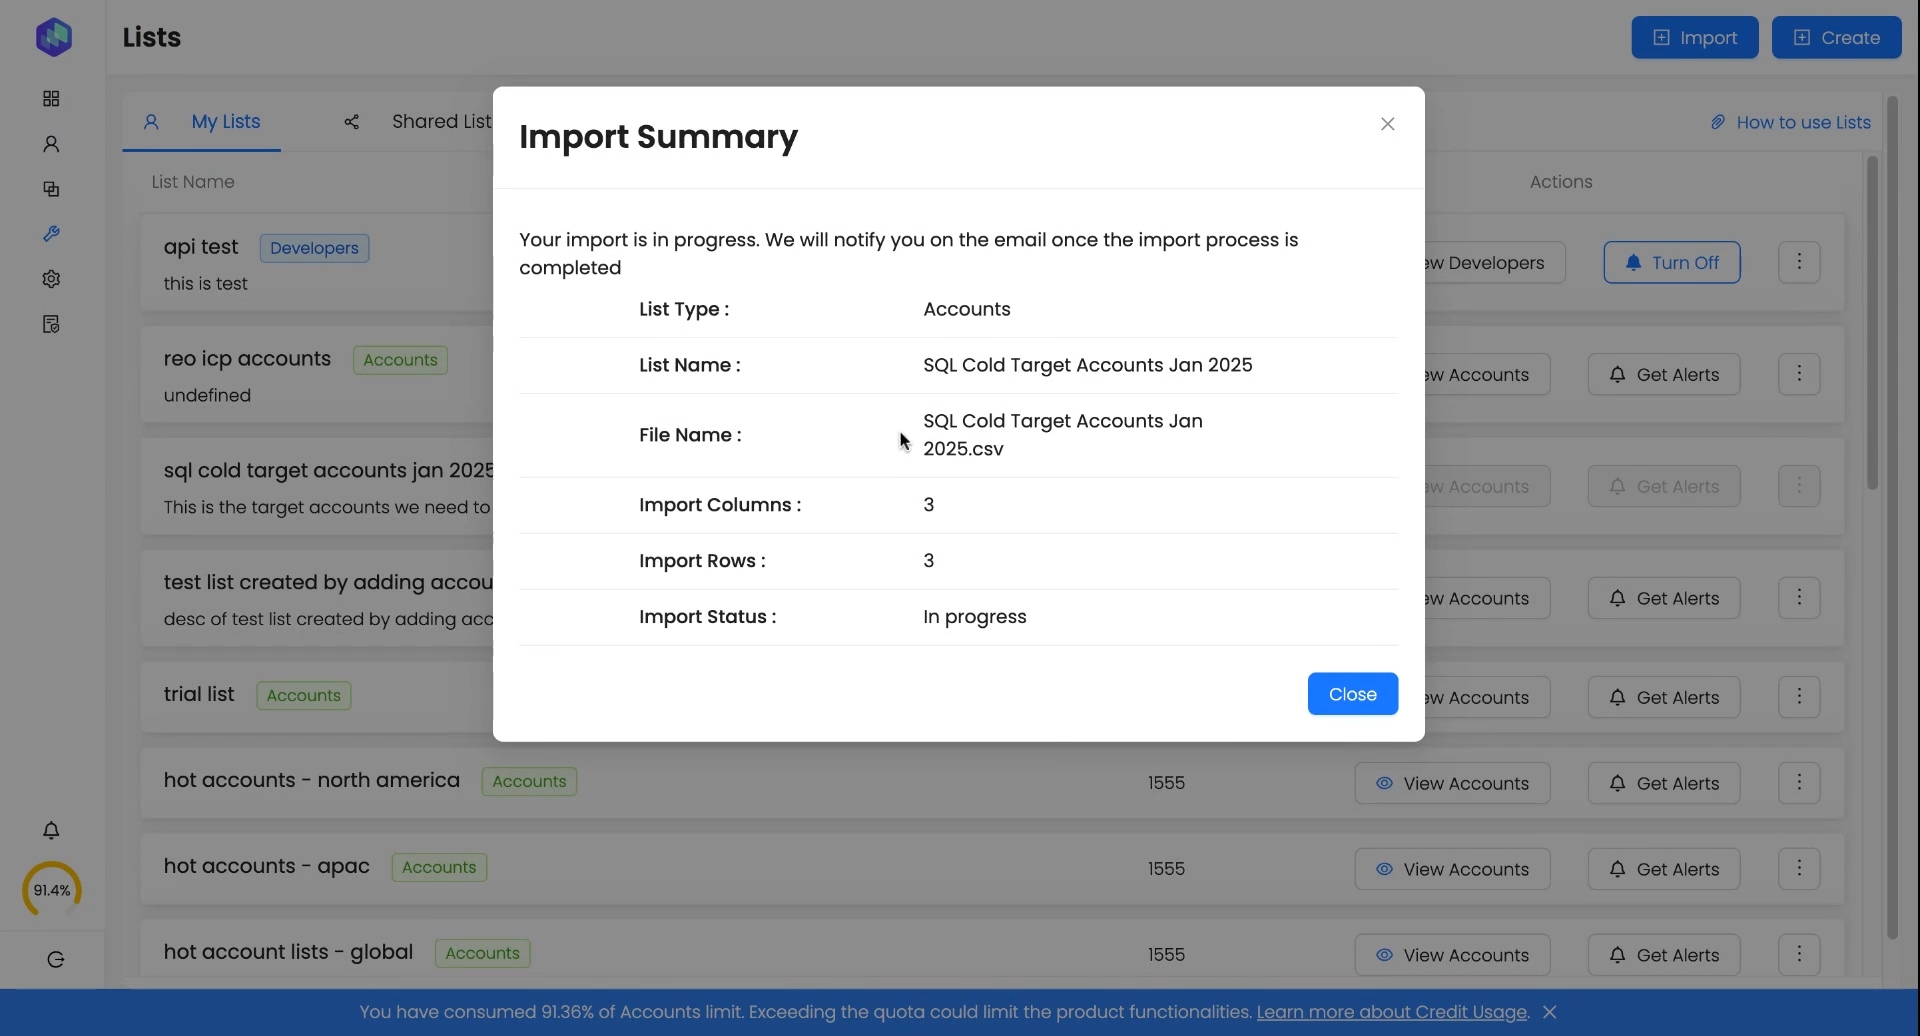
Once you upload a list, the Import Summary pop-up will provide an overview of the import details, including:
List Type (Accounts or Developers)
List Name
File Name
Number of Imported Columns
Number of Imported Rows
Import Status (In Progress)
Email Notification: You will receive an email notification once the import is complete, and the list will be available in the Lists panel under "My Lists."
2. Managing & Enriching Lists
A. Viewing Imported Lists
Once a list is imported successfully:
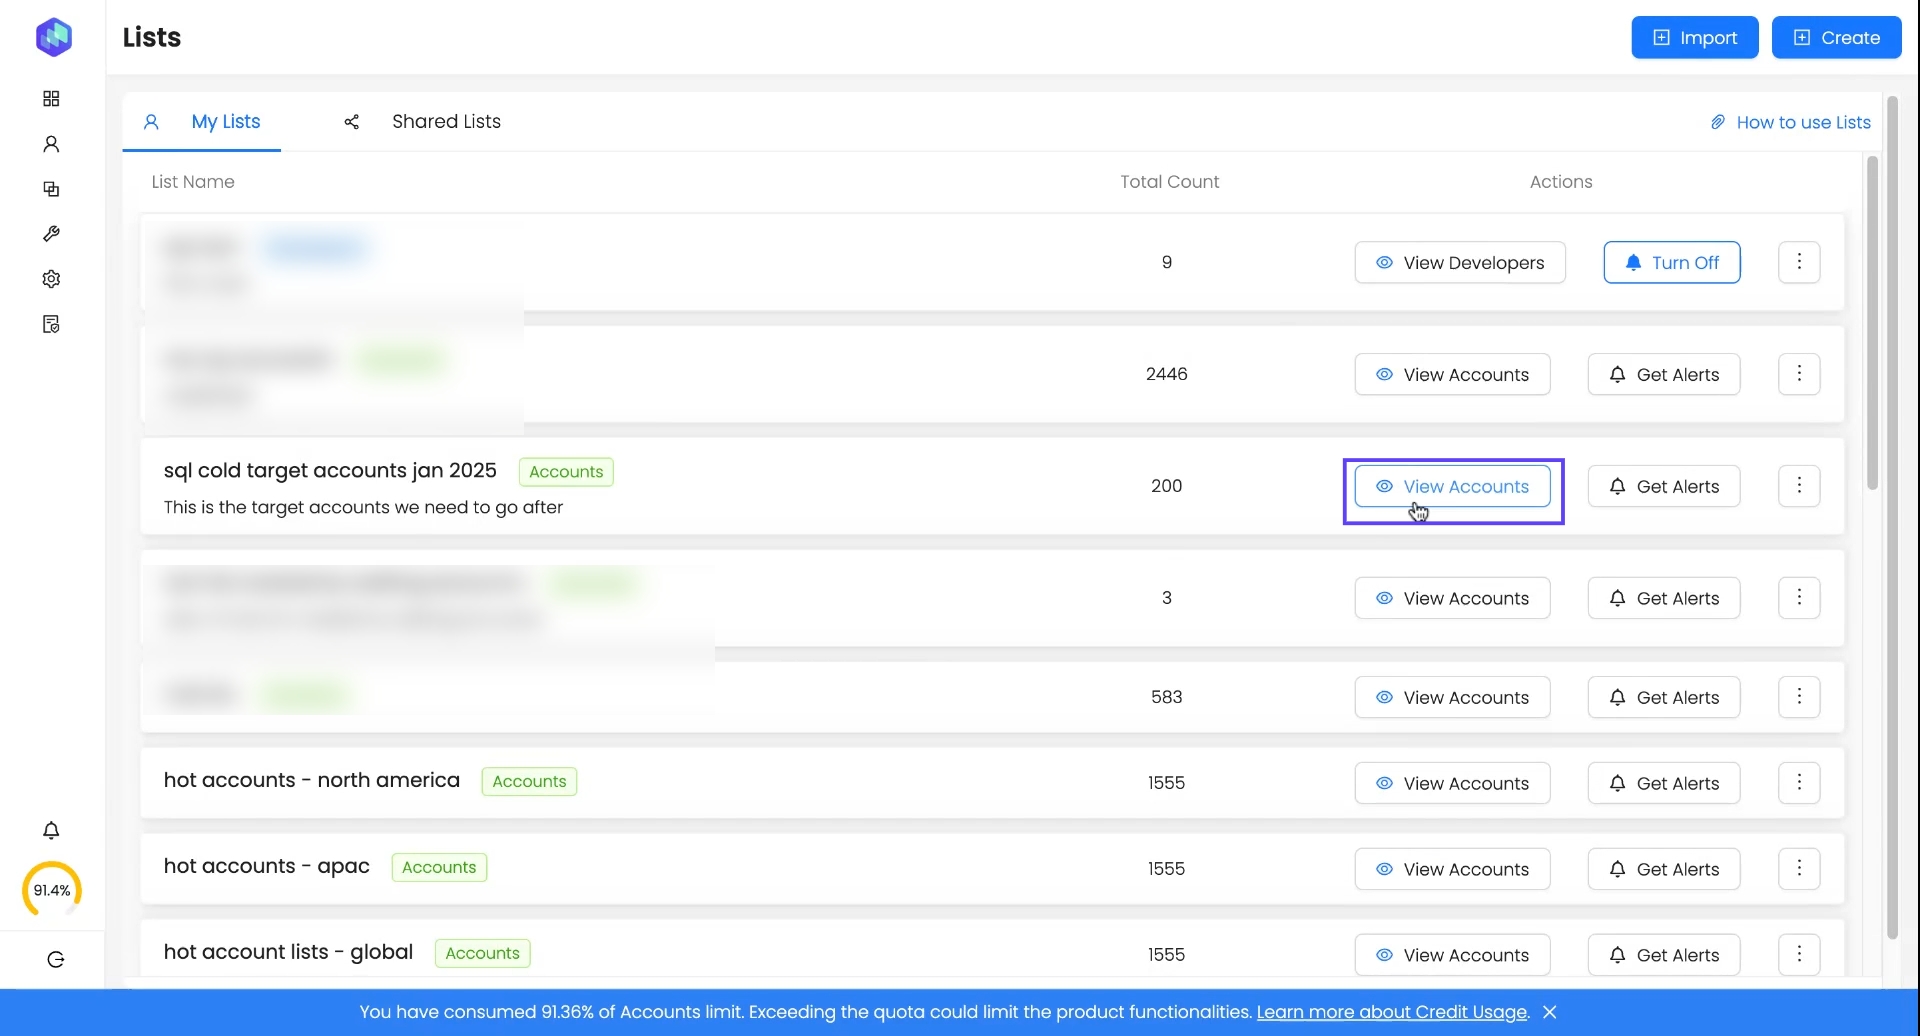
Click View Accounts/Developers to see the enriched data.
Enriched accounts will display Reo.Dev data alongside custom columns.
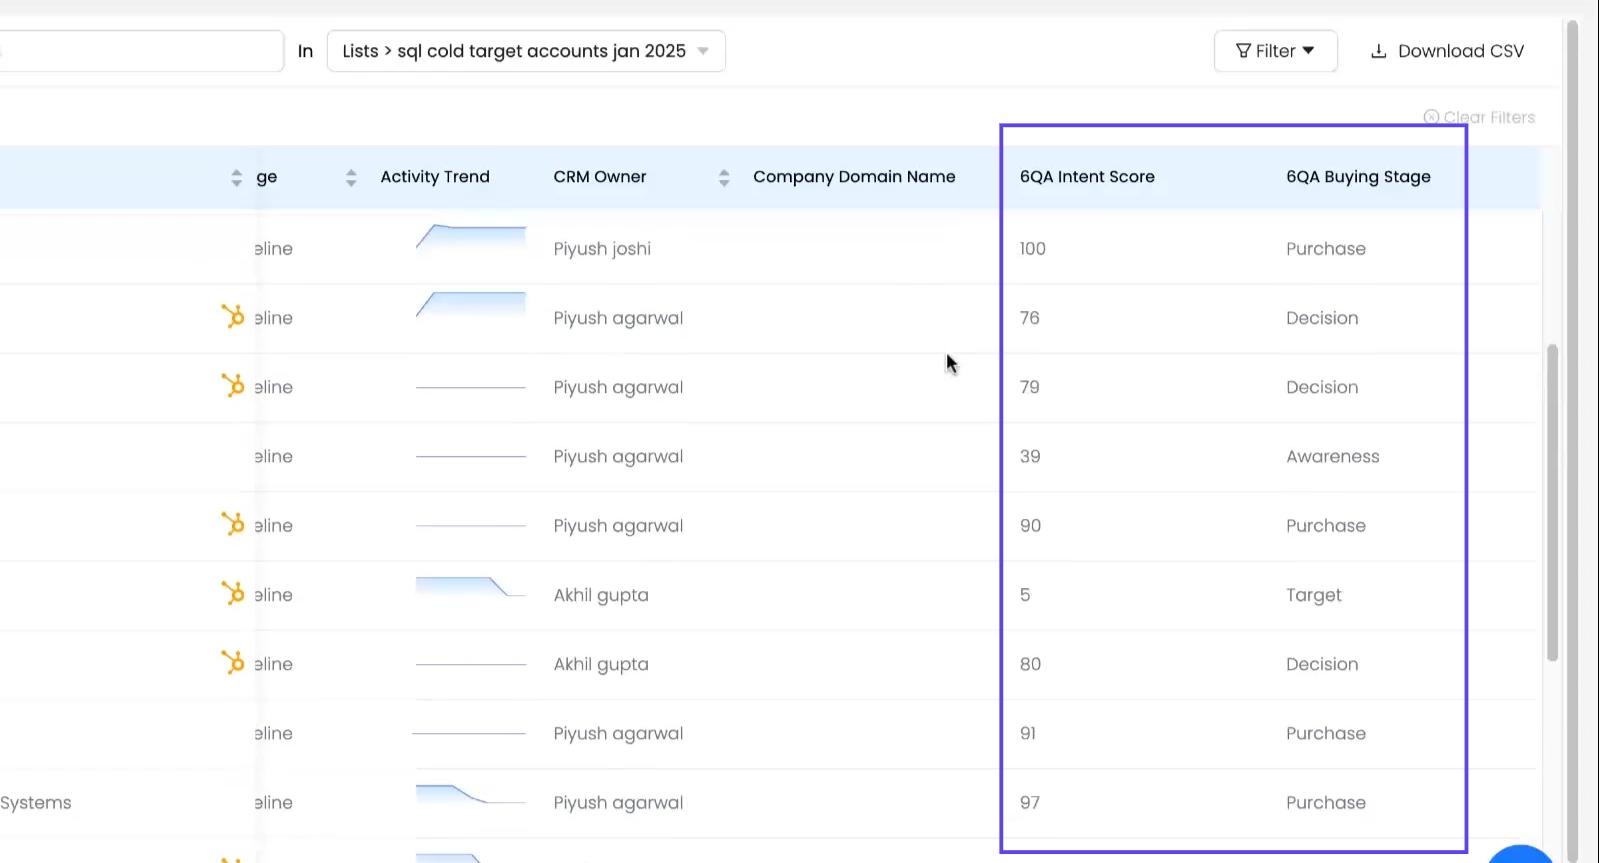
Unmapped accounts/developers remain visible in the list but have no initial enrichment.
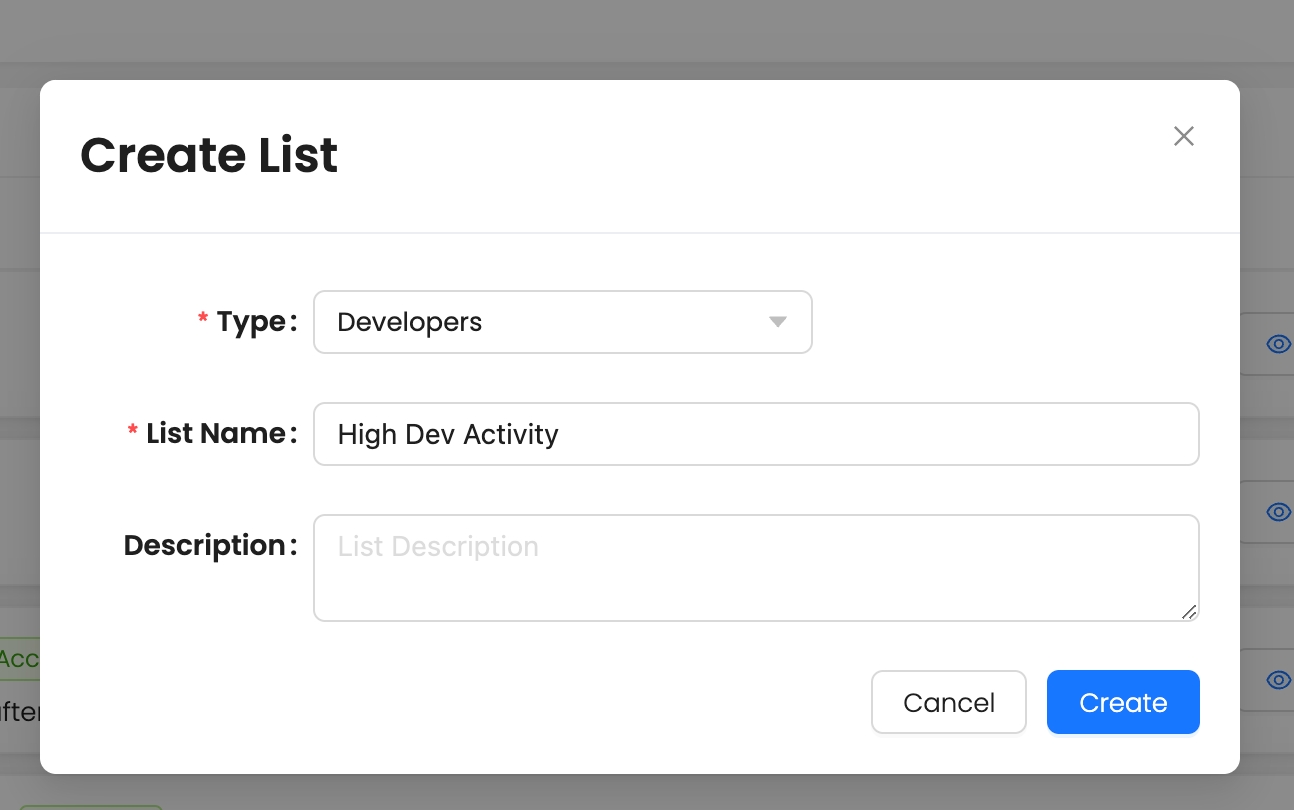
B. Creating a Blank List & Using It for Sliced Data
Steps to Create a Blank List:
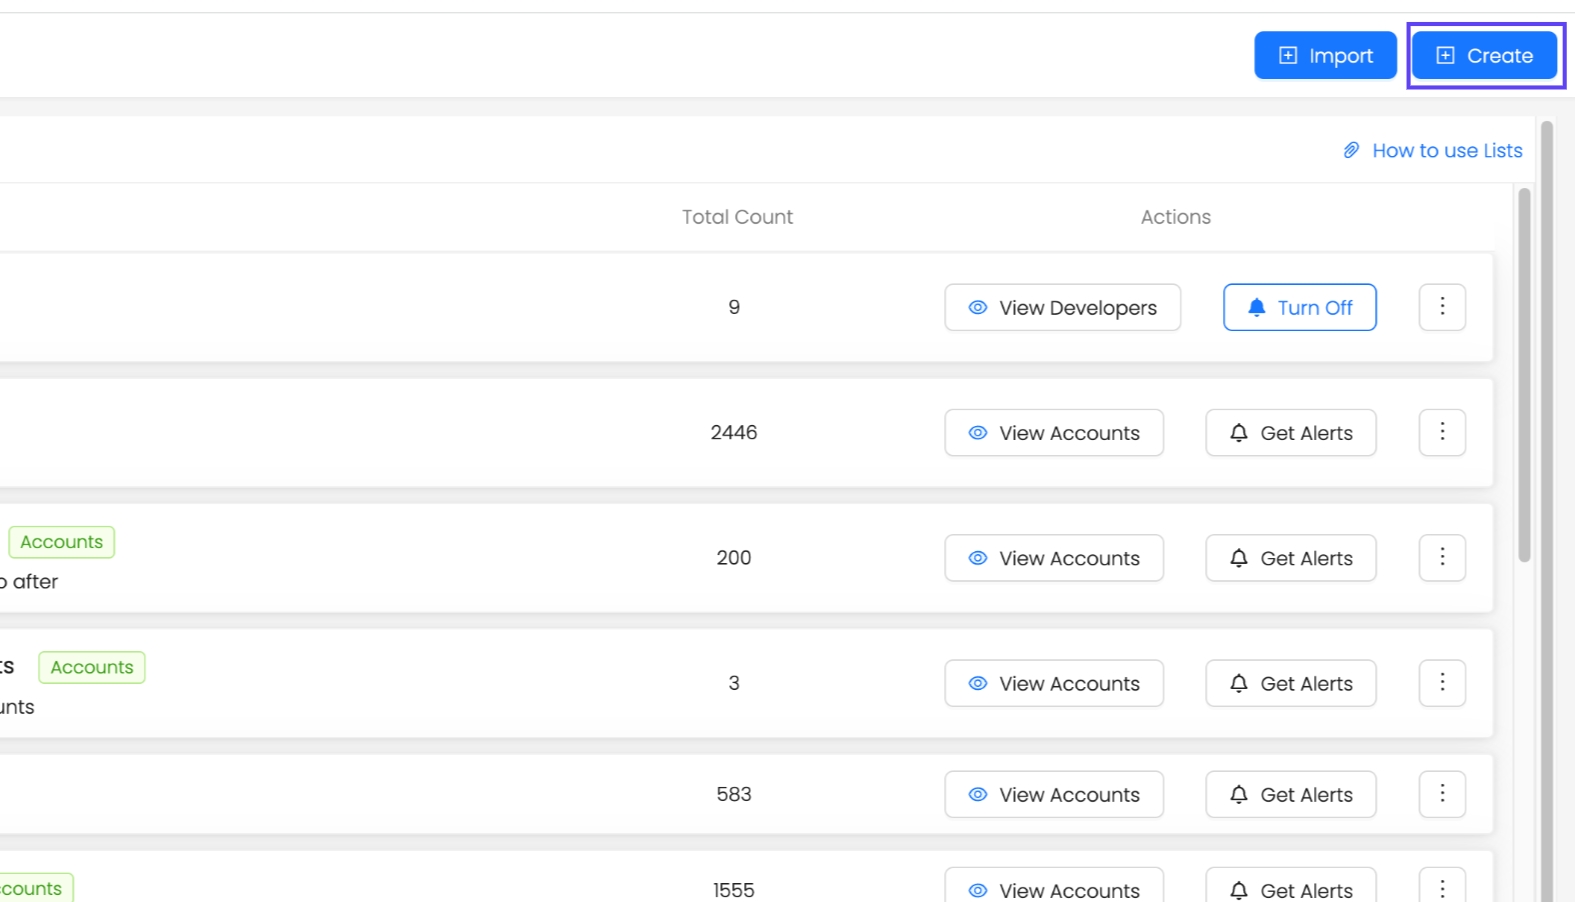
Go to Lists → Click on Create
Choose List Type (Accounts or Developers)
Provide List Name & Description (Optional)
Click Create.
Real-World Use Case:
A Sales Manager uploads a list of 100 accounts. After enrichment with Reo.Dev data, they filter high-intent accounts.
They create two blank lists:
Hot Accounts Jan - John
Hot Accounts Jan - Sarah
They manually add 50 high-priority accounts to John’s list and 50 to Sarah’s.
They share the lists with notes explaining the selection strategy & assigning those accounts to the rep.
Why use blank lists?
Helps divide & assign leads across SDRs.
Allows manual curation for targeted follow-ups.
Provides team flexibility in handling prospects.
3. Adding Accounts/Developers to a List from UI
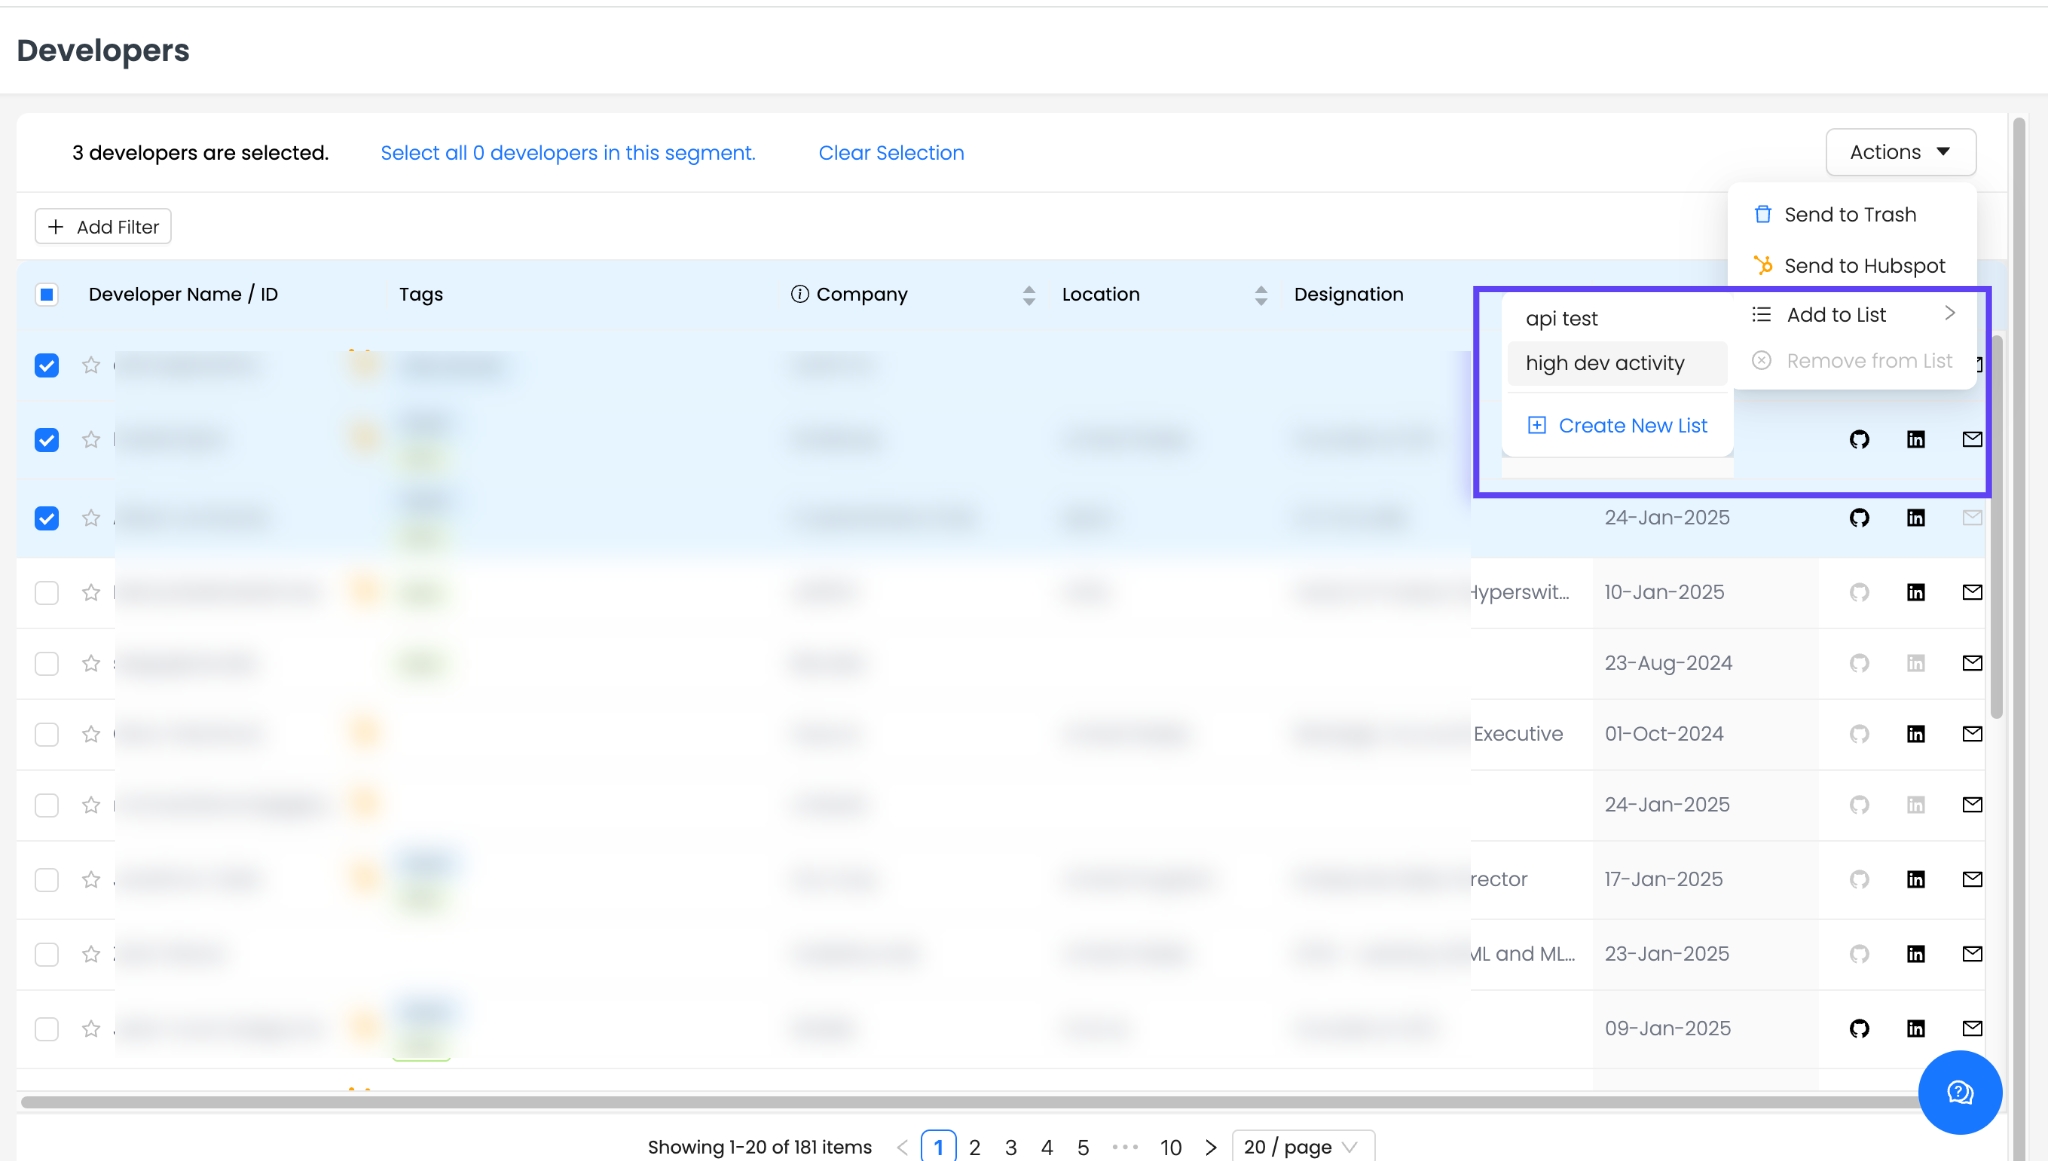
You can now add accounts/developers from the Reo.Dev UI into a list.
Steps to Add Members to a List:
Go to Accounts or Developers Panel
Select profiles to add
Click Actions → Add to List
Select the appropriate list

4. Sharing Lists with Team Members

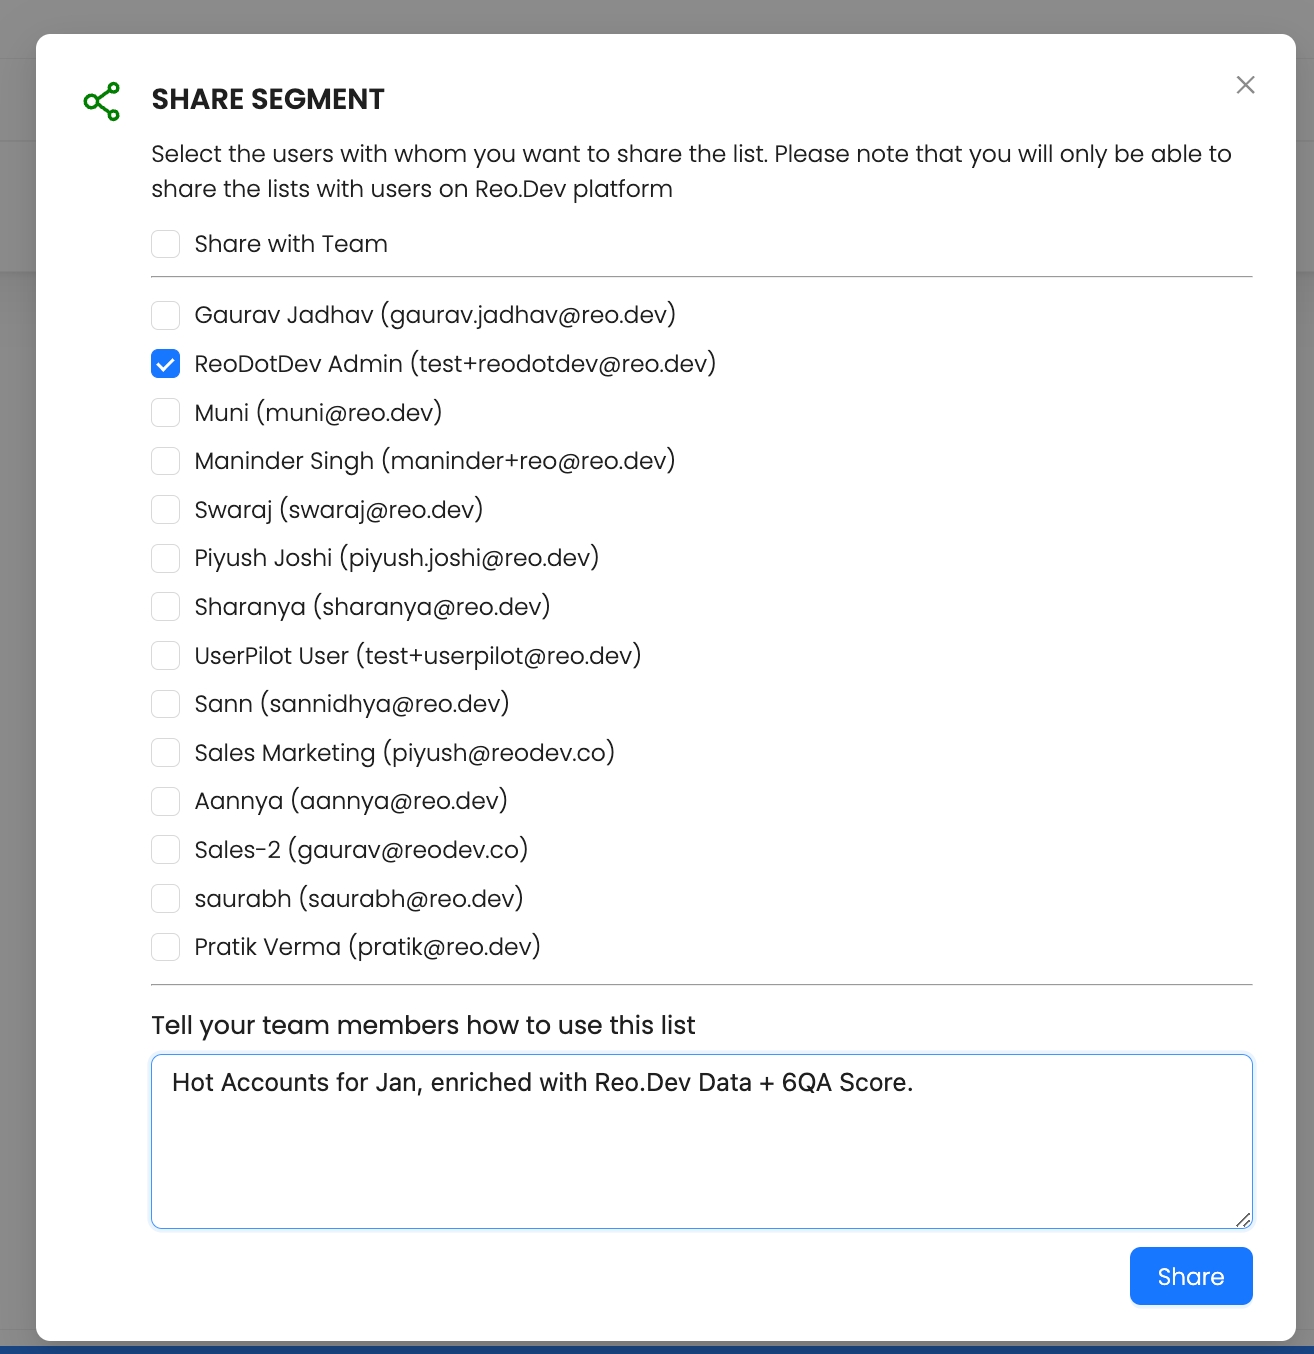
Navigate to Lists → Click on three dots Icon → Share List
Select Users to share with
Add a Note (e.g., "High Intent Accounts for targeted SDR outreach")
Click Share.

5. Creating Segments Using Custom Lists & Columns
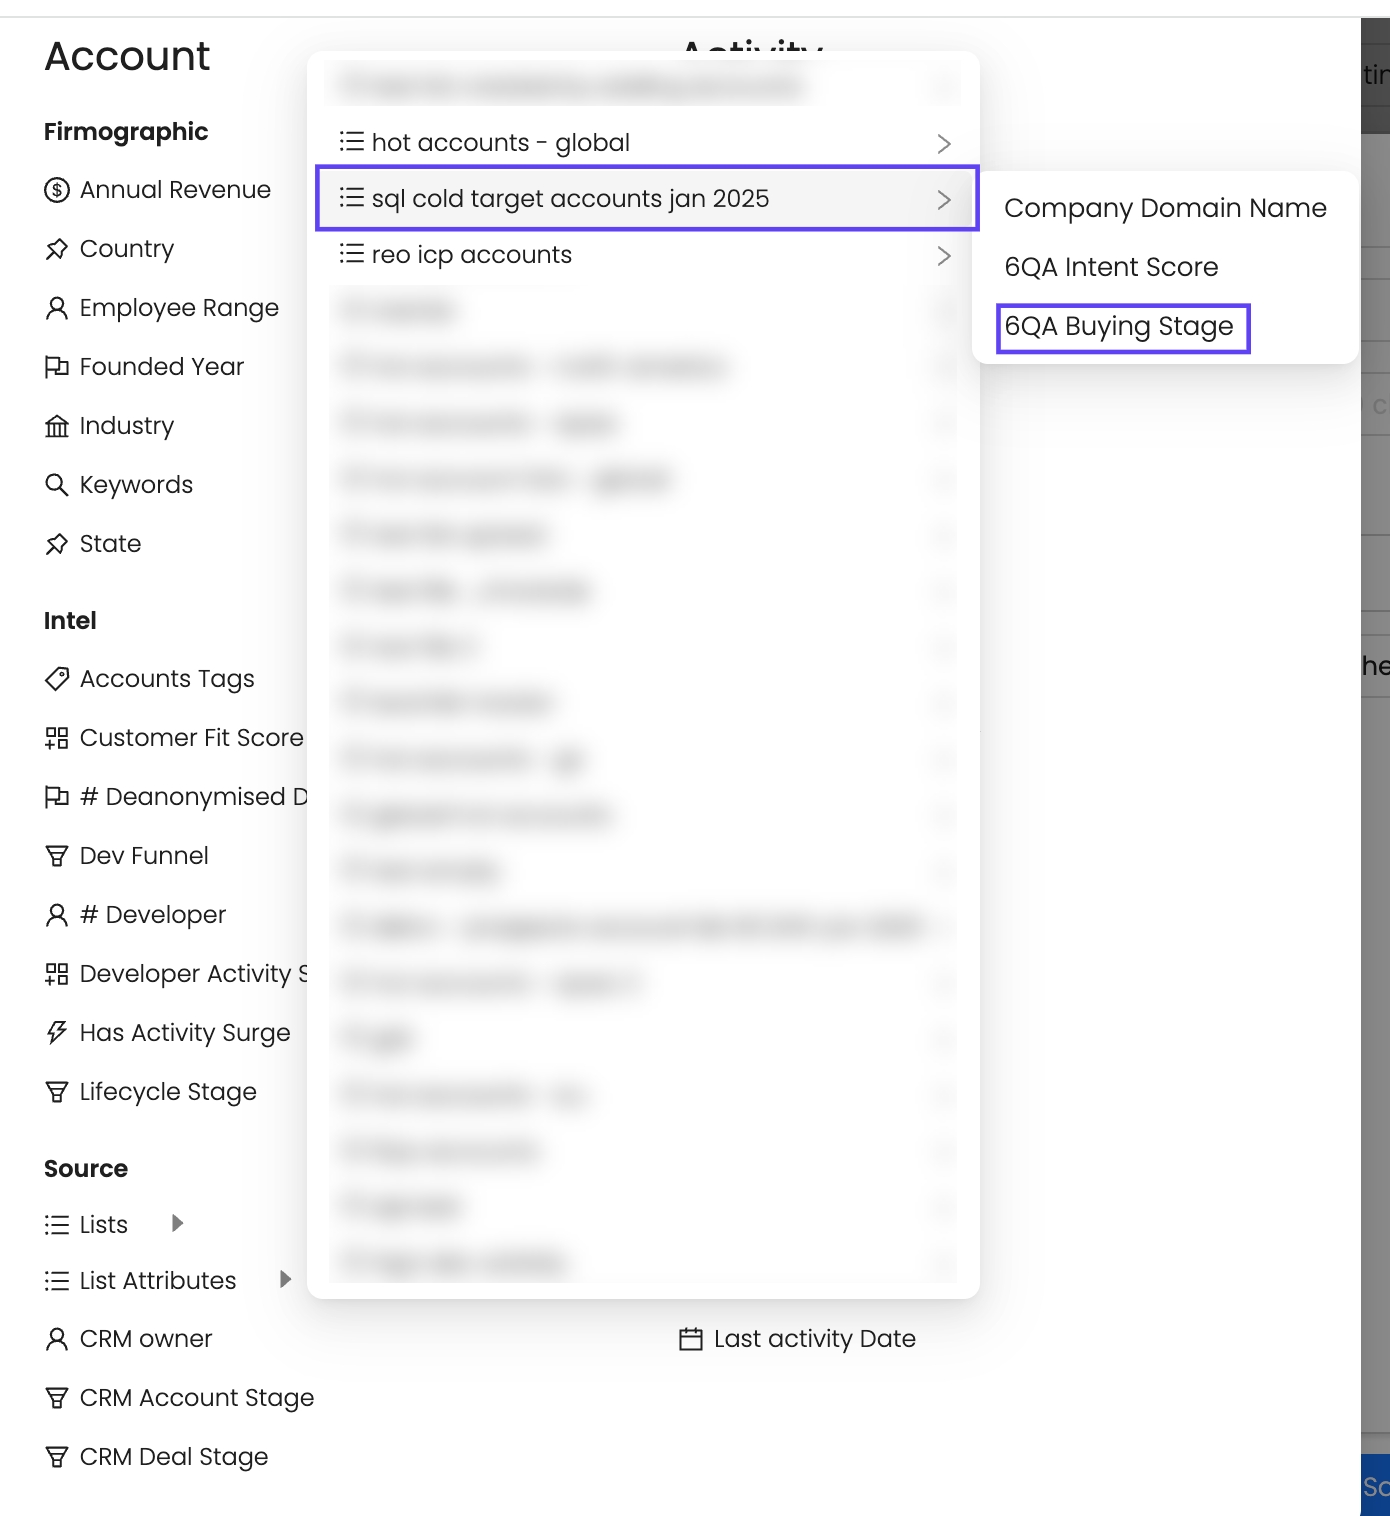
A. Using List Filters in Segments
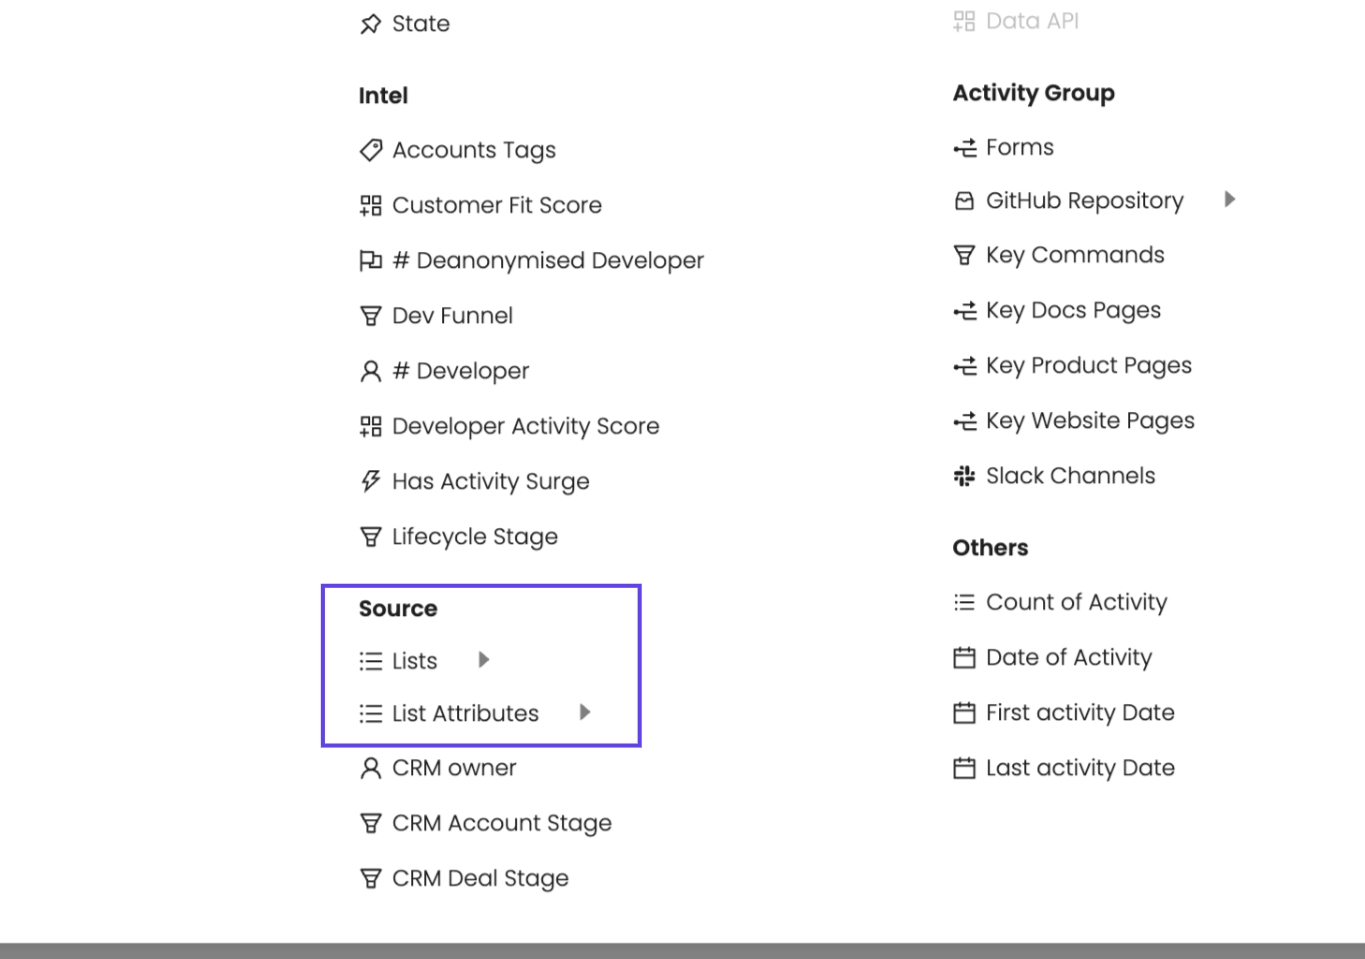
Go to Create Segment
Under Source Filters, select "List Attributes"
Choose the custom list (e.g., SQL Cold Target Accounts - Jan 2025)
Select a custom column (e.g., 6QA Buying Stage)
B. Filtering Based on Custom Column Values
Unlike predefined Reo.Dev filters, users must manually enter values.
Example: If filtering by 6QA Buying Stage, users must type values like Consideration, Purchase, Decision.
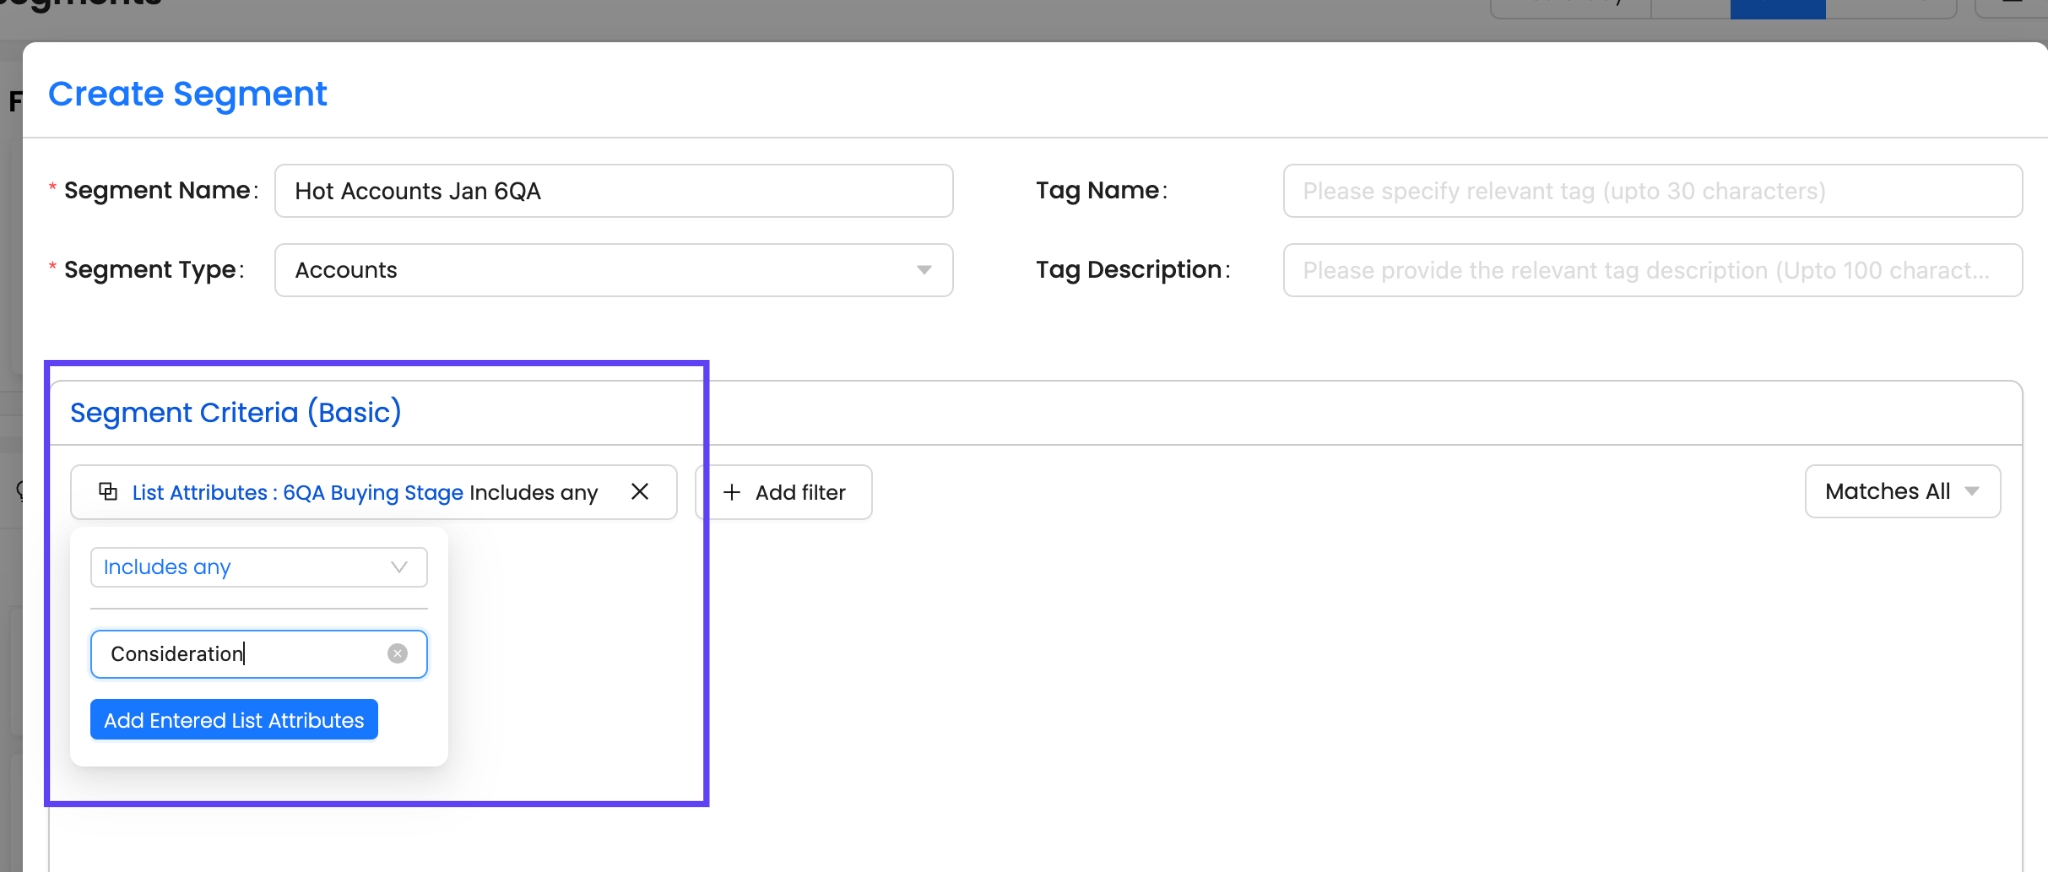
Why manual input?
Imported list data is user-generated and unpredictable.
The UI doesn’t provide predefined dropdowns for custom column values.
C. Combining Custom Columns with Reo.Dev Filters
Users can combine custom list attributes with Reo.Dev segmentation filters.
Example: Prioritizing High-Intent Accounts
Filter: List Attribute → 6QA Buying Stage = Decision
Filter: Developer Activity Score = High & Medium
Apply Segmentation → View high-priority accounts in the Accounts panel
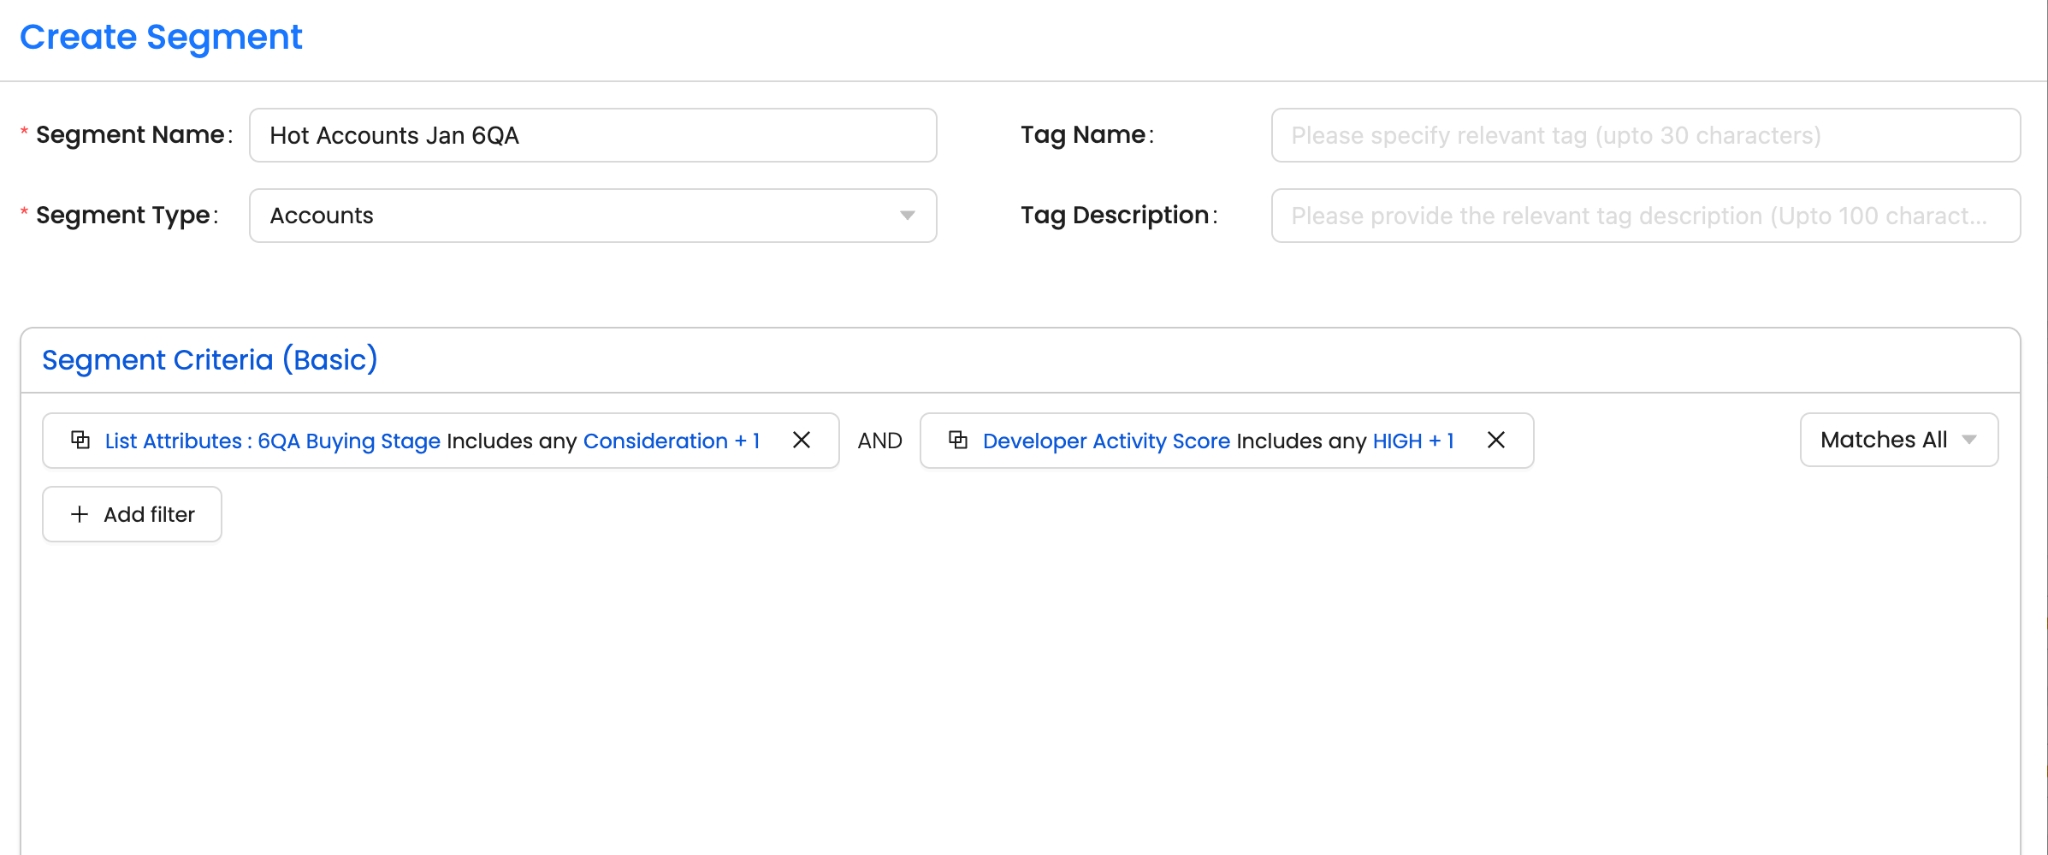
Why is this useful?
Enables granular targeting by merging custom columns with Reo.Dev insights.
Helps prioritize accounts with strong intent & developer engagement.
6. Edit & Delete Lists
Editing a List
You can update an existing list by uploading a new CSV. This replaces all previous data in the list.
Steps to edit a list:
Navigate to Lists from the sidebar.
Find the list you want to update.
Click the ⋮ (More options) button.
Select Edit List from the dropdown.
Upload the new CSV file.
The existing list will be overwritten with the new data.

Deleting a List
If you no longer need a list, you can delete it permanently.
Steps to delete a list:
Navigate to Lists from the sidebar.
Find the list you want to remove.
Click the ⋮ (More options) button.
Select Delete List from the dropdown.
Confirm the deletion when prompted.

Warning: Deleting a list is permanent and cannot be undone.
7. Additional Resources & Playbooks
Developer ABM Playbook Collection → Check it out here
Upcoming Update: New playbooks featuring Lists 2.0 are coming soon.
Summary:
Import Custom Columns for advanced segmentation
Seamless CSV Imports with Reo.Dev enrichment
List-based segmentation for prioritization
Advanced Team Collaboration with list sharing
Start leveraging custom lists today to refine your Developer ABM strategy!
Last updated
Was this helpful?

