Install JavaScript for Website/Documentation through Google Tag Manager
You can install the Reo.Dev JavaScript tracking script in your website or documentation using Google Tag Manager (GTM).
Before adding the script to GTM, you must configure your Base URL in the Reo.Dev UI.
Configure the Base URL in Reo.Dev UI (Required for Tracking to Work)
To ensure tracking applies to the correct documentation pages, you must first configure the Base URL in your Reo.Dev dashboard.
What is the Base URL?
The Base URL is the root domain where your tracked documentation pages exist. For example:
If your documentation is hosted at
https://docs.example.com, setdocs.example.comas your Base URL.If you track multiple subdomains, configure each accordingly in Reo.Dev.
How to Set the Base URL?
Log in to your Reo.Dev dashboard.
Navigate to Tracking Setup → Website Tracking.
Enter your Base URL in the Website URL field (e.g.,
docs.example.com).Choose between:
Enrich Entire Website → Tracks all pages under this domain.
Enrich Specific Pages → Tracks only selected pages.
For Website Tracking via GTM
Go to the Website tab.
In the Website URL field, enter the Base URL of your website (e.g.,
example.com).

For Documentation Tracking via GTM
Go to the Documentation tab.
In the Documentation URL field, enter the Base URL of your documentation site (e.g.,
docs.example.com).Click + Add Documentation URL if you have multiple subdomains for docs (e.g.,
help.example.com,developer.example.com).

Once the Base URL is set up, you can proceed with adding the tracking script in GTM.
Step 1: Login to you google tag manager https://tagmanager.google.com/
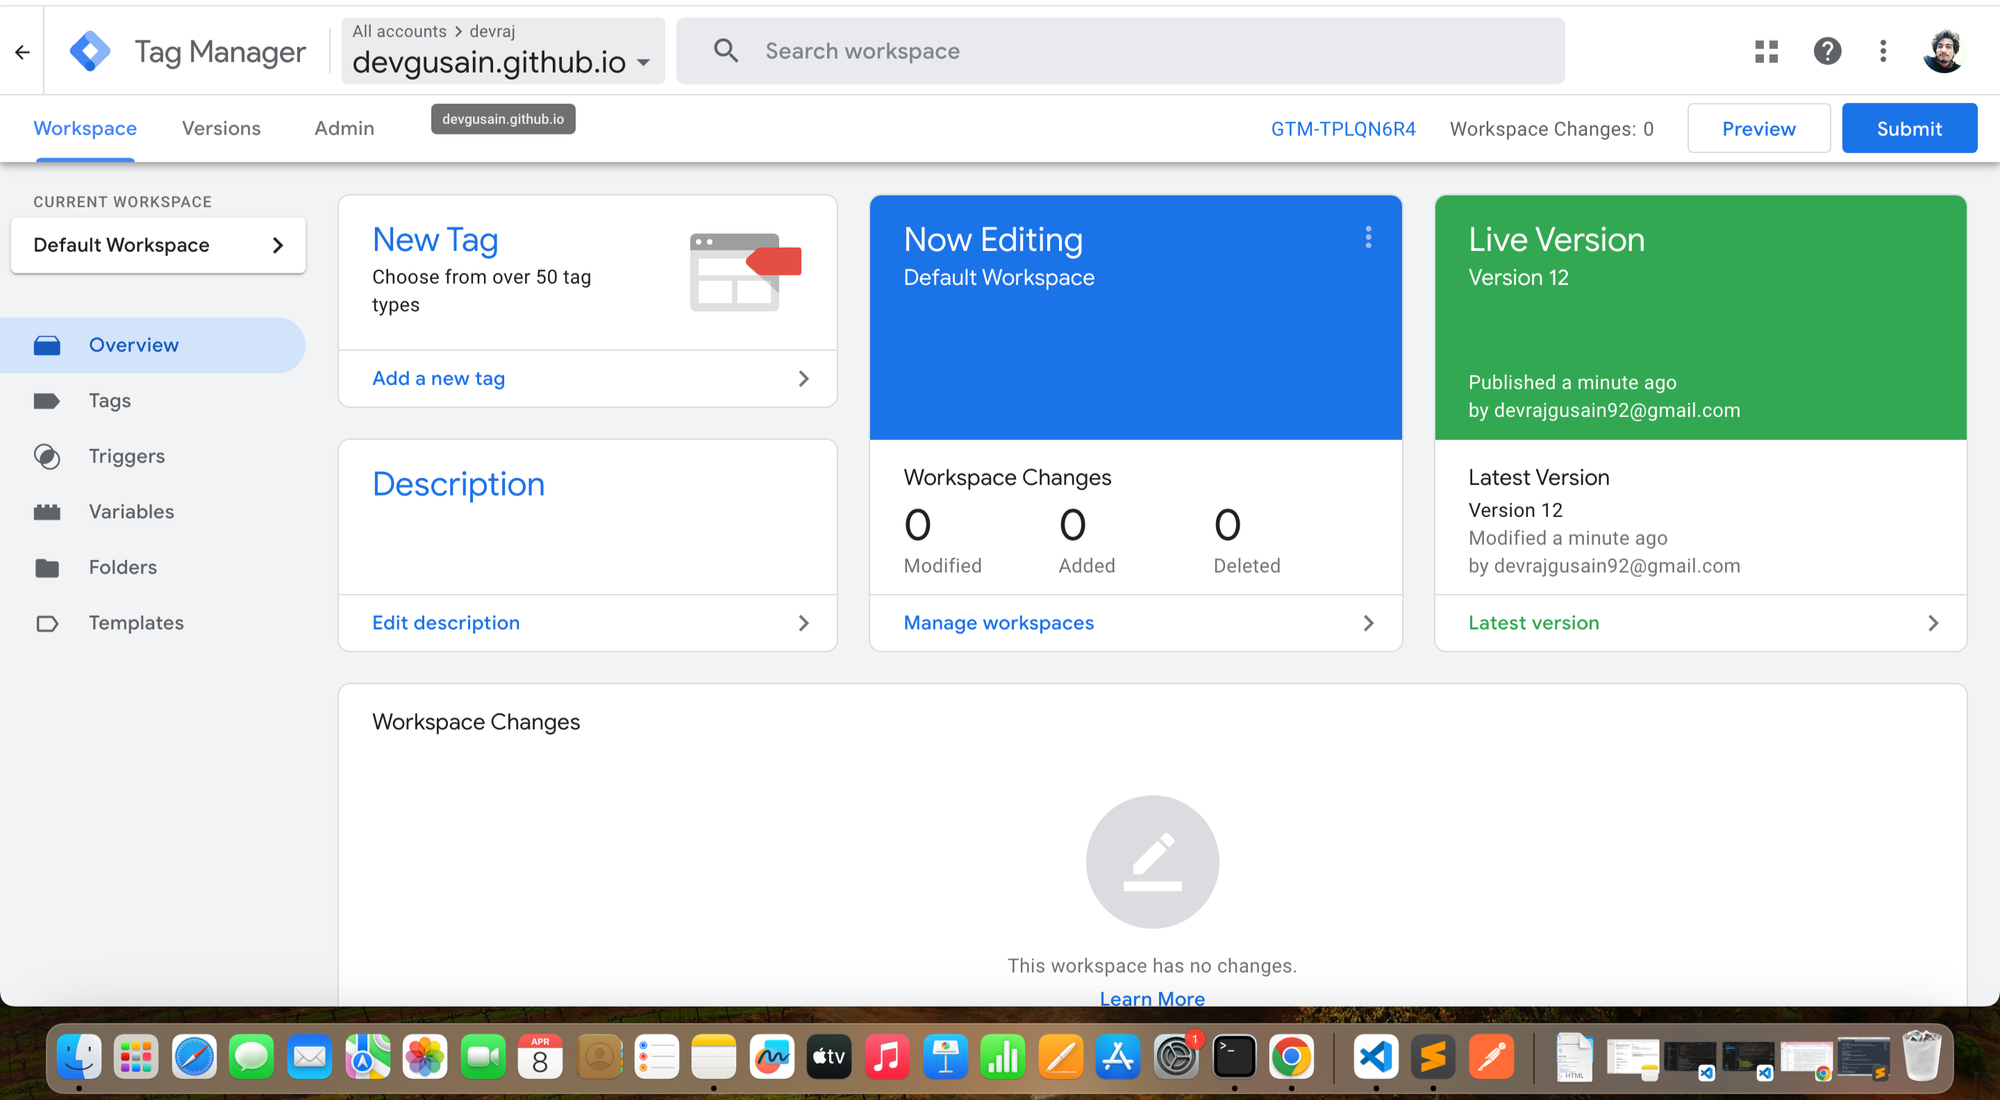
Select Appropriate accounts which is link to the docs.
Step 2: Click on Tags menu and move the the tags page.
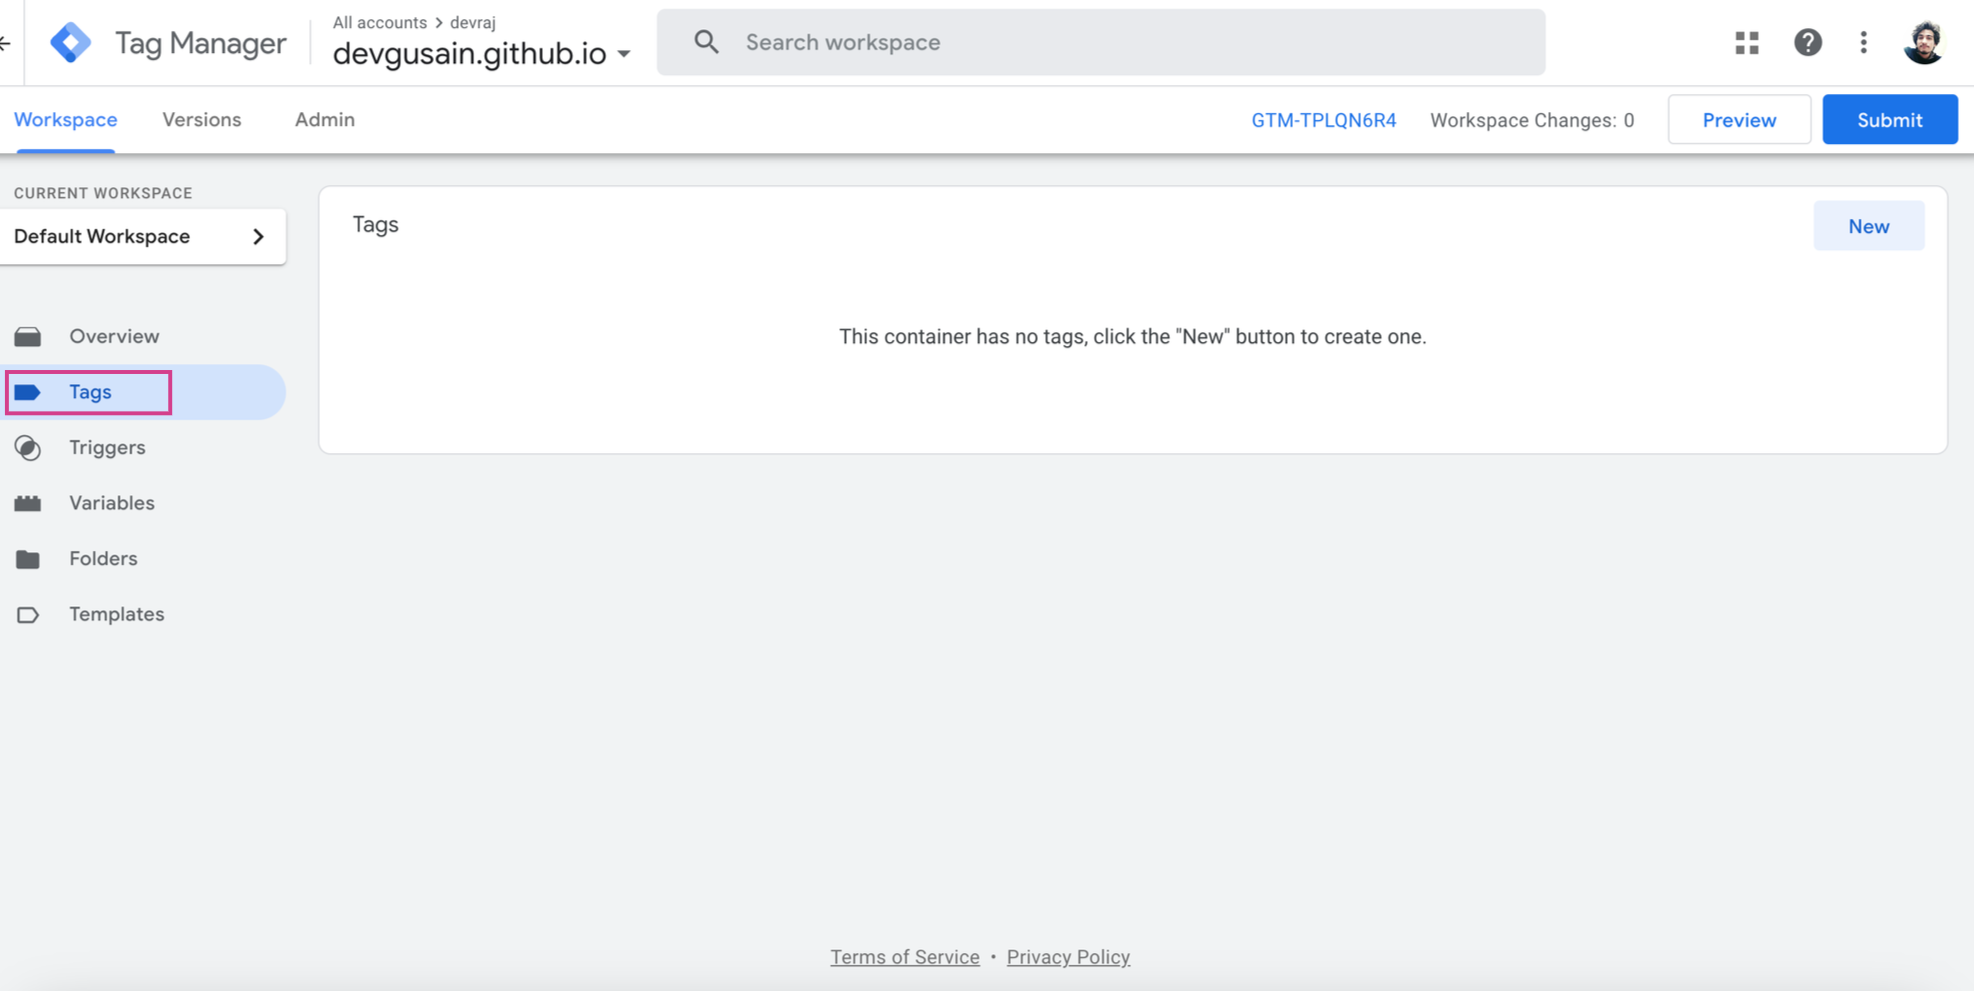
You may have different tags already exist , You can click on “New” for creating a new tag for script.
Step 3: On clicking on New, you will have screen for defining a new tag . You can give a name to this tag.
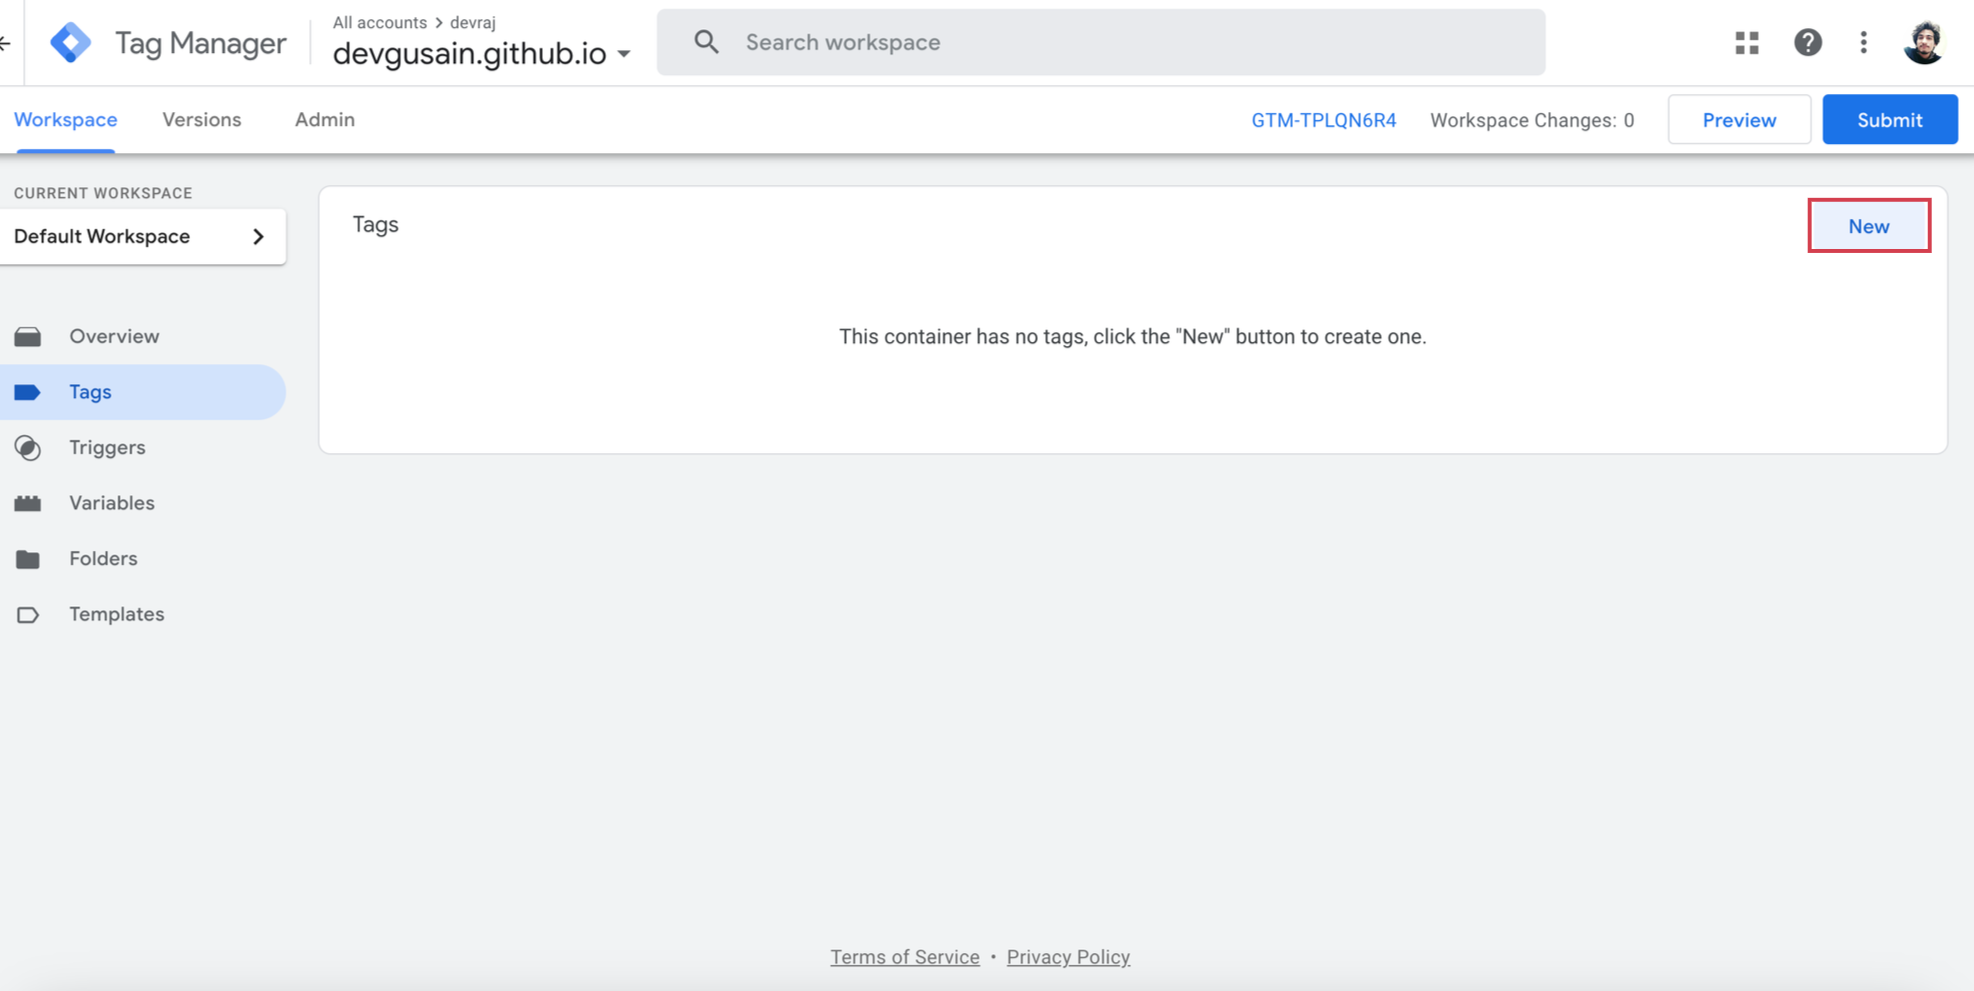
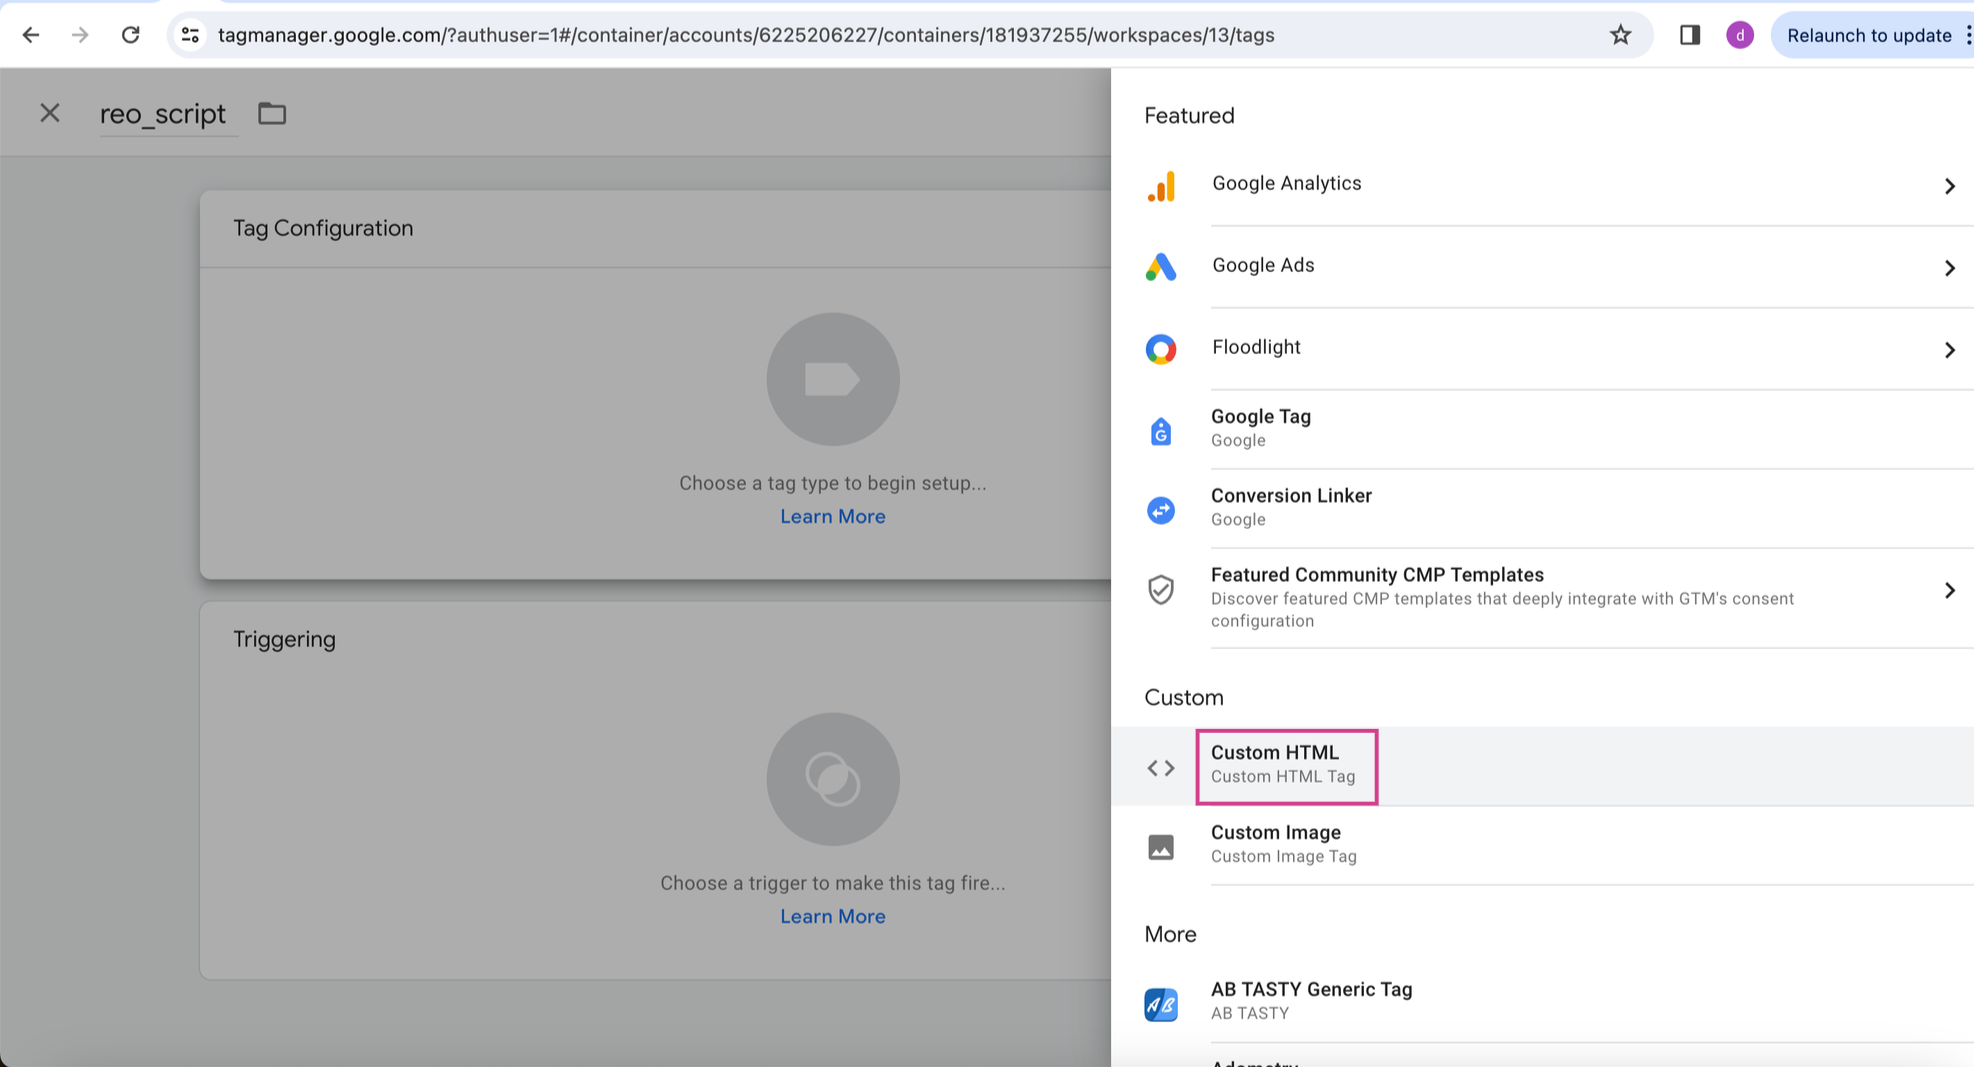
Step 4: Click on “Choose a tag type…”
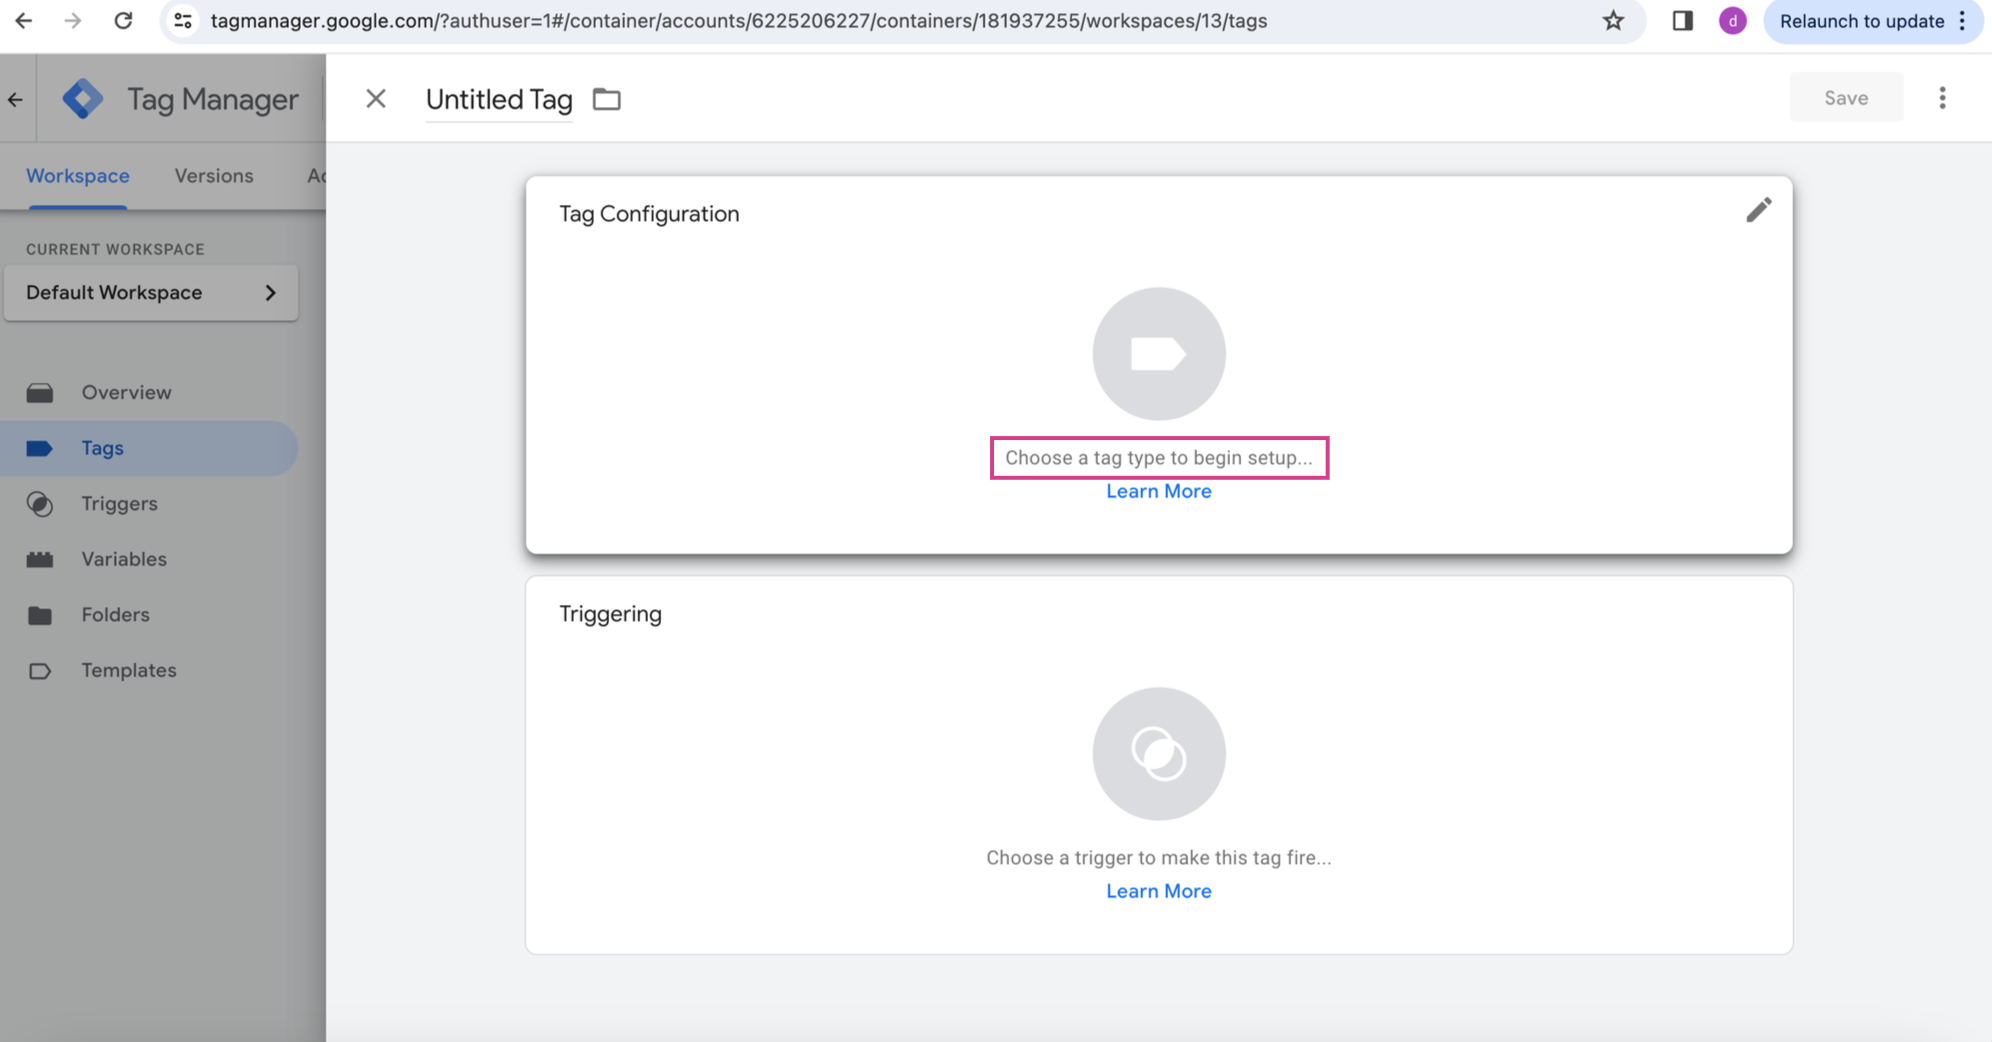
Step 5: Select the tag type as Custom HTML.
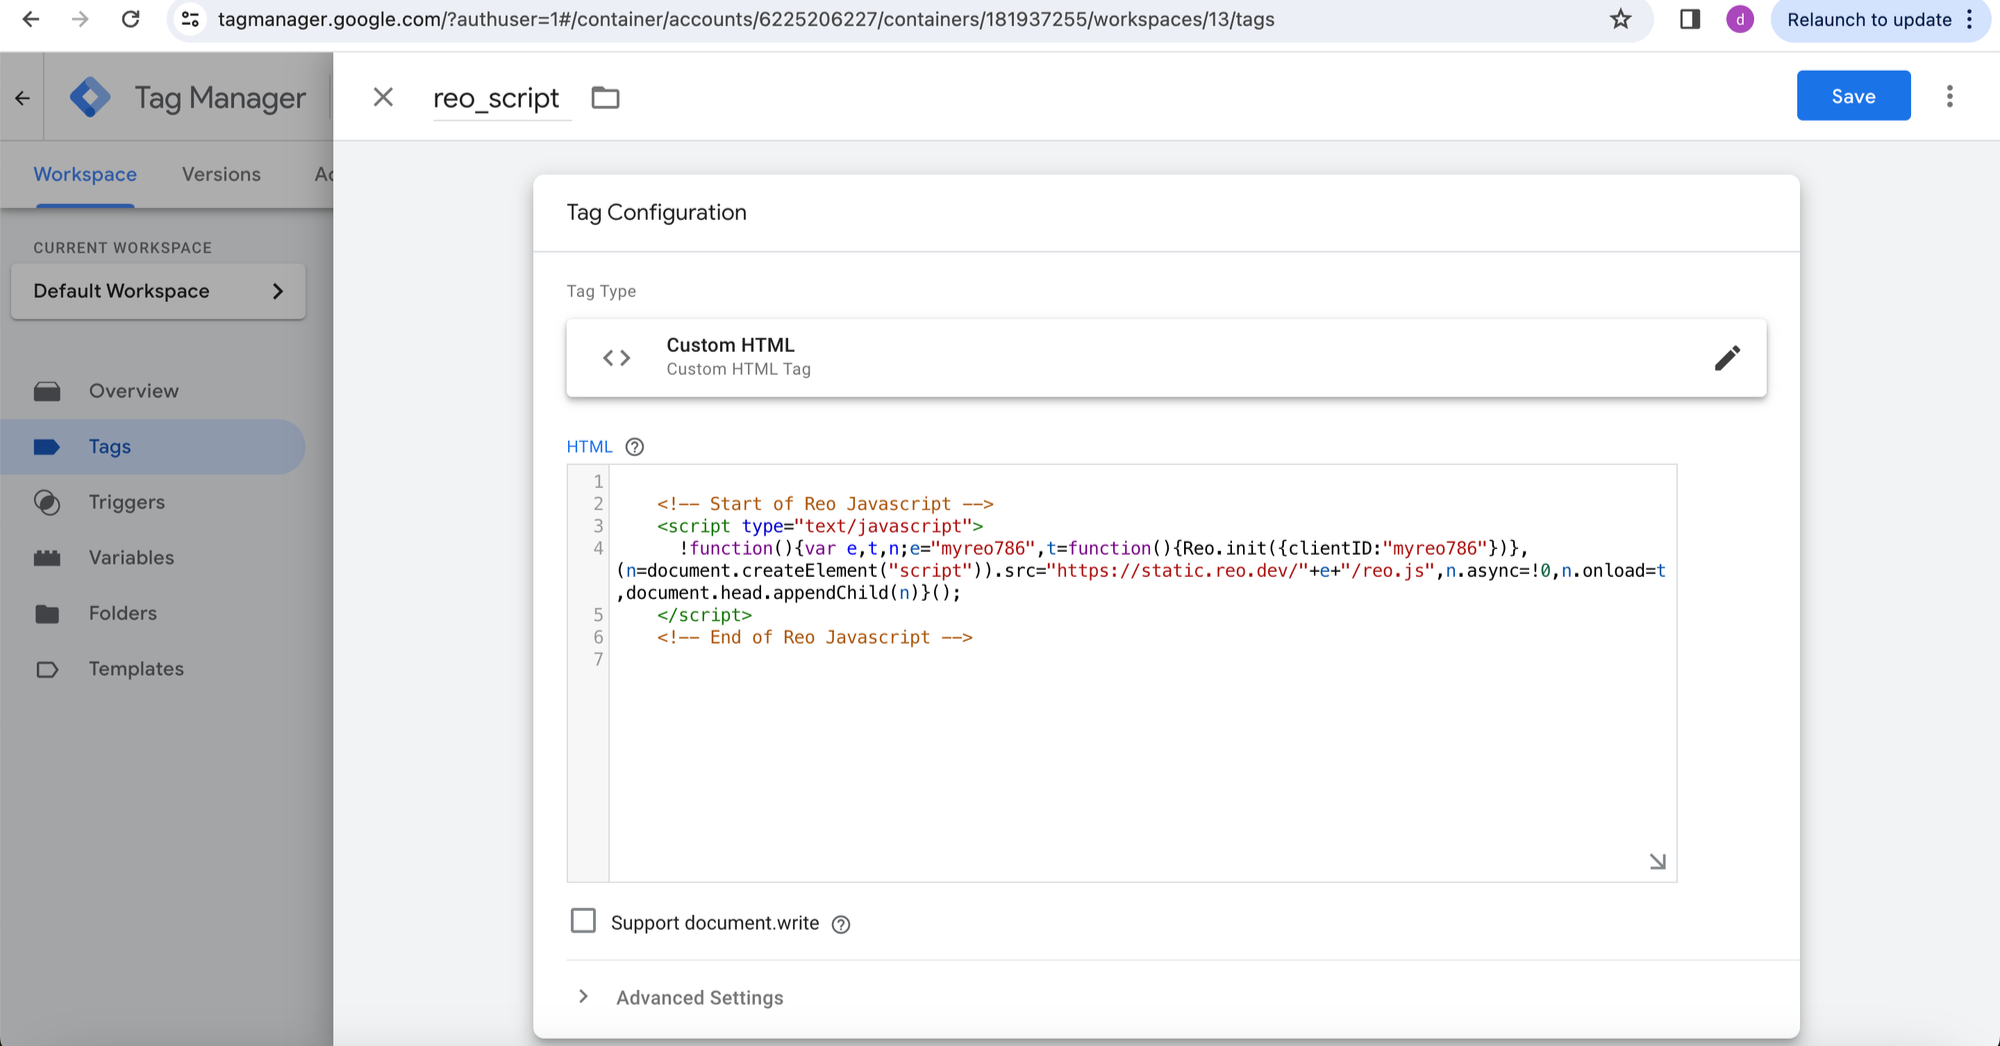
Step 6: In HTML section, paste the code for script : (make sure to update you clientID in place of “myreo786”)
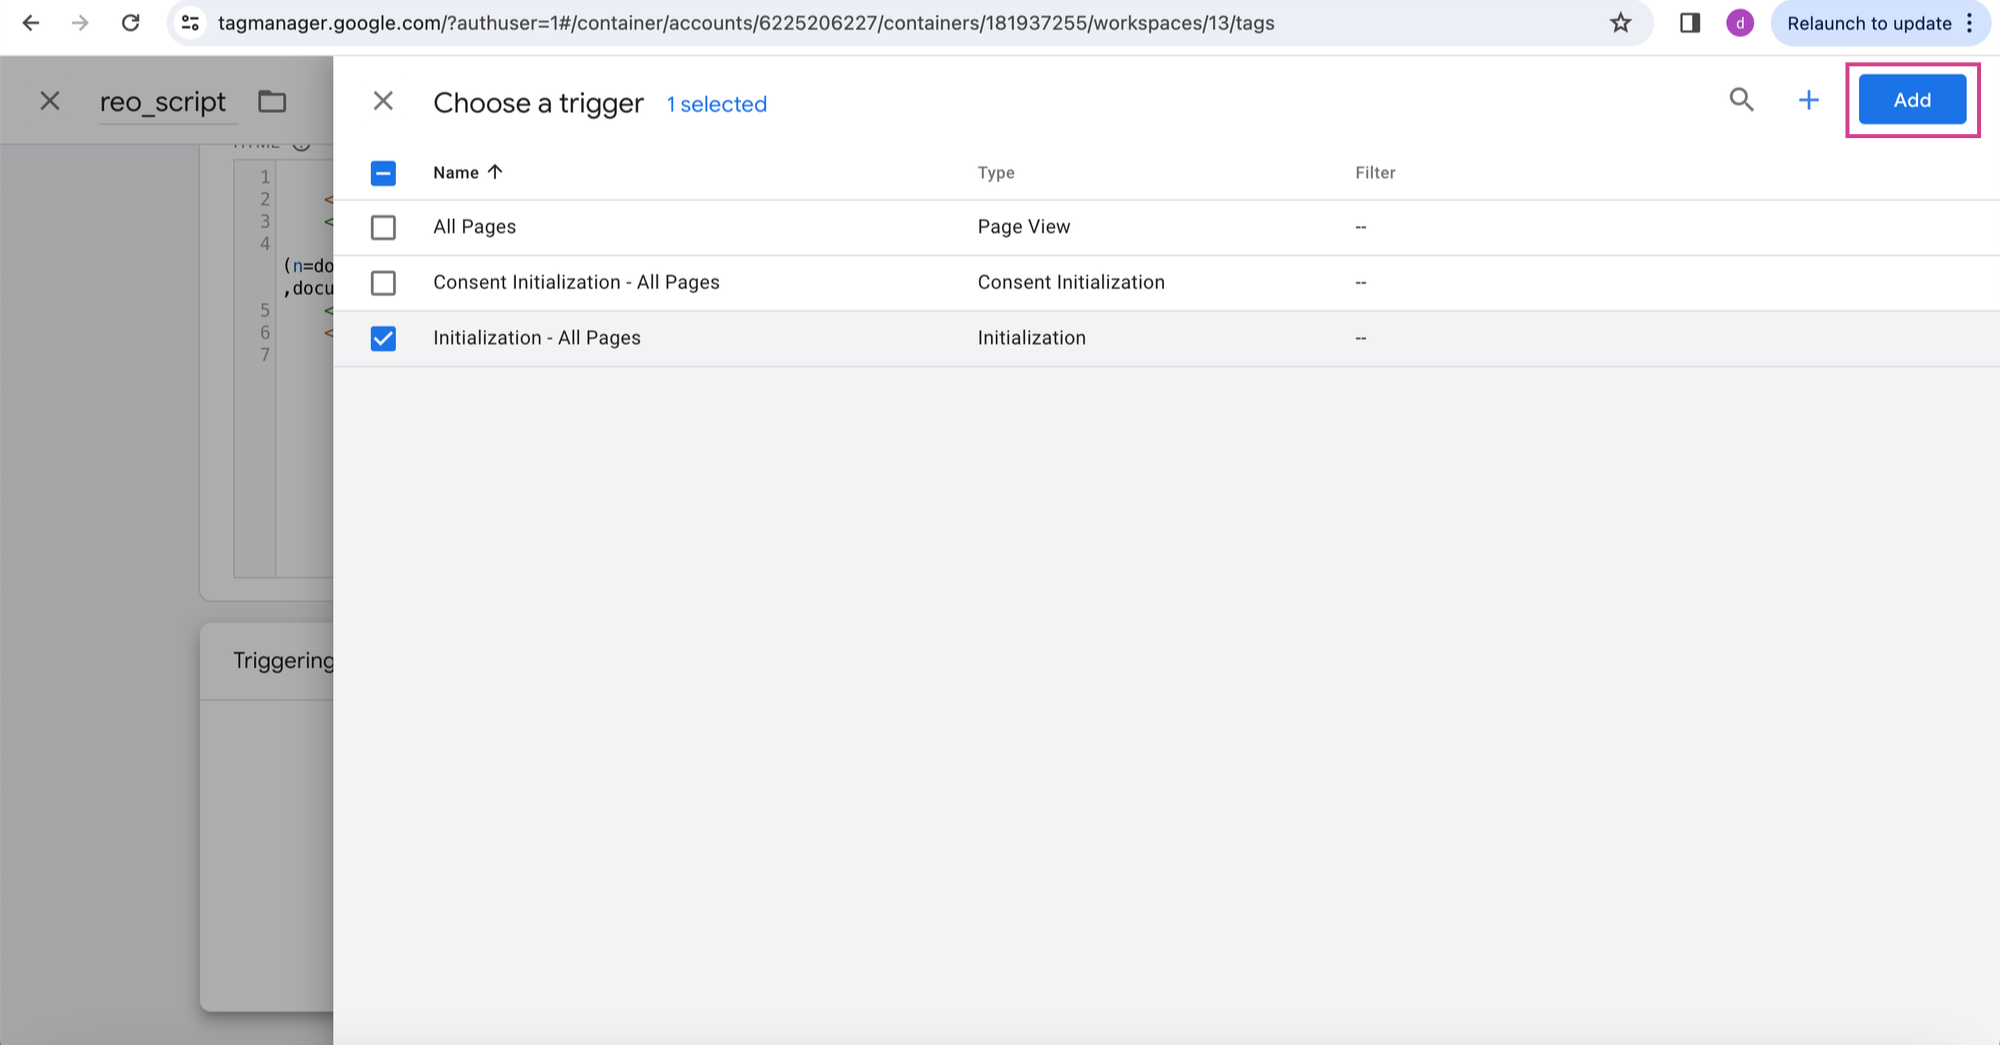
Step 7: After that, choose a trigger for the script to load. After choosing trigger (Initialization -All pages) , click on button.
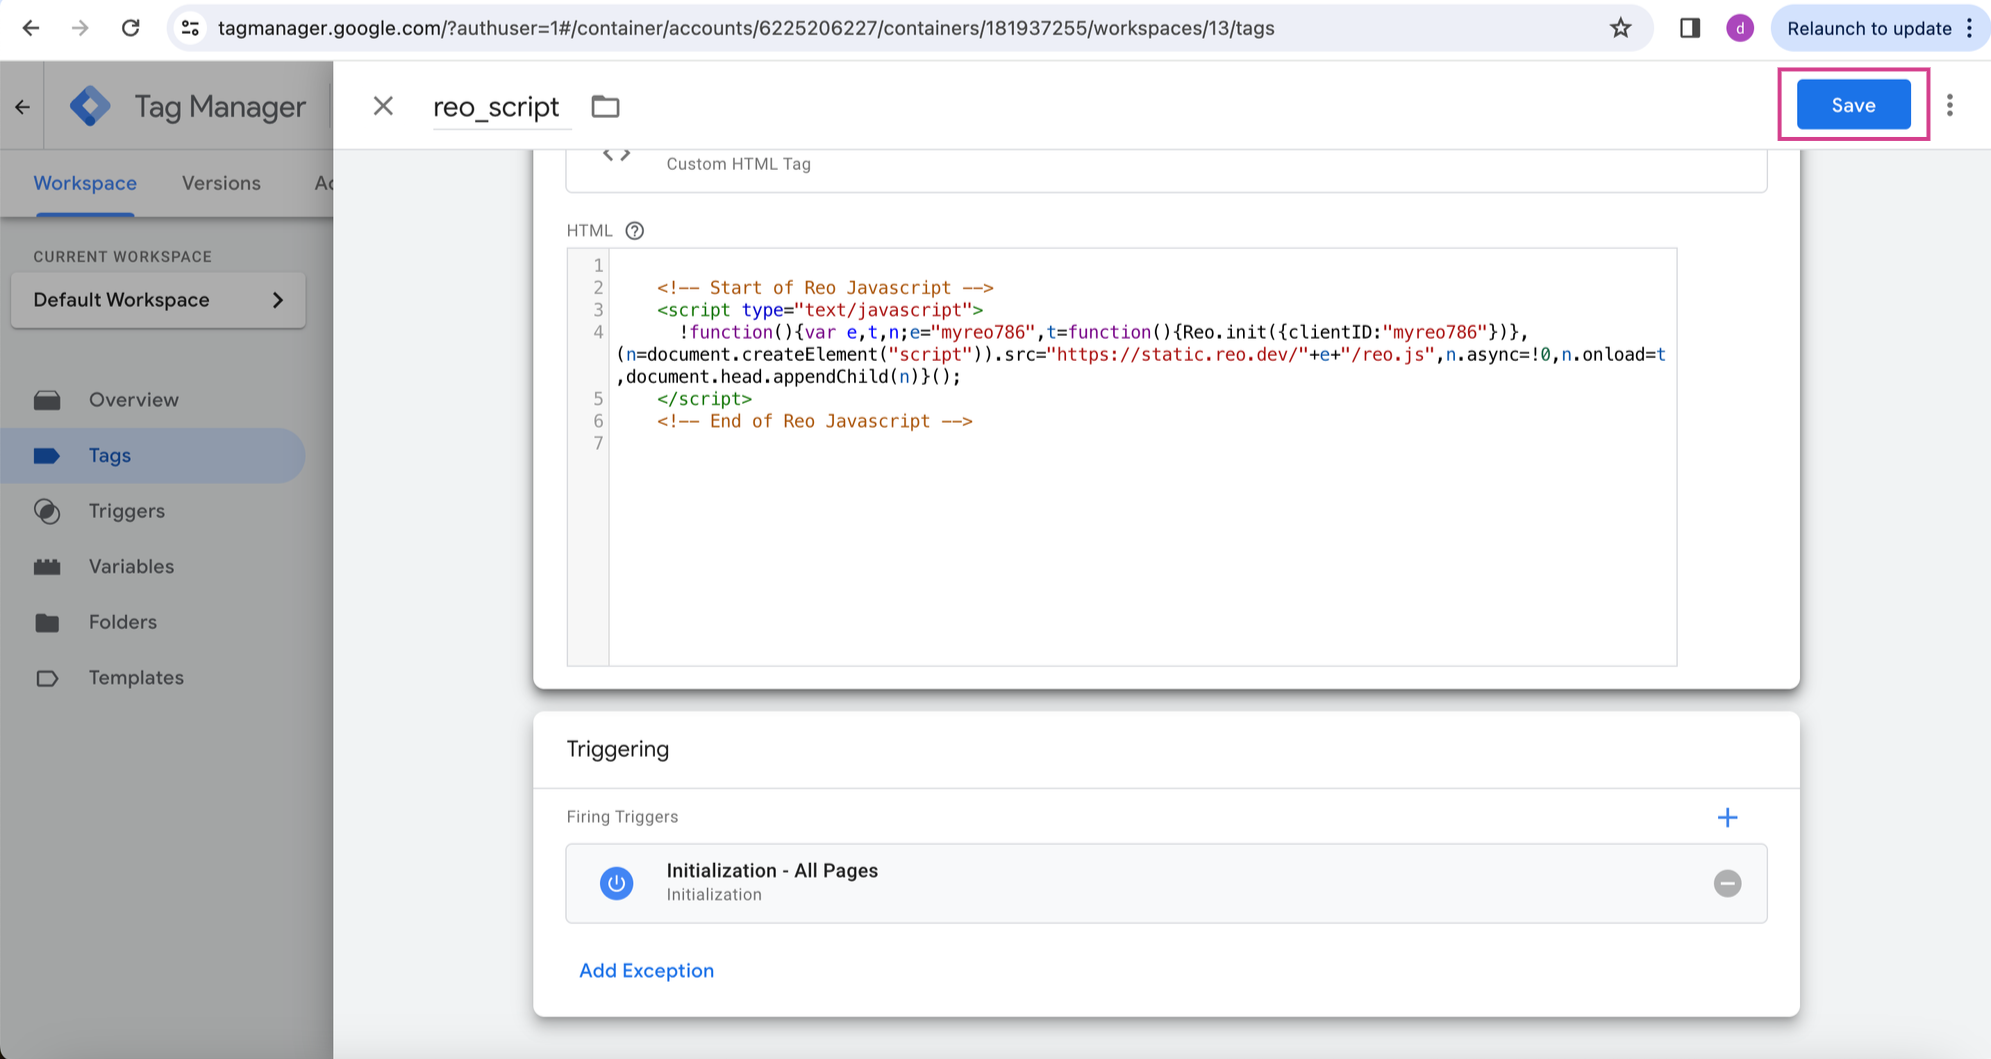
Step 8: After adding trigger, you can save the tag by clicking on Save button.
Step 9: On saving the tag , you will land on tags page. Then click on Submit button to proceed for publishing your changes.
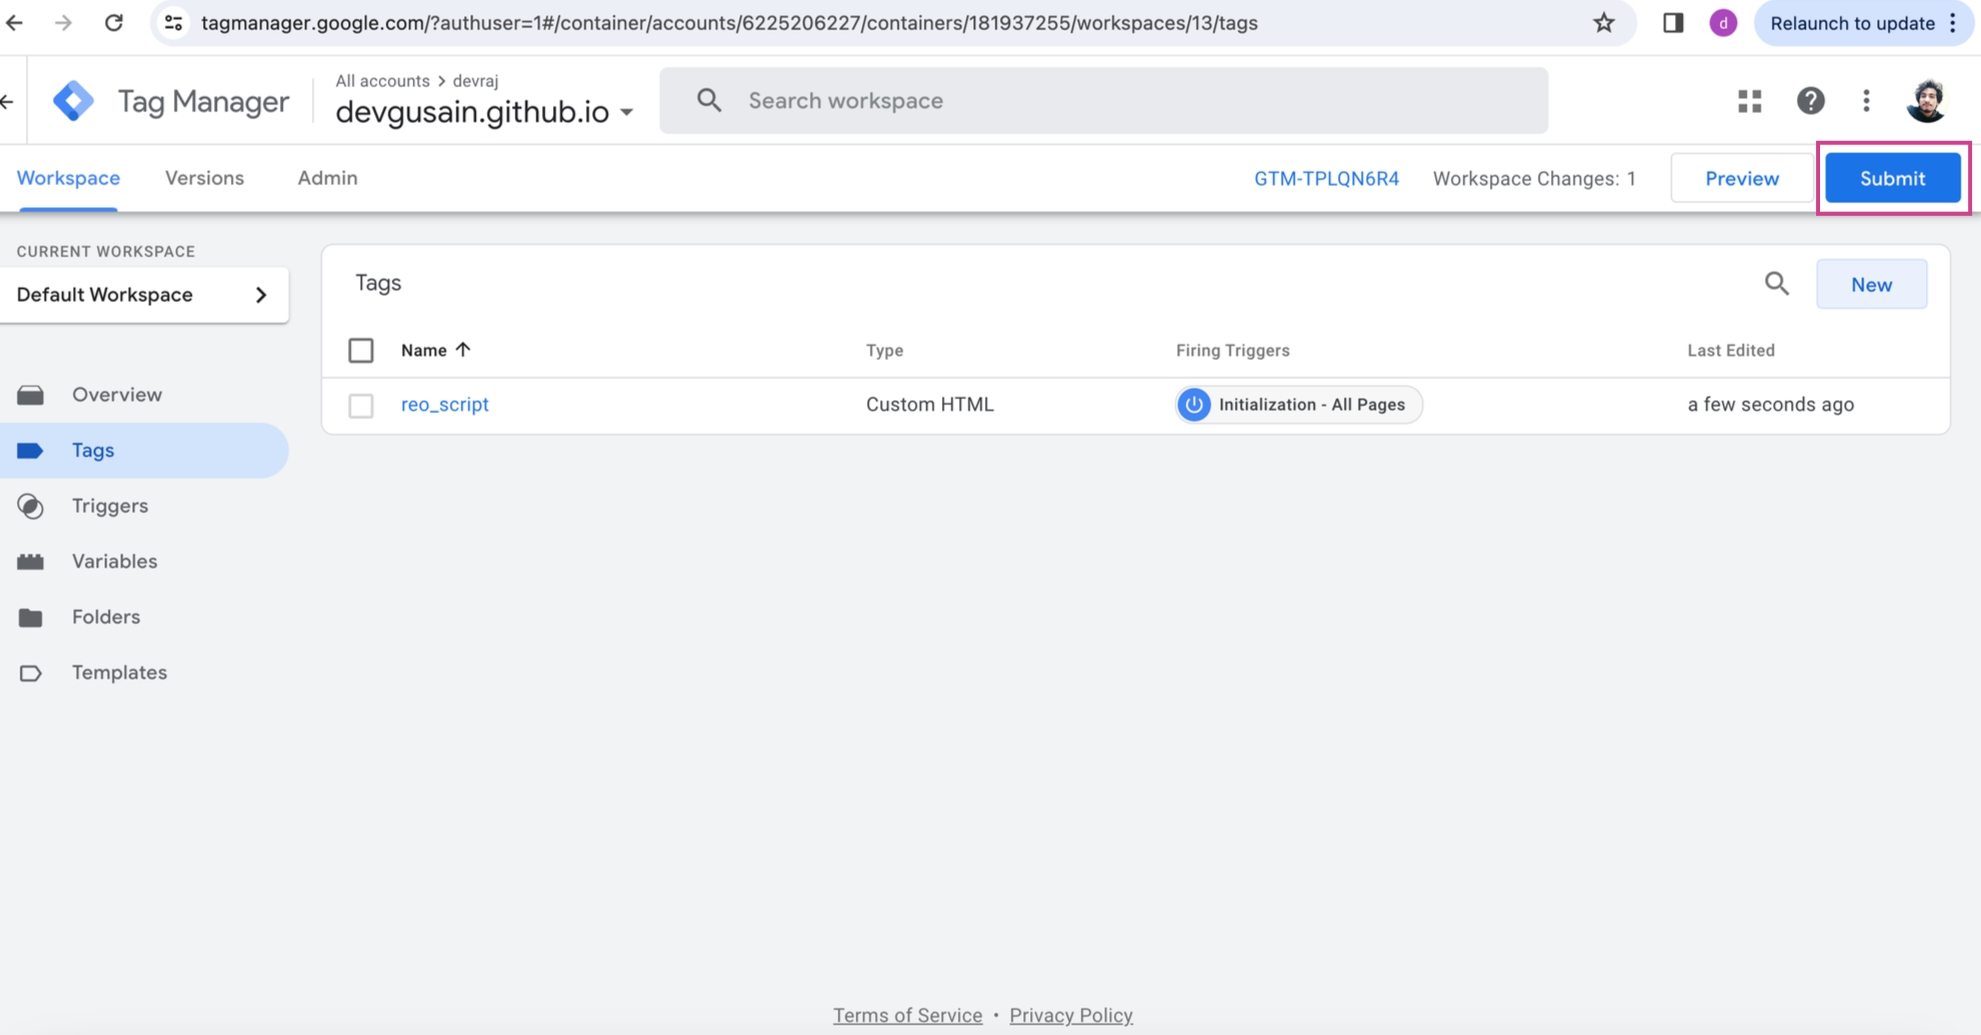
Step 10: Then click on Publish button to proceed for publishing your changes.(you can fill other details as well which appears while publishing changes).
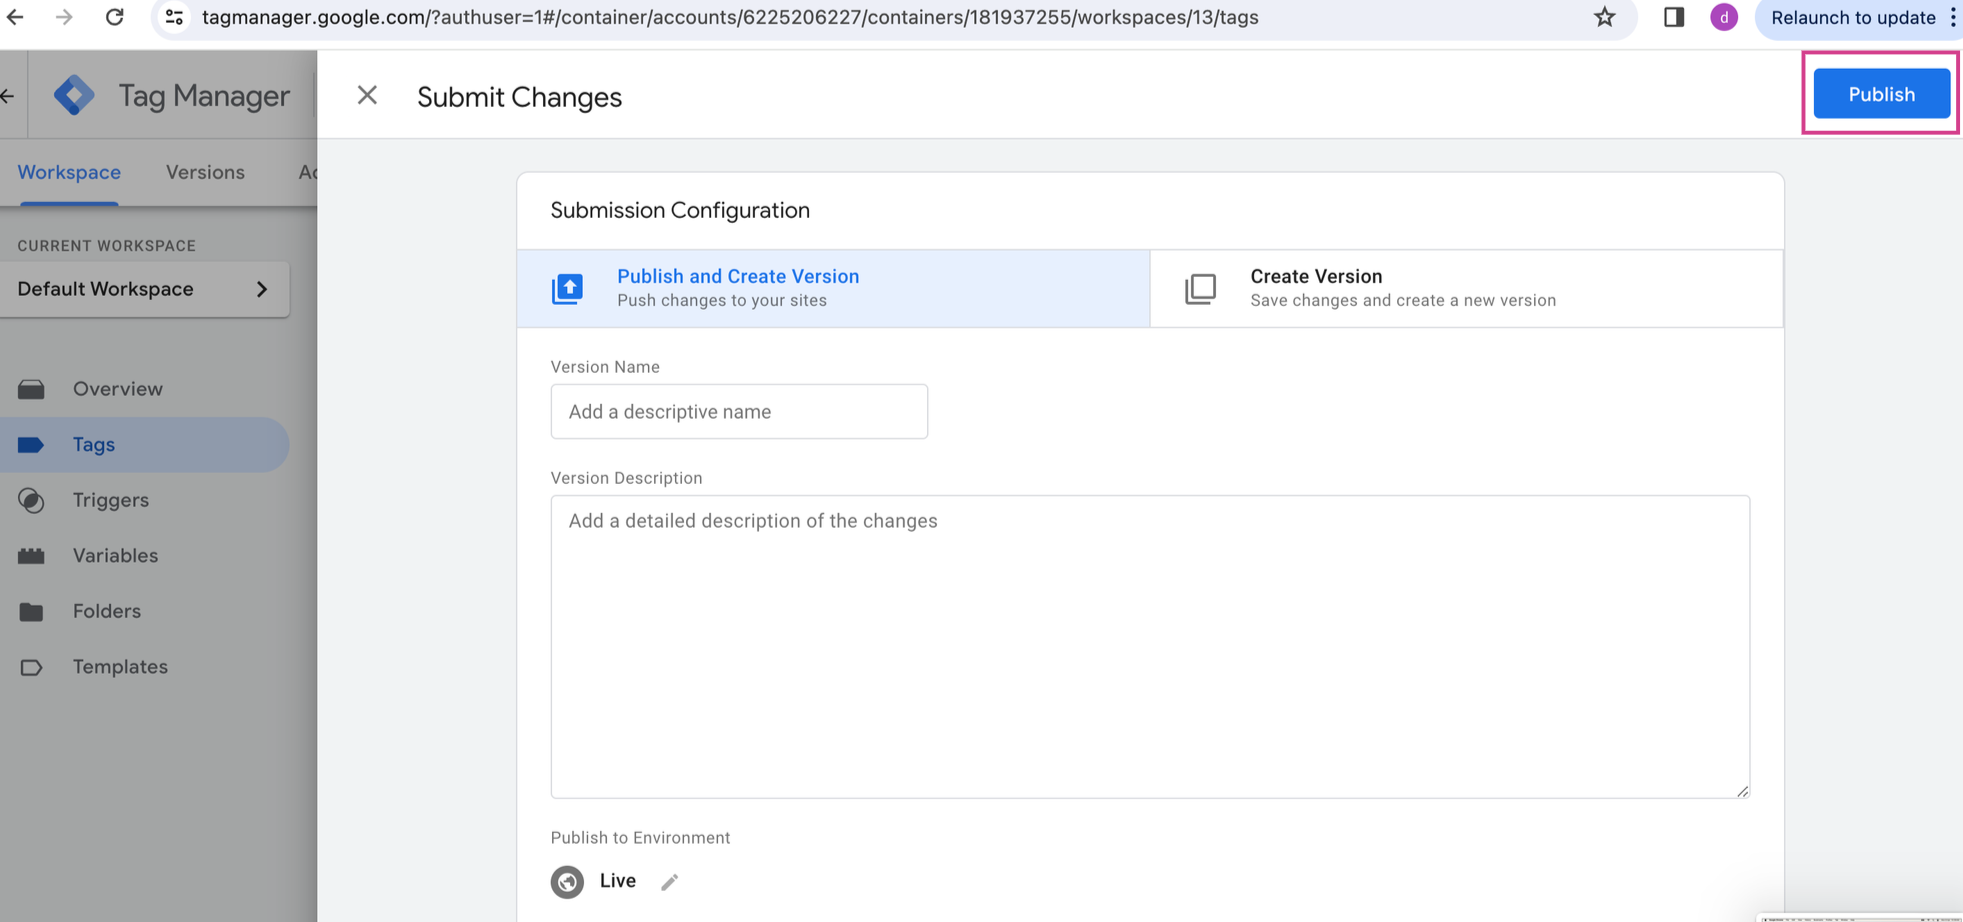
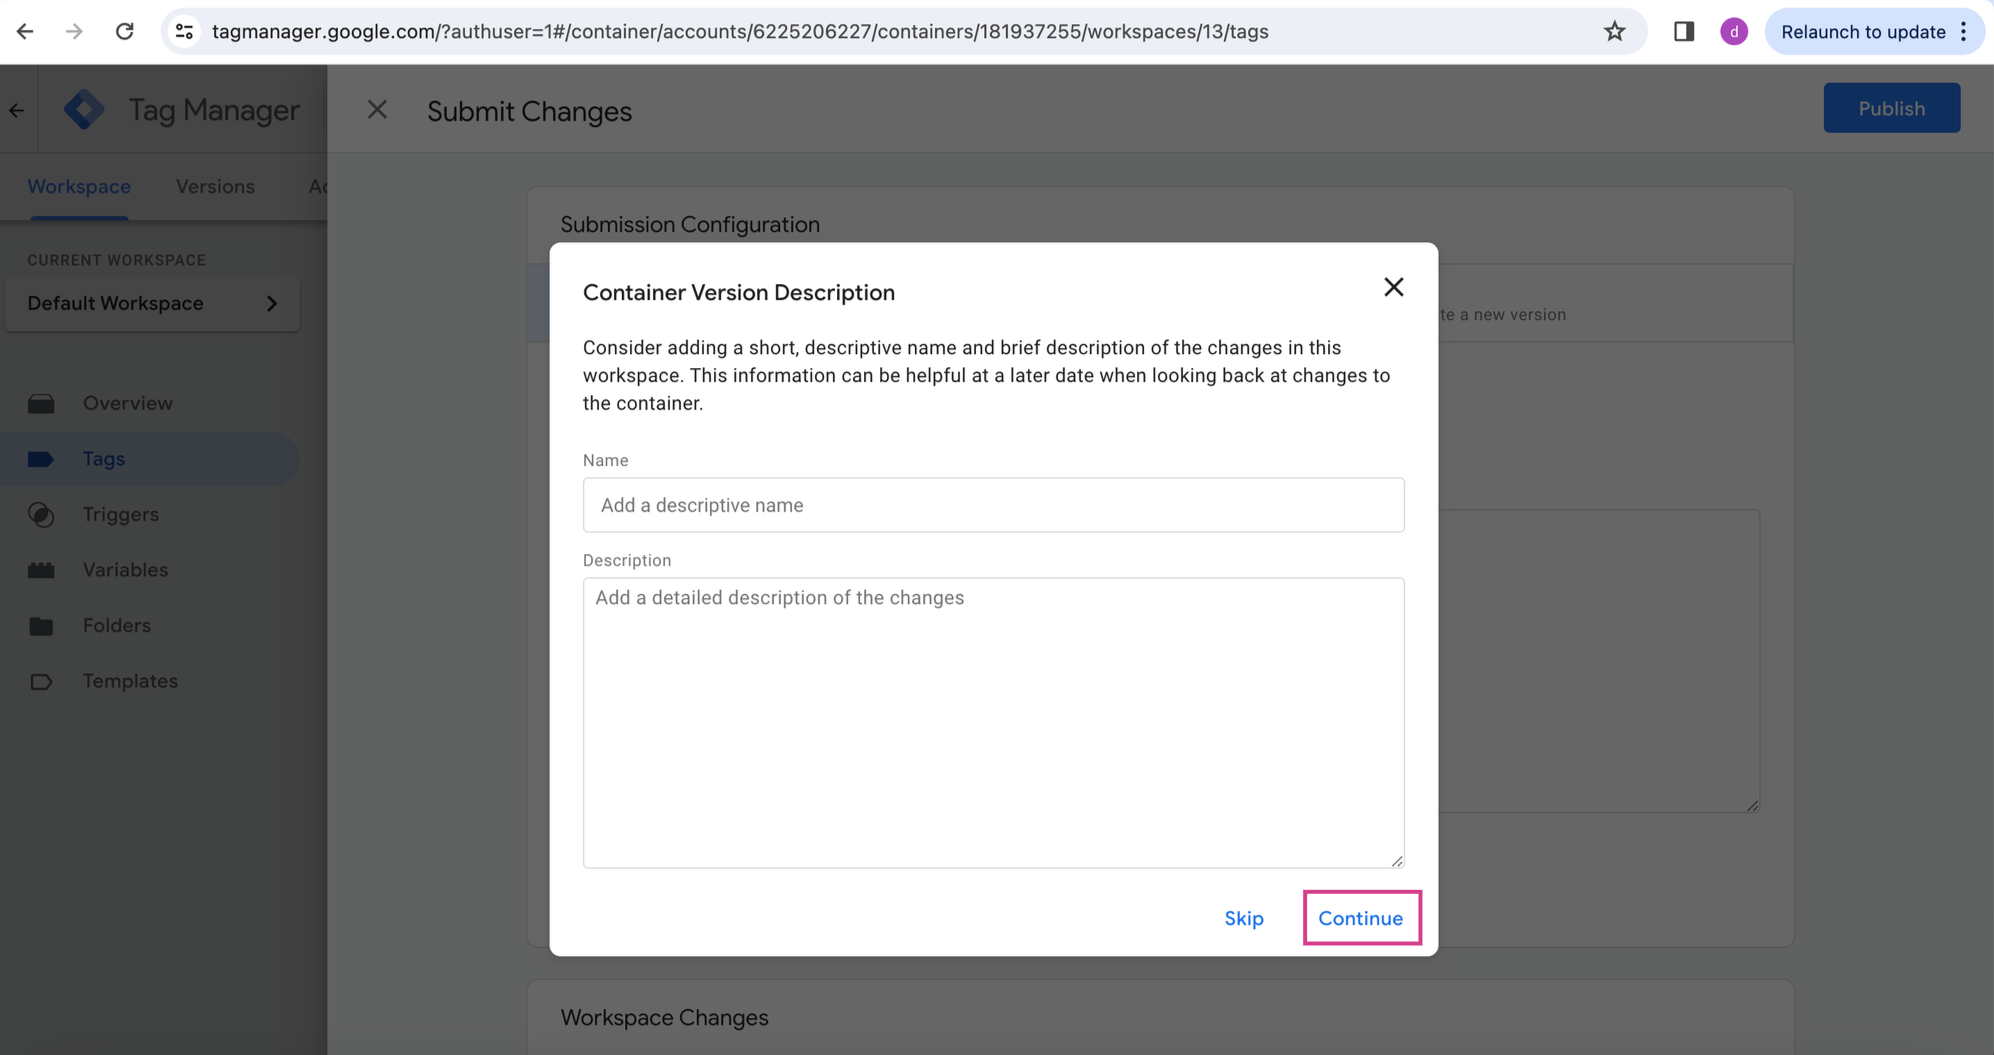
Step 11: You can continue.
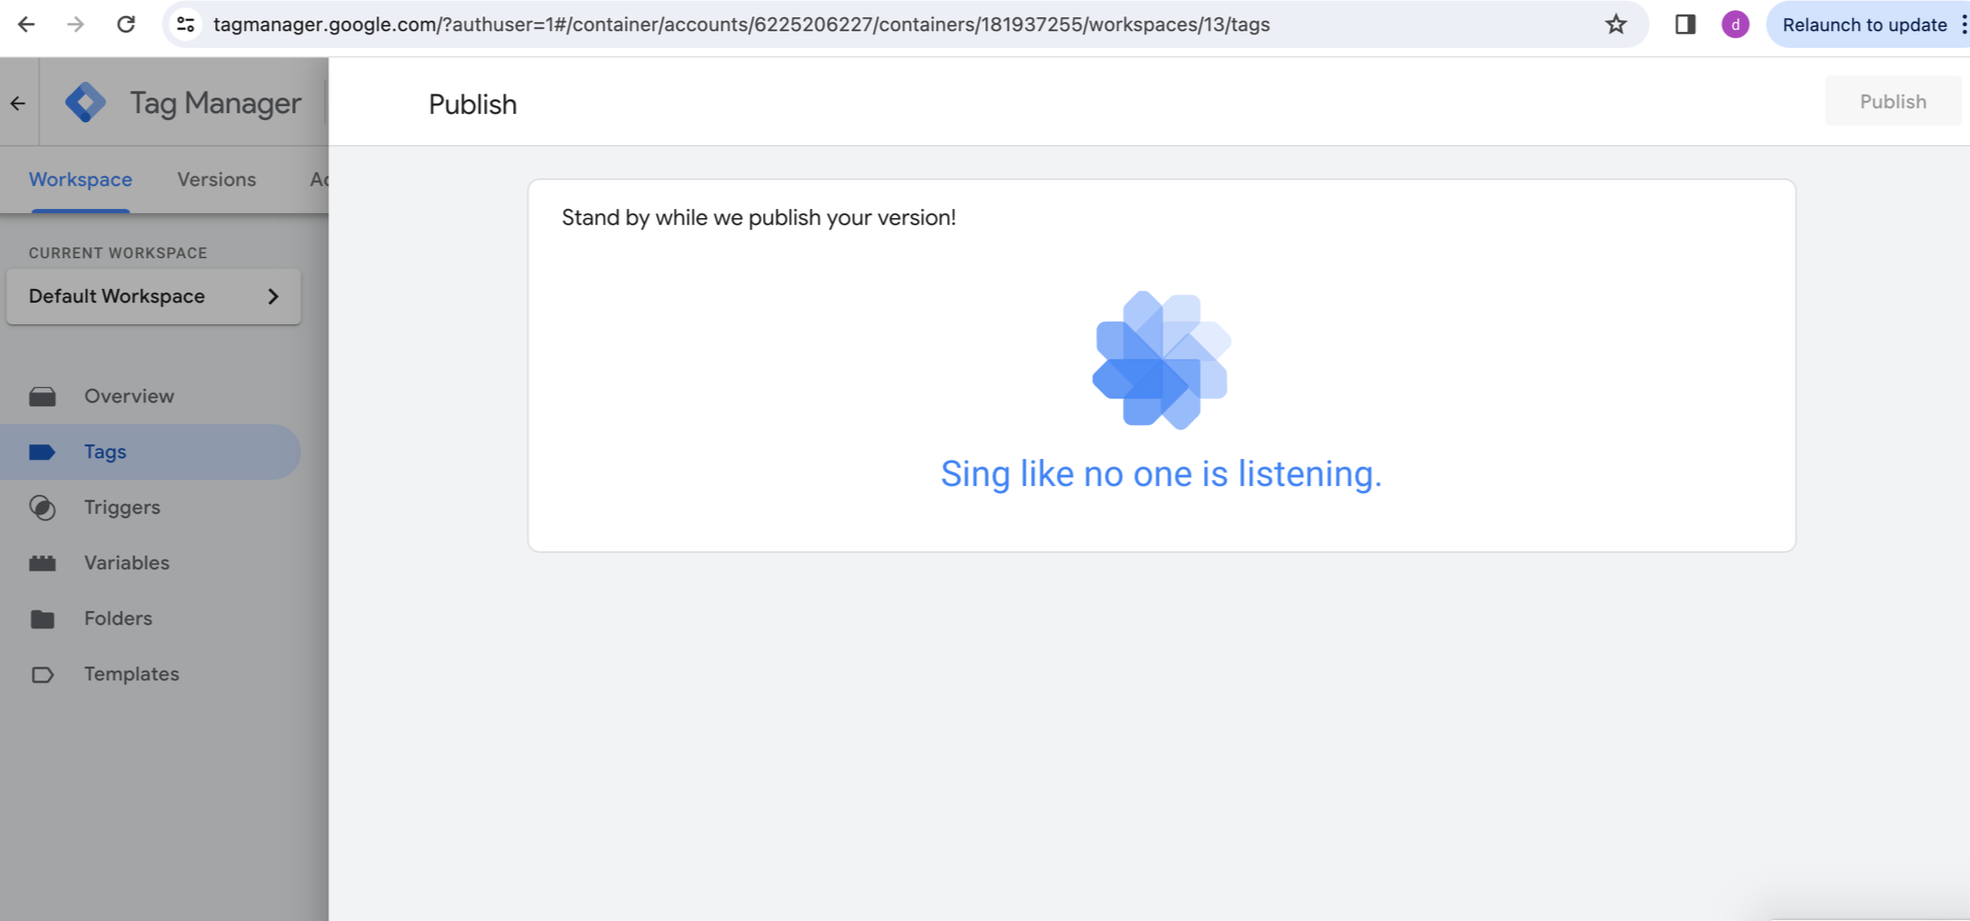
Step 12: Once you see below screen , which means your changes are published.
After publishing GTM changes , go to you docs for which you have made changes in GTM.
You will find below scripts in inspect element of the docs: (with your clientID)


Cookie Management and Compliance
To learn more about Reo.Dev's cookie usage, categorization, and best practices for implementation, refer to this guide.
Content Security Policy (CSP) Considerations
If your website uses a strict Content Security Policy (CSP), you may need to update it to allow our script to load and execute correctly. Please ensure the following directives are updated to include our domains:
Required CSP Directives
FAQs
Does the JavaScript code introduce any vulnerabilities or risks to the website?
The JavaScript code has been tested thoroughly to ensure that it does not introduce any vulnerabilities or risks to the website. Data sent by the JavaScript code is encrypted using the HTTPS protocol to ensure secure transmission and prevent unauthorized access.
Does the JavaScript code use external dependencies or third-party libraries?
The JavaScript code uses secure third-party libraries that have been thoroughly checked for vulnerabilities and risks.
How does JavaScript handle user privacy? Is there a potential risk of collecting personally identifiable information (PII) without proper consent?
It is designed to collect anonymous data such as browser information, page views, copy and click events without collecting any non-consented PII.
What impact will including this JavaScript have on the page load times of my app?
The code has been optimized to minimize any negative impact on page load time and performance. This code uses asynchronous loading technology so it can load independently without blocking the rendering of the screen content.
Has the JavaScript been tested on different browsers and devices to ensure cross-platform compatibility and consistent behavior?
The JavaScript code is thoroughly tested on multiple browsers (Chrome, Firefox, Safari, Edge, Brave) and devices (desktop, mobile) to ensure compatibility and consistent behavior.
Will the inclusion of this JavaScript affect the overall user experience of the product, for example, slow down UI interactions or cause unexpected behavior?
It doesn't affect the overall user experience. It will not slow down, or introduce any intrusive elements that have an impact on the experience.
Are there any fail-safe mechanisms in place to prevent scripts from disrupting critical functionality in the event of an error?
We have implemented fail-safe mechanisms in the javascript to prevent scripts from interrupting the website's critical functionality in the event of an error, thus ensuring a smooth user experience.
Will the JavaScript code continue to perform optimally as the app traffic and user base increase over time?
The code is optimized for scalability. The JavaScript code is designed to scale as your online traffic and user base grow. It will continue to work best even as traffic to your site increases. There are no significant limitations or performance bottlenecks associated with the tracking mechanism.
Last updated
Was this helpful?

