# Getting Started

This section provides an introduction to Reo.Dev and step-by-step guides for the first few actions to help you get started quickly and effectively with the platform.

{% content-ref url="/pages/V9KvMzUiJyIeMvR7xxjo" %}
[Introduction to Reo.Dev](/getting-started/introduction-to-reo.dev)
{% endcontent-ref %}

<table data-card-size="large" data-view="cards"><thead><tr><th></th><th data-hidden data-card-target data-type="content-ref"></th><th data-hidden data-card-cover data-type="files"></th></tr></thead><tbody><tr><td><strong>For Users</strong><br>Quick start checklist for users</td><td><a href="/pages/xY3MnaYxWzubq5uzFrYy">/pages/xY3MnaYxWzubq5uzFrYy</a></td><td><a href="/files/iXoqU9G4vQg7ybtb1Get">/files/iXoqU9G4vQg7ybtb1Get</a></td></tr><tr><td><strong>For Admins</strong><br>Quick start checklist for admins</td><td><a href="/pages/dMFJl6Rukh6zvYndvE4e">/pages/dMFJl6Rukh6zvYndvE4e</a></td><td><a href="/files/4ZOhoaIlBfOzBp0YjjXv">/files/4ZOhoaIlBfOzBp0YjjXv</a></td></tr></tbody></table>


# Introduction to Reo.Dev

Reo.Dev is a revenue intelligence tool tailored for developer-focused Go-To-Market teams. It identifies intent signals from a variety of **developer-specific sources** including GitHub interactions, package manager installations (e.g., npm, pip, helm), open-source telemetry, cloud sign-ups, and technical documentation and converts it into accounts and developer leads who are active around the customer’s product.

![](https://usercontent.us.prod.clueso.io/d06f019c-da0b-4d5b-9fdd-9630e7fd5d0f/1a0785e6-9de1-4308-95d5-e3df92a003df/54617afc-e46d-4f70-9166-7baa24dc66ae/images/da86ab58-40d3-41ae-97dd-e3dc19633565.png)

### How can you use Reo.Dev's intent data?

1. **Deanonymise your full pipeline**: Many developers who interact with your product remain invisible to traditional sales tracking methods. Reo.Dev helps you:
   * Reveal the **80% of developers** who engage with your documentation or product without signing up.
   * Surface **anonymous sign-ups** (e.g., Gmail or GitHub IDs) to gain more clarity on your pipeline.
2. **Generate More Pipeline**

   Reo.Dev utilizes **third-party intent signals** from platforms like:

   * **GitHub** (including competitor and complementary project engagement)
   * **LinkedIn**
   * **StackOverflow**
   * **Reddit** (via keyword monitoring)

   This allows you to identify potential leads early in their journey.
3. **Prioritize Accounts by Dev Funnel Stage:** Reo.Dev identifies where accounts are in the Dev Funnel by analyzing developer activity patterns, enabling you to focus on high-intent, high-value prospects for better conversion rates.
4. **Build Target Lists**

   Reo.Dev enables Go-To-Market teams to build more precise target lists at both the company and individual levels:

   * **Company-level targeting**: Identify companies based on their tech stack, size, developer team composition, and more.
   * **Person-level targeting**: Tap into Reo.Dev’s vast **database of 25 million developers** with 50,000 different skill sets, allowing you to pinpoint high-potential leads.
5. **Increase Sales Outreach Effectiveness**

   By tracking the **developer’s journey**, Reo.Dev enables better qualification and targeted outreach. Key benefits include:

   * **Improved account qualification** for outreach
   * **Finding key buyers** among developer leads
   * Highlighting **high-value activities** performed by an account, allowing SDR teams and AEs to personalize their outreach for maximum impact.


# For Users

Quick start checklist for users

### Guides

* [Step 1: Build your target account list](https://docs.reo.dev/getting-started/for-users/step-1-build-your-target-account-list)
* [Step 2: Explore your account data](https://docs.reo.dev/getting-started/for-users/step-2-explore-your-account-data)
* [Step 3: Identify developers engaging with your product](/getting-started/for-users/step-3-identify-developers-engaging-with-your-product)
* [Step 4: Build custom segments that are most likely to convert](/getting-started/for-users/step-4-build-custom-segments-that-are-most-likely-to-convert)
* [Step 5: Use filters to spot high-intent leads](/getting-started/for-users/step-5-use-filters-to-spot-high-intent-leads)


# Step 1: Build your target account list

Welcome to Reo.Dev! Everything you need to build your target account list, step by step.

Everything in Reo starts with your target account list. Signals, scoring, alerts, outreach: all of it builds on the accounts you bring in here.

This guide walks you through multiple ways to build your target account list, so you can pick whichever works best for your teams.&#x20;

### Overview

There are 3 ways to build a target account list in Reo:

{% stepper %}
{% step %}

### [**Import from CRM**](#method-1-import-from-your-crm)

Pull a list or segment straight from HubSpot or Salesforce, and keep it synced automatically. Your Reo list stays as current as your CRM, always.
{% endstep %}

{% step %}

### [Upload a file](#method-2-upload-a-file-csv-excel)

Drop in a CSV or Excel file of accounts and have a list ready in minutes. Ideal for one-off imports or accounts that live outside your CRM.
{% endstep %}

{% step %}

### [Build a segment ](#method-3-build-a-segment)

Filter Reo's own account universe by region, firmographics, and tech stack (and, if your CRM is connected, by CRM Owner) to find best fit accounts without needing a file at all
{% endstep %}
{% endstepper %}

Whichever method you choose, Reo enriches every account with signals like org size, buyers, and de-anonymized developer activity.

{% hint style="success" %}
**Our recommendation is to use Import from CRM wherever possible, because:**

* Your CRM is already your single source of truth.&#x20;
* importing from it, and keeping the import synced, means the accounts you work with in Reo always match what's in your CRM.&#x20;
* It also saves you the trouble of re-exporting and re-uploading a CSV every time your CRM segment changes.
  {% endhint %}

***

### Method 1: Import from your CRM

**Who it's for:** Anyone who builds lists or segments natively in HubSpot, Salesforce, or Attio.

{% hint style="info" %}
**Supported today:** Account lists from HubSpot or Salesforce. Looking to bring in specific deals or leads instead? Build a list of those in your CRM first, then bring that list into Reo as an account list.
{% endhint %}

**Prerequisite:** Your CRM should be connected to Reo. If it isn't connected yet, ask your admin to connect it.

#### Steps

1. From the **left navigation menu >** go to **Lists >** then click **Import from CRM**.

<figure><img src="/files/b8hiuTyv9RzpEBTso4ZR" alt=""><figcaption></figcaption></figure>

2. A 3-step wizard opens: **Select source >** **Map columns > Add details**.

<figure><img src="/files/xVxnAyoeVqyOUpa3slDC" alt=""><figcaption></figcaption></figure>

> ***Information on each step is provided in its own tab below. Work through them in order using the tabs to move from one to the next.***

{% tabs %}
{% tab title="Select source" icon="1" %}

1. **Search for and select the CRM list you want to import** from the dropdown. Each result shows the list name and its record count.

<figure><img src="/files/xbziyUujyxIQNA0lFWPM" alt=""><figcaption></figcaption></figure>

{% hint style="info" %}
Note: CRM imports are limited to 10,000 accounts per list, to keep the import fast and reliable. If your list has more than 10,000 accounts, import it as a CSV file instead ([see Method 2](https://app.gitbook.com/o/j0dmg4x3Hdhfj3EDr66v/sites/site_LYknN/s/x46P5sAHxDG7PqOdVLxI/~/edit/~/changes/701/getting-started/for-admins/step-1-build-your-target-account-list#method-2-upload-a-file-csv-excel)).
{% endhint %}

2. If you can't find your list, it's usually for one of two reasons:
   1. **Only account lists can be imported and enriched today.** Contact and lead lists aren't supported.
   2. You recently created or updated the list in your CRM, and it hasn't synced to Reo yet. Click **Refresh CRM lists** to pull the latest version right away.
      {% endtab %}

{% tab title="Map columns" icon="2" %}

1. **Select the column that contains the company domain or website.**&#x20;
   1. Get this right: it's the foundational step Reo uses to match your CRM accounts to the correct accounts in Reo.&#x20;
   2. So, an incorrect mapping here can cause accounts to import against the wrong records.
2. All your CRM columns are listed below that.
3. **Toggle on the individual ones you want to bring into Reo**, or tick **Import all** to bring everything over in one go.
   1. **A search box** helps you find specific columns if your CRM has a lot of them.
   2. Reo **automatically detects each column's type** (string, integer, date, and so on)

<figure><img src="/files/flFl2H0x6lRpx9cz71Ky" alt=""><figcaption></figcaption></figure>
{% endtab %}

{% tab title="Add details" icon="3" %}

1. **List type** is set to **Account**.
2. **Provide a list name and description** (this will help your team members understand the list’s purpose when you share it).

<figure><img src="/files/K5atJ8aU3ZM2KjIM5Rvl" alt=""><figcaption></figcaption></figure>

3. Before you save, **Reo shows you an import summary:**
   1. The number of accounts that will be imported
   2. How many of those need enrichment
   3. The estimated credits that enrichment will cost
   4. Your available credit balance
   5. Which signals enrichment will add: tech stack, engineering team size and growth, job postings, prospect buyers, and AI insights

<figure><img src="/files/5gofezpEXJgXmV0qKi8Q" alt=""><figcaption></figcaption></figure>

4. **If your CRM list includes accounts that don't need enrichment** *(because they're already in Reo and already enriched)* Reo shows **the option to import them without enriching**, at no credit cost.
   1. This keeps the number of accounts in your Reo list matched to the number of accounts in your CRM list, even for the ones you're not spending credits to enrich.

<figure><img src="/files/VN3biaXv2fyEay4PYKFw" alt=""><figcaption></figcaption></figure>

5. The **Keep Reo list in sync with CRM list** toggle is on by default. Leave it on if you want this list to update automatically whenever your CRM list changes, **which is what we recommend for most use cases.**

<figure><img src="/files/dEHOnyUDrTEnelTZVz01" alt=""><figcaption></figcaption></figure>

{% hint style="warning" %}
Important - Decide on the sync between your CRM and Reo \
\
Turn it off only if you specifically want a one-time snapshot import with no ongoing connection to your CRM. You can do this later as well, from the **Lists** view.
{% endhint %}

6. Click **Save changes**.
   {% endtab %}
   {% endtabs %}

**Prefer to watch instead?** This quick walkthrough covers the entire process below, from selecting your CRM list to keeping it in sync.

{% embed url="<https://reo-dev.portal.trainn.co/share/N3dqDp8qrNYA1VHL2GSgkA>" %}

### After you import

Open the list and you'll see Reo's standard account fields alongside the CRM columns you chose to import, all on the same account records.

On the main **Lists** page, each list shows a **Source** column that tells you how it was created:

* **Created in Reo:** built manually inside Reo, for example with Build a segment
* **Imported file:** brought in via CSV or Excel upload
* **A CRM's logo (for example, Hubspot), with a sync icon:** imported from that CRM
* **Agent created:** built by a Reo agent
* **MCP created:** built through Reo's MCP integration
* **API created:** built through the Reo API

<figure><img src="/files/BWj10LHlhNjEO0I0x9w8" alt=""><figcaption></figcaption></figure>

### Manage syncing lists between your CRM and Reo

<details>

<summary>If a new account is added to your CRM list</summary>

* The new account will be added and enriched in Reo automatically, using credits as needed. Sync checks for changes every 24 hours.
* The sync icon next to a CRM-sourced list means Reo is keeping it in sync with your CRM automatically.&#x20;

</details>

<details>

<summary>If an account is removed from your CRM list</summary>

* The account will be removed from Reo list as well.&#x20;
* Credits already spent enriching that account aren't refunded.

</details>

Click the sync icon at any time to see the list's sync status and the date it last synced. You're in control of it: use the **Disable sync** button if you'd rather this list stop updating automatically and become a one-time snapshot instead.

<figure><img src="/files/7eWJlfAhNj8hlQH5JrMi" alt=""><figcaption></figcaption></figure>

{% hint style="info" icon="circle-question" %}
**Have more questions about importing from CRM?** Check out [some of the frequently asked questions](https://docs.reo.dev/faqs-and-troubleshooting/things-to-know-before-and-after-you-import-accounts-from-crm) for answers on credits, syncing behavior, and common troubleshooting scenarios.
{% endhint %}

***

### Method 2: Upload a file (CSV/Excel)

Use this when your accounts aren't in a connected CRM, you need a one-off import, or your CRM list is larger than the 10,000 account limit for CRM imports.

#### Steps

1. From the **left navigation menu >** go to **Lists >** then click **Import file**.

<figure><img src="/files/uPimRhAM8YkpJjQ7JAKB" alt=""><figcaption></figcaption></figure>

2. Choose the list type, **Accounts or Developers >** **upload your file >** click **Next**.

* For accounts, you can import and enrich in the same flow.
* For developers, it's import only; enrichment isn't available for developer lists.
* *Supported file types: CSV, XLSX, and XLS.*

<figure><img src="/files/xiiybDdCquCDU25VUHiq" alt=""><figcaption></figcaption></figure>

3. Select the **column containing the company domain or website**, then click **Next**.
4. You'll see the **full list of columns available to import from your file**.
5. **Toggle on the individual columns you want to bring into Reo**, or tick **Import all** to bring everything over in one go.
   * **A search box** helps you find specific columns if your file has a lot of them.
   * For every column you import, **choose its type**: string, integer, or date.

<figure><img src="/files/4TC8PiegIpdeBxpWeecX" alt=""><figcaption></figcaption></figure>

6. Click **Next**.
7. **Give your list a name and an optional description.** A good description helps your team understand what the list is for, especially useful if you plan to share it.

<figure><img src="/files/dupk3plAT171FDITTFkn" alt=""><figcaption></figcaption></figure>

8. Before you save, Reo shows you an import summary:
   1. The number of accounts that will be imported
   2. How many of those need enrichment
   3. The estimated credits that enrichment will cost
   4. Your available credit balance
   5. Which signals enrichment will add: tech stack, engineering team size and growth, job postings, prospect buyers, and AI insights

<figure><img src="/files/URxHBi573nykU3A3LB0h" alt=""><figcaption></figcaption></figure>

9. **If your CSV file includes accounts that don't need enrichment** *(because they're already in Reo and already enriched)* Reo shows **the option to import them without enriching**, at no credit cost.
10. Click **Save changes**. You'll get an email once the import finishes, and your list will appear under **My Lists**.

{% hint style="info" %}
**Good to know:** A file upload is a one-time snapshot.\
\
It won't stay in sync with your source file or your CRM, so if your account list changes afterward, you'll need to export and upload again.&#x20;

If you'd rather your list stayed current on its own, use Import from CRM instead ([see Method 1](https://app.gitbook.com/o/j0dmg4x3Hdhfj3EDr66v/sites/site_LYknN/s/x46P5sAHxDG7PqOdVLxI/~/edit/~/changes/701/getting-started/for-admins/step-1-build-your-target-account-list#method-1-import-from-your-crm)).
{% endhint %}

### After you import

Open the list and you'll see Reo's standard account fields alongside the CRM columns you chose to import, all on the same account records.

On the main **Lists** page, each list shows a **Source** column that tells you how it was created:

* **Created in Reo:** built manually inside Reo, for example with Build a segment
* **Imported file:** brought in via CSV or Excel upload
* **A CRM's logo (for example, Hubspot), with a sync icon:** imported from that CRM
* **Agent created:** built by a Reo agent
* **MCP created:** built through Reo's MCP integration
* **API created:** built through the Reo API

<figure><img src="/files/qsnZC4MNAUy4KTU9uagi" alt=""><figcaption></figcaption></figure>

***

### Method 3: Build a segment

Use this **when you want to filter accounts Reo already tracks**, without importing anything new.

{% hint style="info" icon="circle-info" %}
Segments are customizable cohorts of high-intent accounts, developers, or buyers, built from specific filters and attributes. They help you act on the ones that matter most, so you can prioritize outreach and focus your team on the opportunities most likely to convert.
{% endhint %}

#### Steps

1. From the **left navigation menu >** go to **Segments >** click **Create new**.

<figure><img src="/files/nwoA916YIl8XLZcTGRC3" alt=""><figcaption></figcaption></figure>

2. Choose whether to build a **Basic** or **Advanced** segment, depending on how many filter criteria you need to combine.&#x20;

{% hint style="info" %}
For a full walkthrough of the difference, see the [Basic & Advanced Segments Guide](https://docs.reo.dev/segments/basic-and-advanced-segments).
{% endhint %}

<figure><img src="/files/kjSAAJtLVdgFMNi4n9Jr" alt=""><figcaption></figcaption></figure>

3. Choose what the segment is for: **Accounts**, **Developers**, or **Buyers**.

<figure><img src="/files/EHw6pPxt4KT8ezHLcAGY" alt=""><figcaption></figcaption></figure>

4. **Name the segment.**
5. **Add a tag name and description.** Tags let you quickly filter and prioritize these accounts later, based on the same criteria you're defining now.&#x20;

{% hint style="info" %}
See [Customizing Tags](https://docs.reo.dev/accounts/customizing-tags) for more on how tags work across Reo.
{% endhint %}

<figure><img src="/files/mYHnGjjRoBreLPomOZP3" alt=""><figcaption></figcaption></figure>

6. **Add your filters.** Choose from Reo's full range of filters, including region, firmographics, tech stack, developer activity. If your CRM is connected, filter by **CRM Owner** to see only the accounts you personally own.

<figure><img src="/files/4HzIaVkdEYExNAroe5np" alt=""><figcaption></figcaption></figure>

{% hint style="info" %}
For the complete list of available filters, see [Filters 101](https://docs.reo.dev/segments/filters-101).
{% endhint %}

<figure><img src="/files/HTFL0rGkegITSnOrFAOq" alt=""><figcaption></figcaption></figure>

7. If you're combining more than one filter, choose how they should relate:
   1. **Match All (the AND operator)**
   2. **Match Any (the OR operator)**

<figure><img src="/files/rgL95xjsnKaFEw6M83AZ" alt=""><figcaption></figcaption></figure>

8. As you add filters, Reo shows you **a live count of how many accounts currently match your criteria**, so you can see the size of your segment before you save it.

<figure><img src="/files/bzLNPq83X037YyMRH7OI" alt=""><figcaption></figcaption></figure>

9. If you'd like this segment to be what you see by default, check **Set this as Default Segment**. This makes it the view you land on whenever you open the Accounts, Developers, or Buyers dashboard.

<figure><img src="/files/NLorIDdEVec944Q4v3uq" alt=""><figcaption></figcaption></figure>

10. Click **Save and Exit**.

***

### Credits and enrichment status

Enrichment is what powers the signals Reo adds to your accounts, and it draws from your credit balance.&#x20;

Here's what you'll see if you run low:

<details>

<summary><strong>On your first import or enrichment</strong></summary>

If you don't have enough credits, your list shows the status **Enrichment incomplete**. Request more credits to finish enriching the list.

</details>

<details>

<summary><strong>On a later sync</strong></summary>

If there aren't enough credits to enrich newly added accounts, the list shows the status **Sync paused**. Request more credits to resume.

</details>

### What’s next

Once your accounts are in Reo, see ‘Explore your account data’ to learn how to review the firmographics, activity, and buyer insights Reo has gathered for each one.


# Step 2: Explore your account data

A tab-by-tab guide to everything you'll find on an account page in Reo

Once you have built your target account list, here’s how you can get the most value out of them.

**Every account Reo tracks becomes a living profile:** firmographics, buying stage signals, developer activity, hiring trends, and the actual people behind the account, all in one place.

This guide walks you through everything you'll find on an account page, tab by tab, so you always know exactly where to look for the answer you need.

{% hint style="info" %}
**Before you start:** You'll need at least one account in Reo already. If you haven't built your target account list yet, start with [**Create your target account list**](https://docs.reo.dev/~/revisions/LpXrIuXoRo1tuAYMfI7z/getting-started/for-admins/step-2-explore-your-account-data) before proceeding.
{% endhint %}

### Exploring an account

From the **left navigation menu >** go to **Accounts** (OR) open any list/segment you've built in Reo, and click an account's name.

<figure><img src="/files/dbUXHNfzZwxUAxV2Fx2S" alt=""><figcaption></figcaption></figure>

This opens the **account's full profile, organized into six tabs.**&#x20;

Here's what each one gives you, and when to use it.

<figure><img src="/files/SzGtEHb0Tod65m8fkeUv" alt=""><figcaption></figcaption></figure>

### 1. Overview

This is the first thing you'll see when you open an account, and **it's your snapshot of the whole account.**

Here you'll find:

* Firmographic details: company size, industry, funding, and more
* Where the account sits in its buying or evaluation journey, shown as its Dev Funnel stage
* Which of your ICP technologies the account is actively hiring for

**Make this your starting point every time you open an account.** It answers the first question you'll usually have: is this account worth spending time on right now?

### 2. Activity Insights

Click the **Activity Insights** tab to see how active this account's developers actually are.

<figure><img src="/files/d4MqLr0KzFdtrU1FID5N" alt=""><figcaption></figcaption></figure>

Here you'll find:

* A developer activity score for the account
* The number of active developers
* Where those developers are active from
* A snapshot of overall activity volume across every source Reo tracks

**This is where you gauge intent.** A high activity score is often your earliest signal that an account is worth prioritizing, well before anyone there has talked to sales.

### 3. Activity Timeline

Click the **Activity Timeline** tab for a chronological view of everything developers at this account have done.

**Use the filter option to narrow the timeline down to specific activity types**, so you can focus on one signal at a time instead of scrolling through everything.

<figure><img src="/files/TyBMyFRJVI2jYBbe6pt2" alt=""><figcaption></figcaption></figure>

### 4. Technographics

Click the **Technographics** tab to see hiring trends for your preferred technology functions, along with every job posting tied to your ICP technologies.&#x20;

{% hint style="warning" %}
Before you start seeing data under 'Technographics,' make sure your admin has configured your **ICP and Preferred Technologies under Settings > Configurations.**
{% endhint %}

<figure><img src="/files/2lDKM1yw0aTnonW61meq" alt=""><figcaption></figcaption></figure>

**This is especially useful for spotting accounts that are actively building out a team around the technology you care about**, which is often a stronger signal of real investment than a single conversation would be.

### 5. Active Developers

Click the **Active Developers** tab to see the actual people behind all that activity.

<figure><img src="/files/f8yPRXfS59HXIEluRTDa" alt=""><figcaption></figcaption></figure>

Here you can:

* View every de-anonymized developer at the account
* Access their contact details, including business email addresses and LinkedIn profiles
* Add developers directly to email sequences, right from this tab

**This is where account level insight turns into an actual outreach action.**

### 6. More Prospects

Click **More Prospects** to look beyond developers and find buyers: the people at this account who may not have engaged with your tracked assets yet, but are still worth reaching.

* Reo shows you **a list of recommended prospects for the account.**
* **Refine that list using filters** like location, seniority, designation, and job function, or apply a persona you've already built.
* Once you've found the right people, **reveal them to access their contact details and take action.**
* Everyone you reveal is saved to the **Revealed** tab, so you can always find them again later without having to search from scratch.
* **If your CRM is integrated,** this **CRM Prospects tab** also shows you which of these prospects already exist in your CRM, so you always know whether you're looking at someone new or someone your team is already tracking.

<figure><img src="/files/C3T9YSwEiS9Qeh1fAUSV" alt=""><figcaption></figcaption></figure>

### What's next

Once you've explored an account and found the people worth reaching, act on them: reveal contacts, add developers to a sequence, or fold the account into a segment for ongoing tracking.&#x20;

From here, the next step in your onboarding is to **identify developers engaging with your product.**


# Step 3: Identify developers engaging with your product

Reo.Dev empowers you with in-depth insights into developers engaging with your product assets. In this guide, we will take you through the different intel Reo.Dev provides for each developer.

**Step 1:** Navigate to the **Developers** page on the left panel. Here, you'll find various details about developers such as their company, location, Job Title, Dev Activity score, and contact IDs.

<figure><img src="/files/WrbmoX1MeoGFB2fjYc2M" alt=""><figcaption></figcaption></figure>

**Step 2:** **Click on a developer's name** to see their detailed profile and activity log.

The **Developer Profile** provides information such as designation, current company, joining date, location, first and last activity dates, past companies & more.&#x20;

<figure><img src="/files/vb5NW4EJt5YyozeZZM8I" alt=""><figcaption></figcaption></figure>

**Developer Activity** gives you a quick overview of the activities (and the count of activities) the developer has done across different sources/channels.

<figure><img src="/files/d81fp1LffXIuvOYISvvM" alt=""><figcaption></figcaption></figure>

The **Activity Timeline** shows you a chronological view of all the activities done by the developer. You can further use the activity filter to narrow down and view specific activities.

<figure><img src="/files/0Xnpk2qG6jFzSA8MmAWr" alt=""><figcaption></figcaption></figure>

This gives you more context on developer actions and helps you personalize your outreach based on those actions.


# Step 4: Build custom segments that are most likely to convert

Segments in Reo.Dev are cohorts of accounts/developers/buyers categorized based on specific attributes. In this article, we will guide you on creating segments to find high-intent accounts.

**Step 1:** Click on **Segments**&#x20;

<figure><img src="/files/K9dsFO3HC63fGUHgWrz5" alt=""><figcaption></figcaption></figure>

When you're getting started on Reo.Dev and want to quickly find some high-intent accounts, magic segments is a great feature to explore.

**Step 2:** Click on **'Magic Segments'**

These are pre-built segments by Reo.Dev to help you easily find the high-intent accounts.

<figure><img src="/files/yxTp2it3VPJq4lSBadIu" alt=""><figcaption></figcaption></figure>

**Step 3:** To create a new segment, click on **Create New**

<figure><img src="/files/Lpt6uxsjd6n6iCY345oF" alt=""><figcaption></figcaption></figure>

**Step 4:** Based on your filter critera - choose whether to create a basic or an advanced segment.

<figure><img src="/files/prCwfht56kIa1fyJ0aZh" alt=""><figcaption></figcaption></figure>

**Step 5:** Decide whether to create a segment for accounts or developers or buyers.&#x20;

<figure><img src="/files/UTA3XUPHD9pnnn9xQUgZ" alt=""><figcaption></figcaption></figure>

> As an example - we will create a segment for accounts that have been **'Active on your competitors Github repositories'**

**Step 6:** **Name** the segment

<figure><img src="/files/KQ2tsTKRVolStaGfObTs" alt=""><figcaption></figcaption></figure>

**Step 7:** Add a **custom tag name and description.** It helps you quickly identify and filter these accounts.

<figure><img src="/files/zS1ddBCOEqHCvcLCuf2w" alt=""><figcaption></figcaption></figure>

**Step 8:** Add **filters**

<figure><img src="/files/Fy0T4ey6PHKT5hFRpXRC" alt=""><figcaption></figcaption></figure>

For this segment we will add the following filters:

1. Activity Group —> Github Repository —> Repository Type —> 'Competition'

<figure><img src="/files/PahpGOY6E1CCdt4RxjdU" alt=""><figcaption></figcaption></figure>

2. Activity Type —> Github —> Fork, Pull Request, Opened Issue, Comment. Here we will also set the data range as 'last 180 days'

<figure><img src="/files/8gHtwjbXCzMHJu7gtDru" alt=""><figcaption></figcaption></figure>

3. Account Intel —> ICP fit score → Strong, Moderate

<figure><img src="/files/mYSzGhJtkDdxFhqi5aLQ" alt=""><figcaption></figcaption></figure>

{% hint style="info" %}
**Note:** When you have multiple criteria's you can use 2 conditional operators - The 'AND' function  includes only those accounts that match all the criterias. The 'OR' function and would include accounts that match any of the given criteria's.
{% endhint %}

<figure><img src="/files/OT2vd9n04c9oVcwiQyFY" alt=""><figcaption></figcaption></figure>

**Step 9:** After adding the filters, click on **Save and Exit**.

In the accounts section you can view all the accounts in this segment. The tag appears beside the account.

<figure><img src="/files/c8WtuOTYG3ads7YPPj6k" alt=""><figcaption></figcaption></figure>

You can also view the segment you created under the **'my segments'** tab

<figure><img src="/files/cd3u8OYIDC7X9dvti1md" alt=""><figcaption></figcaption></figure>

**Step 10:** Click on the 3-dotted menu and then click on **share segment.**

<figure><img src="/files/ZCLqc6Dedg7ONaDK4eel" alt=""><figcaption></figcaption></figure>

**Step 11:** Choose the members you want to share the segment with and add notes to give them more context about the segment. And hit the share button.

<figure><img src="/files/ywo5NpDaVHMdexBpHlcb" alt=""><figcaption></figcaption></figure>


# Step 5: Use filters to spot high-intent leads

{% embed url="<https://youtu.be/_RDMRIzn_Y8?si=PcLtnPUwS-K9h1q0>" %}

Filters are a powerful feature that help you narrow your searches by including or excluding specific data related to accounts and developers.

In this article, we will give you a quick overview of the different filters and how to apply them.

**Step 1:** Click on **'Add filter'** in the accounts page

<figure><img src="/files/QB8EZRGkEvjr9Yqt7AvF" alt=""><figcaption></figcaption></figure>

**Step 2:** Choose the filters to find accounts that match your specific criteria

<figure><img src="/files/JX7DVPFlhiIAPCA4fnsA" alt=""><figcaption></figcaption></figure>

For example - you can select the **'surge'** filter to identify accounts where there has been a surge in developer activity.

You can also combine multiple filters to easily find high-intent accounts and prioritize outreach.

<figure><img src="/files/YzVQgviLpc8CYRnbvKCf" alt=""><figcaption></figcaption></figure>

Similarly, you can use filters to identify relevant developers.

**Step 1:** Go to the developers tab and click on 'add filter'

<figure><img src="/files/agcpCrYcO4AhrdO7TjJ7" alt=""><figcaption></figcaption></figure>

**Step 2:** Choose from multiple filters like designation, location, developer tag and many more.

<figure><img src="/files/XabZXQzNrtulGVLZxiBq" alt=""><figcaption></figcaption></figure>

As an example - you can filter developers based on their designation. This helps you identify potential buyers.

<figure><img src="/files/fvd70oSmzs0luDxrpbfi" alt=""><figcaption></figcaption></figure>

Once you've identified relevant accounts and developers, you can start reaching out to them.


# For Admins

Quick start checklist for admins.

### **Guides**

* [Step 1: Create your target account list](https://docs.reo.dev/getting-started/for-admins/step-1-create-your-target-account-list)
* [Step 2: Explore your account data](https://docs.reo.dev/getting-started/for-admins/step-2-explore-your-account-data)
* [Step 3: Find developers engaging with your product](/getting-started/for-admins/step-3-find-developers-engaging-with-your-product)
* [Step 4: Create custom segments that are most likely to convert](/getting-started/for-admins/step-4-create-custom-segments-that-are-most-likely-to-convert)
* [Step 5: Integrating data sources with Reo.Dev](/getting-started/for-admins/step-5-integrating-data-sources-with-reo.dev)
* [Step 6: Integrate Slack and set up notifications](/getting-started/for-admins/step-6-integrate-slack-and-set-up-notifications)
* [Step 7: Add Customer Fit Criteria](/getting-started/for-admins/step-7-icp-and-preferred-technologies)


# Step 1: Create your target account list

Everything you need to build your target account list in Reo, step by step.

Everything in Reo starts with your target account list. Signals, scoring, alerts, outreach: all of it builds on the accounts you bring in here.

This guide walks you through multiple ways to build your target account list, so you can pick whichever works best for your teams.&#x20;

### Overview

There are 3 ways to build a target account list in Reo:

{% stepper %}
{% step %}

### [**Import from CRM**](#method-1-import-from-your-crm-1) <a href="#method-1-import-from-your-crm" id="method-1-import-from-your-crm"></a>

Pull a list or segment straight from HubSpot or Salesforce, and keep it synced automatically. Your Reo list stays as current as your CRM, always.
{% endstep %}

{% step %}

### [Upload a file](#method-2-upload-a-file-csv-excel-1) <a href="#method-2-upload-a-file-csv-excel" id="method-2-upload-a-file-csv-excel"></a>

Drop in a CSV or Excel file of accounts and have a list ready in minutes. Ideal for one-off imports or accounts that live outside your CRM.
{% endstep %}

{% step %}

### [Build a segment ](#method-3-build-a-segment-1) <a href="#method-3-build-a-segment" id="method-3-build-a-segment"></a>

Filter Reo's own account universe by region, firmographics, and tech stack (and, if your CRM is connected, by CRM Owner) to find best fit accounts without needing a file at all
{% endstep %}
{% endstepper %}

Whichever method you choose, Reo enriches every account with signals like org size, buyers, and de-anonymized developer activity.

{% hint style="success" %}
**Our recommendation is to use Import from CRM wherever possible, because:**

* Your CRM is already your single source of truth.&#x20;
* importing from it, and keeping the import synced, means the accounts you work with in Reo always match what's in your CRM.&#x20;
* It also saves you the trouble of re-exporting and re-uploading a CSV every time your CRM segment changes.
  {% endhint %}

***

### Method 1: Import from your CRM

**Who it's for:** Anyone who builds lists or segments natively in HubSpot, Salesforce, or Attio.

{% hint style="info" %}
**Supported today:** Account lists from HubSpot or Salesforce. Looking to bring in specific deals or leads instead? Build a list of those in your CRM first, then bring that list into Reo as an account list.
{% endhint %}

**Prerequisite:** Your CRM should be connected to Reo.

#### Steps

1. From the **left navigation menu >** go to **Lists >** then click **Import from CRM**.

<figure><img src="/files/b8hiuTyv9RzpEBTso4ZR" alt=""><figcaption></figcaption></figure>

2. A 3-step wizard opens: **Select source >** **Map columns > Add details**.

<figure><img src="/files/xVxnAyoeVqyOUpa3slDC" alt=""><figcaption></figcaption></figure>

> ***Information on each step is provided in its own tab below. Work through them in order using the tabs to move from one to the next.***

{% tabs %}
{% tab title="Select source" icon="1" %}

1. **Search for and select the CRM list you want to import** from the dropdown. Each result shows the list name and its record count.

<figure><img src="/files/xbziyUujyxIQNA0lFWPM" alt=""><figcaption></figcaption></figure>

{% hint style="info" %}
Note: CRM imports are limited to 10,000 accounts per list, to keep the import fast and reliable. If your list has more than 10,000 accounts, import it as a CSV file instead ([see Method 2](https://app.gitbook.com/o/j0dmg4x3Hdhfj3EDr66v/sites/site_LYknN/s/x46P5sAHxDG7PqOdVLxI/~/edit/~/changes/701/getting-started/for-admins/step-1-build-your-target-account-list#method-2-upload-a-file-csv-excel)).
{% endhint %}

2. If you can't find your list, it's usually for one of two reasons:
   1. **Only account lists can be imported and enriched today.** Contact and lead lists aren't supported.
   2. You recently created or updated the list in your CRM, and it hasn't synced to Reo yet. Click **Refresh CRM lists** to pull the latest version right away.
      {% endtab %}

{% tab title="Map columns" icon="2" %}

1. **Select the column that contains the company domain or website.**&#x20;
   1. Get this right: it's the foundational step Reo uses to match your CRM accounts to the correct accounts in Reo.&#x20;
   2. So, an incorrect mapping here can cause accounts to import against the wrong records.
2. All your CRM columns are listed below that.
3. **Toggle on the individual ones you want to bring into Reo**, or tick **Import all** to bring everything over in one go.
   1. **A search box** helps you find specific columns if your CRM has a lot of them.
   2. Reo **automatically detects each column's type** (string, integer, date, and so on)

<figure><img src="/files/flFl2H0x6lRpx9cz71Ky" alt=""><figcaption></figcaption></figure>
{% endtab %}

{% tab title="Add details" icon="3" %}

1. **List type** is set to **Account**.
2. **Provide a list name and description** (this will help your team members understand the list’s purpose when you share it).

<figure><img src="/files/K5atJ8aU3ZM2KjIM5Rvl" alt=""><figcaption></figcaption></figure>

3. Before you save, **Reo shows you an import summary:**
   1. The number of accounts that will be imported
   2. How many of those need enrichment
   3. The estimated credits that enrichment will cost
   4. Your available credit balance
   5. Which signals enrichment will add: tech stack, engineering team size and growth, job postings, prospect buyers, and AI insights

<figure><img src="/files/5gofezpEXJgXmV0qKi8Q" alt=""><figcaption></figcaption></figure>

4. **If your CRM list includes accounts that don't need enrichment** *(because they're already in Reo and already enriched)* Reo shows **the option to import them without enriching**, at no credit cost.
   1. This keeps the number of accounts in your Reo list matched to the number of accounts in your CRM list, even for the ones you're not spending credits to enrich.

<figure><img src="/files/VN3biaXv2fyEay4PYKFw" alt=""><figcaption></figcaption></figure>

5. The **Keep Reo list in sync with CRM list** toggle is on by default. Leave it on if you want this list to update automatically whenever your CRM list changes, **which is what we recommend for most use cases.**

<figure><img src="/files/dEHOnyUDrTEnelTZVz01" alt=""><figcaption></figcaption></figure>

{% hint style="warning" %}
Important - Decide on the sync between your CRM and Reo \
\
Turn it off only if you specifically want a one-time snapshot import with no ongoing connection to your CRM. You can do this later as well, from the **Lists** view.
{% endhint %}

6. Click **Save changes**.
   {% endtab %}
   {% endtabs %}

**Prefer to watch instead?** This quick walkthrough covers the entire process below, from selecting your CRM list to keeping it in sync.

{% embed url="<https://reo-dev.portal.trainn.co/share/N3dqDp8qrNYA1VHL2GSgkA>" %}

### After you import

Open the list and you'll see Reo's standard account fields alongside the CRM columns you chose to import, all on the same account records.

On the main **Lists** page, each list shows a **Source** column that tells you how it was created:

* **Created in Reo:** built manually inside Reo, for example with Build a segment
* **Imported file:** brought in via CSV or Excel upload
* **A CRM's logo (for example, Hubspot), with a sync icon:** imported from that CRM
* **Agent created:** built by a Reo agent
* **MCP created:** built through Reo's MCP integration
* **API created:** built through the Reo API

<figure><img src="/files/BWj10LHlhNjEO0I0x9w8" alt=""><figcaption></figcaption></figure>

### Manage syncing lists between your CRM and Reo

<details>

<summary>If a new account is added to your CRM list</summary>

* The new account will be added and enriched in Reo automatically, using credits as needed. Sync checks for changes every 24 hours.
* The sync icon next to a CRM-sourced list means Reo is keeping it in sync with your CRM automatically.&#x20;

</details>

<details>

<summary>If an account is removed from your CRM list</summary>

* The account will be removed from Reo list as well.&#x20;
* Credits already spent enriching that account aren't refunded.

</details>

Click the sync icon at any time to see the list's sync status and the date it last synced. You're in control of it: use the **Disable sync** button if you'd rather this list stop updating automatically and become a one-time snapshot instead.

<figure><img src="/files/7eWJlfAhNj8hlQH5JrMi" alt=""><figcaption></figcaption></figure>

***

{% hint style="info" icon="circle-question" %}
**Have more questions about importing from CRM?** Check out [some of the frequently asked questions](https://docs.reo.dev/faqs-and-troubleshooting/things-to-know-before-and-after-you-import-accounts-from-crm) for answers on credits, syncing behavior, and common troubleshooting scenarios.
{% endhint %}

### Method 2: Upload a file (CSV/Excel)

Use this when your accounts aren't in a connected CRM, you need a one-off import, or your CRM list is larger than the 10,000 account limit for CRM imports.

#### Steps

1. From the **left navigation menu >** go to **Lists >** then click **Import file**.

<figure><img src="/files/uPimRhAM8YkpJjQ7JAKB" alt=""><figcaption></figcaption></figure>

2. Choose the list type, **Accounts or Developers >** **upload your file >** click **Next**.

* For accounts, you can import and enrich in the same flow.
* For developers, it's import only; enrichment isn't available for developer lists.
* *Supported file types: CSV, XLSX, and XLS.*

<figure><img src="/files/xiiybDdCquCDU25VUHiq" alt=""><figcaption></figcaption></figure>

3. Select the **column containing the company domain or website**, then click **Next**.
4. You'll see the **full list of columns available to import from your file**.
5. **Toggle on the individual columns you want to bring into Reo**, or tick **Import all** to bring everything over in one go.
   * **A search box** helps you find specific columns if your file has a lot of them.
   * For every column you import, **choose its type**: string, integer, or date.

<figure><img src="/files/4TC8PiegIpdeBxpWeecX" alt=""><figcaption></figcaption></figure>

6. Click **Next**.
7. **Give your list a name and an optional description.** A good description helps your team understand what the list is for, especially useful if you plan to share it.

<figure><img src="/files/dupk3plAT171FDITTFkn" alt=""><figcaption></figcaption></figure>

8. Before you save, Reo shows you an import summary:
   1. The number of accounts that will be imported
   2. How many of those need enrichment
   3. The estimated credits that enrichment will cost
   4. Your available credit balance
   5. Which signals enrichment will add: tech stack, engineering team size and growth, job postings, prospect buyers, and AI insights

<figure><img src="/files/URxHBi573nykU3A3LB0h" alt=""><figcaption></figcaption></figure>

9. **If your CSV file includes accounts that don't need enrichment** *(because they're already in Reo and already enriched)* Reo shows **the option to import them without enriching**, at no credit cost.
10. Click **Save changes**. You'll get an email once the import finishes, and your list will appear under **My Lists**.

{% hint style="info" %}
**Good to know:** A file upload is a one-time snapshot.\
\
It won't stay in sync with your source file or your CRM, so if your account list changes afterward, you'll need to export and upload again.&#x20;

If you'd rather your list stayed current on its own, use Import from CRM instead ([see Method 1](https://app.gitbook.com/o/j0dmg4x3Hdhfj3EDr66v/sites/site_LYknN/s/x46P5sAHxDG7PqOdVLxI/~/edit/~/changes/701/getting-started/for-admins/step-1-build-your-target-account-list#method-1-import-from-your-crm)).
{% endhint %}

### After you import

Open the list and you'll see Reo's standard account fields alongside the CRM columns you chose to import, all on the same account records.

On the main **Lists** page, each list shows a **Source** column that tells you how it was created:

* **Created in Reo:** built manually inside Reo, for example with Build a segment
* **Imported file:** brought in via CSV or Excel upload
* **A CRM's logo (for example, Hubspot), with a sync icon:** imported from that CRM
* **Agent created:** built by a Reo agent
* **MCP created:** built through Reo's MCP integration
* **API created:** built through the Reo API

<figure><img src="/files/qsnZC4MNAUy4KTU9uagi" alt=""><figcaption></figcaption></figure>

***

### Method 3: Build a segment

Use this **when you want to filter accounts Reo already tracks**, without importing anything new.

{% hint style="info" icon="circle-info" %}
Segments are customizable cohorts of high-intent accounts, developers, or buyers, built from specific filters and attributes. They help you act on the ones that matter most, so you can prioritize outreach and focus your team on the opportunities most likely to convert.
{% endhint %}

#### Steps

1. From the **left navigation menu >** go to **Segments >** click **Create new**.

<figure><img src="/files/nwoA916YIl8XLZcTGRC3" alt=""><figcaption></figcaption></figure>

2. Choose whether to build a **Basic** or **Advanced** segment, depending on how many filter criteria you need to combine.&#x20;

{% hint style="info" %}
For a full walkthrough of the difference, see the [Basic & Advanced Segments Guide](https://docs.reo.dev/segments/basic-and-advanced-segments).
{% endhint %}

<figure><img src="/files/kjSAAJtLVdgFMNi4n9Jr" alt=""><figcaption></figcaption></figure>

3. Choose what the segment is for: **Accounts**, **Developers**, or **Buyers**.

<figure><img src="/files/EHw6pPxt4KT8ezHLcAGY" alt=""><figcaption></figcaption></figure>

4. **Name the segment.**
5. **Add a tag name and description.** Tags let you quickly filter and prioritize these accounts later, based on the same criteria you're defining now.&#x20;

{% hint style="info" %}
See [Customizing Tags](https://docs.reo.dev/accounts/customizing-tags) for more on how tags work across Reo.
{% endhint %}

<figure><img src="/files/mYHnGjjRoBreLPomOZP3" alt=""><figcaption></figcaption></figure>

6. **Add your filters.** Choose from Reo's full range of filters, including region, firmographics, tech stack, developer activity. If your CRM is connected, filter by **CRM Owner** to see only the accounts you personally own.

<figure><img src="/files/4HzIaVkdEYExNAroe5np" alt=""><figcaption></figcaption></figure>

{% hint style="info" %}
For the complete list of available filters, see [Filters 101](https://docs.reo.dev/segments/filters-101).
{% endhint %}

<figure><img src="/files/HTFL0rGkegITSnOrFAOq" alt=""><figcaption></figcaption></figure>

7. If you're combining more than one filter, choose how they should relate:
   1. **Match All (the AND operator)**
   2. **Match Any (the OR operator)**

<figure><img src="/files/rgL95xjsnKaFEw6M83AZ" alt=""><figcaption></figcaption></figure>

8. As you add filters, Reo shows you **a live count of how many accounts currently match your criteria**, so you can see the size of your segment before you save it.

<figure><img src="/files/bzLNPq83X037YyMRH7OI" alt=""><figcaption></figcaption></figure>

9. If you'd like this segment to be what you see by default, check **Set this as Default Segment**. This makes it the view you land on whenever you open the Accounts, Developers, or Buyers dashboard.

<figure><img src="/files/NLorIDdEVec944Q4v3uq" alt=""><figcaption></figcaption></figure>

10. Click **Save and Exit**.

***

### Credits and enrichment status

Enrichment is what powers the signals Reo adds to your accounts, and it draws from your credit balance.&#x20;

As an admin, here's what you'll see if you run low:

<details>

<summary><strong>On your first import or enrichment</strong></summary>

If you don't have enough credits, your list shows the status **Enrichment incomplete**. Buy more credits to finish enriching the list.&#x20;

</details>

<details>

<summary><strong>On a later sync</strong></summary>

If there aren't enough credits to enrich newly added accounts, the list shows the status **Sync paused**. Buy more credits to resume.

</details>

### What’s next

Once your accounts are in Reo, see ‘Explore your account data’ to learn how to review the firmographics, activity, and buyer insights Reo has gathered for each one.


# Step 2: Explore your account data

A tab-by-tab guide to everything you'll find on an account page in Reo

Once you have built your target account list, here’s how you can get the most value out of them.

**Every account Reo tracks becomes a living profile:** firmographics, buying stage signals, developer activity, hiring trends, and the actual people behind the account, all in one place.

This guide walks you through everything you'll find on an account page, tab by tab, so you always know exactly where to look for the answer you need.

{% hint style="info" %}
**Before you start:** You'll need at least one account in Reo already. If you haven't built your target account list yet, start with [**Create your target account list**](https://docs.reo.dev/~/revisions/LpXrIuXoRo1tuAYMfI7z/getting-started/for-admins/step-2-explore-your-account-data) before proceeding.
{% endhint %}

### Exploring an account

From the **left navigation menu >** go to **Accounts** (OR) open any list/segment you've built in Reo, and click an account's name.

<figure><img src="/files/dbUXHNfzZwxUAxV2Fx2S" alt=""><figcaption></figcaption></figure>

This opens the **account's full profile, organized into six tabs.**&#x20;

Here's what each one gives you, and when to use it.

<figure><img src="/files/SzGtEHb0Tod65m8fkeUv" alt=""><figcaption></figcaption></figure>

### 1. Overview

This is the first thing you'll see when you open an account, and **it's your snapshot of the whole account.**

Here you'll find:

* Firmographic details: company size, industry, funding, and more
* Where the account sits in its buying or evaluation journey, shown as its Dev Funnel stage
* Which of your ICP technologies the account is actively hiring for

**Make this your starting point every time you open an account.** It answers the first question you'll usually have: is this account worth spending time on right now?

### 2. Activity Insights

Click the **Activity Insights** tab to see how active this account's developers actually are.

<figure><img src="/files/d4MqLr0KzFdtrU1FID5N" alt=""><figcaption></figcaption></figure>

Here you'll find:

* A developer activity score for the account
* The number of active developers
* Where those developers are active from
* A snapshot of overall activity volume across every source Reo tracks

**This is where you gauge intent.** A high activity score is often your earliest signal that an account is worth prioritizing, well before anyone there has talked to sales.

### 3. Activity Timeline

Click the **Activity Timeline** tab for a chronological view of everything developers at this account have done.

**Use the filter option to narrow the timeline down to specific activity types**, so you can focus on one signal at a time instead of scrolling through everything.

<figure><img src="/files/TyBMyFRJVI2jYBbe6pt2" alt=""><figcaption></figcaption></figure>

### 4. Technographics

Click the **Technographics** tab to see hiring trends for your preferred technology functions, along with every job posting tied to your ICP technologies.&#x20;

{% hint style="warning" %}
Before you start seeing data under 'Technographics,' make sure you've configured your **ICP and Preferred Technologies under Settings > Configurations**.
{% endhint %}

<figure><img src="/files/2lDKM1yw0aTnonW61meq" alt=""><figcaption></figcaption></figure>

**This is especially useful for spotting accounts that are actively building out a team around the technology you care about**, which is often a stronger signal of real investment than a single conversation would be.

### 5. Active Developers

Click the **Active Developers** tab to see the actual people behind all that activity.

<figure><img src="/files/f8yPRXfS59HXIEluRTDa" alt=""><figcaption></figcaption></figure>

Here you can:

* View every de-anonymized developer at the account
* Access their contact details, including business email addresses and LinkedIn profiles
* Add developers directly to email sequences, right from this tab

**This is where account level insight turns into an actual outreach action.**

### 6. More Prospects

Click **More Prospects** to look beyond developers and find buyers: the people at this account who may not have engaged with your tracked assets yet, but are still worth reaching.

* Reo shows you **a list of recommended prospects for the account.**
* **Refine that list using filters** like location, seniority, designation, and job function, or apply a persona you've already built.
* Once you've found the right people, **reveal them to access their contact details and take action.**
* Everyone you reveal is saved to the **Revealed** tab, so you can always find them again later without having to search from scratch.
* **If your CRM is integrated,** this **CRM Prospects tab** also shows you which of these prospects already exist in your CRM, so you always know whether you're looking at someone new or someone your team is already tracking.

<figure><img src="/files/C3T9YSwEiS9Qeh1fAUSV" alt=""><figcaption></figcaption></figure>

### What's next

Once you've explored an account and found the people worth reaching, act on them: reveal contacts, add developers to a sequence, or fold the account into a segment for ongoing tracking.&#x20;

From here, the next step in your onboarding is **Find developers engaging with your product**.


# Step 3: Find developers engaging with your product

Reo.Dev empowers you with in-depth insights into developers engaging with your product assets. In this guide, we will take you through the different intel Reo.Dev provides for each developer.

**Step 1:** Navigate to the **Developers** page on the left panel. Here, you'll find various details about developers such as their company, location, Job Title, Dev Activity score, and contact IDs.

<figure><img src="https://docs.reo.dev/~gitbook/image?url=https%3A%2F%2F2705882080-files.gitbook.io%2F%7E%2Ffiles%2Fv0%2Fb%2Fgitbook-x-prod.appspot.com%2Fo%2Fspaces%252Fx46P5sAHxDG7PqOdVLxI%252Fuploads%252FlsJbdXGlmkdTjwozkSzj%252Fimage.png%3Falt%3Dmedia%26token%3D0d77d2fd-6077-4774-963d-e80aaf2d5239&#x26;width=768&#x26;dpr=3&#x26;quality=100&#x26;sign=93632d28&#x26;sv=2" alt=""><figcaption></figcaption></figure>

**Step 2:** **Click on a developer's name** to see their detailed profile and activity log.

The **Developer Profile** provides information such as designation, current company, joining date, location, first and last activity dates, past companies & more.

<figure><img src="https://docs.reo.dev/~gitbook/image?url=https%3A%2F%2F2705882080-files.gitbook.io%2F%7E%2Ffiles%2Fv0%2Fb%2Fgitbook-x-prod.appspot.com%2Fo%2Fspaces%252Fx46P5sAHxDG7PqOdVLxI%252Fuploads%252FvL3StrZYSaZ9P0riaynC%252Fimage.png%3Falt%3Dmedia%26token%3Df59a5eb0-7a76-4871-bc7f-8c5dfd8d481b&#x26;width=768&#x26;dpr=3&#x26;quality=100&#x26;sign=b88c5727&#x26;sv=2" alt=""><figcaption></figcaption></figure>

**Developer Activity** gives you a quick overview of the activities (and the count of activities) the developer has done across different sources/channels.

<figure><img src="https://docs.reo.dev/~gitbook/image?url=https%3A%2F%2F2705882080-files.gitbook.io%2F%7E%2Ffiles%2Fv0%2Fb%2Fgitbook-x-prod.appspot.com%2Fo%2Fspaces%252Fx46P5sAHxDG7PqOdVLxI%252Fuploads%252Fip1rux2zWuXzPGHr7UEg%252Fimage.png%3Falt%3Dmedia%26token%3D96334f78-16c5-4de2-8a3a-9a1687b26030&#x26;width=768&#x26;dpr=3&#x26;quality=100&#x26;sign=60931f1e&#x26;sv=2" alt=""><figcaption></figcaption></figure>

The **Activity Timeline** shows you a chronological view of all the activities done by the developer. You can further use the activity filter to narrow down and view specific activities.

<figure><img src="https://docs.reo.dev/~gitbook/image?url=https%3A%2F%2F2705882080-files.gitbook.io%2F%7E%2Ffiles%2Fv0%2Fb%2Fgitbook-x-prod.appspot.com%2Fo%2Fspaces%252Fx46P5sAHxDG7PqOdVLxI%252Fuploads%252F8AkeAw7ugKXPPGmQhpYK%252Fimage.png%3Falt%3Dmedia%26token%3D4dba99ff-35d8-40d9-9dfa-5dbb0fdde0da&#x26;width=768&#x26;dpr=3&#x26;quality=100&#x26;sign=674ab705&#x26;sv=2" alt=""><figcaption></figcaption></figure>

This gives you more context on developer actions and helps you personalize your outreach based on those actions.


# Step 4: Create custom segments that are most likely to convert

Segments in Reo.Dev are cohorts of accounts/developers/buyers categorized based on specific attributes. In this article, we will guide you on creating segments to find high-intent accounts.

**Step 1:** Click on **Segments**

<figure><img src="https://docs.reo.dev/~gitbook/image?url=https%3A%2F%2F2705882080-files.gitbook.io%2F%7E%2Ffiles%2Fv0%2Fb%2Fgitbook-x-prod.appspot.com%2Fo%2Fspaces%252Fx46P5sAHxDG7PqOdVLxI%252Fuploads%252FqUGIk12mllzZKQ5lq2tU%252Fimage.png%3Falt%3Dmedia%26token%3Df4834b50-6512-4616-a7eb-3cd93e373bc1&#x26;width=768&#x26;dpr=3&#x26;quality=100&#x26;sign=8d4a0de4&#x26;sv=2" alt=""><figcaption></figcaption></figure>

When you're getting started on Reo.Dev and want to quickly find some high-intent accounts, magic segments is a great feature to explore.

**Step 2:** Click on **'Magic Segments'**

These are pre-built segments by Reo.Dev to help you easily find the high-intent accounts.

<figure><img src="https://docs.reo.dev/~gitbook/image?url=https%3A%2F%2F2705882080-files.gitbook.io%2F%7E%2Ffiles%2Fv0%2Fb%2Fgitbook-x-prod.appspot.com%2Fo%2Fspaces%252Fx46P5sAHxDG7PqOdVLxI%252Fuploads%252FHLTtpcJB7OWjNlF5em6t%252Fimage.png%3Falt%3Dmedia%26token%3Ddbe10c82-6ee6-41c2-9b24-e6b337c3d320&#x26;width=768&#x26;dpr=3&#x26;quality=100&#x26;sign=66f774b6&#x26;sv=2" alt=""><figcaption></figcaption></figure>

**Step 3:** To create a new segment, click on **Create New**

<figure><img src="https://docs.reo.dev/~gitbook/image?url=https%3A%2F%2F2705882080-files.gitbook.io%2F%7E%2Ffiles%2Fv0%2Fb%2Fgitbook-x-prod.appspot.com%2Fo%2Fspaces%252Fx46P5sAHxDG7PqOdVLxI%252Fuploads%252FaKffFvHIyDQTO0CAvD0u%252Fimage.png%3Falt%3Dmedia%26token%3D5c7f6990-210c-4b17-9c57-e403ce812437&#x26;width=768&#x26;dpr=3&#x26;quality=100&#x26;sign=343c0d79&#x26;sv=2" alt=""><figcaption></figcaption></figure>

**Step 4:** Based on your filter critera - choose whether to create a basic or an advanced segment.

<figure><img src="https://docs.reo.dev/~gitbook/image?url=https%3A%2F%2F2705882080-files.gitbook.io%2F%7E%2Ffiles%2Fv0%2Fb%2Fgitbook-x-prod.appspot.com%2Fo%2Fspaces%252Fx46P5sAHxDG7PqOdVLxI%252Fuploads%252FtAzRy3RrNs7uxTLnVqA4%252Fimage.png%3Falt%3Dmedia%26token%3D66b65c0e-5a5f-4d08-912a-4aefe5bf4bc5&#x26;width=768&#x26;dpr=3&#x26;quality=100&#x26;sign=d8c514a5&#x26;sv=2" alt=""><figcaption></figcaption></figure>

**Step 5:** Decide whether to create a segment for accounts or developers or buyers.

<figure><img src="https://docs.reo.dev/~gitbook/image?url=https%3A%2F%2F2705882080-files.gitbook.io%2F%7E%2Ffiles%2Fv0%2Fb%2Fgitbook-x-prod.appspot.com%2Fo%2Fspaces%252Fx46P5sAHxDG7PqOdVLxI%252Fuploads%252Fj3ejn2hcNEvmdIOFSlXM%252Fimage.png%3Falt%3Dmedia%26token%3De7f7ae8e-d828-46b5-be70-c43ca0107081&#x26;width=768&#x26;dpr=3&#x26;quality=100&#x26;sign=89362787&#x26;sv=2" alt=""><figcaption></figcaption></figure>

> As an example - we will create a segment for accounts that have been **'Active on your competitors Github repositories'**

**Step 6:** **Name** the segment

<figure><img src="https://docs.reo.dev/~gitbook/image?url=https%3A%2F%2F2705882080-files.gitbook.io%2F%7E%2Ffiles%2Fv0%2Fb%2Fgitbook-x-prod.appspot.com%2Fo%2Fspaces%252Fx46P5sAHxDG7PqOdVLxI%252Fuploads%252FgrwQCU5vUvukSMJcKm47%252Fimage.png%3Falt%3Dmedia%26token%3D1a0fef59-0295-49cf-9844-05caa539fa39&#x26;width=768&#x26;dpr=3&#x26;quality=100&#x26;sign=2d35df&#x26;sv=2" alt=""><figcaption></figcaption></figure>

**Step 7:** Add a **custom tag name and description.** It helps you quickly identify and filter these accounts.

<figure><img src="https://docs.reo.dev/~gitbook/image?url=https%3A%2F%2F2705882080-files.gitbook.io%2F%7E%2Ffiles%2Fv0%2Fb%2Fgitbook-x-prod.appspot.com%2Fo%2Fspaces%252Fx46P5sAHxDG7PqOdVLxI%252Fuploads%252FrdUtV0ymAppUApXyVXZo%252Fimage.png%3Falt%3Dmedia%26token%3D678a6543-ba04-4d36-b767-489ca7d46b3b&#x26;width=768&#x26;dpr=3&#x26;quality=100&#x26;sign=a71151fb&#x26;sv=2" alt=""><figcaption></figcaption></figure>

**Step 8:** Add **filters**

<figure><img src="https://docs.reo.dev/~gitbook/image?url=https%3A%2F%2F2705882080-files.gitbook.io%2F%7E%2Ffiles%2Fv0%2Fb%2Fgitbook-x-prod.appspot.com%2Fo%2Fspaces%252Fx46P5sAHxDG7PqOdVLxI%252Fuploads%252FpjuMhygvSmxUOTwiM0ap%252Fimage.png%3Falt%3Dmedia%26token%3D50432c37-8852-471f-95ec-e120f3728567&#x26;width=768&#x26;dpr=3&#x26;quality=100&#x26;sign=3f896f7a&#x26;sv=2" alt=""><figcaption></figcaption></figure>

For this segment we will add the following filters:

1. Activity Group —> Github Repository —> Repository Type —> 'Competition'

<figure><img src="https://docs.reo.dev/~gitbook/image?url=https%3A%2F%2F2705882080-files.gitbook.io%2F%7E%2Ffiles%2Fv0%2Fb%2Fgitbook-x-prod.appspot.com%2Fo%2Fspaces%252Fx46P5sAHxDG7PqOdVLxI%252Fuploads%252FbNhlsSbUMi4Q9CnWROuM%252Fimage.png%3Falt%3Dmedia%26token%3D578a9655-d252-4f30-816f-d64a72981c32&#x26;width=768&#x26;dpr=3&#x26;quality=100&#x26;sign=1655007&#x26;sv=2" alt=""><figcaption></figcaption></figure>

2. Activity Type —> Github —> Fork, Pull Request, Opened Issue, Comment. Here we will also set the data range as 'last 180 days'

<figure><img src="https://docs.reo.dev/~gitbook/image?url=https%3A%2F%2F2705882080-files.gitbook.io%2F%7E%2Ffiles%2Fv0%2Fb%2Fgitbook-x-prod.appspot.com%2Fo%2Fspaces%252Fx46P5sAHxDG7PqOdVLxI%252Fuploads%252F2IoEUbTsgtIAeKkZFfjz%252Fimage.png%3Falt%3Dmedia%26token%3D5bcc04fc-7f09-4b35-8ab9-93e20d5adf63&#x26;width=768&#x26;dpr=3&#x26;quality=100&#x26;sign=d6c52517&#x26;sv=2" alt=""><figcaption></figcaption></figure>

3. Account Intel —> ICP fit score → Strong, Moderate

<figure><img src="https://docs.reo.dev/~gitbook/image?url=https%3A%2F%2F2705882080-files.gitbook.io%2F%7E%2Ffiles%2Fv0%2Fb%2Fgitbook-x-prod.appspot.com%2Fo%2Fspaces%252Fx46P5sAHxDG7PqOdVLxI%252Fuploads%252FHi7WNuQrLaSEjkZNF6uB%252Fimage.png%3Falt%3Dmedia%26token%3D911c8c2c-681b-425d-8fa8-29cdc6a97361&#x26;width=768&#x26;dpr=3&#x26;quality=100&#x26;sign=66304a9&#x26;sv=2" alt=""><figcaption></figcaption></figure>

**Note:** When you have multiple criteria's you can use 2 conditional operators - The 'AND' function includes only those accounts that match all the criterias. The 'OR' function and would include accounts that match any of the given criteria's.

<figure><img src="https://docs.reo.dev/~gitbook/image?url=https%3A%2F%2F2705882080-files.gitbook.io%2F%7E%2Ffiles%2Fv0%2Fb%2Fgitbook-x-prod.appspot.com%2Fo%2Fspaces%252Fx46P5sAHxDG7PqOdVLxI%252Fuploads%252FDgpSPu2uMTw4fLQ8gAuG%252Fimage.png%3Falt%3Dmedia%26token%3D25f80f5e-33cd-4002-95f6-c2ec4a74d45e&#x26;width=768&#x26;dpr=3&#x26;quality=100&#x26;sign=e1daac84&#x26;sv=2" alt=""><figcaption></figcaption></figure>

**Step 9:** After adding the filters, click on **Save and Exit**.

In the accounts section you can view all the accounts in this segment. The tag appears beside the account.

<figure><img src="https://docs.reo.dev/~gitbook/image?url=https%3A%2F%2F2705882080-files.gitbook.io%2F%7E%2Ffiles%2Fv0%2Fb%2Fgitbook-x-prod.appspot.com%2Fo%2Fspaces%252Fx46P5sAHxDG7PqOdVLxI%252Fuploads%252F0WmAlDoNTyKFhZK7nYf2%252Fimage.png%3Falt%3Dmedia%26token%3Dbe95861a-987e-4637-9266-2a73e97be5b6&#x26;width=768&#x26;dpr=3&#x26;quality=100&#x26;sign=392c88da&#x26;sv=2" alt=""><figcaption></figcaption></figure>

You can also view the segment you created under the **'my segments'** tab

<figure><img src="https://docs.reo.dev/~gitbook/image?url=https%3A%2F%2F2705882080-files.gitbook.io%2F%7E%2Ffiles%2Fv0%2Fb%2Fgitbook-x-prod.appspot.com%2Fo%2Fspaces%252Fx46P5sAHxDG7PqOdVLxI%252Fuploads%252FV4YY6k7QMzCxOigoQHhi%252Fimage.png%3Falt%3Dmedia%26token%3Ded65d921-1470-403a-ac96-4224219d8a77&#x26;width=768&#x26;dpr=3&#x26;quality=100&#x26;sign=f4a9b93b&#x26;sv=2" alt=""><figcaption></figcaption></figure>

**Step 10:** Click on the 3-dotted menu and then click on **share segment.**

<figure><img src="https://docs.reo.dev/~gitbook/image?url=https%3A%2F%2F2705882080-files.gitbook.io%2F%7E%2Ffiles%2Fv0%2Fb%2Fgitbook-x-prod.appspot.com%2Fo%2Fspaces%252Fx46P5sAHxDG7PqOdVLxI%252Fuploads%252FCVWPZj6Zd2dIpClME1JJ%252Fimage.png%3Falt%3Dmedia%26token%3D0d853e6c-79e4-4c75-b9aa-811330e1e4d4&#x26;width=768&#x26;dpr=3&#x26;quality=100&#x26;sign=a56dad57&#x26;sv=2" alt=""><figcaption></figcaption></figure>

**Step 11:** Choose the members you want to share the segment with and add notes to give them more context about the segment. And hit the share button.

<figure><img src="https://docs.reo.dev/~gitbook/image?url=https%3A%2F%2F2705882080-files.gitbook.io%2F%7E%2Ffiles%2Fv0%2Fb%2Fgitbook-x-prod.appspot.com%2Fo%2Fspaces%252Fx46P5sAHxDG7PqOdVLxI%252Fuploads%252FVGeMYDYLaqQQ64MESGUb%252Fimage.png%3Falt%3Dmedia%26token%3D8b8b8033-dcf2-4c47-a909-c55d41a173ae&#x26;width=768&#x26;dpr=3&#x26;quality=100&#x26;sign=db08d914&#x26;sv=2" alt=""><figcaption></figcaption></figure>


# Step 5: Integrating data sources with Reo.Dev

{% embed url="<https://youtu.be/yrEYr9L-YQo>" %}

In this guide, you'll learn how to set up integrations with various data sources including Github, documents, CRM and more to track developer activities across various platforms and sources and find active accounts to target.

### **Connecting Github**

Connecting Github enables you to track developer actions such as pull requests, fork open issues, and more across your GitHub repositories.

**Step 1:** Navigate to the **Integrations** tab

<figure><img src="/files/JMhOyTGODmrAZg22taJ2" alt=""><figcaption></figcaption></figure>

**Step 2:** Click on the **configure** button on the **Github card**

<figure><img src="/files/e42XMCOGjrbwGJ2LU8gp" alt=""><figcaption></figcaption></figure>

{% hint style="info" %}
Here you can connect 3 main types of repositories

1. **Owned Github Repository -** These are repositories owned by your organization.
2. **Competitor Repository -** These are owned and managed by your competitors. This data helps find prospects actively engaging with your competitors' platforms.
3. **Complementary Repositories -** These are repositories of tools that are complement your product/service
   {% endhint %}

**Step 3:** To add your company's own repositories, expand the tab for '**Owned GitHub Repositories**' and enter the URL of your repository. Add multiple repositories if needed.

Follow the same process to add competitor and complementary repositories.

After adding all the repositories, click **Save**.

<figure><img src="/files/bxTRHHDkPJiY1hdBvSgY" alt=""><figcaption></figcaption></figure>

### **Set up Tracking across Documents, Product, Website and Other key assets**&#x20;

Reo.Dev enables you to monitor and track developer activities across documents, product, website and other key assets.

#### Documentation

**Step 1:** On the integrations page, click on configure in the **'Documentation'** card

<figure><img src="/files/NWYKtEjJyEQbU8jTPMJQ" alt=""><figcaption></figcaption></figure>

**Step 2:** **Configure Documentation URL -** Add the specific document URLs you want to track. For every URL, add a Page Name.&#x20;

<figure><img src="/files/wXvHzupJvixMDilOrkxM" alt=""><figcaption></figcaption></figure>

**Step 3:**  Add your high-intent pages e.g, Troubleshooting, API Reference, Installation Guides as key pages so you can track activities on these pages separately. For every URL, add a Page Name.&#x20;

<figure><img src="/files/w05j4hgGZXsvH7Kmiltm" alt=""><figcaption></figcaption></figure>

**Step 4:** **Install Tracking Pixel on your Documentation -** Copy the Javascript code snippet and paste it in the \<header> of your site.&#x20;

<figure><img src="/files/IuHv9gInk2M3zjq9K9x1" alt=""><figcaption></figcaption></figure>

[Here's a more detailed guide on setting up tracking for your documentation. ](https://docs.reo.dev/integrations/input-sources/developer-insights/documentation)

#### Website&#x20;

**Step 1:** Add the **website base URLs** you'd like to track activity on. For every URL - add a page name.&#x20;

<figure><img src="/files/UxbRLvMzTQMlJKHnjHHr" alt=""><figcaption></figcaption></figure>

**Step 2:** Add your high-intent website pages as key pages to track activities on specific pages of your website separately. Add a page name for every key page.&#x20;

<figure><img src="/files/a31cxoSx1qhkMxMJjiNe" alt=""><figcaption></figcaption></figure>

**Step 3: Install Tracking Pixel -** Copy the below tracking code snippet and paste it in the of your site

```javascript

  !function(){var e,t,n;e="c07f38f6d83bb7e",t=function(){Reo.init({clientID:"c07f38f6d83bb7e"})},(n=document.createElement("script")).src="<https://static.reo.dev/"+e+"/reo.js>",n.defer=!0,n.onload=t,document.head.appendChild(n)}();
```

[Here's a more detailed guide on setting up website tracking ](https://docs.reo.dev/integrations/input-sources/developer-insights/website)

#### Code Interactions

Track specific command interactions. Commands to install a package manager or execute software are high-intent signals indicating active engagement on your product.

**Step 1:** On the integrations page, click on configure in the **'Code Interactions'** card

<figure><img src="/files/u8STABKg1x6VYGBGKr04" alt=""><figcaption></figcaption></figure>

**Step 2:** Add the Key Commands you want to track. Add a command label for every command.&#x20;

<figure><img src="/files/8bUEOvn9eAdFMlVZgOJu" alt=""><figcaption></figcaption></figure>

### **Connecting CRM**

This integration helps you read life cycle stages for contacts and accounts, map customer CRM fields, and sync developer and account insights directly into your CRM.

To integrate your CRM, head to CRM in the integrations section. Choose the CRM you want to connect.

<figure><img src="/files/BWxOXjTTy336oXVCKb1U" alt=""><figcaption></figcaption></figure>

Now, one of the biggest challenges SDRs face is using multiple tools for prospecting - one for finding leads and the other for sending emails. In Reo.Dev - you can do it all from one platform - Let's show you how.

**Step 1:** Go to Integrations > Messaging Tools. Then, Configure the tools you want to connect.&#x20;

<figure><img src="/files/m0ogAHpN06rFG6R7mttD" alt=""><figcaption></figcaption></figure>

For eg - Integrations with Apollo allows your teams to identify potential buyers and add them to your existing Apollo sequences from Reo.Dev itself.

<figure><img src="/files/IaEssGcnn9hhae5skhd0" alt=""><figcaption></figcaption></figure>

**Step 2:** Add the API key.

> [Here's a quick guide on how to create a master key on Apollo.ai](https://docs.reo.dev/integrations/output-integrations/messaging-tools/apollo.io#create-a-master-key-in-apollo.ai)

In the sequences section you can see all the sequences that are on your apollo account. And in just a click you can enroll developers and buyer directly into these sequences.

<figure><img src="/files/Z2L2grRsvHidb74vUpPe" alt=""><figcaption></figcaption></figure>


# Step 6: Integrate Slack and set up notifications

This guide explains how to integrate Reo.Dev with Slack, and set up alerts for specific developer activities in an account or segment.

### Integrating Slack with Reo.Dev

Reo.Dev provides seamless integration with Slack to deliver real-time alerts on developer activity from an account, developer profile, or segments directly within your Slack channel.

**Alert Sharing Options in Slack**

There are two ways in which you can share alerts to a Slack channel:

* **Share alerts with others on a Slack channel:** Get notified of all developer activities from corresponding accounts in your preferred **public Slack channel**. *Private Slack channels are not supported due to Slack’s restrictions for unapproved apps, ensuring user privacy and security.* This allows you to share updates with your teammates in public channels only.
* **Receive alerts to self through the Reo.Dev App:** Receive key updates on developer activity from a single or multiple accounts that you choose to follow in Reo.Dev. These alerts will be visible only to you.

### User Roles

Please note that we’ve bifurcated user roles for Slack integration.

As an **Admin,** you can:

1. Setup the connection/integration for Reo.Dev’s Slack app
2. Select a Slack channel to share alerts with teammates

As an **Admin and non-admin**, you can:

1. Enable alerts for an account/developer on the Slack App. These alerts will be visible only to you.

For Admins: How to integrate with the Slack App

**Step 1:** Go to **Integrations > Notifications** and then click **Configure** on the notifications card.

<figure><img src="/files/7bV1P2uiflgasv9oBlpn" alt=""><figcaption></figcaption></figure>

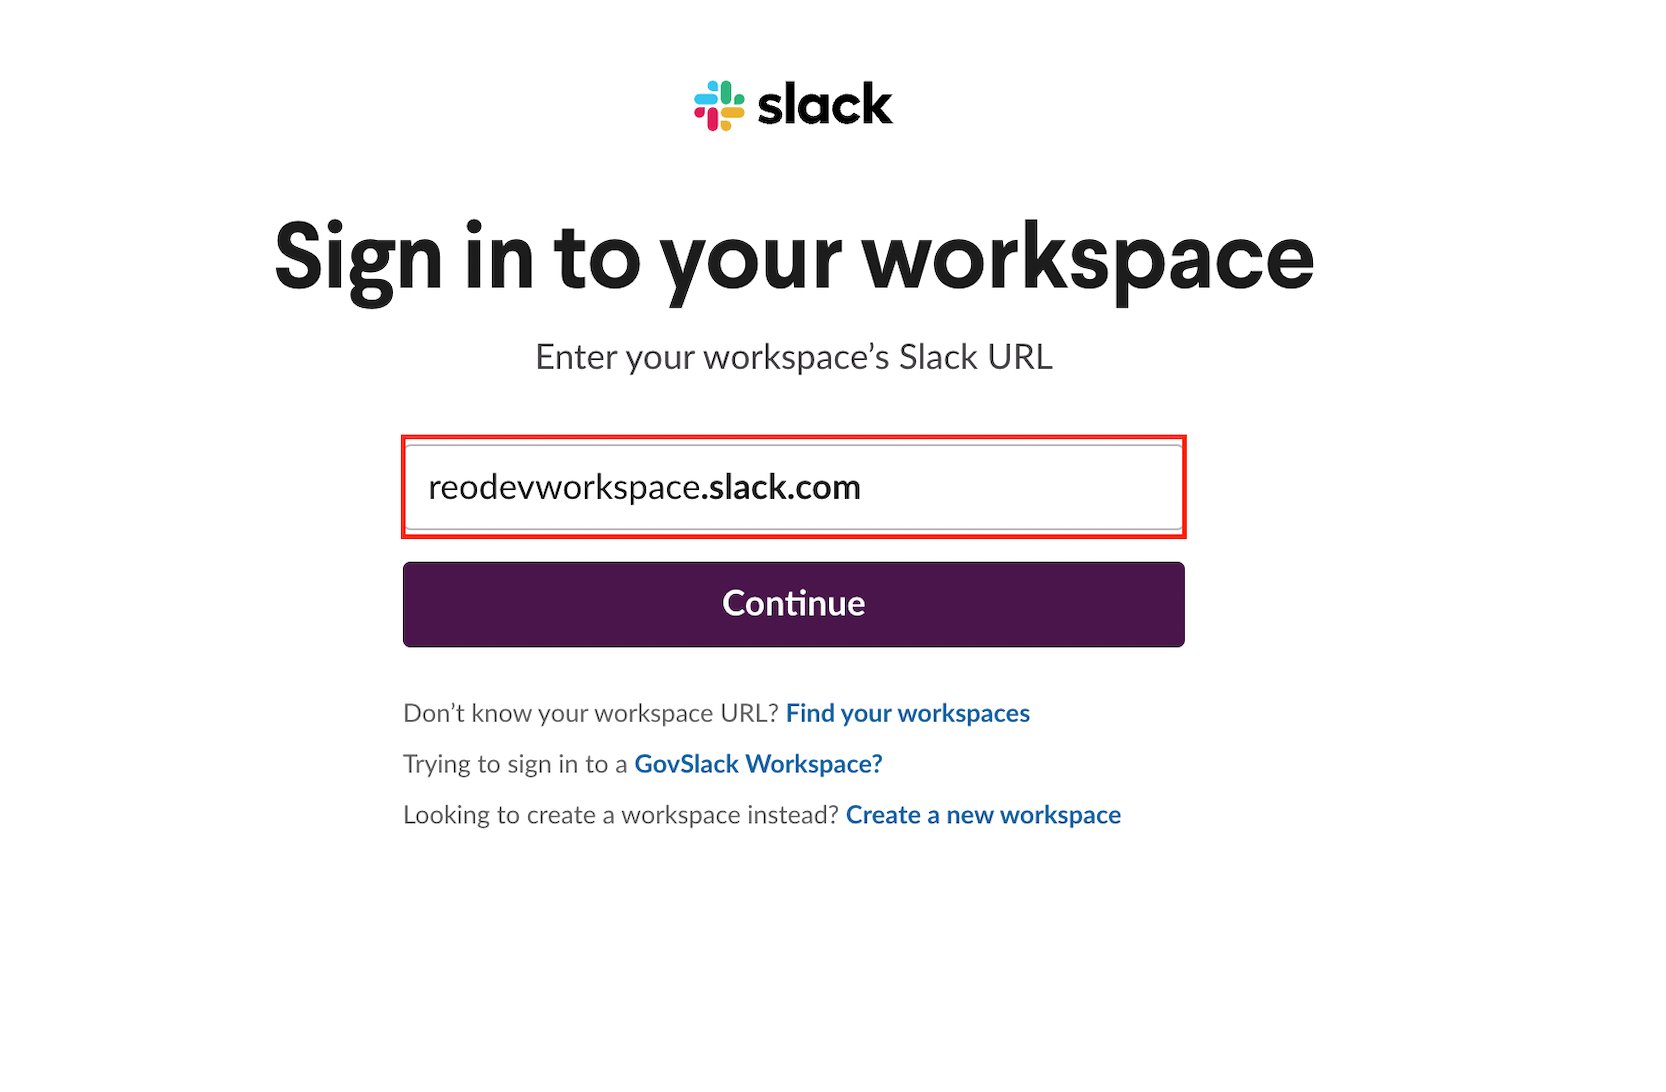
**Step 2:** Enter your workspace URL and click **Continue**.\
\*\*

<figure><img src="https://usercontent.us.prod.clueso.io/d06f019c-da0b-4d5b-9fdd-9630e7fd5d0f/224d6650-0c84-4500-8aee-3acdf481eb80/80667b30-c64c-4275-8115-bacae1086548/images/621b3bf8-acbd-46b0-b126-0811a91cc0f5.png" alt=""><figcaption></figcaption></figure>

**Step 3:** This will take you to the authorization page. Click **Allow**.

![](https://usercontent.us.prod.clueso.io/d06f019c-da0b-4d5b-9fdd-9630e7fd5d0f/224d6650-0c84-4500-8aee-3acdf481eb80/80667b30-c64c-4275-8115-bacae1086548/images/bcdb326a-88d1-401f-a55e-2764f42a2d30.png)

And you’re connected!

### Configuring Slack Channels

**Step 1:** On the success message page, click **Configure Slack Channel**.

<figure><img src="/files/JiaqJ3eVrtncrXiKB0E6" alt=""><figcaption></figcaption></figure>

**Step 2:** From the dropdown menu, select the preferred channel to receive alerts. Then, click on **Share to Slack**.&#x20;

<figure><img src="/files/G4lXKomVIvlgxd4EgVIM" alt=""><figcaption></figcaption></figure>

{% hint style="info" %}
**Important Note**:\
\
**Private channels are not supported** due to Slack’s restrictions on unapproved apps. Notifications can only be sent to public channels displayed in the dropdown menu. You can select an existing **public Slack channel** to share alerts with your team members. Reo.Dev will display only public Slack channels in the dropdown menu.
{% endhint %}

**Step 5:** Open Slack. Check the configured channel. You'll start receiving alerts on the channel you've configured.

***

### Setting up Notifications

Notifications enable you to track developer activity in key accounts, developers or segments. You can set up notifications for specific activities and configure to which channel (Slack or email) these should be delivered.

<figure><img src="/files/wwHlZHDKuzPlELofEcYP" alt=""><figcaption></figcaption></figure>

**Notification Preference**

You can choose on which channel you want to receive notifications from Reo.Dev.

* **Email**
* **Slack**
  * As Direct message
  * On Slack Channel

For accounts and developers, you will get the notifications as direct message. For a segment, you can choose to receive the notifications as direct message or on a Slack channel

**Activity Type**

You can configure the set of activities for which you want to receive the notifications. For Example, you have selected Fork and Product Login as preferred activities for which notifications should be sent, then based on the channel you have selected, you will get the notification as an when Fork and Product activity is recorded for any segment, account or developer for which alerts is subscribed

You can set up notifications for an account, developer or segment by clicking on `Enable Alerts` button

* **Accounts**: To set up notification for an account, click into any account and then click on the Enable Alerts button in the top-right of header section

<figure><img src="/files/Ane33z1AFTXsDIMHxavw" alt=""><figcaption></figcaption></figure>

* **Developers**: To set up notifications for a developer, click into a developer name in the list and then click on the Enable Alerts button in the top-right of header section

<figure><img src="/files/V7dgkbkUMrf4n6xJV1aK" alt=""><figcaption></figcaption></figure>

* **Segments**: To set up notifications for a segment, click on the bell icon

<figure><img src="/files/d51VRPIr6JK4ZysHpT4d" alt=""><figcaption></figcaption></figure>


# Step 7: ICP & Preferred Technologies

In this article, you'll learn how to add ICP and tech-stack criteria to identify the accounts that match your ICP automatically.

**Step 1:** Click on **'Configurations'** under settings in the left navigation panel. Next, click on **configure** under the **'Ideal Customer Profile (ICP)'** card.

<figure><img src="https://docs.reo.dev/~gitbook/image?url=https%3A%2F%2F2705882080-files.gitbook.io%2F%7E%2Ffiles%2Fv0%2Fb%2Fgitbook-x-prod.appspot.com%2Fo%2Fspaces%252Fx46P5sAHxDG7PqOdVLxI%252Fuploads%252FUHKntCZnieoeFDJ1S1TI%252Fimage.png%3Falt%3Dmedia%26token%3D6d5e9642-a886-4e38-9777-79c992a04e8b&#x26;width=768&#x26;dpr=3&#x26;quality=100&#x26;sign=7652e6c2&#x26;sv=2" alt=""><figcaption></figcaption></figure>

**Configure ICP fit score**

Configuring your ICP fit score by specifying the following Firmographics attributes:

* Location (Region/Country of the organisation)
* Employees (Employee range)

Each attribute has two preferences. Preference one represents the stronger criteria, closely aligned with the ideal profile, while Preference two serves as a secondary level, offering more flexibility in account matching.

**Step 1:** Choose the desired location preferences from the drop-down menu

<figure><img src="https://docs.reo.dev/~gitbook/image?url=https%3A%2F%2F2705882080-files.gitbook.io%2F%7E%2Ffiles%2Fv0%2Fb%2Fgitbook-x-prod.appspot.com%2Fo%2Fspaces%252Fx46P5sAHxDG7PqOdVLxI%252Fuploads%252FRrX8ifvUi4PC9pjxhKyg%252Fimage.png%3Falt%3Dmedia%26token%3D0833e5f2-baa8-4e41-8bef-80082ea61c82&#x26;width=768&#x26;dpr=3&#x26;quality=100&#x26;sign=4b159975&#x26;sv=2" alt=""><figcaption></figcaption></figure>

**Step 2:** Choose the employee range attribute from the drop-down menu

<figure><img src="https://docs.reo.dev/~gitbook/image?url=https%3A%2F%2F2705882080-files.gitbook.io%2F%7E%2Ffiles%2Fv0%2Fb%2Fgitbook-x-prod.appspot.com%2Fo%2Fspaces%252Fx46P5sAHxDG7PqOdVLxI%252Fuploads%252F1Sx2cGK8ecb5i7t0XnEU%252Fimage.png%3Falt%3Dmedia%26token%3D6f2dfce8-5101-4bef-aacf-5e78dd081ecd&#x26;width=768&#x26;dpr=3&#x26;quality=100&#x26;sign=8c2e53b3&#x26;sv=2" alt=""><figcaption></figcaption></figure>

**Configure Technographics**

1. **Set up your Preferred Technologies**

Choose specific technologies that best define your ICP. You can select tech categories from the drop-down or even search for specific technologies.

<figure><img src="https://docs.reo.dev/~gitbook/image?url=https%3A%2F%2F2705882080-files.gitbook.io%2F%7E%2Ffiles%2Fv0%2Fb%2Fgitbook-x-prod.appspot.com%2Fo%2Fspaces%252Fx46P5sAHxDG7PqOdVLxI%252Fuploads%252FE02HjFuC1vCnPwBywEZd%252Fimage.png%3Falt%3Dmedia%26token%3D412d48a3-2279-4deb-a5f1-d047bd95ef73&#x26;width=768&#x26;dpr=3&#x26;quality=100&#x26;sign=6dcf3418&#x26;sv=2" alt=""><figcaption></figcaption></figure>

2. **Set up Preferred Technology Functions**
   1. Click on 'Add More'

<figure><img src="https://docs.reo.dev/~gitbook/image?url=https%3A%2F%2F2705882080-files.gitbook.io%2F%7E%2Ffiles%2Fv0%2Fb%2Fgitbook-x-prod.appspot.com%2Fo%2Fspaces%252Fx46P5sAHxDG7PqOdVLxI%252Fuploads%252F1R1Q89wzR5CGn6unZgJb%252Fimage.png%3Falt%3Dmedia%26token%3D5f12fead-c27b-49a7-857c-490cd785fdc0&#x26;width=768&#x26;dpr=3&#x26;quality=100&#x26;sign=9f6bacc3&#x26;sv=2" alt=""><figcaption></figcaption></figure>

b. Add the technology functions and engineering team size that best define your ICP accounts. You can select upto 4 tech functions.

<figure><img src="https://docs.reo.dev/~gitbook/image?url=https%3A%2F%2F2705882080-files.gitbook.io%2F%7E%2Ffiles%2Fv0%2Fb%2Fgitbook-x-prod.appspot.com%2Fo%2Fspaces%252Fx46P5sAHxDG7PqOdVLxI%252Fuploads%252F7Ny6el9RNmC45m8X5Zfd%252Fimage.png%3Falt%3Dmedia%26token%3Db1d70c4a-bf19-485e-851a-1701762b6216&#x26;width=768&#x26;dpr=3&#x26;quality=100&#x26;sign=a93834a9&#x26;sv=2" alt=""><figcaption></figcaption></figure>

Once you’ve set this up, click on save.

<figure><img src="https://docs.reo.dev/~gitbook/image?url=https%3A%2F%2F2705882080-files.gitbook.io%2F%7E%2Ffiles%2Fv0%2Fb%2Fgitbook-x-prod.appspot.com%2Fo%2Fspaces%252Fx46P5sAHxDG7PqOdVLxI%252Fuploads%252FWFhvqnLijLRWkfOgC7mo%252Fimage.png%3Falt%3Dmedia%26token%3D60404986-18f6-4f4f-beb7-9ab58f35129c&#x26;width=768&#x26;dpr=3&#x26;quality=100&#x26;sign=53a00ce3&#x26;sv=2" alt=""><figcaption></figcaption></figure>

**Note:**

a. On the accounts dashboard page, you get a breakdown of the engineering team composition across the preferred tech functions you've set up in the previous steps.

<figure><img src="https://docs.reo.dev/~gitbook/image?url=https%3A%2F%2F2705882080-files.gitbook.io%2F%7E%2Ffiles%2Fv0%2Fb%2Fgitbook-x-prod.appspot.com%2Fo%2Fspaces%252Fx46P5sAHxDG7PqOdVLxI%252Fuploads%252FwP4A7k1cxxsFszx80K0I%252Fimage.png%3Falt%3Dmedia%26token%3Dc0cd2f32-beb2-4bf1-bf01-c04c0ca18e58&#x26;width=768&#x26;dpr=3&#x26;quality=100&#x26;sign=ecf3715&#x26;sv=2" alt=""><figcaption></figcaption></figure>

b. In the **Technology Stack** section of the **Accounts Overview** page, Reo displays the preferred technologies identified for the account, along with the most recent job postings for those technologies.

This information is pulled based on the Preferred Technologies configured in the previous step.

<figure><img src="https://docs.reo.dev/~gitbook/image?url=https%3A%2F%2F2705882080-files.gitbook.io%2F%7E%2Ffiles%2Fv0%2Fb%2Fgitbook-x-prod.appspot.com%2Fo%2Fspaces%252Fx46P5sAHxDG7PqOdVLxI%252Fuploads%252FIeQnHapewxNG5sgUIseH%252Fimage.png%3Falt%3Dmedia%26token%3Dd34d75a4-1529-4360-85b7-ab2c84dc019b&#x26;width=768&#x26;dpr=3&#x26;quality=100&#x26;sign=add4e531&#x26;sv=2" alt=""><figcaption></figcaption></figure>

c. Furthermore, under the technographics tab in the account section you can

* View hiring trends across your preferred technologies

<figure><img src="https://docs.reo.dev/~gitbook/image?url=https%3A%2F%2F2705882080-files.gitbook.io%2F%7E%2Ffiles%2Fv0%2Fb%2Fgitbook-x-prod.appspot.com%2Fo%2Fspaces%252Fx46P5sAHxDG7PqOdVLxI%252Fuploads%252FkglHPOxKNHMpkmcFkWio%252Fimage.png%3Falt%3Dmedia%26token%3D6ed941d5-a41f-47f8-92c6-2b9957044b0d&#x26;width=768&#x26;dpr=3&#x26;quality=100&#x26;sign=e6a1d0d1&#x26;sv=2" alt=""><figcaption></figcaption></figure>

* Filter jobs based on your Preferred Technologies

<figure><img src="https://docs.reo.dev/~gitbook/image?url=https%3A%2F%2F2705882080-files.gitbook.io%2F%7E%2Ffiles%2Fv0%2Fb%2Fgitbook-x-prod.appspot.com%2Fo%2Fspaces%252Fx46P5sAHxDG7PqOdVLxI%252Fuploads%252FFibcuDn2hgZtW6MFDUAm%252Fimage.png%3Falt%3Dmedia%26token%3Df17b35ab-188d-4636-971f-473b4fd8e593&#x26;width=768&#x26;dpr=3&#x26;quality=100&#x26;sign=c66a3f9d&#x26;sv=2" alt=""><figcaption></figcaption></figure>

#### **Create a Segment based on technographics and job postings** <a href="#create-a-segment-based-on-technographics-and-job-postings" id="create-a-segment-based-on-technographics-and-job-postings"></a>

**Build highly targeted account/developer/buyer segments based on:**

**a. Technographics**

Use the **Technology Stack** filter to create a segment based on your preferred technologies or any other tech category that matters to you.

![](https://docs.reo.dev/~gitbook/image?url=https%3A%2F%2F2705882080-files.gitbook.io%2F%7E%2Ffiles%2Fv0%2Fb%2Fgitbook-x-prod.appspot.com%2Fo%2Fspaces%252Fx46P5sAHxDG7PqOdVLxI%252Fuploads%252FNbzSEdxjz3Ks5aucTI5q%252Fimage.png%3Falt%3Dmedia%26token%3Da3f62f49-b4e8-44b7-8e62-4ca711253ffa\&width=768\&dpr=3\&quality=100\&sign=54ebd2d6\&sv=2)

**b. Job postings -**

Use the **Tech Job Postings** filter to find accounts that are actively hiring for your preferred technologies:

* Job Matching Tech - Find job postings for your preferred technologies or any other tech category
* Job Title - Search for specific job titles
* Job Posting Date - Filter based on job posting date
* Job Seniority - Filter based on seniorty level - (Founder, CXO, Head etc)
* Job Country - Filter based on country
* Job State - Filter based on location

<figure><img src="https://docs.reo.dev/~gitbook/image?url=https%3A%2F%2F2705882080-files.gitbook.io%2F%7E%2Ffiles%2Fv0%2Fb%2Fgitbook-x-prod.appspot.com%2Fo%2Fspaces%252Fx46P5sAHxDG7PqOdVLxI%252Fuploads%252FRiLucpfg6Ai1CJMaNeXV%252Fimage.png%3Falt%3Dmedia%26token%3D7d70f55d-b59f-4e63-bb32-808fd8d3d260&#x26;width=768&#x26;dpr=3&#x26;quality=100&#x26;sign=61003913&#x26;sv=2" alt=""><figcaption></figcaption></figure>

c. Tech Functions

Use the technology function filter to find accounts based on tech functions that best define your ICP accounts.

<figure><img src="https://docs.reo.dev/~gitbook/image?url=https%3A%2F%2F2705882080-files.gitbook.io%2F%7E%2Ffiles%2Fv0%2Fb%2Fgitbook-x-prod.appspot.com%2Fo%2Fspaces%252Fx46P5sAHxDG7PqOdVLxI%252Fuploads%252FB89EobNMMNSUNuJ7Gr6n%252Fimage.png%3Falt%3Dmedia%26token%3Ddb879612-cbf2-471a-a6a4-5b117fa7b7f8&#x26;width=768&#x26;dpr=3&#x26;quality=100&#x26;sign=a67ec2b6&#x26;sv=2" alt=""><figcaption></figcaption></figure>


# Reo.Dev Chrome Plugin

Reo’s chrome plugin brings Reo.Dev’s developer intelligence right into your CRM and any company website. Using this plugin you can easily access key account insights, developer activity data, de-anonymized developers and even find technical decision makers directly from your CRM or any company website, without switching tabs.

### **Installing the chrome plugin**

To use the Chrome extension, you need to have a [Reo.Dev](https://www.reo.dev/) account.

1. Open the chrome web store from [here](https://chromewebstore.google.com/detail/reodev/bdobidbjnimmpknddljenmdapnimepag)
2. Click on ‘add to chrome’ to install the extension.

{% hint style="info" %}
Note: Chrome may display a “not trusted by Enhanced Safe Browsing” notice during installation. This is a standard message for newly published extensions and can be safely ignored.&#x20;

![](/files/hYkYtbcUehDuPjPazk2t)
{% endhint %}

### **Using the plugin**

Once you’ve installed the plugin you can access it from the extension bar on chrome.

You will also see a floating widget on supported pages (Hubspot, Salesforce, and any company website). Click the widget to access Reo.Dev insights directly.

{% hint style="info" %}
Note: Currently, the extension supports viewing Reo insights from Hubspot, Salesforce and any company Website.
{% endhint %}

### **CRM**

**From a Company/Account Page**

1. **Overview:** This includes company name, firmographic details, developer funnel stage, and other key insights like Customer fit score, developer activity score, active developers and an overview of all developer activities tracked by Reo.Dev.

<figure><img src="/files/Vit5j49vBQCuYfBz5LOT" alt=""><figcaption></figcaption></figure>

2. **Timeline:** Here you can see the complete log of developer activities. You can further filter activities by activity type (Github, documentation, product, website and others) and Repository type (owned, competition, complimentary).

<figure><img src="/files/w5RyYR0yXhaYOf76NJ0z" alt=""><figcaption></figcaption></figure>

3. **Active devs:** View all de-anonymized and active developers here and directly access their contact information.

<figure><img src="/files/mpobqrtVmHUS4fqm3J3r" alt=""><figcaption></figcaption></figure>

You can also add developers to your CRM or email sequences directly from here.

<figure><img src="/files/ps2lQ6VaiK01G4DhlU9a" alt=""><figcaption></figcaption></figure>

4. **Prospects:** Discover developers and technical buyers that haven’t engaged with your tracked assets yet.
   1. Choose the relevant ones and click on reveal to access their contact IDs.

<figure><img src="/files/T9g0KXEEuUSZBPpoxBES" alt=""><figcaption></figcaption></figure>

b. Add all revealed contacts into your CRM or email sequences directly from here.

<figure><img src="/files/nNAvPyg6fTZty8biC0DX" alt=""><figcaption></figcaption></figure>

**From a contact page:**

1. **Insights:** View details like developer activity score, first and last and other activities across your tracked sources: Github, website, Communities & more.&#x20;

<figure><img src="/files/5Ei4K1zO62aKA3d7CeiL" alt=""><figcaption></figcaption></figure>

2. **Timeline:** View the entire log of developer activity

<figure><img src="/files/TWZqA4w4OH3m2EuKi9AU" alt=""><figcaption></figcaption></figure>

3. **Add to CRM/sequence** - You can directly add contacts to your CRM or email sequences from here.&#x20;

<figure><img src="/files/X6jgu7DgEPISScxMurvR" alt=""><figcaption></figcaption></figure>

### Company Website Page

1. **Overview:** This includes company name, firmographic details, developer funnel stage, and other key insights like Customer fit score, developer activity score, active developers and activities including Github actions, documentation visits, product usage and other activities tracked by Reo.

<figure><img src="/files/BaYc3Zyrwcnc2MWghgc6" alt=""><figcaption></figcaption></figure>

2. **Timeline:** Here you can see the complete log of developer activities. You can further filter activities by activity type (Github, documentation, product, website and others) and Repository type (owned, competition, complimentary).

<figure><img src="/files/CJk4ujTGBrKuI9QJDoyT" alt=""><figcaption></figcaption></figure>

3. **Active devs:** View all de-anonymized developers here. Access their contact information like email ID, LinkedIn profile.

<figure><img src="/files/9pYmpyW60idcHkzcZFXV" alt=""><figcaption></figcaption></figure>

&#x20;You can also **add developers to CRM and email sequences** directly from here. Plus, you can click on an individual developer to view their entire activity history.

<figure><img src="/files/IewJYAb9emqPYH5FBAz5" alt=""><figcaption></figcaption></figure>

3. **Prospects:** Discover developers and technical buyers that haven’t engaged with your tracked assets yet.
   1. Choose the relevant ones and click on reveal to access their contact IDs.

<figure><img src="/files/zDceZlKxDdhWsRXCXDbZ" alt=""><figcaption></figcaption></figure>

b. Add all revealed contacts into your CRM or email sequences directly from here.

<figure><img src="/files/Zvi9eXlwH3oYs0FnBVUB" alt=""><figcaption></figcaption></figure>

{% hint style="info" %}
Note: A status indicator appears on the floating widget - giving you instant context on whether an account is tracked on Reo or not:

* **Green** dot indicates the account is tracked on Reo and data is available.&#x20;
* **Red** dot indicates the account is not tracked by Reo&#x20;

![](/files/PYOYV5tVI48ag6lMaMPb)          ![](/files/p0MdYO4xjfGgWVLnk7AX)
{% endhint %}

### **Reo Chrome Extension – Permissions & Data Usage**

Reo’s Chrome extension is designed to surface **existing Reo intent signals and activity data directly within your workflow**—on websites and supported CRMs (Salesforce and HubSpot). To do this securely and accurately, the extension requires a limited set of browser permissions.

**What the Extension Does**

* Detects the **current page context** (website domain, Salesforce record, or HubSpot record)
* Matches that context to **existing data already available in Reo**
* Displays intent signals, activity timelines, and active developers in an in-page panel

**Permissions Required**

| Permission    | Why You Need It                          |
| ------------- | ---------------------------------------- |
| Execute JS    | To detect page context (website vs CRM)  |
| Read DOM      | To extract Salesforce/HubSpot record IDs |
| UI overlays   | To show Reo intent panel                 |
| Backend calls | To fetch intent data                     |
| Local storage | Cache session/state (not user data)      |

**Permissions & why are they needed?**&#x20;

1. **Read the Current Tab’s URL -** To identify the domain you’re visiting or extract the CRM record ID (Account or Contact).

**What this means:**

* Only the **active tab URL** is read
* Browsing history is **not stored or tracked**

2. **Run Scripts on Pages (Content Scripts) -** To determine whether the page is a public website, a Salesforce record or HubSpot record. This allows the extension to load the correct Reo data.

**What this means:**

* Scripts are used for **context detection only**
* The extension does **not scrape page content**
* The extension does **not capture form inputs, passwords, or keystrokes**

3. **Read Page Structure (DOM Access)-** To locate CRM identifiers (e.g., Account ID or Contact ID) when viewing Salesforce or HubSpot records.

**What this means:**

* No page content is modified
* No sensitive information is collected

4. **Display UI Elements -** To render the Reo sidebar or overlay showing intent signals and activity timelines.

**What this means:**

* The extension adds a visual layer only
* It does not interfere with page functionality

5. **Communicate with Reo Servers -** To fetch relevant intent data from Reo when a matching domain or CRM record is detected.

**What this means:**

* Data is sent **only to `.reo.dev`**
* No third-party services are involved

6. **Local Storage -** To store session state and extension preferences.

**What this means:**

* No personal browsing data is stored
* No content from visited pages is saved

{% hint style="info" %}
**Please note,the Extension Does NOT Do:**&#x20;

❌ Track or store browsing history

❌ Capture user inputs, passwords, or form data

❌ Read emails, messages, or private content

❌ Modify website or CRM data

❌ Send data to third parties
{% endhint %}

**Data & Security Commitment**

* The extension only surfaces **data that already exists in your Reo account**
* All communication is encrypted
* Access is strictly limited to what is required for functionality
* Permissions are reviewed regularly as the product evolves

### FAQs/Troubleshooting

#### **1. Why can’t I log in to the Chrome Extension?**

If you’re experiencing login issues with the Chrome extension, it may be due to **corrupted or outdated cookies** that interrupt the authentication process. To resolve this, please try clearing your cookies by following either of the below options.

&#x20;**Option 1: Delete all cookies**

{% hint style="info" %}
**Important**: Clearing cookies may sign you out of websites and remove saved preferences. Proceed only if you’re comfortable with this.
{% endhint %}

**Steps**

1. Open **Chrome** on your computer.
2. Click the **More (⋮)** icon in the top-right corner → select **Delete browsing data**.
3. Choose **Basic** or **Advanced** and ensure **Cookies and other site data** is selected.
4. Under **Time range**, choose:
   * Last hour
   * Last 24 hours
   * Last 7 days
   * Last 4 weeks
   * All time *(recommended)*
5. Select any additional items you want to delete.
6. Click **Delete data** to confirm.

\
**Option 2: Delete cookies for a specific website**

If you prefer to not delete all cookies, you can remove them only for the affected site.

**Steps**

1. Open **Chrome**.
2. Click **More (⋮)** → **Settings**.
3. Select **Privacy and security** → **Third-party cookies**.
4. Click **See all site data and permissions**.
5. Use the search bar in the top-right to find the website name.
6. Click **Delete (🗑️)** next to the site.
7. Confirm by selecting **Delete**.

\
**Next Steps:**

After clearing the cookies, **restart the Reo Chrome Extension** and try logging in again. If the issue persists, please contact support.  To understand Cookies, refer this article: <https://support.google.com/chrome/answer/95647?hl=en&co=GENIE.Platform%3DDesktop>

#### &#x20;2. Why is a Contact or Account I’m researching not appearing in the Reo Chrome Extension?

If a contact or an account from your CRM is not being detected in the Reo plugin, it is typically due to one of the following reasons:\
\
**For contacts**

| Possible Reason              | Explanation                                                                                                                                                                   | What to Check                                                                                                                                                                 |
| ---------------------------- | ----------------------------------------------------------------------------------------------------------------------------------------------------------------------------- | ----------------------------------------------------------------------------------------------------------------------------------------------------------------------------- |
| No recent activity           | The contact has no qualifying intent or product activity tracked in Reo.Dev                                                                                                   | Check if the contact is already in your Reo.Dev tenant. The Chrome Extension surfaces only those contacts with tracked activity.                                              |
| Missing email in Reo profile | Reo.Dev identifies contacts primarily through email. If we don’t have an email associated with the profile, we cannot match it.                                               | <p>Ensure the email exists in the contact record on Reo.Dev<br>We’re actively improving our detection capabilities for LinkedIn, so coverage will continue to get better.</p> |
| Email mismatch               | The email of the contact in your CRM does not match the email stored in Reo.Dev Even small variations result in mismatch (e.g., <john@company.com> vs <j.smith@company.com>). | Compare the CRM email to the email displayed in Reo.Dev and align them if needed.                                                                                             |

**For Accounts**&#x20;

| Possible Reason            |                                                                                                                                                                             |                                                                                                                                                    |
| -------------------------- | --------------------------------------------------------------------------------------------------------------------------------------------------------------------------- | -------------------------------------------------------------------------------------------------------------------------------------------------- |
| Domain mismatch            | Reo.Dev identifies accounts based on domain structure. Different variations are treated as separate accounts. Example: microsoft.com vs microsoft.inc → counted separately. | Verify that the domain used in your CRM matches the domain used in Reo.Dev                                                                         |
| No recent account activity | The account currently has no active signals, usage, or intent attributed to it.                                                                                             | Check whether the account exists in your Reo.Dev tenant. Accounts only appear in the Chrome Extension once Reo.Dev has detected activity for them. |

\
**Next Steps**

If you’ve confirmed the above scenarios and the issue persists:

* Refresh the page and reopen the plugin.
* Contact support with the CRM record link and the expected contact/account so we can assist.


# Accounts

Learn how to identify high-intent accounts from the list of accounts that Reo.Dev detects with developer activity and how to interpret the various intent signals associated with each account.

### Guides

* [Account Lifecycle Stage](/accounts/account-lifecycle-stage)
* [Custom CRM Stages](/accounts/custom-crm-stages)
* [Developer Funnel Stages](/accounts/developer-funnel-stages)
* [Account Activity Score](/accounts/account-activity-score)
* [Find More Prospects](/accounts/find-more-prospects)
* [Tags](/accounts/tags)
* [Customizing Tags](/accounts/customizing-tags)
* [Custom Lists](/accounts/custom-lists)
* [Managing CRM Owners in Reo.Dev](/accounts/managing-crm-owners-in-reo.dev)
* [Follow an Account](/accounts/follow-an-account)
* [How to Set Up Notification Alerts for Accounts, Developers & Segments in Reo.Dev](/accounts/how-to-set-up-notification-alerts-for-accounts-developers-and-segments-in-reo.dev)
* [Flag incorrect data](/accounts/flag-incorrect-data)


# Account Lifecycle Stage

The "Stage" intent signal in Reo.Dev pinpoints an account's location in the pipeline. It is segmented into five stages:

* In Target
* In Market
* Discovery
* In Pipeline
* Customers

![](/files/YvUJGErotdJSWR88zZgB)

Each stage unlocks specific engagement strategies for various teams, enabling more targeted and relevant interactions.

One key benefit of the Stage intent signal is that it allows GTM teams to craft personalized outreach campaigns, ensuring that messaging aligns with where the account is in the buying journey.

### Understanding each stage

#### **In Target**&#x20;

* **What:** Accounts at this stage haven't done any activity on your tracked assets and are not in your CRM. These are accounts added via list import or audience.&#x20;
* **Action**: Activate these accounts with awareness campaigns to drive first-touch engagement and bring them into the funnel.

***

#### **In Market**

* **What**: Accounts at this stage have interacted with a competitor's GitHub repository but haven't engaged with your product assets.
* **Action**: It's an ideal time for the sales team to reach out to these accounts with targeted messages about your product's superiority.

***

#### Discovery

* **What**: Accounts at this stage have engaged with some of your product assets but aren't in your CRM yet.
* **Action**: It's a prime opportunity for the marketing team to target these accounts with campaigns based on their activities. This stage is crucial for expanding the top of the funnel.

***

#### In Pipeline

* **What**: Accounts at this stage are at various stages in your CRM pipeline.
* **Action**: The sales team can conduct targeted outreach based on activities seen in Reo dot dev to push these accounts down the funnel.

***

#### Customers

* **What**: These accounts are marked as customers in your CRM.
* **Actions**: This stage allows the Customer Success Team to monitor product activities and understand product adoption, which can be used during renewal and upsell processes.

### Filtering accounts based on Stage

1. **From the Accounts View Page**

**Step 1:** Click on **Add Filter** and the select '**CRM Lifecycle Stage**'  and choose the desired filter for the stage

![](/files/Vv1HX6WFGFHw4QcXFFOB)

After applying the filter, only accounts in those stages will be displayed.<br>

2. **Creating dedicated segments based on Stage of the account**

**Step 1:** Click on **Segments** form the nav bar and then on **Create Segments**.

![](/files/15M8zVY6y8pIhvfW1XC8)

**Step 2:** Click **Add Filter**. Select the filter named lifecycle stage from the filter list

![](/files/FSEaVyxvT1gzyAFI1M8i)

![](/files/aAjmmHS20RWFPBkjzvMv)

**Step 3:** Choose the desired filter for the stage.

<figure><img src="/files/Rn4KNA32DzAlyHRvAjKN" alt=""><figcaption></figcaption></figure>

After creating this segment, it will only display accounts in the specified life cycle stage.


# Custom CRM Stages

The new **Custom CRM Stages** feature in Reo.Dev enhances your CRM integration by enabling precise mapping of custom account and deal stages for our customers using either **HubSpot or Salesforce CRM**. This upgrade empowers GTM teams to tailor their sales workflows and target accounts more effectively, overcoming prior limitations where only default lifecycle stages were supported.

By aligning Reo.Dev’s lifecycle stages with your custom CRM fields, you can segment accounts, track deal progress, and generate actionable insights for your teams.

***

### **Previous Limitations and the Solution**

Previously, Reo.Dev relied on default deal/opportunity stages in HubSpot and Salesforce. However, most customers utilized custom CRM field objects for account and deal stages, leading to mismatched data and inefficient filtering.

{% hint style="info" %}
To learn more about **Lifecycle Account Stages** in Reo.Dev, [check out this guide.](/accounts/account-lifecycle-stage)
{% endhint %}

The **Custom CRM Stages** feature now addresses this by allowing the mapping of your **custom picklist fields** from HubSpot or Salesforce to Reo.Dev’s lifecycle stages. This ensures accurate filtering and segmentation that are aligned with your CRM setup.

***

### **Setting Up Custom CRM Stages**

{% hint style="info" %}
**Prerequisite:** Ensure your CRM is connected to Reo.Dev before setting up **Custom CRM Stages.** For integration setup, [refer to this guide.](broken://pages/GxZCaSBLZu9qFqp44DXu)
{% endhint %}

**1) Navigate to CRM Integrations**\
Go to **Integrations** → **CRM** and click on the **Gear Icon**.

![](/files/YDj6ssCoE3piOfN7ikRU)

**2)** Click on the **Edit Field Mapping** button for the **Accounts Card** to configure **Custom CRM Account stages.**

![](/files/NPCRnUxX8JYLb5rErwvI)

**3) Map Account Stages**

Select the **"Stages"** subtab in the Account Mapping section.

![](/files/MFswhBoC8cx0uJmHw4RT)

Choose a **Custom Account CRM** field to map as the **Account Lifecycle Stage**.

{% hint style="info" %}
**Note:** Only fields classified as **"Picklist"** in your CRM are available for selection.
{% endhint %}

![](/files/lH1V5WmE6CDckMKCYwAi)

Pick all Custom CRM Account Stages you want to define as **"Customer"** in **Reo.Dev**. Multiple stages can be mapped as "Customer" to fit your sales cycle. For example, classify accounts by product line (Cloud vs. Open Source) or customer size (Enterprise vs. SMB).

![](/files/8vn6rrVdIlKA4Bu6nLl8)

**4) Save the Configuration**

<figure><img src="/files/glw3Fj1gWohWCT15e0pu" alt=""><figcaption></figcaption></figure>

After mapping, click **Save.**

{% hint style="info" %}
**Note:** Backend updates are applied immediately, but changes in the UI reflecting the new mappings will take up to **24 hours** to refresh.
{% endhint %}

**1) Map Deal Stages**

![](/files/VC63ikIra7wEbWfQEGz4)

**a)** For **HubSpot:**\
Select a **Pipeline** from the dropdown, as HubSpot supports custom pipelines tied to deal stages.

![](/files/AR2scNXPoJNd3g3R5iPL)

**Next,** select the corresponding deal stage field for the selected pipeline.

![](/files/eKSz3N13vaW1ADw9cTtS)

**b)** For **Salesforce:**\
You can directly choose the **Stage** field to map as Opportunity stages in Reo.Dev.

{% hint style="info" %}
**Note:** HubSpot users must select a pipeline as part of the setup. For Salesforce users, this step is not required and will not appear in the UI.
{% endhint %}

**2) Save the Configuration**

After mapping, click **Save.**

![](/files/BLbMxptZDaqFxUJ1k6UQ)

{% hint style="info" %}
**Note:** Backend updates are applied immediately, but changes in the UI reflecting the new mappings will take up to **24 hours** to refresh.
{% endhint %}

***

### **Using the New Filters in Reo.Dev**

Once mapping is complete and synced, you can leverage the **CRM Account Stage** and **CRM Deal Stage** filters to create powerful segments. These filters pull dynamic dropdown options directly from your CRM.

**1) View Lifecycle Stages on Account Profiles**&#x20;

After mapping, visit any account in Reo.Dev. Under the **Firmographics** section, you'll see the mapped **CRM Account Stage** and **CRM Deal Stage**, offering actionable insights at a glance.

![](/files/vNY3ZoRF2UPxbQk9mrX2)

**2) Create Segments Using New Filters**

Go to **Segments** → **Create Segment** and select either **CRM Account Stage** or **CRM Deal Stage** from the **Sources** section.

![](/files/abKGaWLuYYQidGX0IyO8)

Add criteria to refine your segment. Dropdown options mirror your **CRM’s custom stages.**

<div><img src="/files/rycl5Vil7Q05gzeBXmfz" alt="" width="375"> <img src="/files/l2Mc5nHu34xKuHnL6rTA" alt="" width="375"></div>

***

### **Example Use Case:** Revive Cold SQL Leads with Developer Activity Insights

As an SDR or AE, your day is packed. Quotas are looming, new leads are piling up, and you’re constantly juggling priorities. Among the chaos, you face a frustrating challenge—how to know *when* to reengage those promising SQL leads that were once hot but have since gone cold. You know these leads showed interest, maybe even viewed your pricing, but now they’ve dropped off the radar. Without a way to detect if and when their interest reignites, you’re left guessing, and deals that could close end up slipping through the cracks. Sound familiar?

This scenario is even more pronounced in developer-focused GTM strategies, where traditional sales cycles don’t apply, and timing is everything. The buying journey here is often indirect, and intent signals can be hard to pinpoint.

Here is where you can leverage the **CRM Account Stage**, **CRM Deal Stage**, and the powerful **Developer Activity Surge** filter, you now have a way to surface those high-intent accounts exactly when they’re showing renewed interest.

**Here’s how you can turn this challenge into an opportunity:**

1. Create an Account segment to identify accounts marked as **SQL Cold** in the CRM Account Stage.
2. Combine this with the CRM Deal Stage set to **Pricing Discussed**.
3. Add the filter **Has Activity Surge = YES** to highlight accounts with recent spikes in developer activity. Reo.Dev's AI algorithm calculates this surge by tracking GitHub activity, product usage, website visits, code interactions, form fills and more.

   ![](/files/6kdXPrjTk0kKrP3SmPiV)
4. Save the segment and optionally set **Slack/Email Alerts** to get real-time updates whenever new accounts meet these criteria.

   ![](/files/o0wdyDmLgQzlw1K9Rv32)

{% hint style="info" %}
**Note:** For detailed instructions on setting up your Slack/Email notifications, [refer to this guide.](broken://pages/E1T9E3wdKAsefpSTdS59)
{% endhint %}

**Why this is valuable:**\
With this segment, you can instantly identify accounts that have re-entered the buying journey, giving you the perfect opportunity to reinitiate conversations and close the deal—without wasting time on manual guesswork.

This approach not only prioritizes your outreach but also ensures you don’t miss out on valuable opportunities hiding in plain sight. By taking a data-driven approach, you’re one step closer to hitting your quotas and converting high-intent leads into customers.

***

### **Additional Use Cases and Recommendations**

This use case is just the beginning! Get creative with the new filters and tailor them to your unique sales cycles. For example:

* Track accounts transitioning between deal stages.
* Identify high-priority leads with multiple custom filters.

Set these up today and see immediate improvements in your outreach strategy & deal closures.

***

### **Need Help?**

If you need assistance with the implementation, contact your **Customer Success Manager** via the Slack channel or email us at [**support@reo.dev**](mailto:support@reo.dev)


# Developer Funnel Stages

Reo.Dev’s AI-based Dev Funnel feature visualizes where each account is in their buying journey based on developer activities. It identifies which accounts are ripe for sales opportunities by collecting developer activity signals and feeding them into our proprietary AI model, which predicts the buying stage.

![](https://usercontent.us.prod.clueso.io/d06f019c-da0b-4d5b-9fdd-9630e7fd5d0f/69407633-b38a-4146-b719-b6561a93b606/82592c08-6886-4e05-9b48-ec5eb86de94b/images/9b34a361-ce70-4788-8a18-0163073530de.png)

### **Reo.Dev’s Dev Funnel**

To effectively guide sales and marketing strategies, we have categorized the developer account journey into distinct buying stages based on developer engagement:

* **Exploring:** At this initial stage, developers have recognized a problem and began their search for solutions. They discover your product and start to assess its relevance and potential utility. This phase is crucial for making a strong first impression and positioning your product as a viable solution.
* **Evaluating:** As interest grows, developers enter a more\
  advanced stage where they investigate your product thoroughly. This involves a deep dive into features, performance, and compatibility to ensure it aligns with their specific requirements.
* **Building :** Once preliminary assessments are positive, developers move to experiment with the product by building proof of concepts (POCs). This stage is pivotal as they test various use cases to validate the product's effectiveness and adaptability to their environments.
* **Deployed:** This stage marks the transition from testing to adoption, where developers have committed to integrating the product into their production systems. They continue to evaluate its performance, particularly focusing on scalability and reliability in a live environment.

![](/files/pewSCiDbAOfp3lUBbRij)

### Activities we track

We track a variety of activities to gauge developer engagement and interest, categorized under Github, product usage, documentations, website, telemetry data, and slack.

On Github we track pull requests, issues, comments, forks. On documentations and website we monitor intent of activities by deriving context from URLs of activities and activity type. For telemetry, we're looking at how consistently we are receiving Pingbacks from an account. For product usage we track the number of unique developers engaging with product, average logins per developer. For slack we try to analyze the content of posts and replies. Tracking these activities across different sources helps us understand how developers interact with your product and their level of investment in it's capabilities.

### How to action on the Dev Funnel intel

Reo.Dev's Buying Stage feature enhances:

**1. Account Prioritisation**

**2. Triangulate funnel data with other sources.**

#### **Account Prioritization**

Reo.Dev's Buying Stage feature enables precise account prioritization by providing each team — Marketing, DevRel, and Sales — with critical insights into where customers are in the buying journey. This allows for targeted engagement strategies that efficiently allocate resources and efforts to the accounts most likely to move the account from one buying stage to another.

**DevRel**:

* **Building developer community:** DevRels can identify and engage with developers in the Exploring and Evaluation phases, fostering a community that supports detailed product exploration.
* **Cultivating champions:** By understanding which developers are deeply engaged, DevRel can nurture these individuals into champions through educational content, social proofs within their organizations, facilitating smoother transitions through the buying stages.
* **Warm introductions to buyers:** As developers move deeper into the Evaluation and Trial stages, DevRel can make warm introductions to sales.

**Marketing:**

* **Product discovery and awareness:** The marketing team can use insights from the Buying Stage to enhance strategies around product discovery and initial customer engagement to build a robust top-of-funnel pipeline. By understanding where a customer is in their journey, they can tailor content and campaigns to raise awareness effectively.
* **Funnel progression:** They can track how accounts move from initial interest (Exploring) to actively evaluating the product (Evaluation), employing targeted strategies to nurture leads through these phases.
* **Revenue opportunities:** Identify accounts that are transitioning from evaluating to decision stages helps focus efforts on MQLs that are more likely to convert, optimizing resource allocation.

**Sales:**

* **Buyer outreach and relationship uuilding:** Sales teams can use the insights from the Buying Stage to initiate outreach at the right time, ensuring that their efforts are met with interest rather than resistance, especially as accounts move into the POC and Deployment stages.
* **Customizing sales pitches:** Understanding the specific stage of the buyer’s journey allows sales representatives to personalize pitches and demonstrations to address the unique needs and concerns at each stage.
* **Reduce sales cycles:** By knowing when an account is in the Deployment phase, sales can apply closing strategies tailored to the final concerns of decision-makers, leveraging all preceding interactions and engagements.In the **evaluating** stage, developers' interest grows, leading them to thoroughly investigate the product, its features, performance, and compatibility.

Here’s a teardown of how each team can effectively impact every stage of the Buying Funnel.

![](https://usercontent.us.prod.clueso.io/d06f019c-da0b-4d5b-9fdd-9630e7fd5d0f/69407633-b38a-4146-b719-b6561a93b606/82592c08-6886-4e05-9b48-ec5eb86de94b/images/d87f201c-9e01-4eea-b625-f7c5d88724ba.png)

**Triangulate funnel data with other sources**

* **Segments in Reo.Dev:** By uploading a LIST of accounts to Reo.Dev, you can combine this with Buying Stage insights to refine your focus on preferred accounts, enhancing targeted strategies.
* **CRM:** Merge Buying Stage insights with CRM data and deal pipeline information. This allows for a comprehensive view of each account's engagement and potential readiness to buy, facilitating more informed decision-making and strategic allocation of resources.

### Filtering accounts based on Dev Funnel Stage

**Step 1:** To search or narrow down accounts based on certain developer funnel stages, add a filter.

![](/files/Y3WWO2gnLi4w3BXqWHqh)

**Step 2:** Select Dev Funnel

![](/files/ofiYeKU1OUtVOwS23Ri2)

**Step 3:** Select the required funnel stage.

![](/files/jILeg5JAORKYsEHFBlUk)

Note: We also provided to see accounts that have recently moved from one stage of the funnel to another.

![](/files/60AoPXVjYV6vkxvwbXw7)

### Creating Segments based on Dev Funnel

You can create Segments based on Dev Funnel in Reo.Dev by selecting **Dev Funnel** from the filter list.

![](/files/AW5BpwKcCYrJ9JmvH61j)

Then choose the required funnel stage to create a segment of accounts based on the selected stages.

![](/files/ztjo8MiryFB2nCxBlUZC)


# Account Activity Score

**Activity Score** at the account level in Reo.Dev measures **developer engagement across all identified developers** within an organization. This score is an **aggregated** metric that evaluates engagement based on **recency, frequency, and intent** across multiple tracked sources.

**Overview:**

* Available as both a categorical (High, Medium, Low) and numeric (0-100) score.
* Hover functionality shows activity sources contributing to the score.
* Insights Tab in an Account displays a 90-day trend graph for account activity score.
* Numeric Activity Score filters allow for more granular targeting.

![](/files/3oX78STZ9u0VFyVlVyhQ)

***

### **How Activity Score is Calculated for Accounts**

The **Activity Score at the account level** aggregates activity from multiple sources, including:

* Active Developers
* GitHub Activity
* Documentation Activity
* Website Activity
* Form Signups
* Product Usage
* Product Installation
* Community Activity

![](/files/9EQcv1wiLHJnovUUqMeU)

{% hint style="info" %}
The account’s activity score is a weighted calculation of all its developers’ engagements.
{% endhint %}

For a deeper understanding of how Activity Score is calculated at the **Developer Level,** checkout our [\[Developer Activity Score Guide\].](/developers/dev-activity-score)

***

### **Filtering Accounts by Activity Score Category**

In addition to using Activity Score (Numeric) for advanced segmentation, you can also filter accounts by their Activity Score category (High, Medium, Low) directly from the Accounts panel.

**How to Apply the Activity Score Category Filter:**

* Navigate to the **Accounts** panel.
* Click on **"Add Filter"** and select **Activity Score**.

![](/files/SfJrjV3nK7CYa0hvfpXZ)

* Choose from **High, Medium, or Low** to filter accounts accordingly.
* Apply the filter to instantly see accounts that match the selected engagement level.

<img src="/files/rN8gZhRJ6VoIezc1YkJE" alt="" width="375">

This provides a **quick and easy way** to identify high-activity accounts without needing to set up a numeric threshold.

**Score Ranges:**

✔ **High:** **60 - 100** → Strong engagement, high activity levels.\
✔ **Medium:** **20 - 60** → Moderate engagement, requires nurturing.\
✔ **Low:** **0 - 20** → Minimal activity, potential drop-off risk.

This range applies to both **Account Activity Score (AAS)** and **Developer Activity Score (DAS)** and helps teams easily filter and prioritize high-value engagements.

***

### **Create Account Segments Using Activity Score Filters**

1. Navigate to the **Accounts** tab.
2. Click on **"Add Filter."**
3. Select **Activity Score** (either categorical or numeric).
4. Apply conditions:
   * **For categorical filtering:** Choose **High, Medium, or Low**.
   * **For numeric filtering:** Use **greater than, less than, or equal to** conditions.
5. Click **Apply** to filter the results.

![](/files/YHRhxjTEPoiEVmi7eYDo)

***

### **Insights Panel & Trend Analysis**

* The **Insights Tab** for an account displays:
  * A **90-day trend graph** of Activity Score fluctuations.
  * A **detailed breakdown of activity volume per source** (e.g., **GitHub commits, docs reviews, website visits**).
  * An **overview of active developers** contributing to the score.

![](/files/5bUvapmCnGn8MwqFJzaq)

{% hint style="success" %}
Use this to track engagement trends and identify high-priority accounts.
{% endhint %}

***

### Actionable Playbooks for Account Engagement

#### **1.** Identifying High-Engagement Accounts in Your Pipeline

**Segment Criteria:**

✔ Activity Score (Numeric) > 80\
✔ Lifecycle Stage: In Pipeline

![](/files/G2knaI1x9REdLwQFen2Q)

**Why This Matters:**

Not all accounts in your pipeline are equal—some show significantly **higher engagement** than others. This segment helps you focus on accounts where developers are **actively interacting** with your product, whether through **GitHub contributions, documentation views, or product usage.** These accounts are likely **closer to conversion** and should be prioritized for follow-ups.

**Action Steps:**

* **Accelerate Sales Outreach** – These accounts are already warmed up. Get your sales team to **schedule demos, share case studies, or address potential blockers.**
* **Provide Additional Support** – Developers within these accounts are engaged. Offer **personalized guidance, technical resources, or direct access to solutions architects** to ensure they don’t drop off.
* **Monitor Activity Trends** – If engagement is increasing, this could indicate a **buying signal**. If it’s dropping, it might mean the account is losing interest—adjust your approach accordingly.
* **Align with Marketing** – Run **ABM (Account-Based Marketing) campaigns** targeting these accounts with relevant content, such as **advanced use-case guides or customer success stories.**

***

#### **2.** High-Engagement Accounts with Buyer Involvement

**Segment Criteria:**

✔ Activity Score (Numeric) > 80\
✔ Developer Tags: Buyer\
✔ Lifecycle Stage: Not a Customer

![](/files/IzTTnCZLDqKBupC4l0eS)

**Why This Matters:**

This segment identifies accounts where **developers are highly engaged, and a buyer is also present.** This is crucial because while developer engagement is great, deals don’t close unless there’s **a decision-maker involved.** These are **high-value accounts that need strategic attention** to convert into paying customers.

**Action Steps:**

* **Activate Multi-Threading** – Since a **buyer is already engaged**, introduce **sales leadership or account executives** into the conversation to navigate procurement discussions.
* **Leverage Developer Champions** – Encourage the engaged developers in these accounts to internally advocate for your product. Provide them with ROI-focused content, internal pitch decks, or cost-benefit analysis reports to help push the deal forward.
* **Personalized Executive Engagement** – Since this account isn’t a customer yet, a well-timed executive-level conversation could expedite the decision-making process. Consider inviting decision-makers to an exclusive roundtable or a private product roadmap discussion.
* **Monitor Engagement to Prevent Drop-offs** – If engagement remains high but the deal isn’t progressing, check for objections, procurement delays, or competitor evaluations. Address these proactively with targeted messaging.

***

### **Key Takeaways**

* Aggregated score based on developer activity across multiple sources.
* Helps track overall engagement of an account.
* New trend graphs & segmentation filters for deeper insights.

***

### **FAQs: Account Activity Score**

These FAQs help clarify how the **Activity Score at the account level (AAS)** works, how it is calculated, and how to use it effectively.

<details>

<summary>1. What parameters are included in Account Activity Score (AAS)?</summary>

The **Account Activity Score (AAS)** is calculated by aggregating developer activities across the following sources:

* Active Developers
* GitHub Activity
* Documentation Activity
* Website Activity
* Form Signups
* Product Usage
* Product Installation
* Community Activity
* Telemetry Activity

{% hint style="success" %}
**Key Insight:** The **AAS aggregates engagement across all developers** within an account, helping teams track overall account activity trends.
{% endhint %}

</details>

<details>

<summary>2. What does a score of 100 or 80 mean?</summary>

Activity Score is based on **activity type, frequency, and recency**.

* **100 AAS** = **Highest engagement level.** The account is actively interacting with multiple tracked sources on a **consistent** basis.
* **80 AAS** = **Strong engagement, but not as recent.** The account has performed key activities but may not be continuously active.
* Scores naturally **decay over time** if there is no continued engagement. You can **track these changes in the Insights tab** to monitor trends.

{% hint style="success" %}
**Actionable Insight:** 80+ AAS is a key marker of strong engagement and intent.
{% endhint %}

</details>

<details>

<summary>3. Why do some accounts have a score of 100?</summary>

Each tenant has **unique activity thresholds** based on their engagement patterns.

* If an account **crosses the defined engagement threshold**, it receives a **default score of 100** to indicate **continuous high engagement.**
* This makes it easier to identify **high-priority accounts.**

{% hint style="success" %}
**Pro Tip:** Instead of focusing on static 100s, **track engagement trends** over time to monitor increases or decreases in activity.
{% endhint %}

</details>

<details>

<summary>4. What is considered a "good" Account Activity Score?</summary>

* **60+ AAS** = **Moderate engagement**—good, but may require continued nurturing.
* **80+ AAS** = **Strong engagement—ideal for outreach and prioritization.**
* **100 AAS** = **Continuous engagement—potential champions and power users.**

</details>

#### **Pro Tip: Tracking Activity Surges in Accounts**

To identify accounts with a **sudden increase in activity over the past 7 days**, you can use the **"Has Activity Surge"** filter. This is a strong **signal** that helps prioritize high-intent accounts.

{% hint style="info" %}
**How is a "Surge" calculated in Reo.dev?**

A **Surge** occurs when the **Account Activity Score (AAS)** for an account increases by more than **40** in the last 7 days. The surge status lasts for 7 days unless the activity continues to increase, in which case it may persist.
{% endhint %}

**There are two ways to apply this filter in the product:**

**1)** **As a Segment Filter for Account Segments:**

* When creating an **account segment**, add the **"Has Activity Surge"** filter to identify accounts that have seen a recent spike in activity.
* This is useful for **automating tracking and running targeted campaigns** for engaged accounts.

  ![](https://usercontent.us.prod.clueso.io/d06f019c-da0b-4d5b-9fdd-9630e7fd5d0f/ad7bbaab-4a50-4741-91d7-212112a8610f/24d36080-69ca-482a-a643-00a629e5227b/images/c05272be-cbab-42ef-b37b-eef22307af1d.png)

**2)** **Directly in the Accounts Panel:**

* If you’re already viewing an account segment, click **"Add Filter"** at the top left.
* Select **"Surge"** from the dropdown to instantly filter the list based on recent activity spikes.
* This is helpful for **quick, on-the-fly analysis** without needing to create a new segment.

![](/files/MnIgkqoNK4RtOghIcT8u)

{% hint style="success" %}
Using the Activity Surge filter in both ways ensures you never miss a high-engagement account that’s moving down the funnel.
{% endhint %}

***

<details>

<summary>5. How can I track and improve Account Activity Score?</summary>

* Focus on **increasing developer interactions** with **GitHub, documentation, product usage, and community participation**.
* Identify **trends in engagement** to **spot growth opportunities or potential drop-offs.**
* Use **trend reporting** to measure engagement changes over time and refine activation strategies.

{% hint style="success" %}
**Takeaway:** Tracking and improving AAS helps measure account health, developer engagement, and pipeline movement.
{% endhint %}

</details>


# Find More Prospects

The **Find More Prospects** feature helps you discover new buyers and developers within your **active accounts** who haven’t engaged with your tracked assets. This enables you to multi-thread relevant developer and buyers within accounts already showing activity.

Here’s a step-by-step guide on how to find more prospects within an account:

Step 1: Start by clicking on any account in the accounts dashboard.

Step 2: Within the selected account, click on the **‘More Prospects**’ tab.

<figure><img src="/files/5IFj2tMeMbMOMYzbNOB0" alt=""><figcaption></figcaption></figure>

Here you will find the following 3 sections - **ReoDB, CRM Prospects and Revealed.**

<figure><img src="/files/Xg88aspNFJDi5nUuHFV8" alt=""><figcaption></figcaption></figure>

#### **ReoDB**

1. Under the **ReoDB** section, you’ll see a list of Reo recommended prospects. To expand your search beyond the recommended prospects, you can adjust filters for location, seniority, tech function and tech skills. Or you can also create a persona or choose from an existing pre-defined persona.
2. Once you’ve identified relevant buyers - you can click on them and then click on **‘Reveal’** to access their contact IDs.

<figure><img src="/files/OOCaY3LnWwGrgGQA4En1" alt=""><figcaption></figcaption></figure>

{% hint style="info" %}
Note: Revealing prospects consumes credits. 2 credits/contact are consumed for revealing LinkedIn and business email ID. In case either 1 contact (LinkedIn or business email ID) is available - 1 credit/contact is consumed.&#x20;
{% endhint %}

#### **CRM Prospects**

Under the CRM prospects tab - you can see a list of all your prospects that are present in your CRM.

<figure><img src="/files/mI5SvfOEbwpeRiGmMZ0A" alt=""><figcaption></figcaption></figure>

{% hint style="info" %}
Note: In the ReoDB and CRM prospects tab - you will only see prospects that haven’t shown any activity yet on your tracked assets. All active developers or buyers can be viewed under the ‘Active developers’ tab.
{% endhint %}

#### **Revealed**

All prospects added can be viewed under the **‘Revealed’** tab. You can choose to send these prospects directly to your CRM or even enrol them in email sequences on Apollo, Outreach, and Salesloft.

<figure><img src="/files/cJ5jy4peykYeImD4Qn4o" alt=""><figcaption></figcaption></figure>

*


# Tags

Manually monitoring new developer activity in each account or checking for new accounts added to a segment can be time-consuming.

Reo.Dev simplifies this process by using **pre-defined Tags** to highlight new activity in any account or segment, ensuring you're always equipped with the latest intel.

Pre-defined tags in Reo.Dev include:

* **CRM Stage** - When an account moves from one CRM stage to another (e.g., from In-market to Discovery, or any other stage change).
* **Dev Funnel** - when an account changes stage in Developer Funnel
* **Surge**: When the [Account Activity Score](/accounts/account-activity-score) (AAS) for an account increases by more than 40 in the last 7 days. A surge status lasts for 7 days unless the activity continues to increase.
* **New**: When a deanonymised developer is added to an account
* **New Activity**: When a developer does a new activity in an account
* **New account:** When a new account is added in the last 24 hours. This tag is visible only for 24 hours from the day it's added.&#x20;
* **New lead:** When a new developer/buyer is added to a developer/buyer segment respectively. This tag is visible only for 24 hours from the day it's added.&#x20;
* **Buyer**: When a developer we show might have the authority to make purchase decision.

**A few things to note here:**&#x20;

* Pre-defined tags are not customizable&#x20;
* Pre-defined tags are not synced into your CRM&#x20;
* Because  pre-defined tags are not synced to CRM, they can't be used in workflows running in your CRM.&#x20;


# Customizing Tags

This guide explains how to customize tags in Reo.Dev, a feature that allows for quick filtering and prioritizing of accounts based on your predefined criteria.

### Customizing Tags While Creating a Segment

**Step 1:** Click on **Segments** on the nav bar.

![](/files/GGqquoFL1q6vDdd74kPg)

**Step 2:** Select **Create Segments**.

![](/files/OlPcySbFRjPuQK1u3HuC)

**Step 3:** Add the tag name and tag description. The tag name, which can be up to thirty characters, will be visible in the account developer account, the developer list, and the segmentation filter.

Provide a tag description up to hundred characters. This will be displayed when a user hovers over a tag name.

![](/files/VbgmasjJ7behrAapYxbY)

**Step 4:** Define the segment criteria and **save and exit**.

![](/files/ZV95HncxSO9lTj3MFdsZ)

After creating an account segment, the account tags will display for all accounts matching the criteria. Similarly, for a developer segment, the tag will display for all developers matching the criteria.

![](/files/eeC5PH4UM4yO2HlhwzkA)

{% hint style="info" %}
Admins can create a tag visible to all teammates. Users can use this tag to quickly filter the account or developer in the list.
{% endhint %}

Use the Tags to quickly filter the accounts or developers in the list.

![](/files/UEGu4G0JFrX8T1tkXcn0)


# Custom Lists

Import, Enrich & Segment with your custom CSV lists in Reo.Dev

Reo.Dev **Lists 2.0** introduces the ability to **import and enrich lists with custom columns** for both **Accounts and Developers**. This feature enhances segmentation, prioritization, and team collaboration by enabling:

* **Custom CSV Imports** with additional columns beyond standard data.
* **Enrich accounts/developers** not tracked in Reo, with technographic insights&#x20;
* **Advanced Segmentation** based on custom column values.
* **List Sharing & Team Collaboration** for personalized outreach strategies.

***

### **Importing Lists in Reo.Dev**

#### **A. Importing a List (CSV Upload with Custom Columns)**

![](https://usercontent.us.prod.clueso.io/d06f019c-da0b-4d5b-9fdd-9630e7fd5d0f/3489dde6-6927-4b0d-96de-6d143ab01c7c/43c3aae8-a57f-4ea3-adc4-c5d5ebad0855/images/b8801749-6d08-49f9-9516-0673b5539d23.png)

Reo.Dev **supports CSV file uploads** for list creation. The platform allows users to import **custom columns** that can later be leveraged in segmentation and targeting.

**Step 1: Navigate to Tools > Lists**

![](/files/RNwyiD10Q5p6i22oSpdO)

**Step 2:** Click on **Import and Enrich**&#x20;

<figure><img src="/files/Qv7Zyg6BfLyJ67RLlShS" alt=""><figcaption></figcaption></figure>

**Step 3:** Choose the List Type i.e Accounts or Developers.

<figure><img src="/files/MjDz8q2EAgoes4q15I8Z" alt=""><figcaption></figcaption></figure>

**Step 4:** Upload your list and then click on Next

<figure><img src="/files/hqy2dKga9OpYYLlpCCew" alt=""><figcaption></figcaption></figure>

**Step 5:** Select the column in your list that contains the company domain/website. This is mandatory for import success.&#x20;

* **For Account Lists →** Choose **Company Domain/Website**
* **For Developer Lists →** Choose **LinkedIn Profile URL, GitHub ID, or Email**

{% hint style="info" %}
**Why is this important?**

Reo.Dev maps your list against its database for enrichment **based on the primary key column**:

* For **account lists**, this is the **Company Domain Name/Website.**
* For **developer lists**, this is the **GitHub ID, LinkedIn Profile, or Email**.

Incorrect mapping of the primary key column will result in an import failure.
{% endhint %}

Then, click on Next.&#x20;

<figure><img src="/files/7Fwsiy3HP71wkw438Nfk" alt=""><figcaption></figcaption></figure>

**Step 6**: **Map custom columns** to field types

Each column in your uploaded CSV needs to be mapped to a **specific field type** to ensure accurate data processing. Below is a sample dataset illustrating how different types of fields are mapped during the import process:

<table><thead><tr><th>Column Name</th><th valign="middle">Field Type</th><th>Example Data</th><th>Notes</th></tr></thead><tbody><tr><td><strong>Company Domain Name</strong></td><td valign="middle">String</td><td><a href="//example.com">example.com</a></td><td>Primary key for account mapping</td></tr><tr><td><strong>6QA Intent Score</strong></td><td valign="middle">Integer</td><td>85</td><td>Numerical data</td></tr><tr><td><strong>6QA Buying Stage</strong></td><td valign="middle">String</td><td>Awareness</td><td>Categorical text values</td></tr><tr><td><strong>Last Contact Date</strong></td><td valign="middle">Date</td><td>25/01/2025</td><td>Must be in <strong>DD/MM/YYYY</strong> format</td></tr></tbody></table>

**Best Practices for Field Mapping:**

* For numerical values, map as Integer.
* For text-based values or links, map as String.
* For date fields, use the **DD/MM/YYYY** format.

Once you've mapped the columns, turn the import status toggle on for the columns you want to import. Then, click on Next.&#x20;

{% hint style="warning" %}
Columns left unmapped and checked **won’t be imported.**
{% endhint %}

<figure><img src="/files/KSxy6VUonsAfPuVGVzeL" alt=""><figcaption></figcaption></figure>

**Step 7: Provide List Details:**&#x20;

* Enter a **List Name** (e.g., *"Target Accounts APAC- April 2026"*)
* (Optional) Add a **Description** for context.

<figure><img src="/files/fpJvhqDyGoZvDfM3sjSP" alt=""><figcaption></figcaption></figure>

**Step 8:** Select how you want to import your list. There are 2 options here:&#x20;

**a. Import only accounts already in Reo:** Imports accounts that are already tracked in Reo. Any new accounts tracked in Reo in the future are automatically added. This option does not consume any credits.

**b. Import all accounts; Enrich those not in Reo:** Imports all accounts from your list, including those that aren't tracked on Reo. Accounts not already tracked in Reo are enriched with technographic insights.&#x20;

Note: This option consumes **3 credits per account** for each account not already in Reo.

Click **Save Changes** to Continue.&#x20;

<figure><img src="/files/PPPFmxeNUrA6WOZaYU6c" alt=""><figcaption></figcaption></figure>

You will receive an **email notification** once the import is complete, and the list will be available in the **Lists panel** under "My Lists."

{% hint style="info" %}
The import process may take **15–30 minutes for smaller lists** and **a few hours for larger datasets**, depending on the **list size**.
{% endhint %}

***

### **Managing and Actioning on Lists**

Once you've uploaded a list in Reo.Dev, you can manage and take a bunch of quick actions from the 'My Lists' tab:&#x20;

1. **Type** - View and filter list type i.e Accounts or Developers&#x20;
2. **Total Count** - View the total number of accounts/developer records in the list.&#x20;
3. **Status:**&#x20;

   1. **Processing -** This indicates the list is still being enriched
   2. **Failed -** This indicates the list has failed to import.&#x20;
   3. **Completed -** This indicates all accounts have been enriched
   4. **Enrichment Incomplete** - This indicates some records could not be enriched due to insufficient credits. You can purchase more credits to resume the enrichment.

   <figure><img src="/files/nonaxU0oSB9SnSGDlkXg" alt=""><figcaption></figcaption></figure>

{% hint style="warning" %}
Note: Adding credits does not automatically resume enrichment. Once you've topped up your credits, navigate to the list with incomplete enrichment, open the **3-dot menu**, and click **Resume Enrichment** to continue enriching accounts/developers.

{% endhint %}

<figure><img src="/files/hHK8KSnnb0eewms4NZJ0" alt=""><figcaption></figcaption></figure>

4. **Actions:**&#x20;

* **View Imported Lists** - Click **View Accounts/Developers** to see the enriched data.

Note: Enriched accounts will display **Reo.Dev data** alongside **custom columns**. **Unmapped accounts/developers** remain visible in the list but have no initial enrichment.

{% hint style="info" %}
**Note:** If an unmapped account or developer later engages in developer activity that Reo.Dev tracks, the system will automatically enrich their profile. At that point, you’ll see the added intelligence alongside your custom column data in the custom list.
{% endhint %}

* **Download** the list to export this data
* **Enable Alerts** - Click on the bell icon to receive alerts whenever there is a new developer/account activity.&#x20;
* **Share Lists** with Team Members

<figure><img src="/files/2Cg3p6kVtjw8xcwDHCVK" alt=""><figcaption></figcaption></figure>

{% hint style="info" %}
Shared lists appear in the **"Shared Lists"** tab for recipients.
{% endhint %}

* **Delete lists** - If you no longer need a list, you can delete it permanently

<figure><img src="/files/uZOVYwiHTXFW3EL8kjnF" alt=""><figcaption></figcaption></figure>

{% hint style="danger" %}
**Warning:** Deleting a list is **permanent** and cannot be undone.
{% endhint %}

* **Set as default view :** You can set a list as default so every time you land on the Accounts or Developers dashboard, you’ll instantly see the accounts/developers from that default list.&#x20;

<figure><img src="/files/XfzwrpO2pOj7Avz59p1C" alt=""><figcaption></figcaption></figure>

* **View Credit Consumption:** View a summary of the number of credits consumed for enriching a particular list.&#x20;

<figure><img src="/files/tK1heG4VWwy3lrGC91GK" alt=""><figcaption></figcaption></figure>

***

#### **Creating a Blank List & Using It for Sliced Data**

**Steps to Create a Blank List:**

<figure><img src="/files/ycP74FFbFJVl7JDIjKSQ" alt=""><figcaption></figcaption></figure>

1. **Go to Lists → Click on Create New**
2. **Choose List Type** (Accounts or Developers)
3. **Provide List Name & Description** (Optional)
4. Click **Create.**

<figure><img src="/files/tCJb29cjK9D85rfDYyxn" alt=""><figcaption></figcaption></figure>

**Real-World Use Case:**

A **Sales Manager** uploads a **list of 100 accounts**. After **enrichment with Reo.Dev data**, they filter **high-intent** accounts.

* They create two **blank lists**:
  * **Hot Accounts Jan - John**
  * **Hot Accounts Jan - Sarah**
* They **manually add** 50 high-priority accounts to John’s list and 50 to Sarah’s.
* They **share the lists** with notes explaining the selection strategy & assigning those accounts to the rep.

**Why use blank lists?**

* Helps **divide & assign leads** across SDRs.
* Allows **manual curation** for targeted follow-ups.
* Provides **team flexibility** in handling prospects.

***

### **Adding Accounts/Developers to a List from UI**

You can now add accounts/developers from the Reo.Dev UI into a list.

**Steps to Add Members to a List:**

1. Go to Accounts or Developers Panel
2. Select profiles to add
3. Click Add to List
4. Select the appropriate list

![](/files/0wJHOQyuLx8njSeqPdz7)

{% hint style="info" %}
**Note:** The **List names** in the dropdown are dynamically filtered based on the panel you are in:

* **If you're in the Accounts panel →** Only **Account-type lists** will be shown.
* **If you're in the Developers panel →** Only **Developer-type lists** will be shown.
  {% endhint %}

***

#### **Additional Resources & Playbooks**

* **Developer ABM Playbook Collection** → [Check it out here](https://www.reo.dev/playbook-collection/developer-abm)
* **Upcoming Update:** New playbooks featuring Lists 2.0 are coming soon.

***

### **Summary:**

* **Import Custom Columns** for advanced segmentation
* **Seamless CSV Imports** with Reo.Dev enrichment
* **List-based segmentation** for prioritization
* **Advanced Team Collaboration** with list sharing

Start leveraging **custom lists** today to refine your Developer ABM strategy!


# Managing CRM Owners in Reo.Dev

For organizations where multiple sales representatives—such as SDRs and AEs—use Reo.Dev simultaneously, lead ownership can sometimes become unclear, leading to outreach conflicts and inefficiencies. To address this, Reo.Dev offers robust solutions to segregate and manage leads effectively.

By leveraging the **CRM Account owner** feature or **Custom List Uploads**, you can ensure clear ownership and seamless lead management, allowing your team to focus on personalized and conflict-free outreach.

This guide outlines two ways to manage CRM Owners within Reo.Dev:

1. Using the **CRM Account Owner** filter in segment creation.
2. Uploading custom lists for each salesperson and creating segments.

***

### **Solution 1: Creating a Segment Using the CRM Account Owner Filter**

The **CRM Account Owner** filter allows you to segment leads directly based on ownership within your connected CRM. This ensures that each salesperson only accesses the leads assigned to them.

**Steps:**

1. Navigate to the **Segments** tab in Reo.Dev.
2. Click on **Create New > Accounts**&#x20;
3. Select the filter **CRM Account owner** under Account > Source

<figure><img src="/files/EZdncTS3lvQY6wfgobIj" alt=""><figcaption></figcaption></figure>

4. Choose the names of the sales representatives whose leads should be included in the segment (e.g., "John Doe".)

<figure><img src="/files/WXjU7SwnaHLGnoPwqBQN" alt=""><figcaption></figcaption></figure>

6. Add additional filters (e.g., **ICP Fit Score**) to refine the segment further
7. Click on Save & Exit to save the segment

***

### **Solution 2: Uploading Custom Lists for Each Salesperson**

If you prefer to manage lead ownership manually, you can upload custom lists for each salesperson and then create segments from those lists.

**Steps:**

1. Prepare a CSV file containing the leads for each salesperson.
2. Navigate to the **Lists** section in Reo.Dev.
3. **Click on Import** and select the appropriate CSV file.
   * Assign a clear, descriptive name to each list (e.g., "US ICP Leads for John Doe").

{% hint style="info" %}
Resource: [Here's a detailed guide on how to upload lists](https://docs.reo.dev/accounts/custom-lists)
{% endhint %}

4. Once uploaded, create a new segment:

   1. Navigate to the **Segments** tab in Reo.Dev.
   2. Click on **Create New > Accounts**&#x20;
   3. Select the filter **Lists** under Account > Source and choose the list you uploaded in Step 3.

   You can also add additional filters (e.g., activity type or ICP fit score) to refine the segment.&#x20;

   <figure><img src="/files/1D5VaDpfRI6Tuwp13NYm" alt=""><figcaption></figcaption></figure>

d. Save and share the segment with the assigned salesperson.

***

### Summary

Managing lead ownership in teams with multiple sales representatives is critical for effective and conflict-free prospecting. Reo.Dev offers two straightforward methods to ensure clarity:

* Use the **CRM Account Owner** filter to segregate leads based on CRM-assigned ownership.
* Upload **Custom Lists** to assign leads to individual sales team members manually.

By implementing these strategies, your team can optimize outreach efforts, prevent overlap, and maintain a streamlined sales process.


# Follow an Account

This guide explains how to follow accounts.

**Step 1:** Find the accounts that you find interesting. Click the **star icon** next to the account to follow it.

![](/files/5b6J8GuR7NZdKyEJPO0v)

Alternatively, you can open up the account details page and click on the star icon as shown in the image below.&#x20;

![](/files/sZlYmXsOYn1ZxSFXWHOs)

**Step 2:** Head to the **Lists** section and create a new list—you can give it any name like *Favourites* or *Starred Accounts.*&#x20;

<figure><img src="/files/FDlaPy5kaizldQbQKaop" alt=""><figcaption></figcaption></figure>

**Step 3:** Go back to the accounts dashboard page and select all the **starred/followed account (s).**&#x20;

<figure><img src="/files/UF9JVR1xoJoOQBJgBiSs" alt=""><figcaption></figcaption></figure>

**Step 4:** Next, under the Actions Menu, select the 'Add to list' option&#x20;

<figure><img src="/files/ZWgAKpLmH7os9bcoUfoD" alt=""><figcaption></figcaption></figure>

**Step 5:** Choose the 'Favourites' List created in 'Step 2' to add all the selected accounts to this list.&#x20;

<figure><img src="/files/YcSrzWWs3qbtTyqnjc68" alt=""><figcaption></figcaption></figure>

**Step 6:** Once you've added your starred accounts to the list, Click on 'Go to lists' to view all the accounts.&#x20;

<figure><img src="/files/zT9uAGbHo1AOqPEeRNHm" alt=""><figcaption></figcaption></figure>

Once you've created this list, you can keep adding accounts you find interesting or want to follow more closely to this list and monitor them all from one place.&#x20;

Furthermore, everytime you login and want to see all your starred accounts - you can  simply select the 'favourites' list from the dropdown menu on the accounts dashboard page (as shown in the image below)  to view them.&#x20;

<figure><img src="/files/qqGjRyNxtKRNCiQ9LO4o" alt=""><figcaption></figcaption></figure>


# How to Set Up Notification Alerts for Accounts, Developers & Segments in Reo.Dev

Stay on top of high-intent activity across accounts and developers with real-time alerts — delivered via Slack or email. Reo.Dev allows you to configure alert types and channels, and control them at three levels: **accounts, developer profiles**, and **segments**.

***

### Overview: Where Alerts Can Be Set

Reo.Dev supports notifications across three key levels:

| **Level**           | **Description**                                                           |
| ------------------- | ------------------------------------------------------------------------- |
| **Account-level**   | Receive alerts when activity is detected for a specific account           |
| **Developer-level** | Receive alerts when activity is detected for a specific developer profile |
| **Segment-level**   | Receive alerts for any account or developer inside selected segments      |

{% hint style="info" %}
**Note**: Segment-level alerts are only available for **Account** and **Developer** segments. **Buyer segments are not supported** for alerts.
{% endhint %}

***

### Step 1: Configure Notification Preferences (Global Setup)

Before enabling alerts at any level, set your notification preferences first.

1. Go to **Settings → Configurations**
2. Click **Configure** on the **Notification Settings** card

<figure><img src="/files/bvYX8l8rZNmRaYqRYAmK" alt=""><figcaption></figcaption></figure>

***

3. **Set Channel Preferences:**&#x20;

Choose your notification channel(s):

* **Email**: Turn on the toggle to receive alerts via email
* **Slack**:
  * **Send as Direct Message** — alerts go to your personal Slack inbox
  * **Send to Slack Channel** — choose one shared channel across your team to receive all alerts from Reo.Dev

<figure><img src="/files/eZMwztf66vZ5QMuwjd4R" alt=""><figcaption></figcaption></figure>

{% hint style="info" %}
**Slack channel alerts are shared across all users** in the workspace (only one channel can be selected). Slack DMs and all account/developer/segment alert toggles are user-specific.
{% endhint %}

4. **Set Activity Preferences:**&#x20;

Choose the activities that should trigger alerts:

* GitHub (Stars, Forks, Issues Created, Comments)
* Documentation Activity (Docs Review, Installation Initiated, Command Executed)
* Website Activity (Page Visits, Key Page Visits)
* Product Activity (Product Login)

Once saved, these preferences control what activity alerts you receive and where

<figure><img src="/files/cxOXA9cp6gGWkD2sRnvv" alt=""><figcaption></figcaption></figure>

### Step 2: Enable Alerts for Accounts/Developers/Segments

Once your global settings are configured, alerts can be turned on for specific accounts, developers and segments.&#x20;

***

#### 1) Account-Level Alerts

To get notified about specific account activity:

1. Go to the **Accounts** Dashboard
2. Click on the account&#x20;
3. Click on **Enable Alerts**&#x20;

<figure><img src="/files/HL5kvHqYgFOK7fGXr7Vh" alt=""><figcaption></figcaption></figure>

***

#### 2) Developer-Level Alerts

To get notified about individual developer activity:

1. Go to the **Developers** Dashboard
2. Select a developer profile
3. Click on **Enable Alerts**&#x20;

<figure><img src="/files/Dq5tzpiAvcSDWPHcn2tr" alt=""><figcaption></figcaption></figure>

***

#### 3) Segment-Level Alerts

Use this to receive activity alerts only for accounts or developers in **specific segments**.

1. Go to the **Segments** Dashboard
2. Find the segment you want to receive alerts for&#x20;
3. Click on the bell icon to enable alerts for this segment

<figure><img src="/files/sgRHSUmROiU8IOASvkT4" alt=""><figcaption></figcaption></figure>

***

### Summary: Key Behavior to Remember

| Setting / Behavior                        | Scope                       |
| ----------------------------------------- | --------------------------- |
| **Activity Type Selection**               | User-specific               |
| **Email Alerts Toggle**                   | User-specific               |
| **Slack Direct Messages**                 | User-specific               |
| **Slack Channel Selection**               | **Global** (shared for all) |
| **Alerts Enabled at Account/Dev/Segment** | User-specific               |


# Flag incorrect data

To ensure the data provided in Reo.Dev is up-to-date and reliable, improving the quality of account intelligence, users can flag incorrect data at the account level.

**Step 1:** Click on the account with incorrect information&#x20;

**Step 2:** Click on the **flag button**

<figure><img src="/files/umREOZEWV0NH8khvzSAs" alt=""><figcaption></figcaption></figure>

**Step 3:** Select the data points that are incorrect&#x20;

<figure><img src="/files/M4KfX1MYKConTMUFHS7k" alt=""><figcaption></figcaption></figure>

**Step 4:** You can also leave a comment, if necessary, and click on **Flag**

<figure><img src="/files/mTweYqCregXSED9DAAi7" alt=""><figcaption></figcaption></figure>

Once flagged, the Reo.Dev team will receive the feedback and review the data to rectify it.

<figure><img src="/files/I8t9XfFW7wFbKZaNFFsv" alt=""><figcaption></figcaption></figure>


# Developers

In this section, you'll learn how to interpret intent signals for each de-anonymized developer that Reo.Dev identifies and how to pinpoint the right buyers among these developers.

### Guides

* [Interpreting Intel on the Developer view page](/developers/interpreting-intel-on-the-developer-dashboard)
* [Developer Activity Score](/developers/dev-activity-score)
* [How to Find Inbound Developers in Reo.Dev](/developers/how-to-find-inbound-developers-in-reo.dev)


# Interpreting Intel on the Developer Dashboard

Reo.Dev empowers GTM teams with in-depth insights into the developers interacting with your assets. By navigating to the **Developers** tab in the Reo.Dev, you gain access to valuable intel on deanonymized developers. This article will walk you through the various elements of the intel provided for each developer.

<figure><img src="/files/O3hThXLq2leqS25QgauV" alt=""><figcaption></figcaption></figure>

#### **Developer View Page**

| Intel               | Description                                                                                                                                                                                                                                      |
| ------------------- | ------------------------------------------------------------------------------------------------------------------------------------------------------------------------------------------------------------------------------------------------ |
| Developer Name/ID   | Name of the de-anonymized developer                                                                                                                                                                                                              |
| Tags                | <p>Tags associated with the developer. <br><br>New Developer: The developer was added to a segment <br>New Activity: The developer has done a recent activity <br>Buyer: Developer may have authority to make a purchase decision in the org</p> |
| Job Title           | Developers Job title                                                                                                                                                                                                                             |
| Company             | Current company of the developer                                                                                                                                                                                                                 |
| Country (Developer) | Location where the developer is currently active                                                                                                                                                                                                 |
| Country (Company)   | Company Location                                                                                                                                                                                                                                 |
| Employee Range      | Company employee range                                                                                                                                                                                                                           |
| First Activity Date | The developer's first recorded activity                                                                                                                                                                                                          |
| Last Activity Date  | The developer's most recent recorded activity                                                                                                                                                                                                    |
| Contact IDs         | Contact information of the developer: Github ID, LinkedIn, Email ID                                                                                                                                                                              |

#### **Developer Details Page**

When you click on a developer's name, you'll see a detailed profile and their activity log.

The **Developer Profile** provides information such as designation, current company, joining date, location, first and last activity dates, past companies, associated tags, channels they've been active on, and activity score.&#x20;

<figure><img src="/files/yVbgpwEXtNYVWT9EmJ2b" alt=""><figcaption></figcaption></figure>

**Developer Activity** gives you a quick overview of the activities (and the count of activities) the developer has done across different sources/channels.&#x20;

<figure><img src="/files/pnUZSZKkf5jJ0LThTCMD" alt=""><figcaption></figcaption></figure>

The **Activity Timeline** shows you a chronological view of all the activities done by the developer.  You can further use the activity filter to narrow down and view specific activities.&#x20;

<figure><img src="/files/jKFeSNkVfUnirr3Xag40" alt=""><figcaption></figcaption></figure>

{% hint style="info" %}
Click on **Enable Alerts** to receive Slack notifications whenever the developer does a new activity.
{% endhint %}

<figure><img src="/files/l6KTrB6irUrPpC24DnqN" alt=""><figcaption></figcaption></figure>

#### **Develoepr Filters**&#x20;

You can use filters to narrow down/surface developers based on specific attributes.&#x20;

Click on **Add Filter** on the Developers Dashboard.&#x20;

<figure><img src="/files/Zpra9yWrlRDFM4p0SobQ" alt=""><figcaption></figcaption></figure>

**You can filter developer based on the following attributes:**&#x20;

1. Designation - Filter developers based on their seniority level (eg CXO, VP, Director)&#x20;
2. Buyer - Filter developers with decision making/purchase authority&#x20;
3. Developer Location - Filters developers based on their region/country/state/city&#x20;
4. Account Location - Filter developers based on the location of their associated company&#x20;
5. Employee Range - Find developers across companies with specific employee range&#x20;
6. New Developer - Find new developers added in the last 24 hours
7. New Activity - Find developers who've done some new activity in the last 24 hours
8. Status - Filter developers based on status&#x20;
9. Developer Tags - Filter developers based on associated developer tags&#x20;
10. Has Notes - Filter developers with attached notes
11. CRM Account Owner - Filter developers based on account owner&#x20;


# Dev Activity Score

The Activity Score at the developer level in Reo.Dev is a personalized engagement metric that evaluates an individual developer’s interactions with your product ecosystem. It provides a numerical (0-100) and categorical (High, Medium, Low) score based on their recency, frequency, and intent of activities.

<figure><img src="/files/Y6WQW2uAW7DOpiE77Dzp" alt=""><figcaption></figcaption></figure>

**Overview**

* Activity Score is now available at the Developer level.
* Numeric (0-100) and categorical (High, Medium, Low) formats.
* Hover functionality provides detailed activity breakdowns.

***

### **How Activity Score is Calculated for Developers**

A developer's **Activity Score** is based on their interactions with key sources, including:

* GitHub Activity
* Documentation Activity
* Website Activity
* Form Signups
* Product Usage
* Product Installation
* Community Activity
* Telemetry Activity

{% hint style="info" %}
For a deeper understanding of how Activity Score is calculated at the account level, checkout our [\[Account Activity Score Guide\].](/accounts/account-activity-score)
{% endhint %}

<figure><img src="/files/THAKpQjZ0YeZ80M3YC6j" alt=""><figcaption></figcaption></figure>

The developer’s score is a real-time reflection of their engagement with your product.

***

### **Filtering Developers by Activity Score**

#### **Step 1: Apply Filters in the Developers Segment**

1. Navigate to **Segments** → Create a **Developer Segment.**
2. Click **"Add Filter."**
3. Select **Activity Score (Numeric) or Activity Score**&#x20;

<figure><img src="/files/HuxCZWpUlvUAZHP0pQ5u" alt=""><figcaption></figcaption></figure>

**Apply conditions:**

* **For Activity Score filtering:** Choose **High, Medium, or Low**

<figure><img src="/files/9HJstwOYmHnqBrSrBGVK" alt=""><figcaption></figcaption></figure>

* **For Activity Score (Numeric) filtering:** Use **greater than, less than, or equal to** conditions.

<figure><img src="/files/fSgvCXrgikB8pchOl0a3" alt=""><figcaption></figcaption></figure>

**Score Ranges for High, Medium, & Low:**

* **High:** **60 - 100** → Strong engagement, high activity levels.
* **Medium:** **20 - 60** → Moderate engagement, requires nurturing.
* **Low:** **0 - 20** → Minimal activity, potential drop-off risk.

These score ranges provide a standardized way to assess developer engagement and help teams quickly prioritize high-value developers.

***

### **Developer Profile Card & Activity Score**

In a developer’s profile card, the Activity Score is displayed as a numeric value (0-100) along with a High, Medium, or Low label. This score provides a quick overview of the developer’s engagement level.

#### **Activity Score in the Developer Profile Card**

* Located in the developer profile card
* Shows a numeric score with a corresponding engagement level (e.g., High (100), Medium (50), Low (10)).
* Provides a snapshot of the developer’s activity strength based on tracked interactions.

<figure><img src="/files/fDBt5lWcjXPRUWBHMWAf" alt=""><figcaption></figcaption></figure>

{% hint style="success" %}
Use this to assess a developer's engagement and identify potential advocates.
{% endhint %}

***

### Actionable Playbooks for Developer Engagement

#### **1. Identify Champions in ICP Accounts Active on GitHub**

**Filter Criteria:**

✔ Account > Intel > ICP Fit Score: "Strong" & "Moderate".

✔ Developer > Intel > Activity Score (Numeric) > 60

✔ Activity > Activity Type > GitHub: Includes any → Select All + Date Range is set to last 60 days

<figure><img src="/files/c2haDut7S8rtfbZuZcTA" alt=""><figcaption></figcaption></figure>

**Action:**\
Prioritize these developers for direct outreach—engage them with technical content and relevant resources tailored to their activity timeline. Customize your pitch and messaging based on their interactions. Additionally, identify key buyers within the account to connect with decision-makers.

👉 For more guidance, check out this guide: [\[Find Buyer Contact\].](/buyers/find-buyer-contact)

***

#### **2. Find Champion Developers in Your Target List**

**Filter Criteria:**

* Account > Source > Lists > Developers: Select a specific uploaded developer list to create a segment.
* Developer > Intel > Activity Score : Includes any "HIGH"

<figure><img src="/files/rkEnKVsMxPGtHjWLhl0L" alt=""><figcaption></figcaption></figure>

**Action Steps:**

* **Prioritize outreach to these highly engaged developers**—review their activity history and tailor messaging based on their interactions with your product.
* **Offer personalized technical resources** such as in-depth documentation, advanced tutorials, or product deep dives to keep them engaged.
* **Invite them to participate in hands-on experiences** like beta testing, feature previews, or hackathons to strengthen their connection with your product.
* **If their organization is a target account, align with sales teams to identify key buyers** and create a warm introduction based on the developer's engagement.

***

### **Key Takeaways**

* A granular engagement metric for individual developers.
* Allows better segmentation & targeting based on developer activity.
* Supports GTM teams in identifying champions.

{% hint style="success" %}
Use the Developer Activity Score to engage top developers, identify champions, and drive advocacy!
{% endhint %}

***

### **FAQs: Developer Activity Score (DAS)**

These FAQs explain how the **Developer Activity Score (DAS)** works and how it helps track individual developer engagement.

<details>

<summary>1. What parameters are included in Developer Activity Score (DAS)?</summary>

The **Developer Activity Score (DAS)** is calculated based on an individual developer’s interactions across these sources:

* GitHub Activity
* Documentation Activity
* Website Activity
* Form Signups
* Product Usage
* Product Installation
* Community Activity
* Telemetry Activity

{% hint style="success" %}
**Key Insight:** The **DAS provides a granular view of a developer's engagement**, helping teams identify active users and champions.
{% endhint %}

</details>

<details>

<summary>2. What does a score of 100 or 80 mean?</summary>

DAS is based on **activity type, frequency, and recency**.

* **100 DAS** = **The developer is highly engaged and interacting frequently** with tracked sources.
* **80 DAS** = **The developer has engaged meaningfully but not as recently**.
* If a developer **stops engaging**, their DAS **will decay over time**.

{% hint style="success" %}
**Actionable Insight:** **80+ DAS** is a key indicator of developer activation and retention.
{% endhint %}

</details>

<details>

<summary>3. Why do some developers have a score of 100?</summary>

Each tenant has a **custom threshold** based on the frequency of developer activities.

* If a developer **crosses that threshold**, they are assigned **a default score of 100**, indicating **continuous high engagement**.
* This makes it easy to **identify power users and developer advocates**.

{% hint style="success" %}
**Pro Tip:** Instead of focusing on static 100s, **track developer engagement trends** over time to **spot champions and potential drop-offs.**
{% endhint %}

</details>

<details>

<summary>4. What is considered a "good" Developer Activity Score?</summary>

* **60+ DAS** = Moderate engagement—indicates an active but less frequent user.
* **80+ DAS** = Highly engaged—ideal for community building, outreach, and advocacy programs.
* **100 DAS** = **Consistently engaged—these developers are power users and potential champions.**

{% hint style="success" %}
**Pro Tip:** Monitor DAS over time to track developer adoption and conversion into advocates.
{% endhint %}

</details>

<details>

<summary>5. How can I track and improve Developer Activity Score?</summary>

* Encourage more developer interactions with GitHub, docs, product usage, and community engagement.
* Use DAS trends to identify potential champions and nurture them into advocates.
* Track week-over-week DAS changes to see which developers are becoming more engaged over time.

{% hint style="success" %}
**Takeaway:** **Aiming for 80+ DAS** helps track developer activation, retention, and potential champions.
{% endhint %}

</details>


# How to Find Inbound Developers in Reo.Dev

When managing active developers in Reo.Dev, you may track activity across both **first-party assets** (your website, docs, product, Slack community, LinkedIn page) and **third-party assets** (competitor or complementary GitHub repositories).

While integrating competitor & complementary GitHub repos expands your **TOFU (Top of Funnel)** audience for targeted ads and email campaigns, it can make the **Developer Tab** cluttered when you need to focus on developers **engaging with your owned assets**.

To streamline this, we recommend creating an **"Inbound Developers" segment**—a filtered view of developers who are active on your first-party assets, excluding those only interacting with third-party repositories.

***

### **Steps to Create an Inbound Developers Segment**

#### **1) Navigate to the Segment Creation Panel**

1. In Reo.Dev, go to **Segments** panel.
2. Click **Create New**&#x20;
3. Select Advance Segment & Choose **Developer Segment.**
4. Name the segment **"Inbound Developers"**.

***

#### **2) Define Segment Criteria**

Use the **Advanced Filtering** options to include only first-party engagement activities.

**Segment Filters Configuration**

<figure><img src="/files/vL9Z1CPrnOy99fqpzGFh" alt=""><figcaption></figcaption></figure>

| **Criteria**             | **Includes Any**                              |
| ------------------------ | --------------------------------------------- |
| Repository Type          | OWNER                                         |
| Activity Type: Website   | Viewed Pages, Copied Content                  |
| Activity Type: Docs      | Docs Review, Copied Content                   |
| Activity Type: Product   | Screen Visited, Product Login, Copied Content |
| Activity Type: Slack     | Posts, Reactions, Replies, Joined Community   |
| Activity Type: LinkedIn  | Reposts, Comments, Reactions                  |
| Data API (if applicable) | Custom Telemetry Metric                       |

{% hint style="info" %}
**Note:** If your integrated data sources are different, modify the filters to reflect the first-party assets you track in Reo.Dev.
{% endhint %}

🔗 **Related Guide:** [Understanding Basic and Advanced Segments in Reo.Dev](/segments/basic-and-advanced-segments)

***

### **Why This Matters**

* Helps you **focus on engaged developers** within your ecosystem.
* **Filters out** developers only active on third-party repos.
* Enables **better targeting** for nurture campaigns & community-building.

***

### Summary

By configuring this segment, you create a **clear, first-party developer audience** in Reo.Dev, helping your team differentiate inbound interest from external activity.


# Buyers

How to Find, Segment & Engage Decision-Makers in Reo.Dev

### Guides

* [Find Buyer Contact](/buyers/find-buyer-contact)
* [How to Find, Segment & Engage Decision-Makers in Reo.Dev’s Buyer Section](/buyers/how-to-find-segment-and-engage-decision-makers-in-reo.devs-buyer-section)
* [Buyer Persona Configuration in Reo.Dev](/buyers/buyer-persona-configuration-in-reo.dev)


# Find Buyer Contact

{% embed url="<https://youtu.be/_ZgTDdyuIHQ>" %}

With Reo.Dev, you can discover the contact details of potential buyers or decision makers from high-intent account.

This guide walks through the process of finding these details.

Start by navigating to the account page.

**Step 1:** Click on the account of interest.

![](https://usercontent.us.prod.clueso.io/d06f019c-da0b-4d5b-9fdd-9630e7fd5d0f/4105a91e-9ac8-4107-ad2c-580c1ac9216e/4d703056-f714-46de-8745-d4db1fdb8420/images/6b847047-0e5b-4de2-bbf7-622545a92cef.png)

**Step 2:** Select the **Prospects** tab.

![](https://usercontent.us.prod.clueso.io/d06f019c-da0b-4d5b-9fdd-9630e7fd5d0f/4105a91e-9ac8-4107-ad2c-580c1ac9216e/4d703056-f714-46de-8745-d4db1fdb8420/images/1f022329-0753-4a3c-a2ec-505e8babac7f.png)

The buyer section displays buyers who have interacted with your product assets.

{% hint style="info" %}
**How do we define a buyer?**

We leverage generative AI to classify job titles by seniority level. If the classification identifies a title as "Director" or higher, we categorize that individual as a "Buyer."
{% endhint %}

**Step 3:** We understand that your potential buyer may not have engaged in any development activities. To discover additional prospects, click on **Find More Buyers**.

![](https://usercontent.us.prod.clueso.io/d06f019c-da0b-4d5b-9fdd-9630e7fd5d0f/4105a91e-9ac8-4107-ad2c-580c1ac9216e/4d703056-f714-46de-8745-d4db1fdb8420/images/23341206-9961-44c9-b649-38caed917f09.png)

Two sections appear. By default, Reo.Dev suggests prospects based on the following criteria:

1. **Developer Activity by Location**: Decision-makers are often located in the same areas where developers interact with your assets, especially within enterprise organizations. Therefore, these locations are automatically prioritized for you.
2. **Seniority Level**: Prospects with titles at the “Director” level or higher are selected, as these roles typically have decision-making authority.

**Step 4:** f you want to expand your search beyond the recommended prospects, you can adjust filters for location, seniority, designation & job function.

![](https://usercontent.us.prod.clueso.io/d06f019c-da0b-4d5b-9fdd-9630e7fd5d0f/4105a91e-9ac8-4107-ad2c-580c1ac9216e/4d703056-f714-46de-8745-d4db1fdb8420/images/5d5588eb-c368-41f5-a0e1-69ff5b4f5064.png)

An additional feature is the ability to create a persona for your decision-makers. For quick access to a known decision-maker persona.

**Step 5:** Choose **your created persona** from the drop-down or click on **Create New Persona.**

![](https://usercontent.us.prod.clueso.io/d06f019c-da0b-4d5b-9fdd-9630e7fd5d0f/4105a91e-9ac8-4107-ad2c-580c1ac9216e/4d703056-f714-46de-8745-d4db1fdb8420/images/0d07321c-b284-4e49-9778-49c2117bfb2a.png)

{% hint style="info" %}
**To learn more:** [Buyer Persona Configuration in Reo.Dev](/buyers/buyer-persona-configuration-in-reo.dev)
{% endhint %}

**Step 7:** Another important aspect is Import from CRM. If your CRM is integrated with us, we will show you the prospects already present in your CRM in that account.

![](https://usercontent.us.prod.clueso.io/d06f019c-da0b-4d5b-9fdd-9630e7fd5d0f/4105a91e-9ac8-4107-ad2c-580c1ac9216e/4d703056-f714-46de-8745-d4db1fdb8420/images/dccfdeba-7eff-41fc-8932-1cd30f1b809b.png)

**Step 8:** Select the relevant profiles and Click **Add Buyers** to display the list on buyer section.

![](https://usercontent.us.prod.clueso.io/d06f019c-da0b-4d5b-9fdd-9630e7fd5d0f/4105a91e-9ac8-4107-ad2c-580c1ac9216e/4d703056-f714-46de-8745-d4db1fdb8420/images/85a91809-cfc2-425c-8112-c76a1fc4a035.png)

The selected buyers will be populated on the page with their source and other details.

![](https://usercontent.us.prod.clueso.io/d06f019c-da0b-4d5b-9fdd-9630e7fd5d0f/4105a91e-9ac8-4107-ad2c-580c1ac9216e/4d703056-f714-46de-8745-d4db1fdb8420/images/e9b3413e-c70c-4c93-9d7c-b39163453ed5.png)

**Step 9:** **Enroll in a Sales Sequence**

Once buyers are added:

* Select them from the list
* Use available integrations to launch sequences directly:
  * Apollo.io → Add to Apollo Sequence
  * Outreach.io → Add to Outreach Sequence
  * Salesloft → Add to Salesloft Cadence
  * Add to **HubSpot/Salesforce** CRM

![](https://usercontent.us.prod.clueso.io/d06f019c-da0b-4d5b-9fdd-9630e7fd5d0f/4105a91e-9ac8-4107-ad2c-580c1ac9216e/4d703056-f714-46de-8745-d4db1fdb8420/images/e897a5eb-ed76-44d9-bb4e-d00535b89e4d.png)

**Guides:**

* [How to Connect Apollo.io with Reo.Dev](broken://pages/ynOD0Xlydk9V9cWu68BC)
* [How to Connect Outreach.io with Reo.Dev](broken://pages/paqO1ypIIOH9QKlqFpgb)
* [How to Connect Salesloft with Reo.Dev](broken://pages/q9a0AhSSUXU5xKr69yk8)

***

### **Related Guide: Creating Buyer Personas for More Targeted Prospecting**

Enhance your buyer discovery process by defining **custom buyer personas** based on seniority, job function, and designation. This feature helps you **refine ReoDB recommendations**, ensuring you reach the right decision-makers based on your Ideal Customer Profile (ICP).

If you're looking to go beyond standard recommendations and tailor your outreach strategy, learn how to set up **Buyer Personas**.

🔗 [Buyer Persona Configuration in Reo.Dev](/buyers/buyer-persona-configuration-in-reo.dev)


# How to Find, Segment & Engage Decision-Makers in Reo.Dev’s Buyer Section

For **SDRs, BDRs, and marketers**, identifying and engaging the right buyers is often one of the most time-consuming tasks. Scattered data, unclear decision-makers, and inefficient outreach slow down pipeline generation and impact revenue goals.

Reo.Dev introduces the **Buyer Section**—a dedicated workspace designed to help revenue teams **discover, segment, and engage high-intent buyers efficiently**. This feature enables teams to:

* **Identify** relevant buyers based on AI-driven job title classification.
* **Filter and segment** buyers based on their source, designation, and activity.
* **Sync** selected buyers to CRM and outreach tools like Apollo.io, Salesloft & Outreach.io.
* **Run targeted email campaigns** for high-intent buyer segments.

**How does this help different roles?**\
**SDRs & BDRs:** Find & Prioritize high-intent buyers and engage them efficiently.\
**Marketers:** Build and execute **targeted campaigns** to nurture buyer segments at scale.

Let’s explore how the Buyer Section works and how it can **accelerate your sales and marketing efforts**.

***

### **1. Navigating the Buyer Section**

The **Buyer Section** is now available in the left navigation panel.

<img src="/files/1bjPjFkoh0yvLIEs8qT3" alt="" width="223">

**Key Differences from the Developer Panel:**

* All profiles in this section are classified as **buyers** (senior decision-makers).
* A **unique filter: "Source"** helps you track how each buyer was identified.

![](/files/mY2wWYxQkRJ0Ct82qw4Y)

***

### **2. Who is a Buyer in Reo.Dev?**

Reo.Dev leverages **generative AI** to classify job titles based on seniority. If a title is identified as **Director-level or higher**, the system categorizes that individual as a **Buyer**.

***

### **3. Filtering Buyers: The Unique "Source" Filter**

At the top-left of the Buyer Section, a **new filter labeled "Source"** is introduced. This is exclusive to the Buyer Section and does not appear in the Developer or Account panels.

![](/files/zfmvBK0cUk976lztULkC)

#### **Buyer Sources in Reo.Dev:**

| **Source**       | **Description**                                                                                                                                                                        |
| ---------------- | -------------------------------------------------------------------------------------------------------------------------------------------------------------------------------------- |
| **Dev Activity** | A developer’s activity in Reo.Dev was **de-anonymized**, and their job title classified as a senior decision-maker.                                                                    |
| **CRM**          | Buyers imported from a user's **CRM system** into Reo.Dev. These profiles were not previously present in Reo.Dev.                                                                      |
| **ReoDB**        | AI-driven buyer discovery. Reo.Dev identifies buyers by analyzing two key data points: senior-level designations and the geographical location of active developers within an account. |

🔗 **Want to find buyers for an account from ReoDB?** Check out our guide: [Find Buyer Contact](/buyers/find-buyer-contact).

***

### **4. Switching Between Buyer Segments**

You can switch between different Buyer Segments using the segment dropdown at the top-center of the Buyer Section.

**How It Works:**

* By default, the **"All Buyers"** segment is selected, displaying the complete list of buyers.
* You can switch to a **custom Buyer Segment** you’ve created to focus on a more targeted group.

![](/files/OUZuAXG9eqH0rkFId7Vx)

***

### **5. Downloading Buyer Segment as CSV**

Reo.Dev now allows you to **export buyer profiles** from a segment by downloading them as a CSV file. This makes it easier to upload buyer lists into **LinkedIn Campaign Manager, HubSpot, Salesforce, or other platforms** for targeted outreach and marketing campaigns.

#### **How to Download Buyer Profiles as CSV:**

1. **Go to the Buyer Section** and select a **Buyer Segment** from the dropdown.
2. Click on **‘Download CSV’** at the top-right.
3. In the popup, select the **fields for specific platform** where you want to use the CSV:
   * **LinkedIn Campaign Manager**
   * **HubSpot**
   * **Salesforce**
   * **Other**
4. Choose the **object** for export:
   * **Accounts**
   * **Buyers**
   * **Both**
5. Click **‘Download’** to generate and download the CSV.

<img src="/files/gfxhc8vOxwWJRNgmaBj7" alt="" width="375">

This new feature helps **both sales and marketing teams** leverage buyer data outside of Reo.Dev, making outreach and ad campaigns more effective.

***

### **6. Selecting and Sending Buyers to CRM or Adding them to Email Sequences**

Users can select one or multiple buyer profiles perform the following actions on them such as:\
\
**Sync to CRM** → Export buyers to HubSpot/Salesforce (if integrated).

![](/files/BdHgypcPr4uwmEjS7ofk)

**Send to** **Apollo.io/Outreach.io** **Sequences or Salesloft Cadences** → Engage buyers with automated outreach (if integrated).

![](/files/U9kf50hgphMvoSVCOR5R)

🔗 **Related Guides:**

* [Integrate HubSpot with Reo.Dev](broken://pages/qIlng8yz565Wfi80f2uC)
* [How to Integrate & Use Apollo.io with Reo.Dev](broken://pages/ynOD0Xlydk9V9cWu68BC)
* [How to Integrate & Use Outreach.io with Reo.Dev](broken://pages/paqO1ypIIOH9QKlqFpgb)
* [How to Integrate & Use Salesloft with Reo.Dev](broken://pages/q9a0AhSSUXU5xKr69yk8)

***

### **7. Creating Buyer Segments**

Similar to **Account** and **Developer** segments, Reo.Dev now allows you to create **Buyer Segments** for more precise targeting.

![](/files/UC43KZClkXioDM195Swl)

### **How to Create a Buyer Segment**

1. **Navigate to:** Left panel → **Segments** → Click **"Create Segment"** (top-right).
2. **Select Segment Type:** Choose **"Buyers"** (new option).
3. **Apply Filters:** Just like other segments, you can refine your buyer segment using various filters.
4. **Unique to Buyer Segments:** The **"Source"** filter is exclusive to Buyer Segments, allowing you to filter buyers based on their origin:
   * **ReoDB** (AI-driven buyer discovery)
   * **CRM** (Manually imported contacts)
   * **Dev Activity** (Developers identified as decision-makers)

![](/files/PdCzNZQMs4UszY6wDxO3)

***

### **8. Running Email Campaigns for Buyer Segments**

Until now, bulk email campaigns were only possible for **Developer Segments**. With this update, you can now **run targeted campaigns** for **Buyer Segments** too!

#### **How to Create a Buyer Campaign:**

#### **Option 1: From Segments Panel**

1. **Go to Segments** → Click the **three-dot menu** for a Buyer Segment.
2. Select **"Create Campaign."**
3. The campaign setup screen will open automatically.

![](/files/EqSLoz3n2TBknOSGVZjz)

#### **Option 2: From Campaigns Panel**

![](https://usercontent.us.prod.clueso.io/d06f019c-da0b-4d5b-9fdd-9630e7fd5d0f/8d3b5426-f012-4de9-aa9e-89b6c3029f4c/b534a9e1-d52e-4886-bf8c-9310139a26dd/images/02aa812e-8202-4363-807f-ae627240a06b.png)

1. **Navigate to:** Left panel → **Tools** → **Campaigns.**
2. Click **"Create"** (top-right button).
3. Select **Source:** Pick a **Buyer Segment** from the dropdown list.
4. Choose an **Outreach Channel**.
5. Select an **Email Sequence** and sender email.
6. Click **Create** to launch the campaign.

![](/files/UUnPLYNxtSabSjkddiUs)

**Related Guide:**

* [Run Bulk Email Campaigns](/campaigns/run-bulk-email-campaigns)

***

### **Key Takeaways**

* **Dedicated Buyer Section:** Easily discover & manage decision-makers.
* **AI-Powered Buyer Identification:** Filters out non-relevant profiles.
* **Buyer Segments:** Organize & prioritize high-value prospects.
* **CRM & Outreach Sync:** Seamlessly push buyers to HubSpot or add them to email sequences in Apollo.io, Outreach.io or Salesloft.
* **Email Campaigns for Buyers:** Engage buyer segments at scale.

By using the **Buyer Section**, **SDRs, BDRs, and marketers** can **eliminate guesswork, streamline outreach, and drive faster conversions**—whether through direct prospecting or automated nurture campaigns.

***

### **Related Guide: Creating Buyer Personas for More Targeted Prospecting**

Enhance your buyer discovery process by defining **custom buyer personas** based on seniority, job function, and designation. This feature helps you **refine ReoDB recommendations**, ensuring you reach the right decision-makers based on your Ideal Customer Profile (ICP).

If you're looking to go beyond standard recommendations and tailor your outreach strategy, learn how to set up **Buyer Personas**.

🔗 [Buyer Persona Configuration in Reo.Dev](/buyers/buyer-persona-configuration-in-reo.dev)


# Buyer Persona Configuration in Reo.Dev

### **Create Custom Buyer Personas to Find High-Intent Decision-Makers from ReoDB**

Reo.Dev’s **Buyer Persona** feature allows you to define **custom personas** to quickly find ICP-fit **buyers (decision-makers)** and **developers (practitioners)** to refine your prospecting strategy.

Instead of relying solely on geographic triangulation, you can find **buyers based on tech functions, and seniority levels** in addition to location — a crucial advantage when selling to large enterprises or remote teams.

***

### **Why Use Buyer Personas?**

#### **1) Overcome Geographic Limitations**

* In large enterprises, practitioners and decision-makers may be in **different countries**.
* Remote work setups make geographic-based buyer recommendations less reliable.

#### **2) Precision Targeting by Tech Function, Tech Skills & Seniority**

* **DevTool companies** sell to different technical personas based on tech function:&#x20;
  * AI/ML-focused DevTools may have buyers in&#x20;
    * AI/ML Leadership&#x20;
    * Generative AI & LLMs
    * Predictive Analytics & Intelligence
  * A cybersecurity DevTool may target:
    * Security Leadership&#x20;
    * Cloud Security Leadership&#x20;
    * Threat & Defense

By creating **custom personas**, you ensure ReoDB finds buyers **most relevant to your ICP (Ideal Customer Profile).**

***

### **How to Create a Buyer Persona in Reo.Dev**

#### **Navigate to Persona Configuration**

1. Go to **Settings** → **Configurations**

<img src="/files/pm6aJzKZSfvuDQA4kxVG" alt="" width="213">

1. Click **Configure** under *Persona Configuration*.

![](/files/4W1IfQbYlXmlPEAoScBE)

The **Persona Configuration** screen includes two tabs:

* **Persona Templates**\
  Curated persona examples provided by Reo.Dev that users can quickly **clone** and customize.
* **My Personas**\
  All personas created and saved by the user.

![](/files/QGxcKsy5XdLnVIVw8GT2)

***

### Persona Templates (Pre-Made Examples)

Persona Templates are designed to help users get started faster by providing commonly used buyer persona definitions. Each template includes pre-applied filters, which can be cloned, edited, and saved.

Clicking the **Clone** icon on any template opens the persona editor with pre-filled criteria.

![](/files/sfHeZgxi6w9cfemaSJCG)

#### Default Templates Provided:

* **US Technology Buyers**
* **DevOps Buyers**
* **AI/ML Buyers**
* **Cyber Security Buyers**

<figure><img src="/files/r6OabRK6DB3snSWIixNB" alt=""><figcaption></figcaption></figure>

Once saved, the persona will appear under **My Personas**.

***

#### **Create a New Persona**

1. Go to Persona Configuration → My **Personas tab**
2. Click **Create New** (top-right corner).
3. Apply Persona Criteria to define your ideal buyer persona:&#x20;

   * **User Persona**
     * **Location** (e.g., USA, Europe, APAC)
     * **Seniority Level** (Director, VP, CXO, etc.)
   * **Technology Persona**
     * **Tech functions** (AI/ML Leadership, Generative AI & LLMs, DevOps Platform & Reliability etc)
     * **Tech skills** (Terraform, linux, Spring Boot etc - you can choose from 65,000 unique technical skills)

   **Note:** \
   For Technology Persona, you can choose to filter by **Tech Functions** and/or **Tech Skills**.\
   Selecting **“includes any of”** works as an **Either/OR** condition - the persona will match if they meet at least one of the selected criteria.

   Selecting **“includes all of”** works as an **AND** condition — the persona will match only if they meet all selected criteria.

<figure><img src="/files/OyBfHQZ2RDTXHps9StFn" alt=""><figcaption></figcaption></figure>

4. Then, Click on Next.&#x20;
5. Reo suggests AI-generated persona names. You can choose to edit the name. \
   You can also set a persona as your default persona. Once you set it, ReoDB will always show you contacts matching that default persona. To set a persona as your default persona, simply turn on the toggle 'Set as Default Persona'.&#x20;
6. Finally, **Click on Save**

<figure><img src="/files/GLZYOkjQwsjwiQecfVlT" alt=""><figcaption></figcaption></figure>

Use your persona in **More Prospects** to get targeted buyer recommendations

<figure><img src="/files/7tCLcCqLLsdIeph3asYj" alt=""><figcaption></figcaption></figure>

***

#### Setting a Default Persona

In the **My Personas** tab, you can mark any of your created personas as your **default** by clicking **Set Default**.

![](/files/bQTruG9reGm96m3p4NWP)

Once set:

ReoDB will always open with this persona selected whenever you go to **ReoDB** within the **More Prospects tab** of an account.

This replaces the default **“Reo Recommended”** persona, giving you tighter control over persona-based prospecting.

***

#### Previewing and Cloning Personas

* Use the **Clone** icon to duplicate any persona (from either Templates or My Personas).
* Edit filters or criteria if needed.
* Save and use across your prospecting workflows.

***

### **Best Practices for Creating Personas in Reo.Dev**

#### **✔ Always Create at Least Two Personas**

1. **Buyer Persona** – Target senior decision-makers.
2. **Developer Persona** – Identify practitioners influencing the purchase.

#### **✔️ Leverage Location Filters for Multi-Region Sales**

* If selling in **multiple geographies**, create **regional personas**:
  * *AI Buyers – USA*
  * *AI Buyers – Europe*
  * *APAC DevOps Leaders*

***

### **Example Buyer Personas**

| Persona Name            | Location      | Seniority         | Tech Function                                                      | Tech Skills                                    |
| ----------------------- | ------------- | ----------------- | ------------------------------------------------------------------ | ---------------------------------------------- |
| **AI/ML Buyers**        | USA, Europe   | VP, Director, CXO | *Artificial Intelligence and Machine Learning*                     | ML Flow,ML Ops, Tensorflow, Pytorch            |
| **Security Buyers**     | North America | Director, VP, CXO | *Security Architecture and Leadership, Cloud Security Engineering* | Cloud Security & IAM, GCP Cloud Security, SIEM |
| **Cloud/DevOps Buyers** | APAC, USA     | Director, VP      | *DevOps & CI/CD*                                                   | Kubernetes, Terraform, IaC, CI/CD              |

***

### **Finding Buyers Using Your Personas**

1. Go to **More Prospects** in the Account detail page.
2. Select **Persona** → Choose your **persona** from the dropdown.
3. Apply additional filters (if needed).
4. Select the profile/s that interest you & click on **Reveal.**
5. Check the **Revealed Tab** to take further action.

<figure><img src="/files/HJ4RKSUp011dpdjdxTbN" alt=""><figcaption></figcaption></figure>

Note, these buyers can be:\
✅ Synced to CRM (HubSpot, Salesforce, etc.)\
✅ Added to Apollo.io / Outreach.io email sequences or Salesloft Cadences.

***

### **Related Guides**

For a deeper understanding of how to discover and engage decision-makers in Reo.Dev, check out these guides:

* **🔗** [Find Buyer Contact](/buyers/find-buyer-contact) Learn how to find buyer contact details using Reo.Dev’s AI-powered recommendations, based on seniority and developer activity within an account.
* 🔗 [How to Find, Segment & Engage Decision-Makers in Reo.Dev’s Buyer Section](/buyers/how-to-find-segment-and-engage-decision-makers-in-reo.devs-buyer-section)&#x20;

A step-by-step guide on leveraging the Buyer Section to identify, segment, and engage high-intent decision-makers efficiently.

***

By combining **Buyer Personas** with these workflows, you can streamline your prospecting process and engage the most relevant stakeholders faster.


# Segments

This section covers everything you need to know about creating and managing Segments in Reo.Dev, including how to apply the right filters, perform key actions, and create impactful segments to identify high-intent opportunities.

### Guides

* [Creating Segments](/segments/creating-segments)
* [Basic & Advance Segments](/segments/basic-and-advanced-segments)
* [Filters 101](/segments/filters-101)
* [Segment Actions](/segments/segment-actions)
* [My Segments](/segments/my-segments)
* [Shared Segments](/segments/shared-segments)
* [Magic Segments](/segments/magic-segments)
* [Configuring Default Segment](https://docs.reo.dev/segments/configuring-default-segment)
* [Favourite Segment](/segments/pinned-segment)
* [Add notes for better collaboration and context](/segments/add-notes-for-better-collaboration-and-context)
* [CSV Exports for Segments](/segments/csv-exports-for-segments)
* [10 Advanced Segments to create to spot high-intent opportunities](/segments/10-advanced-segments-to-create-to-spot-high-intent-opportunities)


# Creating Segments

Segments are customizable cohorts of high-intent accounts/developers/buyers, built using specific filters or attributes. They help you pinpoint where accounts/developers/buyers are in the buying journey, assess intent signals based on developer activity, and take targeted actions. With Segments, you can prioritize outreach and focus on the most promising opportunities, driving better conversion outcomes.

#### **Creating a Segment**

**Step 1:** Click on **Segments** in the left navigation panel&#x20;

<figure><img src="/files/Bnh8Qoced9sovI4qTGcM" alt=""><figcaption></figcaption></figure>

**Step 2:** Click on **Create New**

<figure><img src="/files/YAgx7oeY5QFPuXDUh6jv" alt=""><figcaption></figcaption></figure>

**Step 3:** You can choose to create either a **Basic** or an **Advanced** segment

<figure><img src="/files/u3CMn9LnKQCAhsC6hYCN" alt=""><figcaption></figcaption></figure>

{% hint style="info" %}
**Resource:** Explore our comprehensive [Basic & Advanced Segments Guide](/segments/basic-and-advanced-segments) to understand how to create targeted lists using **simple** or **complex filters**. Learn key differences, best practices, and discover when to leverage **Basic Segments** for quick results or **Advanced Segments** for multi-layered, precise targeting.
{% endhint %}

**Step 4:** Select the type of segment - Accounts, Developers or Buyers and click on Next

<figure><img src="/files/hTgSpIrbIWWm2UXgzKom" alt=""><figcaption></figcaption></figure>

**Step 5:** Name the Segment&#x20;

<figure><img src="/files/8K7NVeq15pSMw7IPxye0" alt=""><figcaption></figcaption></figure>

**Step 6:** Add a Tag Name and Tag Description. Tags in Reo.Dev enable you to quickly filter and prioritize accounts based on the specific criterias as defined in the segment.&#x20;

[Here's the complete guide on using custom tags in Reo.Dev ](https://docs.reo.dev/accounts/customizing-tags)

<figure><img src="/files/taZW1PVqk09Tj9X7Q2Ba" alt=""><figcaption></figcaption></figure>

**Step 7:** Click on **Add filter**

<figure><img src="/files/yDC7SLBubTugOBEFWm4w" alt=""><figcaption></figcaption></figure>

**Step 8:** Choose from a multitude of filters as per your requirement

{% hint style="info" %}
**Resource:** Learn more about the full range of filters you can use in [Filters 101](/segments/filters-101).
{% endhint %}

<figure><img src="/files/eggspk0TFw72FCkN8hZP" alt=""><figcaption></figcaption></figure>

You can apply two main conditional operators to refine your results.

{% hint style="info" %}
**AND:** This operator will allow you to create AND condition between two different attributes. For example, create a segment with two different attributes - Activity type \[Fork] and Revenue \[$0 - $1M] and then select Match All.  This will display all accounts where developers have forked **AND** fall within the specified revenue range.
{% endhint %}

{% hint style="info" %}
**OR**: This operator will allow you to create OR conditions between two different attributes. For example, create a segment with two different attributes - Activity type \[Fork] and Revenue \[$0 - $1M] and then select Match Any.  This will display all accounts where developers have forked **OR** fall within the specified revenue range.
{% endhint %}

<figure><img src="/files/RC7hpELiNYppts2zoWaA" alt=""><figcaption></figcaption></figure>

Once you've added the filters, you can see the number of accounts matching this criteria.&#x20;

<figure><img src="/files/Gi93powupZ3aY2mmQ0fS" alt=""><figcaption></figcaption></figure>

You can also choose to **set this segment as a default segment** by clicking on the 'Set this ad Default Segment' checkbox. This ensures that every time you land on the Accounts, Developers, or Buyers dashboard, you’ll instantly see the accounts/developers/buyers from that default segment.

<figure><img src="/files/qtuyksqj3IGzQhtrTp8d" alt=""><figcaption></figcaption></figure>

**Step 8:** After adding the filters, click on **Save and Exit**

<figure><img src="/files/kdK3apWQQyiEbOOcplLN" alt=""><figcaption></figcaption></figure>

You can view the segment that you created under the **My** **segments** on the Segments page

<figure><img src="/files/SOAXGkNKUjJz6uJ9uhKZ" alt=""><figcaption></figcaption></figure>

Once you’ve created a segment, you can take several actions on it—like enabling alerts, syncing it to your CRM, sharing it with your team, and more.

[Here’s a detailed guide covering all the actions you can take on a segment.](https://docs.reo.dev/segments/segment-actions)


# Basic & Advanced Segments

Understand basic and advanced segments in Reo.Dev

In Reo.Dev, segmentation is a powerful feature that helps you organize and filter accounts or developers based on specific criteria. This capability is pivotal for targeted outreach, precise analytics, and creating personalized engagement strategies. This guide covers the **Basic** and **Advanced Segment** options, highlighting their features, differences, and best practices to help you decide when to use each type.

### Introduction

Segmentation allows you to surface accounts/developers/buyers based on selected criteria, improving your targeting efficiency. Whether you’re defining a list of high-fit accounts or identifying engaged developers, Reo.Dev’s segmentation features provide two main options:

<figure><img src="/files/DV4fB1IyRI9mqNk0VTR5" alt=""><figcaption></figcaption></figure>

* **Basic Segment**: Simple yet effective, suitable for straightforward criteria.
* **Advanced Segment**: Offers granular control with the ability to add complex filter groups.

Understanding the key differences will help you choose the right approach based on your needs.

***

### Basic Segment

The **Basic Segment** is designed for users who need a straightforward way to filter their data without complex criteria. It is ideal to define a segment using a few filters with simple logical operators.

#### Features

* Quick and easy setup.
* Two main operators: **(AND)** and **(OR)**.
* Suitable for standard use cases where all filters apply equally.

#### Operators Explained

1. **(AND)**: This operator combines all the filters, and a record must meet every filter condition to be included in the segment.
   * Example: If you filter for "Activity Count > 2" **AND** "Customer Fit Score = Strong", only records meeting **both** conditions will be included.
2. **Matches Any (OR)**: This operator uses an OR condition, meaning a record only needs to satisfy **one** of the filters to be included.
   * Example: If you filter for "Activity Count > 2" **OR** "Customer Fit Score = Moderate", any record meeting at least **one** of these conditions will be included.

#### Example of a Basic Segment - ICP Accounts in Build & Deploy Stages

In this example, we will create a **Basic Segment** for identifying accounts that are currently in the **Build or Deploy** stages of your Dev Funnel and have a **Strong ICP Fit Score**. This is a great use case for targeting high-fit accounts that are demonstrating advanced product engagement.

<figure><img src="/files/U2wXqi2czqvXsjI5Djhi" alt=""><figcaption></figcaption></figure>

**Segment Setup:**

* **Segment Mode**: Basic
* **Segment Name**: ICP Accounts in Building & Deployed Stages
* **Segment Type**: Accounts
* **Segment Criteria**:
  1. **Dev Funnel**: Includes any **Building** or **Deployed** stages.
  2. **ICP Fit Score**: Includes any accounts classified as **Strong**.

**Operator Used**: **(AND)**

This means both conditions must be met for an account to be included in this segment. The segment will only show accounts that are in the Build or Deploy stages **AND** have a Strong ICP Fit Score.

**Use Case:** This segment is ideal for identifying mature accounts that are progressing through advanced stages of your Dev Funnel. These accounts are more likely to be ready for targeted outreach or commercial discussions.

This simple yet effective example demonstrates how you can use a **Basic Segment** using the **AND** operator to focus on high-priority accounts with strong engagement signals.

{% hint style="info" %}
**Note:** Once you’ve chosen the segment type, the next step is to apply **filters** to refine your results. Learn more about the full range of filters you can use in [Filters 101](/segments/filters-101).
{% endhint %}

***

### Advanced Segment

The **Advanced Segment** offers a more flexible and detailed segmentation process. It allows you to set up multiple filter groups and control the logical operators at each level, making it ideal for more complex scenarios.

#### Features

* Ability to use **Filter Groups** with AND/OR logic.
* Granular control over individual filters and group conditions.
* Suitable for scenarios requiring complex, multi-level filtering.

#### Filter Groups Explained

In Advanced Segments, you can create **filter groups**, which allow you to:

* **Combine different sets of filters** using AND/OR operators at the group level.
* Apply **different logical rules** within the same segment, providing a broader yet targeted list.

#### Example of an Advanced Segment

You want to identify all developers in your high-intent accounts using three distinct criteria:

<figure><img src="/files/vJgWqWpQoSlGrmhVIPix" alt=""><figcaption></figcaption></figure>

1. **Advanced Dev Funnel Filter Group**:
   * Dev Funnel: Building, Deployed
   * ICP Fit Score: Strong, Moderate
   * **Operator used within the Filter Group:**: AND (Matches All)
2. **Code Interaction Filter Group**:
   * CLI Command & Installation Executed
   * Activity Count > 2
   * Activity Date: Last 60 Days
   * ICP Fit Score: Strong, Moderate
   * **Operator used within the Filter Group::** AND (Matches All)
3. **Documentation Review Filter Group**:

   * Docs Review Activity
   * Activity Count > 2
   * Activity Date: Last 60 Days
   * ICP Fit Score: Strong, Moderate
   * **Operator used within the Filter Group:** AND (Matches All)

   **Use Case:** This advanced segment is perfect for casting a wide net to include high-fit developer leads from accounts showing strong intent signals. By combining multiple filter groups with **AND** within each filter group and **OR** across all the filter groups, you can maximize your lead pool while ensuring all included developers meet meaningful engagement thresholds.

This example demonstrates how to use the **Advanced Segment** feature effectively, offering greater flexibility and granular control in identifying high-intent leads tailored to your specific needs.

{% hint style="info" %}
**Note:** Once you’ve chosen the segment type, the next step is to apply **filters** to refine your results. Learn more about the full range of filters you can use in [Filters 101](/segments/filters-101).
{% endhint %}

***

### Comparison: Basic vs. Advanced Segments

| Feature                 | Basic Segment                 | Advanced Segment                    |
| ----------------------- | ----------------------------- | ----------------------------------- |
| **Setup Complexity**    | Simple, quick setup           | Detailed, multi-level configuration |
| **Use Case**            | Standard filtering            | Complex, multi-criteria filtering   |
| **Operators Available** | AND, OR                       | AND, OR at filter and group levels  |
| **Control Level**       | Limited to individual filters | High, includes filter groups        |
| **Best For**            | Quick segmentation needs      | Granular and detailed targeting     |

***

### Best Practices

1. **Use Basic Segments** when:
   * You need quick and simple segmentation.
   * The criteria are straightforward and don’t require complex conditions.
2. **Use Advanced Segments** when:
   * You have multiple sets of conditions that need to be applied.
   * You need precise control over which records to include.
   * You are targeting a diverse group and need to account for various engagement signals.
3. **Start with a Basic Segment**, and if you find that you need more flexibility, consider upgrading to an Advanced Segment.

***

### Conclusion

Understanding the differences between Basic and Advanced Segments is key to effectively using Reo.Dev’s segmentation features. Basic Segments offer simplicity and are great for straightforward use cases. In contrast, Advanced Segments provide the flexibility needed for complex scenarios, allowing for more detailed targeting.

Both options are segment-type agnostic, meaning you can use them for either **Accounts** or **Developers or Developers** based on your specific needs. Use this guide to choose the right approach and optimize your segmentation strategy for better targeting and personalized outreach.

{% hint style="info" %}
**Reminder**: Filters are the backbone of your segments, helping you surface high-fit accounts and engaged developers. Check out [Filters 101](/segments/filters-101) to learn how to filter for precise, actionable insights.
{% endhint %}


# Filters 101

Filters in Reo.Dev are highly effective parameters in narrowing down your search results by allowing you to include or exclude specific data related to accounts, developers, and buyers. With these filters, you can streamline your search for high-intent opportunities, create focused segments, generate prospecting lists, and monitor developer activity. Filters are primarily used to create segments.

This article provides a comprehensive overview of the universe of filters available in Reo.Dev and how and why to use each one.

<figure><img src="/files/sWjeRfmb19PGCuyXuELj" alt=""><figcaption></figcaption></figure>

### **Developer Filters**

| Filter Name              | Description                                                                                       |
| ------------------------ | ------------------------------------------------------------------------------------------------- |
| Designation              | Filter developers based on their seniority - VP, Director, CXO etc                                |
| Developer Tags           | Filter developers based on assigned tag that indicate buyer persona or decision-making authority. |
| Developer Attributes     | Filter developers who are buyers                                                                  |
| Location                 | Find the Region/State/City where the developer is doing the activity from                         |
| Has business email ID    | Filter developers whose business email has been identified by Reo.Dev.                            |
| Has LinkedIn ID          | Filter developers whose LinkedIn ID has been identified and verified by Reo.Dev.                  |
| Job Change Date          | Find developers who switched jobs during the period you specify                                   |
| Activity Score           | Identify developers based on their activity score (High, Medium, Low)                             |
| Activity Score (Numeric) | Find developers whose activity score meets your selected threshold.                               |

### **Account Filters**

| Activity Type            | Description                                                                                                                                                                                                         |
| ------------------------ | ------------------------------------------------------------------------------------------------------------------------------------------------------------------------------------------------------------------- |
| Technology Stack         | Find accounts based on the technologies they use                                                                                                                                                                    |
| Tech Job Postings        | <p>Filter accounts based on job postings data: <br>1. Job Matching Tech: Job postings for your ICP technologies<br>2. Job Title <br>3. Job Posting Date <br>4. Job Seniority<br>5. Job Country <br>6. Job State</p> |
| Technology Functions     | Filter accounts based on their engineering team composition across your preferred tech functions. You can choose from 17 pre-defined tech functions.                                                                |
| Annual Revenue           | Find accounts based on their annual revenue within specified ranges.                                                                                                                                                |
| Location                 | Find accounts based on Region/State/City where the account HQ is located.                                                                                                                                           |
| Employee Range           | Filter accounts based on the number of employees within a specified range.                                                                                                                                          |
| Founded Year             | Find accounts by the year they were established.                                                                                                                                                                    |
| Industry                 | Filter accounts by their industry or sector of operation.                                                                                                                                                           |
| Keywords                 | Find accounts based on the attributes that best define the company's offerings                                                                                                                                      |
| Account Tags             | Filter accounts based on assigned tags that indicate any action you want to take on them.                                                                                                                           |
| ICP Fit Score            | Filter accounts based on a score indicating strong alignment with your Ideal Customer Profile. The score is categorised into Strong, Moderate and Weak.                                                             |
| #Deanonymized Developers | Filter accounts by the number of developers whose identities have been verified by Reo.Dev.                                                                                                                         |
| Dev Funnel               | Filter accounts based on the stage of the developer funnel. Stages include Exploring, Evaluating, Building, Deployment.                                                                                             |
| #Developers              | Find accounts by the number of developers active on your product assets                                                                                                                                             |
| #Monthly Active devs     | Find accounts by the number of developers active on your product assets in a month                                                                                                                                  |
| Activity Score           | Identify accounts based on their developer activity score (High, Medium, Low)                                                                                                                                       |
| Activity Score (Numeric) | Find accounts whose developer activity score meets your selected threshold.                                                                                                                                         |
| Has Activity Surge       | Filter accounts that have shown a recent spike in activity.                                                                                                                                                         |
| Lifecycle Stage          | Filter accounts based on current stage of the account in the pipeline. Stages include: Discovery, In Market, In-Pipeline, Customer.                                                                                 |
| Lists                    | Narrow down accounts based on lists uploaded under My Lists.                                                                                                                                                        |
| Audiences                | Find accounts from the Audience List you created.                                                                                                                                                                   |
| CRM Account Owner        | Find accounts based on their assigned CRM owner.                                                                                                                                                                    |
| CRM Account Stage        | Find accounts based on their stage in your CRM pipeline.                                                                                                                                                            |
| CRM Deal Stage           | Filter accounts by the current deal stage recorded in your CRM.                                                                                                                                                     |

### **Activity Filters**

| Activity                 | Description                                                                                                                                                                              |
| ------------------------ | ---------------------------------------------------------------------------------------------------------------------------------------------------------------------------------------- |
| Code Interaction         | <p>Filter based on code interactions like<br>- CLI Command Executed (i.e execution command copied)<br>- CLI Installation Initiated  (i.e installation command copied) </p>               |
| Product                  | Filter by key actions taken in Product such as Screen Visited, Product Login, and Copied Command                                                                                         |
| GitHub                   | <p>Filter by GitHub actions:</p><ul><li>Fork</li><li>Star</li><li>Pull Request</li><li>Opened Issue</li><li>Watch</li><li>Comment</li></ul>                                              |
| Docs                     | <p>Filter by activies done on your technical docs such as:</p><ul><li>Docs Review</li><li>Copied Content</li></ul>                                                                       |
| Website                  | <p>Filter by actions done on your website:</p><ul><li>Viewed Pages</li><li>Copied Content</li></ul>                                                                                      |
| Local Product            | Use this filter to see all accounts showing localhost activities                                                                                                                         |
| Forms                    | Find accounts, developer, or buyers where   sign-up forms have been submitted                                                                                                            |
| Community                | Filter accounts, developers, or buyers based on where developers are active across LinkedIn and Slack                                                                                    |
| Data API                 | Filter accounts, developers, or buyers based on key product metrics captured via telemetry or Cloud Product                                                                              |
| Data API Meta            | Filter accounts, developers, or buyers based on Meta Parameters associated with a product metric captured via telemetry or Cloud Product                                                 |
| Key Forms                | Show accounts, developer and buyers associated with key form submissions.                                                                                                                |
| GitHub Repository        | <p>Filter accounts, developers and buyers based on:<br></p><ul><li>Repository Type (Owned, Competitor, and Complimentory)</li><li>Repository Owner</li><li>Repository Name<br></li></ul> |
| Key Commands             | Filter accounts, developer or buyers based on developers executing key product commands.                                                                                                 |
| Key Doc Pages            | Filter accounts, developer or buyers based on developers visiting your key documentation pages.                                                                                          |
| Key Product Pages        | Filter accounts, developer or buyers based on developers visiting your key product pages.                                                                                                |
| Key Website Pages        | Filter accounts, developer or buyers based on developers visiting your key website pages.                                                                                                |
| Slack Channels           | Filter accounts, developer or buyers based on where developers are active on specific Slack channels.                                                                                    |
| Activity Count           | Find developers, accounts, or buyers based on the activity count you specify.                                                                                                            |
| #Deanonymized Developers | Filter accounts by the number of active developers whose identities have been verified by Reo.Dev.                                                                                       |
| #Active Developers       | <p>Find accounts by the number of developers active on your product assets\*<br><br>\*includes Github, your website, your competitor's Github, etc.</p>                                  |
| Date of Activity         | Filter results by the date when the activity occurred.                                                                                                                                   |
| First Activity Date      | Filter by date when developer's first activity was recorded by Reo.Dev.                                                                                                                  |
| Last Activity Date       | Filter by date when developer's most recent activity was recorded by Reo.Dev.                                                                                                            |


# Segment Actions

This guide explains how to manage segments once they're created.

Once you've created a Segment in Reo.Dev, you unlock a range of quick actions that allow you to efficiently manage and act on the data.

<figure><img src="/files/7PI7i6NypZFNuPp0uJxN" alt=""><figcaption></figcaption></figure>

**Actions** **Overview**

![](/files/7X7pVyuywl4AEQBggmrp)

* You can **edit a segment** to change the name or adjust filters

<figure><img src="/files/7IAP2Mhwda6uwJlRqcKq" alt=""><figcaption></figcaption></figure>

* You can also **Share the segment** with your team

<figure><img src="/files/BvtUEnMhtUX6j90QbUQu" alt=""><figcaption></figcaption></figure>

* You have the option to delete or clone the segment

<figure><img src="/files/tjxgXRrqZ4OH6WC58IFK" alt=""><figcaption></figcaption></figure>

* Pin the segment for quick access in the Pinned Segments section&#x20;

<figure><img src="/files/ol6BrtV3gq32awEQkLdI" alt=""><figcaption></figcaption></figure>

* Set a default segment - so every time you land on the Accounts, Developers, or Buyers dashboard, you’ll instantly see the accounts/developers/buyers from that default segment.

<figure><img src="/files/DlmOgnnmlWnN4efKMroz" alt=""><figcaption></figcaption></figure>

* Sync segment to CRM - Click on the 'Send to CRM' option to send segments data directly into your CRM.&#x20;

<figure><img src="/files/TURJLwt0W0barUxsHmDc" alt=""><figcaption></figcaption></figure>

* Turn off CRM sync - Click on the 'Turn off CRM' sync to stop sending segment data into your CRM.&#x20;

{% hint style="warning" %}
Note: Turning off CRM sync will stop new data/account from being sent, but segments data/accounts already synced to your CRM will remain as is and won’t be deleted.&#x20;
{% endhint %}

<figure><img src="/files/apAYnOKmtrWt6MwF3QZU" alt=""><figcaption></figcaption></figure>


# My Segments

**My Segments** displays a list of all user-created segments. Each time a new segment is created, it is automatically added to this section for easy access.&#x20;

<figure><img src="/files/xldtztXzwm4WBwae0zfD" alt=""><figcaption></figcaption></figure>


# Shared Segments

## Understanding Shared Segments

Shared Segments provides a list of segments that other team members have shared with you.

This feature helps you stay informed about which accounts your colleagues are working on. Additionally, it allows you to share segments with your team, particularly when assigning accounts based on territory.

{% hint style="info" %}
**Note:** You cannot edit a segment that has been shared with you.
{% endhint %}

#### **Sharing a Segment**

To share the segment with other team members, click on the dotted menu option corresponding to a Segment and then click **Share Segment**.

<figure><img src="/files/GQ9gSknxZjej0bPybLrL" alt=""><figcaption></figcaption></figure>

Next, Select the team members that are added to Reo.Dev to share the segment with.

<figure><img src="/files/qKLdPnOlOAlnBQVFs5Zi" alt=""><figcaption></figcaption></figure>

You can click on the 'Share with Team' option to share the segment with all your team members/ users added to Reo.Dev.&#x20;

<figure><img src="/files/M78S0z6d7sNWnX1XU5aL" alt=""><figcaption></figcaption></figure>

Furthermore, users with 'Admin' Role on Reo.Dev can set default segments for other users or the entire team. This means - if users land on Accounts, Developers, or Buyers dashboard, users will instantly see the accounts/developers/buyers from the default segment.

<figure><img src="/files/npBdF7qeI0Wmew9ESFmG" alt=""><figcaption></figcaption></figure>


# Magic Segments

When you're starting out with Reo.Dev and want to quickly act on the data, Magic Segments on the Segments page are an excellent place to begin.

Magic Segments are pre-built by Reo.Dev to help you easily identify high-intent accounts in no time.

<figure><img src="/files/AdqkTHnLxWVZDXoRDH7C" alt=""><figcaption></figcaption></figure>

There are 5 magic segments:

1. **Accounts with De-anonymized Developers**: This segment displays only those accounts where developer profiles have been de-anonymized.
2. **High Developer Activity**: This segment identifies accounts with developers who are frequently active on product assets. It's worth your sales team's attention to spot potential sales opportunities.
3. **Accounts in Building POC Stage:** Accounts in this stage are experimenting with your features and building proofs of concept. Keep an eye on these accounts as they show high interest in your product.
4. **Accounts in Deployed Stage:** Shows accounts with signals indicating your product is live and in use
5. **Accounts Active on GitHub and Docs**: Accounts in this segment show strong technical engagement across your GitHub Repos and Docs. Activities on cross-functional channels most likely suggests high interest in your product.


# Pinned Segment

Dive into this guide to learn how to pin a segment for quick access. This feature is particularly useful when a segment is of interest or frequently worked upon.

Follow these steps to pin a segment:

**Step 1:** Click on the 3 dotted menu corresponding to the segment of interest. Select **Pin Segment** from the dropdown menu.

<figure><img src="/files/dlDW8nWshcbliE4b0wUb" alt=""><figcaption></figcaption></figure>

This segment will now appear under Pinned Segments for easy access.

<figure><img src="/files/sfpSnyK16dNBncBfmCl2" alt=""><figcaption></figcaption></figure>


# Add notes for better collaboration and context

Notes can be added **when sharing segments**, providing valuable context. They can also be added to **specific accounts or developer profiles** for better collaboration and clarity.

Reo.Dev Notes help users clearly communicate the reasons behind sharing a segment. Without this context, team members may struggle to understand the significance of a shared account or lead.

Similarly, when an account or lead looks promising, the lack of notes can make it difficult to remember why it stood out. Users often have to revisit its activity history to piece together the details, which can be time-consuming. Notes solve this issue by providing clear, shareable context, streamlining collaboration and decision-making.

***

### **Adding Notes while sharing segment**

**Step 1:** Click on Share Segment from the 3 dotted menu&#x20;

<figure><img src="/files/TUEFszZCiP1sTbTcxhb1" alt=""><figcaption></figcaption></figure>

**Step 2:** Select the user you want the share the Segment with and add the relevant context behind sharing the Segment in the Notes sections.

<figure><img src="/files/AgXu0hZ0YKnUSRRRgRYx" alt=""><figcaption></figcaption></figure>

Users will receive an email notification informing them that a segment has been shared with them, along with the accompanying notes.

In the **"Shared with Me"** section, they can see the shared segment, who shared it, and any notes added for context.

<figure><img src="/files/DlZuZ59EcjwBrtWde7hn" alt=""><figcaption></figcaption></figure>

***

### **Adding notes to interesting accounts**

Click on any account from the accounts dashboard. Then, Click on **Notes.**&#x20;

<figure><img src="/files/OE7AmWFudRTl4WOOBxfL" alt=""><figcaption></figcaption></figure>

Add your notes. You can view all historical notes along with the details of who added them and when. You can also update the account status directly from here.&#x20;

<figure><img src="/files/1J3KikRjaL5RoMDSlrM2" alt=""><figcaption></figcaption></figure>

You can even edit and delete the notes that you have added.

<figure><img src="/files/hW2VuTCvu2vNHhlfFtMZ" alt=""><figcaption></figcaption></figure>

***

#### **Adding notes to a developer/buyer profile**

Navigate to the developer/buyers section and follow the same process as described in the above steps to add notes.

![](https://usercontent.us.prod.clueso.io/d06f019c-da0b-4d5b-9fdd-9630e7fd5d0f/4652342f-7ca1-42e1-90c8-4507b905b502/687ff80e-267d-4182-b32d-4e45423b115d/images/10776cba-6dcc-4002-b185-a808f5601af2.png)


# CSV Exports for Segments

Reo.Dev allows you to export data in CSV format for **Account/Developer/Buyer segments**, making it easier to integrate with your workflows and tools. This feature works seamlessly within Reo.Dev’s segmentation capabilities. Here’s a comprehensive guide to CSV exports in Reo.Dev.

**Step 1:** Click the download icon for the segment you want to download

<figure><img src="/files/jwlC1hxNW1s3ixSNl6FC" alt=""><figcaption></figcaption></figure>

**Step 2:** Select the objects and the fields you would like to export.&#x20;

**Objects include:**&#x20;

* Accounts
* Developers
* Buyers
* All (Exports 3 separate CSV files: for Accounts, for Developers, for Buyers)

**Fields include:**&#x20;

* Fields for LinkedIn Campaign Manager
* Fields for HubSpot
* Fields for Salesforce
* All available fields

<figure><img src="/files/Br9luQVEk0M4A7m7EYs3" alt=""><figcaption></figcaption></figure>

#### **Sample CSV Columns for Exported Data**

#### Accounts CSV Structure

| Column Name                  | Example Record                                      |
| ---------------------------- | --------------------------------------------------- |
| Company Name                 | Growth Partner                                      |
| Company domain name          | Yourtarget.com.pl                                   |
| Reo Segment Name             | Account in Deployed stage                           |
| Reo Developer Activity Score | LOW                                                 |
| Reo Customer Fit Score       | WEAK                                                |
| LinkedIn Company Page        | NaN                                                 |
| Company Location             | India                                               |
| Annual Revenue               | NaN                                                 |
| Industry                     | Professional Services                               |
| Founded In                   | NaN                                                 |
| Reo Count of Developers      | 1                                                   |
| Reo Account Link             | <https://web.reo.dev/dashboard/accounts?orgId=0>... |
| First Activity Date          | 07-Jan-2024                                         |
| Last Activity Date           | 07-Jan-2024                                         |
| Stage                        | In Pipeline                                         |
| Employee Count Range         | 251-1K                                              |
| Tags                         | forked, dev,Owned GitHub,Hot accounts               |

***

#### Developers CSV Structure

| Column Name          | Example Record                                         |
| -------------------- | ------------------------------------------------------ |
| First Name           | Manikantan                                             |
| Last Name            | Ramachandran                                           |
| Email Address        | <manikantan.ramachandran@oracle.com>                   |
| Company Domain       | [oracle.com](https://docs.reo.dev/segments/oracle.com) |
| Reo Segment Name     | Account in Deployed stage                              |
| Designation          | Senior Software Engineer DevOps                        |
| Country              | India                                                  |
| LinkedIn ID          | <https://www.linkedin.com/in/manikantanr>              |
| Github ID            | <https://github.com/manikantanr>                       |
| First Activity Date  | 19-Jan-2024                                            |
| Last Activity Date   | 19-Jan-2024                                            |
| Reo Account Link     | <https://web.reo.dev/dashboard/accounts?orgId=b>...    |
| Stage                | In Pipeline                                            |
| Employee Count Range | 100K+                                                  |
| Tags                 | viewed pricing, buyer involved                         |

***

### Customizing CSV Exports by Platform

For platforms like **HubSpot**, **Salesforce**, and **LinkedIn Campaign Manager**, the exported CSV files are optimized for the respective platform by modifying columns and data structure to ensure relevancy and ideal compatibility.

For more details on CRM syncing within our product, check out the following guides:

* [HubSpot Integration Guide](broken://pages/qIlng8yz565Wfi80f2uC)
* [Salesforce Integration Guide](/integrations/output-integrations/crm/salesforce)

***

### Tags in CSV Exports

#### **New Feature: Export Tags in CSV**

You can now export **Account Tags** and **Developer Tags** as part of your CSV files. These tags are:

* Fully customizable
* Provide quick context and insights on enriched data

**Why it matters:**

* Tags help identify key account traits or developer activities at a glance.
* Allow better segmentation and prioritization of accounts and developers.
* Enable your sales and marketing teams to make more informed decisions.

Want to learn more? Check out our [Tags Handbook](https://www.reo.dev/tags-handbook), featuring **15+ use case examples** for tagging and segmenting developers to prospect smarter, increase pipeline, and close deals faster.

***

### Technical Notes

* If you select the **"Both"** option while exporting objects, **two separate CSV files** will be downloaded: one for Accounts and one for Developers.
* The **Download CSV** button is hidden for two default segments: **All Accounts** in the Accounts panel and **All Developers** in the Developers panel.
* For all other custom or default segments, the **Download CSV** option is available at the top right corner.
* CSV exports are structured to ensure compatibility and usability across various platforms and tools.

***

Let us know if you have any questions or need help getting started with CSV exports in Reo.Dev!

If you need assistance with the implementation, contact your **Customer Success Manager** via the Slack channel or email us at [**support@reo.dev**](mailto:support@reo.dev)


# 10 Advanced Segments to create to spot high-intent opportunities

There are certain Developer activities that deserve to be looked at with urgency.

1. Recent Forks
2. Multiple Stars, Watches
3. Issues and Comments
4. Engaging with Multiple Products in the Same Category
5. Recent Engagement with a competitor
6. CLI installs and Regular Docs visits
7. Engaging with High Intent Pages and Multiple Developers involved
8. Engaging on multiple platforms\
   Product Signup and Activity on Github or Docs
9. Target Account with Recent Activity

### **1. Recent Forks**

> [**Why this is relevant?**](#user-content-fn-1)[^1]
>
> Shows strong interest in the OSS project. Developer might be tinkering around or there might be an enterprise use case.
>
> **Interesting if:**
>
> * Developer works at an ICP Account
> * Your product is more relevant for an enterprise than for an individual developer
> * Compounded by one or more signals: Deal conversation going on, Regular visits to the Docs, Sign up, Pricing page visit, etc.
>
> **How to Identify Such Accounts:**
>
> Create a Segment with these filters:
>
> 1. Activity Type ‘Includes Any’ Fork
>    1. Data Range = In the last 2 weeks
> 2. Filter for ICP Accounts.
>    1. Option 1: ICP Fit Score = Strong/Moderate
>    2. Option 2: Add Filters for Location, Employee Range, Industry, etc.
>
> **Action**
>
> * Reach out immediately and catch this Account early, they haven’t had a chance to actually deploy the open source project. You may be able to catch them\
>   at an early buy-vs-build decision

### **2. Multiple Stars, Watches**

> **Why this is relevant?**
>
> If more than one developer from the same company is engaging with a project, it is highly likely that a team evaluation is going on
>
> **Interesting if:**
>
> * Activity is from an Account that matches your ICP
> * Recent Actions are usually more interesting
> * There is triangulation with other signals like other activities like visiting docs, checking out your website, developers with the right designations.
>
> **How to Identify Such Accounts:**
>
> Create a Segment with these filters:
>
> 1. Activity Type ‘Includes Any’ Stars, Watch
> 2. \# Deanonymised Devs > 1
> 3. Filter for ICP Accounts.
>    1. Option 1: ICP Fit Score = Strong/Moderate
>    2. Option 2: Add Filters for Location, Employee Range, Industry, etc.
>
> **Action**
>
> * Reach out to the evaluating developers with content that showcases the strengths of your product and builds awareness.
> * Also reach out to the Buyer persona from the same\
>   geography with a targeted sales email.

### 3. Issues and Comments

> **Why this is relevant?**
>
> Developers create Issues and Comments when they are reporting a Bug or Requesting a feature.
>
> Two scenarios here:
>
> 1. If the issues and comments are on your repository: The bug or the feature request can be a good conversation starter
> 2. If the issues and comments are on a competitor repo: Maybe your product solves that particular pain point or has the feature being requested. Again this can be a great opportunity
>
> **Things to watch out for:**
>
> 1. Too many issues on a Competitor repo: They are already using the competitor product actively. Need a rip and replace approach. Or just start building a relationship for future opportunities
> 2. Multiple issues or comments on our own repo: They might be using the OSS in production. Need a strong reason to move from OSS to Enterprise
>
> **How to Identify Such Accounts:**
>
> Create a Segment with these filters:
>
> 1. Activity Type ‘Includes Any’ Issues, Comments
> 2. Filter for ICP Accounts.
>    1. Option 1: ICP Fit Score = Strong/Moderate
>    2. Option 2: Add Filters for Location, Employee Range, Industry, etc.
>
> **Action**
>
> * Write a personalised email to the developer based on their specific issue or comment. Offer to bring a technical person onto a call to help solve their issue, or talk about their feature request.

### **4. Engaging with Multiple Products in the Same Category**

> **Why this is relevant?**
>
> If an Account is active on your own Github, Docs, or Package Managers, as well as active on a competitor, or they have activities on multiple Competitors, then they are "In Market" for a product like yours.
>
> This is a strong sign of intent, and in most cases, you need to act quickly here.
>
> **Important If:**
>
> 1. Activity is from an Account that matches your ICP
> 2. Recency will play a role - you want to catch accounts before they get entrenched in your competitors
>
> **How to Identify Such Accounts:**
>
> Create a Segment with these filters:
>
> 1. Repository Type ‘Includes All’ Owner, Competitor
> 2. Filter for ICP Accounts.
>    1. Option 1: ICP Fit Score = Strong/Moderate
>    2. Option 2: Add Filters for Location, Employee Range, Industry, etc.
>
> **Action**
>
> * Reach out to the evaluating developers with messaging around the problem they face, what factors to consider while looking for a solution in this space, and how your product shines vs other offerings.
> * Offer them some exclusive content/product freebies to help tip the scales in your favour.
> * Reach out to the Buyer persona from the same geography with a targeted sales email.

### **5. Accounts that just became active on a Competitor Repo**

> **Why this is relevant?**
>
> Activity on a Competitor repo, especially recent activity can be a sign that an Account is “In Market”. They are checking out a competitor and hence the window to act is limited. Before the Developer adopts or starts building on the Competitor product it would be important to get in front of them and introduce our solution.
>
> This is particularly important if that Account is an ICP account, or even slightly relevant.
>
> **How to Identify Such Accounts:**
>
> Create a Segment with these filters:
>
> 1. Repository Type = Competition
> 2. Filter for ICP Accounts.
>    1. Option 1: ICP Fit Score = Strong/Moderate
>    2. Option 2: Add Filters for Location, Employee Range, Industry, etc.
>
> **Action**
>
> * Reach out immediately and catch the developers early, they haven’t had a chance to actually deploy the open source project.messaging around what factors to consider while looking for a solution in this space, and how your product shines vs other
> * Enroll the developers in an awareness campaign

### **6. Installations Initiated, Commands Executed + Regular docs visits**

> **Why this is relevant?**
>
> Activity on Docs is a strong sign of intent, as it shows a deeper desire to learn about your product compared to mere website visits.
>
> If someone is trying to run installations and executing commands from your docs, then there is a high likelihood that they have a use case.
>
> They are either trying out your product to see how it works, or are now actively trying to build something.
>
> **More interesting if:**
>
> * There is high degree of activity.
> * Activity is sustained over a period of days or weeks
> * ICP Qualified Account, Deal conversation going on
>
> **Things to watch out for:**
>
> 1. In most cases, the identity of the developer is not known.
> 2. You can use Apollo or Sales Navigator to find people with the right personas in the location where the activity took place and reach out to them.
>
> **How to Identify Such Accounts:**
>
> Create a Segment with these filters:
>
> 1. Activity Type ‘Includes Any’ Installations Inititiated, Commands Executed
> 2. Activity Type ‘Includes Any’ Docs Review AND Activity Count > 10
> 3. Filter for ICP Accounts.
>    1. Option 1: ICP Fit Score = Strong/Moderate
>    2. Option 2: Add Filters for Location, Employee Range, Industry, etc.
>
> **Action**
>
> * If these developers are executing commands, they already know of your product.
> * If there are only a small number of commands, there could be a short window of opportunity to push them towards a build-vs-buy decision (in case your product has a managed offering)
> * If there are a large number of commands, then it is most likely that the open source product has been Deployed. Reach out with messaging that highlights the advantages of your paid product vs the open source version

### **7. Engagement on High Intent Pages + Multiple Devs involved**

> **Why this is relevant?**
>
> High intent pages are pages with premium features, pricing, support etc.
>
> If multiple devs from an accounts are checking out these pages then a silent evaluation might be going on.
>
> **More interesting if:**
>
> * There is high degree of activity.
> * Activity is sustained over a period of days or weeks
> * ICP Qualified Account
>
> **Things to watch out for:**
>
> 1. In most cases, the identity of the developer is not known.
> 2. You can use Apollo or Sales Navigator to find people with the right personas in the location where the activity took place and reach out to them.
>
> **How to Identify Such Accounts:**
>
> Create a Segment with these filters:
>
> 1. Tracking Source ‘Includes Any’ Tag of Relevant pages (You can tag the high intent pages in Integrations >> Website, Add Webpage URL)
> 2. Developers > 1
> 3. Filter for ICP Accounts.
>    1. Option 1: ICP = Strong/Moderate
>    2. Option 2: Add Filters for Location, Employee Range, Industry, etc.
>
> **Action**
>
> * Based on the pages the developers are visiting, we can ascertain the specific usecase that they are looking to solve.
> * Send the developers info on the use cases that can be solved with these features or the benefits of using these premium features.
> * Also send similar messaging to senior people on the same team.

### **8. Engagement on Github and Docs**

> **Why this is relevant?**
>
> Checking out different platforms shows stronger intent to actually build something using your open source product.
>
> **More Interesting if:**
>
> * If there are multiple developers from the same company active on your docs. This implies that it has moved beyond an exploratory experiment to a deeper evaluation
> * ICP qualified account, Right Persona
>
> **How to Identify Such Accounts:**
>
> Create a Segment with these filters:
>
> 1. Activity Type ‘Includes Any’ Github (all)
> 2. Activity Type ‘Includes Any’ Docs (all)
> 3. Filter for ICP Accounts.
>    1. Option 1: ICP Fit Score = Strong/Moderate
>    2. Option 2: Add Filters for Location, Employee Range, Industry, etc.
>
> **Action**
>
> * The main goal here should be to nurture these developers, and help them with their usecase, as well as make them aware of the benefits of your product.
> * Invite these devs to a webinar, send them some exclusive content

### 9. Product Signups & Activity on Github or Docs

> **Why this is relevant?**
>
> If someone is signing in to your product, it’s usually a very high intent action and merits tracking. We check for some other activity to eliminate stray sign ups.
>
> **More Interesting if:**
>
> * If there are multiple developers from the same company active on your tracked assets - this helps differentiate personal interest from a business use case.
> * ICP qualified account, Right Persona
>
> **How to Identify Such Accounts:**
>
> Create a Segment with these filters:
>
> 1. Activity Type ‘Includes Any’ Product Login
> 2. Activity Type ‘Includes Any’ Github (all), Docs (all)
> 3. Filter for ICP Accounts.
>    1. Option 1: ICP Fit Score = Strong/Moderate
>    2. Option 2: Add Filters for Location, Employee Range, Industry, etc.
>
> **Action**
>
> * Once someone signs up on your product, you can try to reverse engineer what causes someone to sign up, and what kind of actions they take post sign up.
> * They already know of your product. Nurture these leads and send them content on interesting use cases, invite them to a webinar.

### **10. Accounts that are part of My Target List of Accounts**

> **Why this is relevant?**
>
> If you are Targeting a set list of Accounts \[typically relevant for SDRs and AEs] then you want to be top of every movement in those accounts
>
> Also, it can help to monitor whether the sales interventions are leading to an evaluation or increased developer activity in those accounts
>
> **How to Identify Such Accounts:**
>
> First upload your target list of Accounts from the Lists Section under Tools. Let say this list is called “John's Target Accounts - Feb '26”.

> Next, create a Segment with these filters:
>
> 1. Source >> Lists >> “John Doe’s target list”
>
> <img src="/files/xWcP1tXsQ46J5fEqv3Cd" alt="" data-size="original">
>
> **Actions**
>
> * Everyday when you login into Reo.Dev, check out this segment. Newly added Accounts will be tagged with a “New” sticker
> * Any activity on these accounts deserve attention
> * SDRs and AEs should be running interventions to get these accounts to become more active.
> * They can judge the efficacy of their interventions by monitoring the Activity Timeline of these target accounts

[^1]:


# Configuring Default Segment

This guide gives you a step-by-step breakdown of how you can set a default segment so every time you land on the **Accounts, Developers**, or **Buyers** dashboard, you’ll instantly see the accounts/developers/buyers from that default segment.

### User Permissions

* **‘User’ Role** → Can set a default segment for themselves
* **‘Admin’ Role** → Can set a default segment for themselves and also other users.

### Setting your default segment

Users and Admins on [Reo.De](http://Reo.De)v can set default segments for themselves. And there are 2 ways to do this:

**Option 1: While creating a segment:** Here you can choose the ‘Set as default’ option to make this segment your default segment.

<figure><img src="/files/pyddsy8w5ERPRuxIhKk7" alt=""><figcaption></figcaption></figure>

**Option 2: From the segments dashboard:**

1. Click on the 3-dotted menu
2. Choose the ‘set default’ option to mark this particular segment as your default segment.

<figure><img src="/files/UKRNcNuu8VTGMvRcSPjh" alt=""><figcaption></figcaption></figure>

Default segments display a **'Default tag'** for easy identification.

<figure><img src="/files/fg28g0X2CPsdNbdwCNpS" alt=""><figcaption></figcaption></figure>

### Setting a default segment for others

Only users with ‘Admin’ role can configure default segments for other users. Here’s how:

1. **Create or select the segment** you want to set as default
2. Click on the 3-dotted menu and select **‘share’** segment

<figure><img src="/files/wi78fg62fSekJxxYcIrL" alt=""><figcaption></figcaption></figure>

3. Next, choose the users you want to share the segment with.

{% hint style="info" %}
Note: You can only set a default segment for other users you’ve shared the segment with. You can also set a segment as the default segment for your entire team. To do this - Click on the **share with team** option and turn the set as default toggle on.
{% endhint %}

<figure><img src="/files/5Tco47JFqtgV8hnSSMg4" alt=""><figcaption></figcaption></figure>

4. Turn on the ‘Set as Default’ toggle on for the selected users.

{% hint style="info" %}
Note: It may take upto 45-60 mins for the default segment to reflect on the users dashboard. Users are notified via email when a default segment has been set for them.
{% endhint %}

<figure><img src="/files/0setvA4QJJrF9do5F6wO" alt=""><figcaption></figcaption></figure>

{% hint style="success" %}
Few things to note:

* If a default segment is deleted, users will return to the system default.
* You can have only one default segment for each account, developer and buyer segment.
* If a user sets a default segment and an admin also sets another default segment for that user - the default segment set by the admin overrides the default set by the user.
  {% endhint %}


# Agents

Reo Agents help you find and monitor accounts and developers based on GTM signals that matter to you - so you always know **who to prioritize and when to act. You can use Reo Agents to discover new accounts and even enrich exsiting accounts with key signals that matter to you.**

Here’s a complete guide on how to create, deploy and manage Reo agents.

### Types of Agents in Reo

There are two types of Agents in Reo:

**1. Chat Agents**

Chat Agents let you build custom agents using natural language prompts. You can use them to discover new accounts or enrich existing account segments/lists based on specific GTM signals.

For example:

> Find companies scaling their DevOps function
>
> Find companies switching from SIEM to CrowdStrike
>
> Find companies hiring AI infrastructure leaders

**2. Pre-built Agents**

Pre-built Agents are ready-to-use agents created by Reo. You can use them to monitor your accounts, developers for specific signals without building an agent from scratch.

#### **Chat Agents**

**Step 1:** Head to the Agents Section from the left navigation panel

<figure><img src="/files/SnAt8jxDd1sispa6wEy3" alt=""><figcaption></figcaption></figure>

**Step 2:** Build your custom agent to:

* **Discover New accounts**: Use this when you want to **build a new account list** based on a specific GTM signal. This includes companies that match your criteria, even if they are not already being tracked in Reo.
* **Enrich existing accounts:** This helps you identify which accounts from an existing segment or list match a specific GTM signal. For example, you can build and run an agent on your target account list to find which companies are hiring DevOps leaders, expanding their AI/ML team, or showing signs of competitor migration.

<figure><img src="/files/4YTMqI40jshsYJj8v4G3" alt=""><figcaption></figcaption></figure>

**Step 3:** There are 2 ways you can build a custom agent via chat:

a. In the chat window, choose ‘Discover new accounts’ or ‘Enrich existing accounts’. **Type a prompt** in the chatbox. Example - “Find companies scaling their DevOps function”. Then, click on Let’s Go.

<figure><img src="/files/qca28dwC28WBgGRQnqCC" alt=""><figcaption></figcaption></figure>

{% hint style="info" %}
In the top right, toggle to the data source you want the agent to run on: Reo data and Public data. Reo data which is selected by default, draws on Reo's proprietary account signals. Public data searches news, filings, and blogs, so it's the better choice for signals like SOC 2 certifications or funding announcements.
{% endhint %}

b. You can **choose one of the listed signals:**

* Select a signal and click on ‘Chat and Build’

<figure><img src="/files/kj7hzKXs7jsJ8M2nvxsg" alt=""><figcaption></figcaption></figure>

* Choose ‘Discover New Accounts’ or ‘Enrich Existing Accounts’
* Choose an existing prompt or type a custom prompt

<figure><img src="/files/02pMDdZi7ktyW8uuZno8" alt=""><figcaption></figcaption></figure>

Here’s a complete overview of the different signals you can use to build and and enrich account lists:

<table><thead><tr><th width="137.921875">Category</th><th width="149.63671875">Agent Name</th><th width="244.2734375">What it tracks</th><th>Example</th></tr></thead><tbody><tr><td>Technology Investments</td><td>Tech Maturity</td><td>Find companies deeply using/invested in a specific tech stack</td><td>Find me companies using kubernetes at scale</td></tr><tr><td>Technology Investments</td><td>Tech Migrations</td><td>Find companies that are switching tools - signalling budget and buying intent</td><td>Who is migrating from AWS to GCP?</td></tr><tr><td>Technology Investments</td><td>Tech Adoption</td><td>Find companies scaling use/investing heavily in a specific technology</td><td>Companies scaling their AI/ML Infra today.</td></tr><tr><td>Technology Investments</td><td>Tech Role Hiring</td><td>Find companies hiring for roles that require expertise in specific technologies</td><td>Companies hiring platform engineers skilled in K8</td></tr><tr><td>Engineering Team Investments</td><td>Tech Team Expansion</td><td>Find companies scaling a specific tech function that signals budget expansions</td><td>Companies aggressively scaling their DevOps team</td></tr><tr><td>Engineering Team Investments</td><td>Engineering Org Mix and Size</td><td>Find companies with a specific engineering team size &#x26; mix</td><td>Companies having 10+ platform engineers among 100-200 engineers.</td></tr><tr><td>Public Data</td><td>Open Signal </td><td>Track news, filings, blogs to find companies that might have a need for your tool now.</td><td>SOC 2 Type II certified companies</td></tr></tbody></table>

Here's a quick walkthrough video on how you can leverage our Open Signal Agent:\ <br>

{% embed url="<https://reo-dev.portal.trainn.co/share/nfkTxA3tm6MO6LSCunJWIg>" %}

**Step 3:**

a. Discover New Accounts:

1. Click on **Discover New Accounts**
2. Enter your prompt and Reo will generate a list of all accounts matching the signal described

   Example: Companies switching from SIEM to CrowdStrike

<figure><img src="/files/VuoHhOxHl1psnfO3juU9" alt=""><figcaption></figcaption></figure>

3. Click on **Save as a List** to create a new list of these accounts.

<figure><img src="/files/hu82fe1OmLupxi7shb9Y" alt=""><figcaption></figcaption></figure>

4. Reo auto-generates the list name, description, agent name and tag. You can edit these if needed.

**Note: Agent tags can be used to filter these accounts/developers and create segments later.**

<figure><img src="/files/rsuZ0SaASOIq9ARIVkGK" alt=""><figcaption></figcaption></figure>

5. Choose how you want companies to be added to the list.

When saving a new list, you can choose how Reo should add companies found by the agent.

**a. Recommended: Add all companies, always:** This option adds all companies found by the agent. The agent will automatically re-run every week and continue adding matching companies to the list. It also updates the reason for matching accounts.

<figure><img src="/files/2SAOkZLMRt3jXb0vmYZQ" alt=""><figcaption></figcaption></figure>

{% hint style="success" %}
Credits charged: 3 credits for every new company that does not already exist in Reo. 1 credit for every company already found in Reo. \
\
In case of an agent rerun, 1 credit is charged for every company already found in Reo.
{% endhint %}

b. **Set your own limits:** Use this option if you want more control over how many companies are added and how often the agent runs. You can configure the Number of companies to add.

<figure><img src="/files/8V2N2fZazx4uIycPyblN" alt=""><figcaption></figcaption></figure>

Once done, click on **Save as List.**

**b.** **Enrich Existing Accounts:**

**How to enrich existing accounts**

1. Click on Enrich existing accounts.
2. Choose the segment/list you want to run this agent on

<figure><img src="/files/ajUUNlZDASqV0z8poePU" alt=""><figcaption></figcaption></figure>

3. Type your prompt or choose one of the suggested prompts. Reo will pull all the accounts from the selected segment that match your signal criteria
4. Click on **Enrich Now** - This automatically deploys this agent on the selected segment and tags all accounts matching the agent criteria.

<figure><img src="/files/FLjFDQFxt76JbdPUwDIU" alt=""><figcaption></figcaption></figure>

{% hint style="success" %}
Credits charged: 1 credit for every account matching the signal criteria is charged.
{% endhint %}

5. Reo auto-generates the agent name and tag. You can edit these if needed. Next, add **agent name and tag**

<figure><img src="/files/CIjjuTetz9WpTeMLgVak" alt=""><figcaption></figcaption></figure>

6. **Specify re-run settings**: You can choose how frequently you want agents to run on the selected segment/list to surface newly matched accounts and refresh the reason for existing accounts.

<figure><img src="/files/FkT5b0UKpxFqOzrH4li0" alt=""><figcaption></figcaption></figure>

7. Click on **Deploy Agent and Enrich**

Once deployed, Reo will tag all matching accounts with the above Agent Tag.

{% hint style="info" %}
Enrich Agents can also be used to redeploy on another segment/list from the Deploy Agent dropdown.
{% endhint %}

**Set up alerts for new Agent findings**

**Use this when:** You want to stay updated whenever an Agent finds a new matching account or developer.

You can set up automations to receive Slack or email alerts whenever there are new Agent findings.

To set this up:

1. Go to **Automations**
2. Choose the segment or list you want to monitor
3. Select the trigger: **New Finds by Agents**
4. Choose the relevant Agent tag

![](/files/2k68pp27BeJcJJpRCfU4)

5. Set up the alert channel — Slack or email

You can use these alerts to notify the right sales rep, route accounts to the right owner, or take immediate action based on the signal.

#### **Pre-built agents**

**Step 1:** Head to the Agents Section from the left navigation panel > Navigate to the Pre-built agents section under Reo agent library.&#x20;

<figure><img src="/files/AU2u6p5lpx0OKKMbrlDQ" alt=""><figcaption></figcaption></figure>

**Step 2:**

* Click on ‘Configure’ on the agent you want to use

<figure><img src="/files/ZVRVTvYHrJoslL8j5q3b" alt=""><figcaption></figcaption></figure>

* Fill in the required fields:
  * **Agent Name** (mandatory): Add an agent name
  * **Agent Tag** (mandatory): Add an agent tag which you can use to filter accounts/developers/buyers and create segments.

Next, provide additional inputs depending on the agent type.

<figure><img src="/files/XWFxayEFtWKCgqIf1hGq" alt=""><figcaption></figcaption></figure>

Here’s a complete overview of all agents and the specific inputs you might need to provide based on what the agent tracks.

<table><thead><tr><th width="110.2890625">Category</th><th>Agent Name</th><th width="132.796875">What it tracks</th><th width="111.8046875">Target</th><th>Additional Inputs Required</th><th>Credits Consumed</th></tr></thead><tbody><tr><td>Job Changes</td><td>Champion Job Switch</td><td>Helps you identify people who’ve recently changed jobs.</td><td>Developers/ Accounts</td><td>Recency of Job Change - Find job changes for a specific time period</td><td>2 credits per find. 1 credit for per run with no results.</td></tr><tr><td>Job Changes</td><td>New Key Hire</td><td>Find accounts who’ve hired new folks matching your target persona</td><td>Accounts</td><td>• User persona - Select the specific target persona for which the account is hiring<br><br>• Job post recency - Find accounts based on job posting date</td><td>2 credits per find</td></tr><tr><td>Hiring Intent</td><td>Hiring for specific roles</td><td>Find accounts hiring for your target technical roles</td><td>Accounts</td><td>• User persona - Select the specific target persona for which the account is hiring<br><br>• Job post recency - Find accounts based on job posting date</td><td>2 credits per find</td></tr><tr><td>Hiring Intent</td><td>Tech Stack Fit</td><td>Find accounts with job postings mentioning a specific tech stack</td><td>Accounts</td><td>• Tech Stack - Specify the tech stack for which you want to track job postings<br><br>• Job post recency - Find accounts based on job posting date<br></td><td>None</td></tr><tr><td>Account Research</td><td>Reo Copilot</td><td>Apply a Copilot prompt to each account in a segment or list</td><td>Accounts + Developers</td><td><strong>Prompt</strong> - Enter the specific prompt you want Copilot to run. <br><br></td><td>5 credits per find</td></tr><tr><td>Developer Activity </td><td>High-intent Accounts</td><td>Find accounts ready for sales outreach.</td><td>Accounts</td><td>None</td><td>None</td></tr><tr><td>Developer Activity </td><td>Active Buyers</td><td>Find buyers who match a specific target persona/buyer persona</td><td>Developers/Buyers</td><td>User persona - Find buyers matching specific target persona’s</td><td>None</td></tr><tr><td>Developer Activity</td><td>Account Pulse</td><td>Track accounts showing increasing, declining or surge in activity</td><td>Accounts</td><td>• Heating - Accounts with activity trends moving upwards<br><br>• Cooling - Accounts with activity trends declining<br><br>• Activity Score - Activity score has been at it’s highest since 2 weeks</td><td>None</td></tr></tbody></table>

**Step 3:** Click on ‘Create Agent’

<figure><img src="/files/CqpZGyCa8Bk00ahafZ8z" alt=""><figcaption></figcaption></figure>

You’ll see a success message with an option to Deploy Agent directly in the accounts/developers/buyers section based on the type of agent it is.

Follow the below steps to deploy pre-built agents.

#### **Deploying Pre-built Agents**

**Deploy on Segment/List**

Once you’ve created an agent, you can deploy it from the accounts/developers/buyers dashboard for a particular segment/list.

1. Go to **Accounts** or **Developers or Buyers section** and select the particular segment/list

<figure><img src="/files/9RgumeQXtBJ6AmBJkhhs" alt=""><figcaption></figcaption></figure>

2. Click on Deploy Agent and choose the agent you want to deploy. You can select your own agents or select ones created by other team members.

<figure><img src="/files/kkFeB3piRGFMbfKjpHA9" alt=""><figcaption></figcaption></figure>

3. Set up re-run frequency - Choose how often to run this agent (every 3 weeks, etc.) Select the ‘do not re-run’ option for one-time deployment.

<figure><img src="/files/jmZNvg8czkbxBRQXnXJ5" alt=""><figcaption></figcaption></figure>

{% hint style="info" %}
Note: You can also choose to auto-deploy this agent for any new account/developer/buyer that gets added to the segment/list.
{% endhint %}

<figure><img src="/files/2tR6qfBIEaaXLMxucsYh" alt=""><figcaption></figcaption></figure>

4. Click on deploy agent

{% hint style="success" %}
Note: Agent Results might take upto 24 hours to show. You'll receive an email notification when the agent run completes.
{% endhint %}

Follow the same steps to deploy an agent to a developer and buyer segment/list.

**Deploy on Individual Accounts/Developers/Buyers**

1. Open a specific **account, developer or buyer** you want to deploy the agent for
2. Click on **Deploy Agent**
3. Select the agent and follow the same steps as above to configure frequency and auto-run settings

<figure><img src="/files/h2e7y6C5bXWe3auLS7qr" alt=""><figcaption></figcaption></figure>

#### **View Pre-built Agent Results**

Once you’ve deployed the agent - you can view the results in multiple ways:

1. **Within the accounts/developers/buyers dashboard:** Check the Agent Tags column where all records matching the agents criteria has the agent tag.

You can further click on any agent tag to view detailed results.

<figure><img src="/files/bW3wIwz1ZZAo6FbuZ7tK" alt=""><figcaption></figcaption></figure>

2. **Agent Tags Filter:** Use the agent tag filter to find accounts that have specific agent tags. Note: All Agent tags are visible to all users.

<figure><img src="/files/DKuuANDu1CmfgSqtg0VO" alt=""><figcaption></figcaption></figure>

3. **For an individual account/developer/buyer:** Open any account/developer/buyer. Under the Reo Agents section in the Overview tab, see all agents deployed to this record that it qualified for.

<figure><img src="/files/Mb7rQNsjHjSZQEbUX43t" alt=""><figcaption></figcaption></figure>

#### Actioning on Pre-built Agents:

* You can filter account/developer view based on agent tags
* You can also create new segments based on agent tags filter.

#### **Managing Chat and Pre-built Agents:**

You can view and manage all your chat and pre-built agents from the the configured agents tab.

From here, you can:

* View all configured agents
* Track which agents are active
* Review the account segments or lists an agent is deployed on
* Manage re-run settings

If you have created a custom agent to enrich one account segment or list, you can also deploy the same agent on other segments or lists.

Click on **View all Chat History** - to access all previous chats and agents created via chat.

Note: You can also view agents and deployments of team members.

<figure><img src="/files/TVqtyQ0VFPlu98nONLmG" alt=""><figcaption></figcaption></figure>

For every agent, you’ll see:

* **Finds** → The number of accounts/developers matching the agent criteria
* **Credits consumed** → Total credits used
* **Category** → Type of agent (e.g., Chat - Discover, Chat - Enrich, Sales Ready, Engaged Buyer etc)
* **Status**
  * Active → Currently deployed
  * Archived → Not in use
* **Owner**
* **View** - View agent details (Note: Once an agent is created you can’t edit the tag names or criterias.)
* **Clone an agent -** Clone an existing agent and and select which deployments to carry forward

{% hint style="info" %}
Note: Chat agents can’t be cloned
{% endhint %}

* **Archive -** Archive an agent to stop it from running on any future records. Once archived, agent tags are removed from the accounts, developers and buyers section.

To further manage deployed agents, simply expand the agent. For every agent, you can see the following deployment details:

**For segments/lists:**

* Deployed at - Segment/List for which this agent was deployed
* Status -
  * Success - Indicates agent is deployed successfully
  * Error - Indicates agent failed to deploy
  * Insufficient credits - Indicates Agent deployment is paused due to insufficient credits
* **Finds -** Shows the number of accounts/developers matching the agent criteria
* Last run - Most recent run date
* Next run - If you’ve set up a recurring agent, you can see the upcoming date for which the run is scheduled
* Auto-run on new data - Turn on the toggle to auto-run this agent on any new accounts/developers added to a segment/list

{% hint style="info" %}
Note: Auto-run is only available for pre-built agents
{% endhint %}

* Re-run settings - Edit the frequency at which the agent runs
* Actions
  * **Pause:** This stops all future runs. Users can still see the results fetched by the agent so far.
  * Download a CSV of all the finds. Quick Tip: To export agent results to another tool - use this.
  * Audit Log - Get a detailed breakdown report of every run - run date, how many credits consumed for that run, whether it’s a success or failure run and more for both finds and non-finds.

{% hint style="info" %}
Note: You can only pause pre-built agents. Chat agents can’t be paused.
{% endhint %}

{% hint style="warning" %}
NOTE: You can only pause, archive, edit auto-run and re-run settings if you’re the owner of the agent.
{% endhint %}

Similarly - you can view and manage the agents for the list for which this agent was run.&#x20;

**For Accounts/Developers/Buyers** - it shows all the individual accounts/devs (that are not run as a part of a segment or list deployment) the agent has been deployed on


# Intel Columns

Intel Columns let you enrich any segment or list with the exact tech-GTM signals you care about, right inside your Accounts view. Instead of running a separate agent and jumping between screens, you describe the signal you want in plain language, and Reo adds it as a new column against every account in your segment or list.

Here's a complete guide on how to add, manage, and filter Intel Columns.

#### What you can add as a column

An Intel Column can answer almost any question you'd ask about your accounts. A few common types:

* **Enrichment signals** like "add the number of DevOps engineers for my list"
* **Qualification signals** like "which companies are doing cloud migration from my list"

Each column is created by an agent, and one agent creates exactly one column. Supporting details, reasoning, and evidence live inside that column and open up when you expand a value. (more on that below)

{% hint style="info" %}
The **Intel Column** feature works on any segment or list, including segments that have been shared with you. It is not currently available on the “**All Accounts”** list or in any segment or list with more than 10,000 accounts.
{% endhint %}

#### Adding a column

**Step 1:** Open the segment or list you want to enrich.

<figure><img src="/files/4nDzBFgtPdAaovcYARze" alt=""><figcaption></figcaption></figure>

**Step 2:** Click **Add Column** to get started.

<figure><img src="/files/zGRoaMLBNFr2r6Ddiq9N" alt=""><figcaption></figcaption></figure>

This opens the **Add an intel column with AI** modal.

<figure><img src="/files/BiWqFQmGfGHohpr5GmD9" alt=""><figcaption></figcaption></figure>

From here, you have a few ways to build your column:

* **Write a prompt:** Describe the signal you want as a column.
* **Choose from an existing prompt:** Select from the three prompts personalized to your workspace if you'd rather start from an example.
* **Add an existing intel column:** Reuse an intel column you already created on another segment or list.
* **Chat with an agent:** Open a conversation to refine exactly what the column should capture.

{% hint style="info" %}
Choose between Reo data and Public data. Reo data draws on Reo's proprietary account signals and is selected by default. Public data searches news, filings, and blogs, so it is the better choice for signals like SOC 2 certifications or SEC filings.
{% endhint %}

#### 1) Prompt to Column

Here's a quick walkthrough on how to add and filter an **Intel Column**:

{% embed url="<https://reo-dev.portal.trainn.co/share/XIzK87888EcJDyFol7sThA>" %}

**Step 1:** Type your prompt, pick your data source, and click **Add Column**.

<figure><img src="/files/wiJEvU96TASNbyYASpe4" alt=""><figcaption></figcaption></figure>

**Step 2:** A loading screen walks you through the steps, so you can see how it's reasoning through your request.

<figure><img src="/files/CkUnwkat9DJeJBqZQs6d" alt=""><figcaption></figcaption></figure>

**Step 3:** Review the **Preview & Save** screen. This is where you confirm what's about to be added before any credits are used.

<figure><img src="/files/3Dj2wVjfQq2sGaXhdn2Z" alt=""><figcaption></figcaption></figure>

**a. The column.** The agent identifies the single column your prompt is asking for and names it. Column names are set by the agent and are not editable. Any supporting columns, reasoning, and evidence are rolled into this one column and can be opened later from the Accounts list.

<figure><img src="/files/qB42oyIClYcHIwdMjKNC" alt=""><figcaption></figcaption></figure>

**b. Preview and reasoning.** You'll see a sample of up to 5 accounts with the value the agent found for each. Click **View Reasoning** on any row to expand it and read the full reasoning. If the agent can't find data for the signal, you'll see a clear message saying so.

<figure><img src="/files/dMptbjyhqXdGeSqCj5xQ" alt=""><figcaption></figcaption></figure>

**c. Automations.** Decide how the column stays current:

* **Auto Enrich New Accounts:** Any new account that enters this segment or list gets enriched with this column automatically.
* **Re-enrich All Accounts:** Refreshes the column across all accounts on a schedule. Choose weekly, monthly, quarterly, or do not re-enrich.

<figure><img src="/files/ADxwuyKIDYXevRZhvrJZ" alt=""><figcaption></figcaption></figure>

**d. Credits estimation.** Reo shows the credits this column will use before you commit.

<figure><img src="/files/7dRt4d5M5dW6lpBVBFAL" alt=""><figcaption></figcaption></figure>

**Step 4:** Click **Add Column**. You're taken back to the Accounts Listing page and the new column is added as the second column. You'll watch each account enrich in real time.

<figure><img src="/files/ON3Oq1NwFW5kM3ArknbL" alt=""><figcaption></figcaption></figure>

The column is added to this segment or list only. It won't appear on your other segments automatically, but you can add the same column elsewhere whenever you want (see Add an existing intel column below).

#### 2) Chat with an agent

If you want to shape the column through conversation, click **Chat with agent** from the Add column modal.

<figure><img src="/files/biilWdDHbYSJf8mH8HSW" alt=""><figcaption></figcaption></figure>

This opens the same chat view used across Reo's Agents flows, pre-filled with your current session so you can pick up right where you left off. Keep chatting until the agent understands exactly what you want, then click **Enrich & Add Column**.

<figure><img src="/files/CIqyxGIIQYfcTyDIkLwD" alt=""><figcaption></figcaption></figure>

You'll land on a **Preview & Save** screen with the column name (not editable), the automation settings, the credits estimation, and a preview of up to 5 accounts showing account name, agent tags, and the pre-filled column values. Here you can also edit the agent name and tag. Click **Enrich & Add Column** and you'll be returned to the segment or list.

<figure><img src="/files/ujdrNyMhn0F1Sve5gnSF" alt=""><figcaption></figcaption></figure>

{% hint style="info" %}
If you close the chat modal without saving, you'll land back on the previous Preview screen. Nothing is lost.
{% endhint %}

#### 3) Add an existing intel column

If you've already built a column somewhere else, you don't need to recreate it.

**Step 1:** In the Add column modal, choose **Add an existing intel column**. Reo lists every column created across your other segments and lists, showing the column name, the data type of its values, and the agent that created it.

<figure><img src="/files/DZ31rn9DpDUpdq9etfUK" alt=""><figcaption></figcaption></figure>

**Step 2:** Pick a column. Reo opens the same Preview & Save screen used in the prompt flow, this time with 5 sample accounts from your current segment so you can see how the column fills here.

<figure><img src="/files/lEWVHTFBt6ExuhFhgd4H" alt=""><figcaption></figcaption></figure>

**Step 3:** Set your automations (Auto Enrich New Accounts and Re-enrich All Accounts), review the credits estimation, and click **Add Column**. You're redirected back to the segment or list, same as the prompt flow.

<figure><img src="/files/WsCRzQeJyW1srVuvtheX" alt=""><figcaption></figcaption></figure>

#### Credits

You're only charged for accounts where Reo is able to fill in the data. Accounts the agent can't enrich don't cost you credits.

If you add an existing column to a new segment or list, the overlapping accounts are charged again for that new placement.

Reo shows a credits estimation on the Preview & Save screen before you confirm, so there are no surprises.

<figure><img src="/files/MqTInVQK9sL8jA5UTyg9" alt=""><figcaption></figcaption></figure>


# Enrichment

This section provides you with a step-by-step guide on leveraging Reo.Dev's enrichment feature to convert GitHub handles and email IDs into comprehensive developer profiles.

{% content-ref url="/pages/XpyFT33N1nLNTPKg8bKw" %}
[Enrichment](/enrichment/enrichment)
{% endcontent-ref %}


# Enrichment

This tutorial walks you through Reo.Dev’s enrichment feature, helping you enrich anonymous leads and uncover detailed information about developers and companies using just a GitHub ID or an email ID.

### **Upload Files to Enrich**

**Steps to upload a file:**

**Step 1:** Head to the navigation panel on the left. Under tools, click on **‘Enrichment’**.

![](/files/vBSMfXz5OFk42DqumBU8)

**Step 2:** Click on **‘Import’**

![](/files/SvWYXtCRinRZRlaGMYA6)

**Step 3:** Based on the input data (GitHub ID or email), choose **‘Enrichment Type’**.

![](/files/1FmTTseNzPP5tYwAjaZW)

**Step 4:** After selecting the enrichment type, click **Next** to upload the file.

![](/files/sCZgQxXG3aJP3URcoMhs)

{% hint style="info" %}
**Note:**

* Only CSV format is supported.
* The file should contain only one column based on the enrichment type chosen.
  * If you’ve chosen the Github enrichment - please ensure that your file has just one column having the Github handles.
  * Similarly - if you’ve chosen email enrichment - ensure your file has one column having email IDs.
  * [Here’s a sample template](https://drive.google.com/file/d/1xSccQURzc18Sp840UxugeGbI5ThKrHPG/view?usp=sharing) for your reference
* You can add upto 5000 records in a file. If you'd like to enrich more records - you can upload the file in batches of 5000.
  {% endhint %}

![](/files/Z7QYBtQNTaGqMz6kGz2x)

**Step 5:** Click **Next** after successfully uploading the file.

![](/files/xDEO58raxNVakliJAqkR)

Once done, you’ll see a pop-up showing the maximum credits that *could* be consumed if all records are enriched with both LinkedIn and Email ID. Actual consumption will depend on how many records are successfully enriched.

{% hint style="info" %}
**Note:** It usually takes upto 24 hours for the enrichment to complete. You’ll receive a notification via email once it's done.
{% endhint %}

Next **- >** Click on **'Done'**

![](/files/rTboHcF2N8odT41dBBLv)

Below is the final output of enriched developer and enriched account fields after a successful enrichment.

**GitHub Enrichment:**

![](https://usercontent.us.prod.clueso.io/d06f019c-da0b-4d5b-9fdd-9630e7fd5d0f/c7b5b56c-9161-4518-a0b9-3a00fbbf35b8/3dfea692-a73f-410c-be97-52bbd44e74b0/images/e8495794-55a2-44c3-b167-8617ed082bd4.png)

**Email ID Enrichment:**

![](https://usercontent.us.prod.clueso.io/d06f019c-da0b-4d5b-9fdd-9630e7fd5d0f/c7b5b56c-9161-4518-a0b9-3a00fbbf35b8/3dfea692-a73f-410c-be97-52bbd44e74b0/images/5ca48c12-a20f-4d69-b38f-a10d09d17524.png)

{% hint style="info" %}
**Note:** Every official email ID is verified via trusted email verification platforms like **NeverBounce** — so you get only valid, verified emails.
{% endhint %}

### **Manage Enriched Developers & Accounts**

#### **Manage files**

If you’ve previously uploaded file(s), you can see all the files you’ve uploaded in the **'Imported Files'** tab.

![](/files/A9ovcVr5DK5VihTC7Ecn)

In this tab, you can see:

* File you uploaded
* Enrichment type
* Status
  * In-progress - This indicates enrichment is in process.
  * Completed - This indicates enrichment is completed. You can view the developers and accounts for these files.
  * Complete (restricted) - This indicates enrichment is complete but some developers are hidden due to low credits. You can use the actions menu to view them.
* Total records: Total number of records in the uploaded file
* Enriched records: Total number of records successfully enriched by Reo.Dev. For files still being processed, you'll see a "Check Progress" status. Hover over it to view the number of records enriched so far for that specific file.

#### Take actions on the enriched files

\- **Download CSV**: Download the CSV with enriched data, including all input file columns and the enriched columns.

\- **Click on the burger menu to:**

\- **View accounts/View developers**: This takes you to the enriched developer/enriched account tab, where you can see a filtered view of all enriched developers and accounts from that particular file.

\- **Create campaign**: Directly enroll contacts into existing email campaigns. [Learn More about creating campaigns on Reo.Dev.](/campaigns/run-bulk-email-campaigns)

![](/files/kitgBr8CyBkdrUu8gMyH)

#### **Enriched Developers tab:**

This tab lists all enriched developers.

Choose the enrichment file from the drop-down menu to view all enriched developers.

![](/files/PHVNOa7bpECJ9rSTiew1)

You can view every developers profile details including designation, company, location and contact IDs.

#### **Enriched Accounts tab:**

Similar to the enriched developers tab, the enriched accounts tab shows a list of all enriched accounts.

#### **How Credit Consumption works for enrichment:**

* Credits are consumed based on enriched fields. For example, if only a LinkedIn profile is found, 5 credits are consumed. If both LinkedIn and a verified business email ID are found, 5 + 1 (total 6) credits are consumed. The same applies to email enrichment.&#x20;

{% hint style="info" %}
**Note**: There is no option to fetch just an LinkedIn or email ID. For enriched developers - if both email and LinkedIn are available, Reo.Dev will fetch both by default.
{% endhint %}

* Once you upload the file, you’ll see a breakdown of credit consumption. You’ll see the maximum number of credits that will be consumed for this enrichment. If you don’t have enough credits, you can reduce the file size or buy additional credits.
* If credits are exhausted during enrichment (e.g., you use up credits to get buyer contact), the enrichment will continue, but you won’t be able to access the enriched data like email ID or LinkedIn profile from the point when credits are exhausted.

{% hint style="info" %}
For more info on credits — Checkout: [Reo.Dev Credit-Based Pricing: FAQs](/faqs-and-troubleshooting/reo.dev-credit-based-pricing-faqs)
{% endhint %}

And that’s it!

From anonymous lead to identified profiles in just a few clicks.


# Audiences

{% content-ref url="/pages/jApNGj62q8dbqKQ2GxpQ" %}
[Buyer Audience](/audiences/buyer-audience)
{% endcontent-ref %}

{% content-ref url="/pages/Gw33pRwnKpi1eB4wpaPh" %}
[Company Audience](/audiences/company-audience)
{% endcontent-ref %}

{% content-ref url="/pages/ObRjqqgOYDcXCQ8TxgNd" %}
[Developer Audience](/audiences/developer-audience)
{% endcontent-ref %}


# Company Audience

This section explains how you can leverage the company audience feature to build target account lists based on technographics and hiring activity/intent.

{% hint style="info" %}
**Note: Only users with 'Admin' role on Reo.Dev can create and view audiences.**&#x20;
{% endhint %}

Here’s a step-by-step guide to building a company audience

### Creating Company Audience

**Step 1:** Navigate to the ‘Audiences’ section in the left navigation panel

<figure><img src="/files/78hedca4olLQxSAOdC71" alt=""><figcaption></figcaption></figure>

**Step 2**: Click on Create New > Select Company Audience

<figure><img src="/files/BL1nZCIKmybJrea7GDpQ" alt=""><figcaption></figcaption></figure>

**Step 3:** Start by adding the ‘Technographics’ filters:

a. Technology - Search for a specific technology or choose from the list of tech category from the drop-down menu

<figure><img src="/files/YGm5pjW2da7p2QIkQIxN" alt=""><figcaption></figcaption></figure>

b. **Company Industry** - Add specific industries to target

<figure><img src="/files/rzNL4vNfDhk4JNFnHlUo" alt=""><figcaption></figcaption></figure>

c. **Company HQ Country** - Specify the country where the company is headquartered

<figure><img src="/files/JoN05qo0QYJgnjV4sB2j" alt=""><figcaption></figcaption></figure>

d. **Company HQ City -** Specify the city where the company is headquartered

<figure><img src="/files/HK0X20Yhm6VfY6SE77O0" alt=""><figcaption></figcaption></figure>

e. **Company Employees** - Add an employee size range

<figure><img src="/files/kD2xq28hrHRh7m7CYUYQ" alt=""><figcaption></figcaption></figure>

f. **Company Revenue** -Set a revenue range

<figure><img src="/files/9wh23G0tN3A2HPVm7fWv" alt=""><figcaption></figcaption></figure>

**Step 4:** Next, add **hiring intent filters** to find companies that are actively hiring for specific engineering roles/building engineering teams.

a. **Hiring in -** Add a timeframe for the hiring activity

<figure><img src="/files/lA8CLlhwwG5JaoTMnl2k" alt=""><figcaption></figcaption></figure>

b. **Hiring for**&#x20;

* **Seniority** - Select the seniority level of the role

<figure><img src="/files/tP2Ety09Sz200t40nyaN" alt=""><figcaption></figcaption></figure>

* **Job title** - Add a specific designation or job function

<figure><img src="/files/74OpIFA0mdqmvejc7LoG" alt=""><figcaption></figcaption></figure>

**Step 5**: Click on **‘Preview’** to view accounts matching your defined criteria

<figure><img src="/files/goAAk2schgXdEWmLdTuy" alt=""><figcaption></figcaption></figure>

{% hint style="success" %}
Note: This is a **limited preview** showing 25 companies. To access the full audience click on **‘Continue to Save’**
{% endhint %}

<figure><img src="/files/5gxeAYpQvFuOg9YmFyv9" alt=""><figcaption></figcaption></figure>

**Step 6:** Define the Audience Name

<figure><img src="/files/Wzhgz56dcXRiQzvUd19e" alt=""><figcaption></figcaption></figure>

**Step 7:** In this step, decide how you want to add companies to your audience. You’ll see two options here:

1. **Add all companies now; Auto-add all new ones weekly&#x20;*****(This is the default option)***

* This adds all companies that currently match your defined audience criteria.
* Every week, the system will automatically add any new companies that meet the same criteria.

<figure><img src="/files/i2I5Kf4SNu8Z6yXDHqTf" alt=""><figcaption></figcaption></figure>

To control how many companies you want to add now or auto-add later, click on **‘Modify the no. of companies to add’.** You can edit both values under “Add x companies now” and “Auto-add upto X companies weekly.”

<figure><img src="/files/cjbItXNF74CgN7A74kxF" alt=""><figcaption></figcaption></figure>

The maximum number of companies you can add is limited to the total number of companies that currently meet your audience criteria.

If you make changes and want to revert, click ‘**Reset to Default’** This resets your selection to the default option: Add all companies now; Auto-add all new ones weekly

**b**. **Add companies now; Do not auto-add later**

Choose this if you only want to add companies that currently match your criteria — without auto-adding new companies. Click **Modify** to adjust the number of companies to add now.

<figure><img src="/files/gu7SYzpwSUBcmy4moUIB" alt=""><figcaption></figcaption></figure>

{% hint style="info" %}
**Note:** The credit summary shows you the number of credits that will be consumed for this audience. For each company - 3 credits are consumed.
{% endhint %}

**Step 8:** Once you’ve set this - click on **Save.**&#x20;

<figure><img src="/files/U9thDFhZHiGSen4yBZGd" alt=""><figcaption></figcaption></figure>

{% hint style="info" %}
**Note: It can take upto 24 hours to populate the audience.**
{% endhint %}

### Managing Company Audience

Once your company audience is created, you can manage it from the **Company** tab:

1. Audience name
2. Total count - Total number of companies in an audience
3. Status
   * In-progress - This indicates audience is still being created.
   * Complete - This indicates audience is completed. You can view the companies for these audiences.
   * Complete (restricted) - This indicates that the company audience is complete but some companies are hidden due to low credits. You can use the actions menu to view them.
4. Auto-refresh weekly - The Auto-refresh weekly toggle is turned on automatically for audiences saved with the "Add all companies now; Auto-add all new ones weekly” option.&#x20;

You can turn this toggle ON for any audience to enable weekly auto-additions of new companies matching your criteria.&#x20;

You can edit the number of companies to auto-add each week (e.g., cap at 100 or add all new matches). Note: Disabling the toggle stops future weekly additions without affecting companies already in the audience.

5. Last refreshed at - Shows the last date when new companies were added

### Actioning on Company Audience

Once you've created a company audience there's a range of actions you can take to manage and act on the data. Here's a quick overview of those actions:

1. **View Companies** - View all company details like matched tech, matched jobs (here you get a detailed summary of when was the job posted, job description and other key details), HQ location, Employee, Revenue and Industry, Company profile links
2. **Find Developers/Buyers** - You can build a developer/buyer audience from a company audience list.
3. **Download CSV** of company audience to export this data
4. **Create a segment** - You can create a segment of company audience using the filter ‘company audience’ under account source.
5. **Sync to CRM** - Sync company audiences to your CRM directly. This enables you to filter and view the contacts from a specific audience in your CRM itself.
6. **Configure Webhooks** - You can send audiences data to your other tools via webhooks
7. **Clone Audience** - Clone an existing audience&#x20;

{% hint style="warning" %}
**Only those companies that are present in Reo.Dev will be considered in the segment. Companies without any tracked developer activity in our system will be not be included in the segment.**
{% endhint %}

### **Company Audience Tags to filter accounts**&#x20;

Tags are automatically created for accounts within your company audience. Any accounts in your company audience engaging with your product assets can be easily filtered and viewed on the accounts dashboard using these tags.

To search for accounts within a company audience:&#x20;

1. Click on **'Add filter'** on the accounts dashboard

<figure><img src="/files/MJ6nzef7nLlRiTxnGm0j" alt=""><figcaption></figcaption></figure>

2. Next - Click on **Account Tags**&#x20;

<figure><img src="/files/f3Agw6TH8hSG9hmoUFpm" alt=""><figcaption></figcaption></figure>

3. Now, **choose specific audience(s)** to see active accounts within that audience.

<figure><img src="/files/Pc7FLhIB1kwV0NsYZiTX" alt=""><figcaption></figcaption></figure>

Note:&#x20;

* The tag name is the same as the company audience name.&#x20;
* You can also see the audience criteria in the tag description and get quick actionable context on the accounts.&#x20;

<figure><img src="/files/hg44JIEwnHZJHAfs3ILH" alt=""><figcaption></figcaption></figure>

**Editing Company Audience Tags**&#x20;

You can also edit a company audience tag. To do so:&#x20;

1. Head to the **Segments** section&#x20;

<figure><img src="/files/mmGdOzulVnvBRiyxsHB9" alt=""><figcaption></figcaption></figure>

2. Reo auto-generates segments that surfaces active accounts from the created audience. The name of this segment is same as the audience name.&#x20;

<figure><img src="/files/VxyTBKoNvnmT4UOxVeL3" alt=""><figcaption></figcaption></figure>

3. Click on the edit icon to edit the tag name and description.&#x20;

<figure><img src="/files/I15HKmdppROSDBrr8CUz" alt=""><figcaption></figcaption></figure>


# Developer Audience

This section explains how you can leverage the developer audience feature to find developers based on specific skillsets, job title, and location within your target account lists or company audience.

{% hint style="info" %}
**Note: Only users with 'Admin' role on Reo.Dev can create and access audiences.**&#x20;
{% endhint %}

Here’s a step-by-step guide to building a developer audience:

### **Creating a Developer Audience:**

**Step 1:** Navigate to the **‘Audiences’** section from the left panel&#x20;

<figure><img src="/files/NGoRUerySiblWOoUevqd" alt=""><figcaption></figcaption></figure>

**Step 2:** Click on Create New > Select Developer Audience

<figure><img src="/files/mM8n3XOlBUPpbsk9oJup" alt=""><figcaption></figcaption></figure>

**Step 3:** Start by adding the ‘**Developer details**’

1. **Skills** - Search for the specific skill sets that fit your ideal developer persona

<figure><img src="/files/QWDaORzKHDT1LFX2Ih57" alt=""><figcaption></figcaption></figure>

2. **Job Title** - Add a specific designation or job function

<figure><img src="/files/1o34ucQgp5ovBjWqL4kE" alt=""><figcaption></figcaption></figure>

3. **Country** - Specify the countries where you want to find developers from

<figure><img src="/files/Epgqmy62Hxde9r2dXbp4" alt=""><figcaption></figcaption></figure>

4. **State-** Specify the states where you want to find developers from

<figure><img src="/files/ZWMquhdU7Ftz6fBTGOZl" alt=""><figcaption></figcaption></figure>

**Step 4:** Next, choose the **‘Company’** - which is basically specifying companies you want to find developers in. These could be from a:&#x20;

1. **Account Segments:** You can find developers with specific skillsets from any of your existing account segments in Reo.&#x20;
2. **Account Lists:** If you have a target account list - you can upload that on Reo.Dev and then find developers within those target companies.
3. **Company Audiences** - You can further find developer from accounts within a company audience.
4. **Firmographics** - You can also choose to just find developers from companies based on specific firmographic filters (company industry, company HQ Country, revenue, employees)

<figure><img src="/files/iDPwHpvUkgJaZaecliIR" alt=""><figcaption></figcaption></figure>

**Step 5:** Now, click on **Preview** to view developers matching the defined criteria

<figure><img src="/files/Vkc3YoytCcUIt7zCK2JY" alt=""><figcaption></figcaption></figure>

{% hint style="info" %}
Note: This is a **limited preview** showing 25 developers from all the developer profiles fetched for the set criteria.&#x20;
{% endhint %}

To access the full audience click on **‘Continue to Save’**

<figure><img src="/files/MgCcNLUMmbdk9PKPlmQL" alt=""><figcaption></figcaption></figure>

**Step 7:** Define the Audience Name

<figure><img src="/files/fFVziv38SEbOAeHbJ312" alt=""><figcaption></figcaption></figure>

**Step 8:** Define **max developers per company**: Here you can select the maximum number of developers you want to add from each company. You can choose upto 20 developers per company.

<figure><img src="/files/BI9hjLAcYYIzipYONoNI" alt=""><figcaption></figcaption></figure>

**Step 9:** Select Contact Ids to fetch. You can choose to fetch only the LI IDs, only business email ID or choose to fetch LinkedIn and business email IDs both.

<figure><img src="/files/c9mJStoulUdiLp0Wzw7t" alt=""><figcaption></figcaption></figure>

{% hint style="info" %}
The credit summary shows you the number of credits that will be consumed for building this audience.&#x20;

* The number of credits consumed for fetching only LI Ids for each developer  = 1 credit&#x20;
* The number of credits consumed for fetching LI and business email ID for each developer  = 2 credits&#x20;
  {% endhint %}

**Step 10:** Once you’ve set this - click on **Save Audience.**

{% hint style="info" %}
It can take upto 24 hours to populate the audience. New developers matching the defined criteria will be added automatically when new companies are added to the source account list, segment, or audience.
{% endhint %}

<figure><img src="/files/V6ZJsEg4VRFTzNomjtC3" alt=""><figcaption></figcaption></figure>

### **Managing Developer Audience**

Once your developer audience is created, you can manage it from the **Developers** tab:

1. **Audience name**
2. **Total count** - Total number of developers in an audience
3. **Status**
   * In-progress - This indicates audience is still being created.
   * Complete - This indicates audience is completed. You can view the developers for these audiences.
   * Complete (restricted) - This indicates that the developer audience is complete but some developers are hidden due to low credits. You can use the actions menu to view them.
4. **Auto-refresh status:** This is turned on by default for all developer audiences. So it auto-adds developers matching the defined criteria from any new account added to your segment/list/audience. If you disable this, any new developers identified in the account segments/list/audiences will not be added for that particular developer audience.
5. **Last refreshed at:** This shows the most recent date and time when new contacts were added to an audience.

### **Actioning on Developer Audience**

Once you've created a developer audience there's a range of actions you can take to manage and act on the data. Here's a quick overview of those actions:

1. **View Developers** - View all developer details like - name, designation, skills, matched skills, company, developer location, and contact IDs (LI, email, stackoverflow, Github ID etc)
2. **Download CSV** of developer audience to export this data
3. **Create campaign** - Enrol developers in your existing email sequences
4. **Sync to CRM** - Sync developer audience to your CRM directly. This enables you to filter and view the contacts from a specific audience in your CRM itself.
5. **Clone Audience** - Clone an existing audience&#x20;


# Buyer Audience

This section explains how you can leverage the buyer audience feature to find economic buyers across your target account segments and lists **in bulk** with Reo.Dev.

{% hint style="info" %}
**Note: Only users with 'Admin' role on Reo.Dev can create and access audiences.**&#x20;
{% endhint %}

Here’s how it works:

### **Creating Buyer Audience**

**Step 1:** Navigate to the **‘Audiences'** section in the left navigation panel

<figure><img src="/files/w6TQsK70u4Yx5TC0jdHW" alt=""><figcaption></figcaption></figure>

**Step 2:** Click on Create New > Select **Buyer Audience**&#x20;

<figure><img src="/files/udKEt0Qa8VEEosVyiyM7" alt=""><figcaption></figcaption></figure>

**Step 3:** Choose or simply search for the the account segment/list/audience for which you want to find buyers

<figure><img src="/files/HFVUbJDtHwGkEgoLmrV7" alt=""><figcaption></figcaption></figure>

**Step 4:** Add Buyer Persona: There are two things here:

* If you’ve created your buyer persona already - you can choose the specific persona from the drop-down menu to find buyers that match that persona
* Or - you can create a new persona.

{% hint style="info" %}
**Note:** You can adjust the filters to further refine your search
{% endhint %}

<figure><img src="/files/l7wJtEfgWztvwbP0RKlG" alt=""><figcaption></figcaption></figure>

**Step 5:** Click on **‘Preview ’ to see a preview of buyers**

<figure><img src="/files/OnzeODyFwY5C8EwZuiIw" alt=""><figcaption></figcaption></figure>

Note: This is a limited preview of buyers. To see all matching buyers click on **'Continue to Save'**

<figure><img src="/files/TU9WsquanXEEVowYpLao" alt=""><figcaption></figcaption></figure>

**Step 6:** Add the **audience name**

<figure><img src="/files/mPmA8xA21PsIKMEktQwj" alt=""><figcaption></figcaption></figure>

**Step 7:** Define **max buyers per company**: Here you can select the maximum number of buyers you want to add from each company. You can choose upto 15 buyers per company.&#x20;

<figure><img src="/files/nxJbUW9Hnsl7gQhiAj5c" alt=""><figcaption></figcaption></figure>

**Step 8:** Select **Contact Ids to fetch.** You can choose to fetch only the LI IDs, only business email ID or choose to fetch LinkedIn and business email IDs both.

<figure><img src="/files/7i0csAKhaYTwyLW8iyXM" alt=""><figcaption></figcaption></figure>

**Step 9:** Click on **Save Audience** to fetch the buyers.&#x20;

{% hint style="info" %}
Note: It usually takes upto 24 hours to generate the audience.&#x20;
{% endhint %}

<figure><img src="/files/nwunLRCvCxDHeIznAkeX" alt=""><figcaption></figcaption></figure>

{% hint style="info" %}
**Note:** You can view these buyers in the Prospects tab under each account and Buyers section too.
{% endhint %}

### **Managing Buyer audience**

**Under the buyers tab** you can see the

1. Audience name
2. Total count: Number of buyers present in that audience
3. Credits consumed - Total number of credits consumed till now by that audience
4. Auto-Refresh Status : Turn this on to automatically fetch any new buyer added to your segment/list/audience. If you disable this, then new buyers identified in the account segments will not be added for that particular audience.
5. Last refreshed at: This shows the most recent date and time when new contacts were added to an audience.

### **Actioning on buyer audience**

Once you've created a buyer audience there's a range of actions you can take to manage and act on the data. Here's a quick overview of those actions:

* View Buyers - View all buyers detailed profiles (designation, company, location, time in company, LinkedIn and email ID) for any audience.
* Download CSV of the buyer profiles to export data
* Sync Buyers to your CRM  - We’ve introduced a new contact field '**Reo:Audience Name'** that automatically maps audiences to your CRM. This enables you to filter and view the contacts from a specific audience in your CRM itself.&#x20;

{% hint style="info" %}
*Quick note here: The sync can take upto 24 hours.*&#x20;
{% endhint %}

* Create Campaign - Enroll audience in bulk email campaigns on Apollo, Outreach from Reo.Dev itself. [Learn more about creating campaigns.](/campaigns/run-bulk-email-campaigns)
* Configure Webhooks - Sent audience data to your other tools via webhooks
* Clone Audience - Clone an existing buyer audience&#x20;

### **How credit consumption works for buyer audience**

* For each buyer record that we fetch, if only LinkedIn ID is fetched, 1 credit will be charged
* If the record has LinkedIn and email both, 2 credits will be charged
* In case any contact already exists in the system - no credits will be charged

Note: There's no option to just fetch an email ID or LinkedIn profile for a buyer. If both email and LinkedIn profile are available - Reo.Dev will fetch both by default.&#x20;

{% hint style="info" %}
For more info on credits — Checkout: [Reo.Dev Credit-Based Pricing: FAQs](/faqs-and-troubleshooting/reo.dev-credit-based-pricing-faqs)
{% endhint %}

**Few things to note:**

* If you’ve created a buyer audience for a specific segment and in case you edit that segment - Reo.Dev will automatically pull out new buyers from that segment. So credits will be consumed automatically for any new buyers auto-fetched.&#x20;
* In case you want to delete a segment associated with a buyer audience - you need to first turn off the ‘auto-refresh’ in the buyers tab.

### **Tips to get the most out of Buyer Audience:**

* Create custom persona to find buyers that match your ICP. [Learn More.](/buyers/buyer-persona-configuration-in-reo.dev)
* Take actions like sending buyers to your CRM and enrolling buyers into a sequence - to avoid downloading CSVs, uploading it on other platforms and then taking actions.


# Automations

Reo.Dev Automations help you act instantly on intent by pushing real-time account, developer, and buyer signals directly into your Slack or other tools (using webhooks).

Whether it’s a surge in activity, a new developer or buyer being identified, a new account showing activity —you get the updates where you need them, without any manual effort.&#x20;

**Automations has 4 components:**

1. **Source**

The object you want to run the automation on — a **segment** (account, developer, buyer) or a **list** (account or developer)

**2. Trigger**

The event that fires the automation. Each source comes with a predefined set of available trigger for every segment and list type.

**3. Condition (Optional)**

Additional filters or criteria that must be met for the automation to run.

**4. Action**

Where the data goes — Slack (channel or DM), Webhook via Zapier, Email.&#x20;

{% hint style="info" %}
**Pre-requisites:**&#x20;

To use **Automations** in Reo, you’ll need at least one of the following set up:

1. **Slack Integration**: To get alerts on slack - please ensure that your slack workspace is integrated to Reo. [Here's a quick guide on how to set it up.](https://docs.reo.dev/settings/configure-slack-and-email-notifications)
2. **Configure Webhooks**: To trigger workflows in other tools, please configure webhooks. [Here's the complete guide on creating webhooks. ](https://docs.reo.dev/integrations/webhooks)

{% endhint %}

### **Create an automation:**

**Step 1:** Go to **Tools → Automations** from the left navigation panel

<figure><img src="/files/BORCD125Y3wIIyw7oTZa" alt=""><figcaption></figcaption></figure>

**Step 2:** Click on **‘Create New’**

<figure><img src="/files/EMrCOITgn53N1XnU6DG9" alt=""><figcaption></figcaption></figure>

**Step 3:** Name your automation and click on **Create**&#x20;

<figure><img src="/files/vNEfTkeUehZHtYtpykWt" alt=""><figcaption></figcaption></figure>

**Step 4:** Start by selecting the source object. You can choose to build an automation on

* segment (account, developer, buyer)
* or a list (account, developer)

Then, click on ‘Save and next’

In this example, we'll build the automation on an account segment

<figure><img src="/files/1nNpvVHsnoH6u18LYGHj" alt=""><figcaption></figcaption></figure>

{% hint style="info" %}
Note: You can build an automation only on your owned segments i.e segments created by you.
{% endhint %}

**Step 5:** Once you’ve selected the source, you can choose the trigger that will fire this automation. For every segment type and list there’s a pre-defined list of triggers from which you can select.

<figure><img src="/files/A3QTf8XCGNplaFNHts39" alt=""><figcaption></figcaption></figure>

**Account Segment**

| Trigger                                        | What it means                                                             |
| ---------------------------------------------- | ------------------------------------------------------------------------- |
| New Account added to the segment               | New account is added to the segment                                       |
| New Activity in an account in a segment        | New activity is detected in any account in the segment                    |
| New Buyer added to an account in a segment     | A new buyer is added to an account in the segment                         |
| New Developer added to an account in a segment | A new developer is identified in any account within the selected segment. |
| Surge in Activity                              | An account showing recent spike in activity                               |
| Key Page Visited                               | Account shows activity on any of the key pages                            |
| Change in Developer Funnel Stage               | Account moves to a new developer funnel stage                             |
| New finds by Agents                            | New accounts matching agent criteria                                      |

**Developer Segment**

| Trigger                          | What it means                                                         |
| -------------------------------- | --------------------------------------------------------------------- |
| New Developer added to a segment | New developer is added to the segment                                 |
| New Activity in the segment      | New activity done by any developer in the segment                     |
| Key Page Visited                 | Any developer from the segment shows activity on any of the key pages |
| New finds by Agents              | New developers matching agent criteria                                |

**Buyer segment**

| Trigger                      | What it means                                                     |
| ---------------------------- | ----------------------------------------------------------------- |
| New Buyer added to a segment | New buyer is added to the segment                                 |
| New Activity in the segment  | New activity is done by any buyer in the segment                  |
| Key Page Visited             | Any buyer from the segment shows activity on any of the key pages |

**Account list**

| Trigger                          | What it means                                          |
| -------------------------------- | ------------------------------------------------------ |
| New Activity in an account       | New activity is detected within an account in the list |
| New Buyer added to an account    | New buyer added to an account in the list              |
| Surge in Activity                | An account showing recent spike in activity            |
| Key Page Visited                 | Account shows activity on any of the key pages         |
| Change in Developer Funnel Stage | Account moves to a new developer funnel stage          |
| New finds by Agents              | New accounts matching agent criteria                   |

**Developer list**

| Trigger                                 | What it means                                |
| --------------------------------------- | -------------------------------------------- |
| New Activity by a developer in the list | New developer activity detected              |
| Key Page Visited                        | Developer engaging with any of the key pages |

Then, click on save and next

<figure><img src="/files/KXyvmd29v8xctdKWYsaW" alt=""><figcaption></figcaption></figure>

**Step 6:** Once you’ve selected a trigger, you can choose to add conditions that need to be met for an automation to trigger. This is an optional step. (Choose the skip this step option to move to the next step).

{% hint style="warning" %}
Note: You can’t use set conditions for the trigger ‘New finds by Agents’
{% endhint %}

<figure><img src="/files/aHGFwpzups911ciPAR9p" alt=""><figcaption></figcaption></figure>

Here’s a list of filters you can choose as conditions:

<figure><img src="/files/XOUGXiARrVuywzagPxYb" alt=""><figcaption></figcaption></figure>

In this example - we’ve added the following conditions - Activity type: Github - Fork, AND Designation: CXO/Founder/VP/Director

Once done, click on save and next

<figure><img src="/files/g35LLF36TkoF3y28lndY" alt=""><figcaption></figcaption></figure>

**Step 7:** You can choose to send this data to Zapier via webhooks, Slack channel/DM or Email

<figure><img src="/files/dlQDdf2FbBljrd661hpF" alt=""><figcaption></figcaption></figure>

* **Send to Zapier via webhook**: Choose the webhook you want to map this data to. [Here’s a guide on creating webhooks.](https://docs.reo.dev/integrations/webhooks)

{% hint style="info" %}
Note: The new finds by agents will be pushed to webhooks as an when the agent finds new matching accounts.
{% endhint %}

<figure><img src="/files/CPCPPVlWOExEgybe4gwr" alt=""><figcaption></figcaption></figure>

* **Get alerts via Slack:** Choose to get alerts on slack either on DM or a specific channel. You can further set the alert frequency:

  * As events happen - You get real-time alerts
  * Once daily as a summary - Set a specific time of the day when you want to receive alerts. Here you get a downloadable list/summary of all accounts/developers/buyers that match your alert criteria at your preferred time of the day.

  <figure><img src="/files/lWSb8ulCllzzZwraeL36" alt=""><figcaption></figcaption></figure>

&#x20;   Click on ‘**save and publish’** to activate the automation

<figure><img src="/files/4P2Gq29qH3kqWKKZX71S" alt=""><figcaption></figcaption></figure>

* **Get alerts via Email:** You can get alerts directly on your email. The email alerts are sent as a daily summary. To get these alerts:
  * Choose a specific time at which you’d like to receive the email.
  * Select the team members you’d like to send this alert to.

{% hint style="info" %}
Note:&#x20;

* You can only send email alerts to team members added on Reo.Dev.
* If you’ve selected the trigger as ‘New find agents’, in case of email and slack alerts you will receive an alert whenever a new match is found by the agent. Setting up frequency for emails and slack is not supported.
  {% endhint %}

Then, click on **'Save and publish'** to activate this automation.&#x20;

<figure><img src="/files/hECsXLgdTnmRxwvvX1Rv" alt=""><figcaption></figcaption></figure>

### **Managing Automations**

You can see all the automations you’ve created under the automations section.

1. The target object column shows where the data is being sent.

<figure><img src="/files/5LBblVOAA55yvp8UQzCB" alt=""><figcaption></figcaption></figure>

2. Status shows whether an automation is active/inactive or in draft

<figure><img src="/files/3pYFLEZ1DRJzFJJIVXq7" alt=""><figcaption></figcaption></figure>

{% hint style="warning" %}
Note: If an active automation is edited and no source is selected, the automation will be moved to ‘draft’ status automatically.
{% endhint %}

3. **Under actions** -

* Click on view to see the automations criteria.&#x20;
* To edit an existing automation you can simply click on edit. If you edit any one of the steps in the automation, the subsequent steps will need to be re-configured.
* Click on play/pause icon to Activate/Deactivate an automation

<figure><img src="/files/pAAJpk6p0j1wnNoj2acB" alt=""><figcaption></figcaption></figure>

* Click on the 3 dotted menu to:
  * Rename it
  * Copy automation ID
  * Delete an automation (Quick note: Active automations can’t be deleted directly. To do so, first de-activate the automation and then delete.)

<figure><img src="/files/Pm62LbXnLuy269jJTiRX" alt=""><figcaption></figcaption></figure>


# Integrations

<br>


# Input Sources


# Developer Insights


# GitHub

Connecting GitHub repositories to Reo.Dev allows you track developers' actions, such as raise pull request, watch, fork, open an issue, and comment.

Along with connecting your own repository, you can also connect competitors' and complementary repositories. Reo.Dev will then track developer activities across all these repositories.

{% hint style="info" %}
**Note**: Only Admins can connect GitHub repository.
{% endhint %}

There are two parts to setting up GitHub:

* **adding** your repositories: this gets a repository connected to Reo
* **authenticating** your owned repositories: this is a separate, one-time step for owned repositories only, [covered in Part 2 below](#part-2-authenticating-your-owned-repositories).

***

## Part 1: Adding your repositories

**Step 1:** From the left navigation, click on **Settings > Integrations**.

<figure><img src="/files/zcMjJAque7OMJksyo5R7" alt=""><figcaption></figcaption></figure>

**Step 2:** Find the GitHub card and click '**Configure**'.

<figure><img src="/files/oMC1GrejGwloz0hiq56j" alt=""><figcaption></figcaption></figure>

**Step 3:** Connect the three main types of repositories.

* **Owned GitHub repositories**: Repositories that your organization directly manages and maintains on GitHub.
* **Competitor repositories:** Repositories managed by organizations that compete with your products or services.
* **Complementary repositories:** Repositories that offer tools or resources that enhance or work well with your products or services.

**Step 4: Add repositories -** to add your company's own repositories, expand the tab for '**Owned GitHub Repositories**' and enter the URL of your repository. Add multiple repositories if needed.

<figure><img src="/files/Q6YBvRpSXTceRX0Ryll8" alt=""><figcaption></figcaption></figure>

**Step 5:** Follow the same process to add competitor and complementary repositories.

**Step 6:** After adding all the repositories, click **Save**.

<figure><img src="/files/dIXB6eYjLf52TNLlA2W8" alt=""><figcaption></figcaption></figure>

***

## Part 2: Authenticating your owned repositories

Adding a repository connects it to Reo. Authenticating it is what gets you:

* Deeper insights into how developers engage with your repositories
* Faster, more dependable syncing, so your data is always current
* A tighter, more resilient integration between GitHub and Reo

### Who's involved

Two roles are involved - they can be either the same person or two different people.

* **Reo Admin:** Has Admin access to your Reo account
* **GitHub Admin:** Has admin rights on the specific GitHub repository you're authenticating.

If you're the Reo Admin but not the GitHub Admin, you'll need to loop in whoever is. The steps below show you how.

***

## How to authenticate a repository

Watch this quick video walkthrough of how to authenticate your GitHub repositories before you dive in.

{% hint style="info" %}
**Note:** Authentication applies only to repositories you own, not competitor or complementary repositories.
{% endhint %}

{% embed url="<https://reo-dev.portal.trainn.co/share/s0rCALkYmsqPeGVBjvq9pA>" %}

**Step 1:** From the left navigation, select **Settings** **→** **Integrations → GitHub** card **→** open **Owned GitHub Repositories**.

**Step 2:** Find the repository and click the **Share auth link** button next to it.

**Step 3:** A window opens asking you to send a secure authentication link to the repository's admin.

* If you have admin rights on the repository yourself, enter your own email address.
* If you don't, enter the GitHub Admin's email address instead.

{% hint style="info" %}
**Note:** The person you send this to doesn't need a Reo account to authenticate the repository.
{% endhint %}

**Step 4:** Click **Email auth link**.

**Step 5:** You'll see a confirmation that the email has been sent. The same window also shows the link itself, which you can copy and share directly, for example over Slack, instead of relying on email.

{% hint style="info" %}
**Note:** The link is valid for **7 days**. If it expires before it's used, generate a new one.
{% endhint %}

**Step 6:** The repository now shows an **Auth pending** status. Hover over it to see a tooltip confirming the request was emailed to the repo admin, with a **Check status** button inside it to refresh the status.

**Step 7:** The GitHub Admin opens the link and signs in to GitHub if needed.

**Step 8:** They click **Authorize reodotdev**.

**Step 9:** GitHub may ask them to verify their identity with a code sent to their email. This is a standard GitHub step, not something specific to Reo.

**Step 10:** After verifying, they're redirected back to the GitHub configuration screen in Reo. The repository now shows a green GitHub icon, confirming authentication succeeded.

{% hint style="info" %}
**Note:** Repeat this process for each repository that doesn't already have admin access covered by someone who's authenticated before.
{% endhint %}

***

### Repository statuses

<table><thead><tr><th width="168.53515625">Status</th><th width="232.59375">What it means</th><th>What to do</th></tr></thead><tbody><tr><td>Share auth link (button visible, no status)</td><td>The repository hasn't been authenticated yet</td><td>Click Share auth link to start</td></tr><tr><td>Auth pending</td><td>A link has been sent and Reo is waiting on the GitHub Admin to complete it</td><td>No action needed yet. Click Check status to refresh, or follow up with the GitHub Admin if it's been a while</td></tr><tr><td>Connected (green GitHub icon)</td><td>Authentication succeeded</td><td>Nothing to do</td></tr><tr><td>Auth failed</td><td>The GitHub Admin wasn't able to complete authentication</td><td>Click Share auth link again and confirm you're sending it to someone with admin access on that specific repository</td></tr></tbody></table>

A repository shows **Auth failed** for one of three reasons:

* The user doesn't have admin access to that repository
* The authorization request was canceled or declined
* The wrong GitHub account was used, for example a personal account instead of the correct one

***

## Authentication and new repositories

Authentication is tied to the person who completes it, not to the repository itself.

* Going forward, if that same person has admin rights on a new repository you add to Reo, it connects automatically, no separate authentication needed.
* This includes a repository you remove and add back later.

**This doesn't apply retroactively.**

* If you already have several owned repositories in Reo, authenticating one of them doesn't authenticate the others.
* Each existing repository still needs to [go through the steps above individually](#how-to-authenticate-a-repository), even if the same person has admin rights on all of them.

{% hint style="info" %}
**Note:** A repository can have more than one GitHub Admin. Any one of them can complete authentication for that repository.
{% endhint %}

***

### What to expect if Reo's team helps you authenticate

If your Customer Success contact is helping you get your repositories authenticated, here's what that looks like:

* They'll ask you who has admin access on GitHub for each of your owned repositories.
* They'll send an authentication link to that person, either directly by email or by sharing it with you to pass along.
* The person receiving the link doesn't need a Reo account. They just need admin access to the repository on GitHub.
* Each repository is authenticated separately. If you have several repositories, expect a link for each one that isn't already covered by someone who's authenticated before.

***

### Adding a new owned repository

**Step 1:** Go to **Integrations → GitHub → Owned GitHub Repositories** and click **Add new**.

**Step 2:** Enter the repository URL and click **Save**.

**Step 3:** Reo checks whether someone who's already authenticated has admin rights on this repository.

* If yes, the repository connects automatically.
* If not, follow the steps in ["How to authenticate a repository" above](#how-to-authenticate-a-repository).

***


# Tech Hiring


# Documentation

Reo.Dev can track developers who access your documentation to analyze their interactions and transform this data into actionable insights for your sales funnel. All you have to do is simply add the JavaScript code generated by Reo.Dev on relevant sections of your documentation.

1. Start by clicking on **Integrations**&#x20;

<figure><img src="/files/bC1LTHQeThxITa3mT2VP" alt=""><figcaption></figcaption></figure>

2. Click on **'Configure'** in the Documentation card

<figure><img src="/files/xBMPFh9yhYI8rq1pQrkq" alt=""><figcaption></figcaption></figure>

#### **Step 1: Configure Documentation URL**

1. **Add the documentation URLs** you want to track. You can choose to add multiple base and sub-domain URLs by clicking on ‘Add New’.

<figure><img src="/files/cWvylAGd3ygCA7uF50M2" alt=""><figcaption></figcaption></figure>

2. **Add a Page Name** for each base URL

<figure><img src="/files/pKBG0hjI6pp4B4aerS7a" alt=""><figcaption></figcaption></figure>

Once added, you can create a Segment to view accounts/developers/buyers interacting with each documentation site. The page name will appear under the ‘**Key Docs’** filter while creating segments.

#### Step 2: Add Key Pages

This is an optional step. But we highly recommended adding your high-intent pages e.g, Troubleshooting, API Reference, Installation Guides as key pages so you can track activities on these pages separately.

1. **Add URLs of specific doc pages** you want to track activities on

<figure><img src="/files/WhAhhkuwe1JuSlcnEbmC" alt=""><figcaption></figcaption></figure>

2. **Add a Page Name** for each URL

<figure><img src="/files/T3q86bhAylW134Klp1CX" alt=""><figcaption></figcaption></figure>

**Tracking dynamic URLs with wildcards**

If your URLs include dynamic segments — like a project ID or org name — you can track them as a single Key Page by using `*` as a wildcard in place of the dynamic part.&#x20;

For example, to track the journeys page across every project - you can set up the URL as `/project/*/journeys`

Reo will capture all URLs matching this pattern, no matter what sits in place of the `*`. To set this up:&#x20;

1. Add the Key Page URL with `*` as the wildcard for the dynamic part
2. Hit Save — Reo will start tracking all URLs that match the pattern

**Note:**&#x20;

* Wildcards mid-URL (like [`abc.com/id/*/orgpage`](http://abc.com/id/*/orgpage)) are supported
* A trailing wildcard like `abc.com/page/*` isn't needed. Reo automatically captures everything after the last `/`, so it's redundant.&#x20;

You can create a Segment to track accounts/developers/buyers who visited those Pages. The page name will appear under **Key Docs Pages filter** while creating segments.

#### **Step 3: Install Tracking Pixel on your Documentation**

Copy the Javascript code snippet and paste it in the \<header> of your site. Replace "xxxxxxxxxx" with the Client ID.

{% code overflow="wrap" %}

```javascript
<!-- Start of Reo Javascript -->
<script type="text/javascript">
  !function(){var e,t,n;e="8e5bea4a6b94770",t=function(){Reo.init({clientID:"xxxxxxxxxx"})},(n=document.createElement("script")).src="https://static.reo.dev/"+e+"/reo.js",n.defer=!0,n.onload=t,document.head.appendChild(n)}();
</script>
<!-- End of Reo Javascript -->
```

{% endcode %}

<figure><img src="/files/lVQA738ThVarCQkJcq28" alt=""><figcaption></figcaption></figure>

Here are few more ways you can install JavaScript on documentation pages:

1. Using Google Tag Manager. [Here’s the setup guide.](https://docs.reo.dev/integrations/tracking-beacon/install-javascript-for-website-documentation-through-google-tag-manager#for-documentation-tracking-via-gtm)
2. Using NPM Package. [Here’s the setup guide.](https://docs.reo.dev/integrations/tracking-beacon/install-javascript-for-website-documentation-through-google-tag-manager#for-documentation-tracking-via-gtm)

For 3rd party documentation software:

* [Gitbook](https://docs.reo.dev/integrations/developer-docs/gitbook)
* [Mintlify](https://docs.reo.dev/integrations/developer-docs/mintlify)
* [Docusaurus](https://docs.reo.dev/integrations/developer-docs/docusaurus)

#### **Error Scenarios**

* **Script initiation**

  Script initiation has been modified to rely on code initiation only on successful callback post download from CDN. So it will only initiate if successfully downloaded. In case the download fails, the javascript won’t get enabled but this eliminates the likelihood of an error scenario of page breaking.<br>
* **API failure on token delete**

  On deletion of **all** Reo tokens, the most recent event tracking data will likely fail, but subsequent API calls will work fine.<br>
* **Any inadvertent code failure on JavaScript**

  This should not be an issue since the code is wrapped in a try-catch block, the console may throw errors, which won’t be visible even on the console since logger would be disabled on the script.

**Cookie Management and Compliance**

To learn more about Reo.Dev's cookie usage, categorization, and best practices for implementation, refer to this [guide.](https://docs.reo.dev/integrations/tracking-beacon/reo.dev-javascript-cookies-and-consent-guide)

#### **Content Security Policy (CSP) Considerations**

If your website uses a strict Content Security Policy (CSP), you may need to update it to allow our script to load and execute correctly. Please ensure the following directives are updated to include our domains:

**Required CSP Directives**\
\
**Required CSP Directives**\
\
Copy

```
script-srchttps://static.reo.dev;connect-srchttps://api.reo.dev;
```


# Cloud Product

You can track developers who access your cloud product to analyze their interactions on the product.

1. Start by clicking on **'Integrations'**

<figure><img src="/files/KksAjsBM9lWGXDi0OEh9" alt=""><figcaption></figcaption></figure>

2. Then, click on **'Configure'** in the Cloud Product card

<figure><img src="/files/bCeStDwVVSWxEf9mVDVr" alt=""><figcaption></figcaption></figure>

#### **Step 1: Configure Cloud Product URL**

1. **Add the Cloud Product URLs** you want to track in the Cloud Product URL field. You can choose to add multiple cloud instances of your product.

<figure><img src="/files/6DROO3K37Ox1anyxc5C3" alt=""><figcaption></figcaption></figure>

2. **Add a Page Name** for every domain under the Page Name field

<figure><img src="/files/Yo5Okea9Ru7BAdotWBjn" alt=""><figcaption></figcaption></figure>

Once added, you can create a Segment to view accounts/developers/buyers interacting with your product.The page name will appear under the ‘**Key Product Pages’** filter while creating segments.

#### **Step 2: Add Key Pages**

This is an optional step. But we highly recommend this. Some pages within your product signal **high user intent**—indicating that users are actively engaging with or setting up your tool. Tracking these **Key Pages** helps you identify accounts showing high intent.

For example:

* **Dashboard settings or integrations** – Users configuring integrations might indicate onboarding progress.
* **Account & Subscription pages** – Frequent visits to billing or account management suggest decision-making.
* **API Access or Authentication pages** – Developers generating API tokens signal deeper product adoption.

To add the key pages:

1. **Add URLs of specific pages/sections** in your product you want to track activities on.

<figure><img src="/files/A3Kjxlp8IrcJNEu0uMZh" alt=""><figcaption></figcaption></figure>

2. **Add a Page Name** for each URL

<figure><img src="/files/akiTlau4GpiSlVOW9CXr" alt=""><figcaption></figcaption></figure>

**Tracking dynamic URLs with wildcards**

If your URLs include dynamic segments — like a project ID or org name — you can track them as a single Key Page by using `*` as a wildcard in place of the dynamic part.&#x20;

For example, to track the journeys page across every project - you can set up the URL as `/project/*/journeys`

Reo will capture all URLs matching this pattern, no matter what sits in place of the `*`. To set this up:&#x20;

1. Add the Key Page URL with `*` as the wildcard for the dynamic part
2. Hit Save — Reo will start tracking all URLs that match the pattern

**Note:**&#x20;

* Wildcards mid-URL (like [`abc.com/id/*/orgpage`](http://abc.com/id/*/orgpage)) are supported
* A trailing wildcard like `abc.com/page/*` isn't needed. Reo automatically captures everything after the last `/`, so it's redundant.&#x20;

You can create a Segment to see accounts/developers/buyers interacting with specific Key Pages. The page name will appear under ‘**Key Product Pages’** filter \*\*\*\*while creating segments.

#### Step 3: Install Tracking Pixel

Copy the tracking code snippet directly from Reo's UI and paste it in the \<header> of your site. Replace "XXXXXXXXXXX" with the client ID.&#x20;

{% code overflow="wrap" %}

```jsx
<!-- Start of Reo Javascript -->
<script type="text/javascript">
  !function(){var e,t,n;e="c07f38f6d83bb7e",t=function(){Reo.init({clientID:"XXXXXXXXXXX"})},(n=document.createElement("script")).src="<https://static.reo.dev/"+e+"/reo.js>",n.defer=!0,n.onload=t,document.head.appendChild(n)}();
</script>
<!-- End of Reo Javascript -->
```

{% endcode %}

Note: Here are a few more ways you can install Javascript on your cloud instance:

1. Using Google Tag Manager. [Here’s the setup guide.](https://docs.reo.dev/integrations/tracking-beacon/install-javascript-for-website-documentation-through-google-tag-manager#for-documentation-tracking-via-gtm)
2. Using NPM Package. [Here’s the setup guide.](https://docs.reo.dev/integrations/tracking-beacon/install-javascript-for-website-documentation-through-google-tag-manager#for-documentation-tracking-via-gtm)

#### **Step 4: Invoke Sign-in Event**

This is an essential step to track product logins.

Sign-in flows can be in-house, using a 3rd party or IDP based. Hence we have exposed an event which needs to be invoked in the call-back of your successful sign-in with appropriate payload.

The **payload for sign-in needs to contain two mandatory attributes&#x20;*****username*****&#x20;and&#x20;*****type*****.** Invoke **`identify` method to send sign-in details** which basically tells Reo who the user is and that they have logged in.

```jsx
//Prepare the payload post successful login.
const identity = {
  "username": "johndoe@microsoft.com",
  "type": "email", // primary identifier to be email
  "other_identities": [
    {
      "username": "johndoe83",
      "type": "github" // other identifiers can be github, linkedin
    }
  ],
  "firstname": "John",
  "lastname": "Doe",
  "company": "microsoft.com" // company domain
}
Reo && Reo.identify(identity);
```

**In case of use with NPM, we need to resolve the promise before we can invoke `identify` method on it. Make sure to initialise the snippet using `Reo.init` before using `Reo.identify`**

{% hint style="info" %}
Note:

* In terms of preference, we recommend using Email, Github, LinkedIn *(in that order)* handle as `username` and corresponding `type:'email'` ,`type:'github'` or `type: 'linkedin'` as the primary identifier due to declining enrichment rates. If we receive multiple identifiers from IDP, we can accommodate other identifiers in the `other_identities` field.
* We need to invoke `identify` method on every successful login
  {% endhint %}

<figure><img src="/files/WY5Ddzy7Qftuo7xujzqx" alt=""><figcaption></figcaption></figure>

Once Done, click on Save.

Once you’ve set up the entire integration, click on Check status to see if all the URLs are connected.

<figure><img src="/files/n24aZQ2uEvuaABL9MUlJ" alt=""><figcaption></figcaption></figure>

#### **Error Scenarios**

* **Script initiation**

  Script initiation has been modified to rely on code initiation only on successful callback post download from CDN. So it will only initiate if successfully downloaded. In case the download fails, the javascript won’t get enabled but this eliminates the likelihood of an error scenario of page breaking
* **API failure on token delete**

  On deletion of **all** Reo tokens, the most recent event tracking data will likely fail, but subsequent API calls will work fine
* **Any inadvertent code failure on JavaScript**

  This should not be an issue since the code is wrapped in a try-catch block, the console may throw errors, which won’t be visible even on the console since logger would be disabled on the script

**Cookie Management and Compliance**

To learn more about Reo.Dev's cookie usage, categorization, and best practices for implementation, refer to this [guide.](https://docs.reo.dev/integrations/tracking-beacon/reo.dev-javascript-cookies-and-consent-guide)

#### **Important to Note:**&#x20;

By default, we track copy commands in your product environment. This is needed so that you can learn which of your logged in prospects (e.g. free users/ trial users) are showing high intent activities such as copy pasting code blocks or executing CLIs, which are a great proxy to learn their evaluation maturity and intent. We take multiple measures to ensure no sensitive information is captured or stored:

* A locally deployed AI model automatically identifies and skips sensitive information such as passwords, API keys, and card numbers, ensuring we skip as much of sensitive information as possible.
* Additionally, since the AI model can make mistakes, all captured data, including emails and copied text, is encrypted in our database. Decryption is handled via a tenant hash stored in a remote cloud vault, accessible only where applicableAll captured data, including emails and copied text, is encrypted in our database. Decryption is handled via a tenant hash stored in a remote cloud vault, accessible only where applicable.

To disable tracking for copy commands - use the `dnt` track flag. Copy the tracking code snippet below:

{% code overflow="wrap" %}

```jsx
<!-- Start of Reo Javascript --> 
<script type="text/javascript"> 
!function(){var e,t,n;e="customer_client_id",t=function(){Reo.init({clientID:"customer_client_id", dnt: ["copy"]})),(n=document.createElement("script")).src="<https://static.reo.dev/"+e+"/reo.js>",n.defer=!0,n.onload=t,document.head.appendChild(n)}(); 
</script> 
<!-- End of Reo Javascript -→
```

{% endcode %}

#### **Content Security Policy (CSP) Considerations**

If your website uses a strict Content Security Policy (CSP), you may need to update it to allow our script to load and execute correctly. Please ensure the following directives are updated to include our domains:

**Required CSP Directives**

Copy

```
script-srchttps://static.reo.dev;connect-srchttps://api.reo.dev;
```

### FAQs <a href="#faqs" id="faqs"></a>

<details>

<summary>Does the JavaScript code introduce any vulnerabilities or risks to the website?</summary>

The JavaScript code has been tested thoroughly to ensure that it does not introduce any vulnerabilities or risks to the website. Data sent by the JavaScript code is encrypted using the HTTPS protocol to ensure secure transmission and prevent unauthorized access.

</details>

<details>

<summary>Does the JavaScript code use external dependencies or third-party libraries?</summary>

The JavaScript code uses secure third-party libraries that have been thoroughly checked for vulnerabilities and risks.

</details>

<details>

<summary>How does JavaScript handle user privacy? Is there a potential risk of collecting personally identifiable information (PII) without proper consent?</summary>

It is designed to collect anonymous data such as browser information, page views, copy and click events without collecting any non-consented PII.

</details>

<details>

<summary>What impact will including this JavaScript have on the page load times of my app?</summary>

The code has been optimized to minimize any negative impact on page load time and performance. This code uses asynchronous loading technology so it can load independently without blocking the rendering of the screen content.

</details>

<details>

<summary>Has the JavaScript been tested on different browsers and devices to ensure cross-platform compatibility and consistent behavior?</summary>

The JavaScript code is thoroughly tested on multiple browsers (Chrome, Firefox, Safari, Edge, Brave) and devices (desktop, mobile) to ensure compatibility and consistent behavior.

</details>

<details>

<summary>Will the inclusion of this JavaScript affect the overall user experience of the product, for example, slow down UI interactions or cause unexpected behavior?</summary>

It doesn't affect the overall user experience. It will not slow down, or introduce any intrusive elements that have an impact on the experience.

</details>

<details>

<summary>Are there any fail-safe mechanisms in place to prevent scripts from disrupting critical functionality in the event of an error?</summary>

We have implemented fail-safe mechanisms in the javascript to prevent scripts from interrupting the website's critical functionality in the event of an error, thus ensuring a smooth user experience.

</details>

<details>

<summary>Will the JavaScript code continue to perform optimally as the app traffic and user base increase over time?</summary>

The code is optimized for scalability. The JavaScript code is designed to scale as your online traffic and user base grow. It will continue to work best even as traffic to your site increases. There are no significant limitations or performance bottlenecks associated with the tracking mechanism.

</details>


# Website

Reo.Dev can track developers who visit your website to analyze their interactions and transform this data into actionable insights for your sales funnel.

#### **Step 1: Configure Website URL**

1. **Add the website base URLs** you want to track. You can choose to add multiple base and sub-domain URLs by clicking on ‘Add New’.

The **Base URL** is the main domain under which all your tracked pages exist. For example:

* If your website is `https://www.example.com`, set the **Base URL** as `example.com`.
* If you want to track only a subdomain like [docs.example.com](https://docs.example.com/), then set `docs.example.com` as the Base URL.

<figure><img src="/files/ej7TbZcIYMIuFV6iz5e7" alt=""><figcaption></figcaption></figure>

2. **Add a Page Name** for each base URL

<figure><img src="/files/pZGsytipG5sSnpyWJyhW" alt=""><figcaption></figcaption></figure>

Once added, you can create a Segment to view accounts/developers/buyers interacting with website. The page name will appear under the ‘**Key Website Pages’** filter while creating segments.

#### Step 2: Add Key Pages

This is an optional step, but adding your high-intent website pages helps you track activities on specific pages of your website separately.

For example:

* **Case Study Pages** – Visitors researching customer success stories are likely evaluating your solution.
* **Pricing Page** – A strong indicator of purchase intent.
* **Integration or Solution Pages** – Suggests users are exploring how your tool fits into their workflow.
* **Landing Pages with UTM parameters** – Helps track the effectiveness of specific marketing campaigns.

To add key pages:

1. **Add URLs of specific website pages** you want to track activities on

<figure><img src="/files/HkUkMnigUkJgx996fFdb" alt=""><figcaption></figcaption></figure>

2. **Add a Page Name** for each URL

<figure><img src="/files/vSqFy7Cs7rCPm1dpCaKi" alt=""><figcaption></figcaption></figure>

**Tracking dynamic URLs with wildcards**

If your URLs include dynamic segments — like a project ID or org name — you can track them as a single Key Page by using `*` as a wildcard in place of the dynamic part.&#x20;

For example, to track the journeys page across every project - you can set up the URL as `/project/*/journeys`

Reo will capture all URLs matching this pattern, no matter what sits in place of the `*`. To set this up:&#x20;

1. Add the Key Page URL with `*` as the wildcard for the dynamic part
2. Hit Save — Reo will start tracking all URLs that match the pattern

**Note:**&#x20;

* Wildcards mid-URL (like [`abc.com/id/*/orgpage`](http://abc.com/id/*/orgpage)) are supported
* A trailing wildcard like `abc.com/page/*` isn't needed. Reo automatically captures everything after the last `/`, so it's redundant.&#x20;

You can create a Segment to see accounts/developers/buyers interacting with specific Key Pages. The page name will appear under **Key Website Pages filter** while creating segments.

#### **Step 3: Install Tracking Pixel**

Copy the below tracking code snippet and paste it in the \<header> of your site. Replace 'XXXXXXXXXX' with the Client ID.&#x20;

{% code overflow="wrap" %}

```jsx
<!-- Start of Reo Javascript -->
<script type="text/javascript">
  !function(){var e,t,n;e="c07f38f6d83bb7e",t=function(){Reo.init({clientID:"XXXXXXXXXX"})},(n=document.createElement("script")).src="<https://static.reo.dev/"+e+"/reo.js>",n.defer=!0,n.onload=t,document.head.appendChild(n)}();
</script>
<!-- End of Reo Javascript -->
```

{% endcode %}

Here are few more ways you can install JavaScript on your website pages:

1. Using Google Tag Manager. [Here’s the setup guide.](https://docs.reo.dev/integrations/tracking-beacon/install-javascript-for-website-documentation-through-google-tag-manager#for-documentation-tracking-via-gtm)
2. Using NPM Package. [Here’s the setup guide.](https://docs.reo.dev/integrations/tracking-beacon/install-javascript-for-website-documentation-through-google-tag-manager#for-documentation-tracking-via-gtm)

#### **Content Security Policy (CSP) Considerations**

If your website uses a strict Content Security Policy (CSP), you may need to update it to allow our script to load and execute correctly. Please ensure the following directives are updated to include our domains:

**Required CSP Directives**

Copy

```
script-srchttps://static.reo.dev;connect-srchttps://api.reo.dev;
```

### FAQs <a href="#faqs" id="faqs"></a>

<details>

<summary>Does the JavaScript code introduce any vulnerabilities or risks to the website?</summary>

The JavaScript code has been tested thoroughly to ensure that it does not introduce any vulnerabilities or risks to the website. Data sent by the JavaScript code is encrypted using the HTTPS protocol to ensure secure transmission and prevent unauthorized access.

</details>

<details>

<summary>Does the JavaScript code use external dependencies or third-party libraries?</summary>

The JavaScript code uses secure third-party libraries that have been thoroughly checked for vulnerabilities and risks.

</details>

<details>

<summary>How does JavaScript handle user privacy? Is there a potential risk of collecting personally identifiable information (PII) without proper consent?</summary>

It is designed to collect anonymous data such as browser information, page views, copy and click events without collecting any non-consented PII.

</details>

<details>

<summary>What impact will including this JavaScript have on the page load times of my app?</summary>

The code has been optimized to minimize any negative impact on page load time and performance. This code uses asynchronous loading technology so it can load independently without blocking the rendering of the screen content.

</details>

<details>

<summary>Has the JavaScript been tested on different browsers and devices to ensure cross-platform compatibility and consistent behavior?</summary>

The JavaScript code is thoroughly tested on multiple browsers (Chrome, Firefox, Safari, Edge, Brave) and devices (desktop, mobile) to ensure compatibility and consistent behavior.

</details>

<details>

<summary>Will the inclusion of this JavaScript affect the overall user experience of the product, for example, slow down UI interactions or cause unexpected behavior?</summary>

It doesn't affect the overall user experience. It will not slow down, or introduce any intrusive elements that have an impact on the experience.

</details>

<details>

<summary>Are there any fail-safe mechanisms in place to prevent scripts from disrupting critical functionality in the event of an error?</summary>

We have implemented fail-safe mechanisms in the javascript to prevent scripts from interrupting the website's critical functionality in the event of an error, thus ensuring a smooth user experience.

</details>

<details>

<summary>Will the JavaScript code continue to perform optimally as the app traffic and user base increase over time?</summary>

The code is optimized for scalability. The JavaScript code is designed to scale as your online traffic and user base grow. It will continue to work best even as traffic to your site increases. There are no significant limitations or performance bottlenecks associated with the tracking mechanism.

</details>


# Forms

Reo.Dev’s JavaScript beacon works consistently across all your assets — website, documentation, and product. If the JS is already installed on any of these properties, **you don’t need to re-install it** to track form activity.

However, if you're using separate platforms for landing pages or lead capture (e.g., HubSpot, Unbounce), you’ll need to manually add the JS snippet to those assets to track form opt-ins effectively.

{% hint style="info" %}
Form tracking is currently supported for:

* HubSpot forms
  * Hubspot form
  * Non-HubSpot forms utilizing the HubSpot API
* Ninja Forms
* Standalone form with semantic HTML \<form> tag and \<input type="submit" />

If you’re using a different form library, please reach out to your account manager.
{% endhint %}

#### Step 1: Add Key Forms

1. **Add URLs of key sign-up forms** you want to track

<figure><img src="/files/Y9pBRz1sKUR4BEv4T12p" alt=""><figcaption></figcaption></figure>

2. **Add the custom Form Name** for each form

Once you add the Form Name, you can create a Segment to view accounts/developers/buyers interacting with specific form pages. The page name will appear under ‘**Key Forms’ filter** while creating segments.

{% hint style="info" %}
Note: This filter currently identifies **all visitors** to the page, not just form submitters. We’re working on enhancing this feature so you’ll soon be able to filter users who **specifically filled out** the form on a configured page.
{% endhint %}

#### **Step 2: Install Tracking Pixel**

Copy the tracking code snippet and paste it in the \<header> of your site

```jsx
<!-- Start of Reo Javascript -->
<script type="text/javascript">
  !function(){var e,t,n;e="c07f38f6d83bb7e",t=function(){Reo.init({clientID:"c07f38f6d83bb7e"})},(n=document.createElement("script")).src="<https://static.reo.dev/"+e+"/reo.js>",n.defer=!0,n.onload=t,document.head.appendChild(n)}();
</script>
<!-- End of Reo Javascript -->
```

Here are few more ways you can install JavaScript on form pages:

1. Using Google Tag Manager. [Here’s the setup guide.](https://docs.reo.dev/integrations/tracking-beacon/install-javascript-for-website-documentation-through-google-tag-manager#for-documentation-tracking-via-gtm)
2. Using NPM Package. [Here’s the setup guide.](https://docs.reo.dev/integrations/tracking-beacon/install-javascript-for-website-documentation-through-google-tag-manager#for-documentation-tracking-via-gtm)

Finally, click on **Save** once you’ve added the form pages.

<figure><img src="/files/JQFiBLjDj3tpDlNVHQD7" alt=""><figcaption></figcaption></figure>

#### **Error Scenarios**

* **Script initiation**

  Script initiation has been modified to rely on code initiation only on successful callback post download from CDN. So it will only initiate if successfully downloaded. In case the download fails, the javascript won’t get enabled but this eliminates the likelihood of an error scenario of page breaking
* **API failure on token delete**

  On deletion of **all** Reo tokens, the most recent event tracking data will likely fail, but subsequent API calls will work fine
* **Any inadvertent code failure on JavaScript**

  This should not be an issue since the code is wrapped in a try-catch block, the console may throw errors, which won’t be visible even on the console since logger would be disabled on the script

**Cookie Management and Compliance**

To learn more about Reo.Dev's cookie usage, categorization, and best practices for implementation, refer to this [guide.](https://docs.reo.dev/integrations/tracking-beacon/reo.dev-javascript-cookies-and-consent-guide)

#### **Content Security Policy (CSP) Considerations**

If your website uses a strict Content Security Policy (CSP), you may need to update it to allow our script to load and execute correctly. Please ensure the following directives are updated to include our domains:

**Required CSP Directives**

```
script-src <https://static.reo.dev>;
connect-src <https://api.reo.dev>;
```


# Code Interactions

When key commands are used to install a package manager or execute software, they provide a strong signal of developer intent, indicating active engagement and interest.

Reo.Dev enables you to track these specific command interactions, giving you valuable insights into which accounts are actively using and engaging with your product.

To configure tracking for code commands:

1. Go to **Integrations** under Settings

<figure><img src="/files/8Uj78KLcmCoQ4pyyfl2i" alt=""><figcaption></figcaption></figure>

2. Click on **Configure** within the Code Interactions Card

<figure><img src="/files/Njvvga4BigfgNWsaQDo9" alt=""><figcaption></figcaption></figure>

3. **Add the Key Commands** you want to track.

Note:

* Before adding key commands, please ensure your documentation is set-up. Here’s a quick guide.
* Copy the complete command from the code block including the comments, if any

<figure><img src="/files/7uRPTWFdDJUGOsXpUQb3" alt=""><figcaption></figcaption></figure>

4. Add a **Command label** for every code command

<figure><img src="/files/ImIhZlUC4FpnIkB1TMTn" alt=""><figcaption></figcaption></figure>

Once added, you can create a Segment to track accounts/developers/buyers who executed specific commands. The command labels will appear under the ‘**Key Commands’** filter while creating segments.

5. Once done, click on **‘Save’** to start tracking code commands.

<figure><img src="/files/XFDtqjdCZxGhyKIkm6EI" alt=""><figcaption></figcaption></figure>

#### **Content Security Policy (CSP) Considerations**

If your website uses a strict Content Security Policy (CSP), you may need to update it to allow our script to load and execute correctly. Please ensure the following directives are updated to include our domains:

**Required CSP Directives**

Copy

```
script-srchttps://static.reo.dev;connect-srchttps://api.reo.dev;
```


# Local Product

With Reo.Dev you can track developer activity on all your locally hosted products. Here's a step-by-step guide on how to set it up:

***

1. Go to **Integrations** under Settings

<figure><img src="/files/58pZmTZcmOLzGNlajCh9" alt=""><figcaption></figcaption></figure>

2. Click on **Configure** in the Local Product card

<figure><img src="/files/UwnJ6jZ5UnbJSESK1OKo" alt=""><figcaption></figcaption></figure>

#### **Step 1: Enable Local Product Tracking**

Click on the ‘Track locally hosted products and custom URLs’ checkbox to enable tracking on your locally hosted products.

<figure><img src="/files/uJ3zWJqLjpY1A5WQsBLp" alt=""><figcaption></figcaption></figure>

#### **Step 2: Install Tracking Pixel**

Copy the tracking code snippet directly from Reo's UI and paste it in the \<header> of your site

```jsx
<!-- Start of Reo Javascript -->
<script type="text/javascript">
  !function(){var e,t,n;e="c07f38f6d83bb7e",t=function(){Reo.init({clientID:"c07f38f6d83bb7e", source: "internal"})},(n=document.createElement("script")).src="<https://static.reo.dev/"+e+"/reo.js>",n.defer=!0,n.onload=t,document.head.appendChild(n)}();
</script>
<!-- End of Reo Javascript -->
```

<figure><img src="/files/ez68jMyCU5RVcX41on0j" alt=""><figcaption></figcaption></figure>

Here are few more ways you can install JavaScript on documentation pages:

1. Using Google Tag Manager. [Here’s the setup guide.](https://docs.reo.dev/integrations/tracking-beacon/install-javascript-for-website-documentation-through-google-tag-manager#for-documentation-tracking-via-gtm)
2. Using NPM Package. [Here’s the setup guide.](https://docs.reo.dev/integrations/tracking-beacon/install-javascript-for-website-documentation-through-google-tag-manager#for-documentation-tracking-via-gtm)

Once done, click on **‘Save’** to start tracking developer activity

<figure><img src="/files/qGBgTCT0ZCqUbNLP3rIy" alt=""><figcaption></figcaption></figure>

Once you've added the JS, you can **create a Segment** to see accounts/developers/buyers interacting with your local product. Use filter '**Local Product'** from the Segment filter list.

<figure><img src="/files/uPLEUN8fPCfEXP3zZbce" alt=""><figcaption></figcaption></figure>

Then, select the specific activities you want to track from the Segment Criteria attribute

<figure><img src="/files/Tn0ukxH1viE1QjGc0Rp9" alt=""><figcaption></figcaption></figure>

For any account - you can filter the activity timeline based on the local product filter and see which developers have interacted with your local product, how often they've engaged, and gain valuable insights to tailor your messaging effectively.

<figure><img src="/files/HniXZmgUqRgqthjyBsbV" alt=""><figcaption></figcaption></figure>

{% hint style="info" %}
**Note:** Key Pages aren’t supported on local hosted products.
{% endhint %}

#### **Content Security Policy (CSP) Considerations**

If your website uses a strict Content Security Policy (CSP), you may need to update it to allow our script to load and execute correctly. Please ensure the following directives are updated to include our domains:<br>

**Required CSP Directives**

```
script-srchttps://static.reo.dev;connect-srchttps://api.reo.dev;
```

### FAQs <a href="#faqs" id="faqs"></a>

<details>

<summary>Does the JavaScript code introduce any vulnerabilities or risks to the website?</summary>

The JavaScript code has been tested thoroughly to ensure that it does not introduce any vulnerabilities or risks to the website. Data sent by the JavaScript code is encrypted using the HTTPS protocol to ensure secure transmission and prevent unauthorized access.

</details>

<details>

<summary>Does the JavaScript code use external dependencies or third-party libraries?</summary>

The JavaScript code uses secure third-party libraries that have been thoroughly checked for vulnerabilities and risks.

</details>

<details>

<summary>How does JavaScript handle user privacy? Is there a potential risk of collecting personally identifiable information (PII) without proper consent?</summary>

It is designed to collect anonymous data such as browser information, page views, copy and click events without collecting any non-consented PII.

</details>

<details>

<summary>What impact will including this JavaScript have on the page load times of my app?</summary>

The code has been optimized to minimize any negative impact on page load time and performance. This code uses asynchronous loading technology so it can load independently without blocking the rendering of the screen content.

</details>

<details>

<summary>Has the JavaScript been tested on different browsers and devices to ensure cross-platform compatibility and consistent behavior?</summary>

The JavaScript code is thoroughly tested on multiple browsers (Chrome, Firefox, Safari, Edge, Brave) and devices (desktop, mobile) to ensure compatibility and consistent behavior.

</details>

<details>

<summary>Will the inclusion of this JavaScript affect the overall user experience of the product, for example, slow down UI interactions or cause unexpected behavior?</summary>

It doesn't affect the overall user experience. It will not slow down, or introduce any intrusive elements that have an impact on the experience.

</details>

<details>

<summary>Are there any fail-safe mechanisms in place to prevent scripts from disrupting critical functionality in the event of an error?</summary>

We have implemented fail-safe mechanisms in the javascript to prevent scripts from interrupting the website's critical functionality in the event of an error, thus ensuring a smooth user experience.

</details>

<details>

<summary>Will the JavaScript code continue to perform optimally as the app traffic and user base increase over time?</summary>

The code is optimized for scalability. The JavaScript code is designed to scale as your online traffic and user base grow. It will continue to work best even as traffic to your site increases. There are no significant limitations or performance bottlenecks associated with the tracking mechanism.

</details>


# Docker

With Reo.dev, you can now identify and monitor downloads of your open-source repositories through Docker and Helm. This short guide will walk you through how this works and how you can set it up.

#### How open-source Docker Images and Kubernetes Charts are downloaded <a href="#how-open-source-docker-images-and-kubernetes-charts-are-downloaded" id="how-open-source-docker-images-and-kubernetes-charts-are-downloaded"></a>

Developers who want to install your OSS package through a docker image will typically execute a command like this:

```
docker pull YourSoftware/version1
```

When this command is executed, the developer's system will download the docker image of your software hosted on Docker Hub.

Since Docker Hub is maintained by Docker, you will normally get only limited, aggregated analytics of pulls of your Docker image → such as aggregate counts of image pulls, origin countries of pull requests, aggregation of cloud services initiating a pull and domain classification (business, ISP, education) etc.

You will not get download-specific information, or the ability to de-anonymize docker pulls at user or organization level.

The use of Helm commands works in a similar manner → with the commands pulling Kubernetes charts from registries, and you as a publisher only getting aggregate statistics on download and usage.

This level of detail isn’t useful to GTM motions as it does not identify the actual company or developer initiating the pull.

#### Reo.dev Docker / Helm Redirection <a href="#reo.dev-docker-helm-redirection" id="reo.dev-docker-helm-redirection"></a>

​[Reo.dev](http://reo.dev/) uses a redirection system for docker and Helm commands helps you achieve this enhanced visibility. Here's how:Reo creates a redirection layer that sits in front of your Open Source Software packages - whether they're on Docker, GitHub, GitLab or anywhere else.\ <br>

<figure><img src="/files/uIEayh57pFrPNQLFlWgK" alt=""><figcaption></figcaption></figure>

Users then replace the default pull command:\ <br>

```
docker pull YourSoftware/version1
//OR
helm install yoursoftware-chart oci://registry-1.docker.io/charts/yoursoftware-chart
```

with a domain-specific command:

```
docker pull yourcompany.com/YourSoftware/version1
//OR
helm install yoursoftware-chart oci://yourcompany.com/charts/yoursoftware-chart
```

\
💡 **Note**: “[yourcompany.com](http://yourcompany.com)” serves as a proxy for actual package registry and is not a host of the package.

Your docker images will continue to be hosted at Docker Hub / Github or any other repository that you originally configured. Savvy users can always directly pull from the original package hub without anything breaking.

When a docker pull / helm install command is executed with the new domain-specific command, the request is redirected (307 redirect) on to the original registry for package download.

[Reo.dev](http://Reo.dev) can map multiple packages to multiple registries. Each package will need a unique URL on “[yourcompany.com](http://yourcompany.com)” which maps to the correct package repository.

Example:<br>

```
yoursoftware/version1 -> yourcompany.com/yoursoftware/version1
yoursoftware/version2 -> yourcompany.com/yoursoftware/version2
yoursoftware/betasoftware/version08 -> yourcompany.com/yoursoftware/betasoftware/version08
```

Since this redirection service and the URL ([yourcompany.com/YourSoftware](http://yourcompany.com/YourSoftware)) is maintained by Reo.dev, you will now get far richer insights on the user downloading your software, just as if you were hosting it yourself.

You will get:

| Information                                       | Description                                                                                                         |
| ------------------------------------------------- | ------------------------------------------------------------------------------------------------------------------- |
| IP Level De-anonymization                         | De-anonymized developers who have downloaded your Docker image / Helm chart derived from their IP address           |
| Company-level aggregation of Repository downloads | We aggregate Docker Pulls and Helm installs across an identified organization to create picture of adoption levels. |

#### Final Flow Summary <a href="#final-flow-summary" id="final-flow-summary"></a>

| Step | Description                                          |
| ---- | ---------------------------------------------------- |
| 1    | User runs docker/helm with yourcompany.com           |
| 2    | Request hits Docker/Helm endpoint of yourcompany.com |
| 3    | Request is proxied to reo.dev                        |
| 4    | reo.dev issues a 307 redirect to actual registry     |
| 5    | Docker/Helm CLI downloads image/chart from registry  |

The redirection system ensures that while you gain enhanced visibility into who is downloading your packages, the actual downloads continue to happen directly from the original registries, maintaining performance and reliability.

#### Configuration Setup <a href="#configuration-setup" id="configuration-setup"></a>

Once you configure the Reo redirection system, your users will have the option to use the new URL to pull docker images. Update your documentation and Gtihub release notes to reflect the new URL.

> 💡 **Note**: Your docker images will continue to be hosted at Docker Hub / Github or any other repository that you originally configured. Savvy users can always directly pull from the original package hub without anything breaking.

#### Certificate Setup for HTTPS <a href="#certificate-setup-for-https" id="certificate-setup-for-https"></a>

To enable secure access, a TLS certificate for your custom domain (e.g., [yourcompany.com](http://yourcompany.com/)) is required.\
\
**Issue a TLS Certificate:** This certificate can be created yourself or by [reo.dev](http://reo.dev/) for you. Get a TLS certificate from a trusted provider. Let's Encrypt offers free certificates, Amazon provides them through ACM if you use AWS, or you can purchase one from any established certificate company.\
\
**Update DNS & Install the Certificate:** If [reo.dev](http://reo.dev/) servers handles traffic or redirects for the domain ([yourcompany.com](http://yourcompany.com/)), DNS records for that domain would need to point to reo.dev servers. The TLS certificate wold also need to be installed on reo.dev servers.It's important to note that only the [yourcompany.com](http://yourcompany.com/) domain requires the certificate - no other domains in the setup need certification. While the certificate can be issued and installed by either by you or reo.dev, it must be from a trusted source that client systems will recognize and accept.​​


# Maven

With Reo.dev, you can now identify and monitor downloads of your open-source artifacts through Maven. This short guide will walk you through how this works and how you can set it up.

### How open-source Maven Artifacts are downloaded

Developers who want to install your OSS package through Maven will typically execute a command like this:

```python
mvn dependency:get -Dartifact=YourSoftware:version1
```

When this command is executed, the developer's system will download the Maven artifact of your software hosted on Maven Central.

Since Maven Central is maintained by Sonatype, you will normally get only limited, aggregated analytics of downloads of your Maven artifact → such as aggregate counts of artifact downloads, origin countries of download requests, aggregation of cloud services initiating a download and domain classification (business, ISP, education) etc.

You will not get download-specific information, or the ability to de-anonymize Maven downloads at user or organization level.

This level of detail isn't useful to GTM motions as it does not identify the actual company or developer initiating the download.

### Reo.dev Maven Redirection

Reo.dev uses a redirection system for Maven commands helps you achieve this enhanced visibility. Here's how: Reo creates a redirection layer that sits in front of your Open Source Software packages - whether they're on Maven Central, GitHub, GitLab or anywhere else.

Users then replace the default pull command:

```python
mvn dependency:get -Dartifact=YourSoftware:version1
```

with a domain-specific command:

{% code overflow="wrap" %}

```python
mvn dependency:get -Dartifact=YourSoftware:version1 -DremoteRepositories=https://yourcompany.com
```

{% endcode %}

{% hint style="info" %}
**Note**: `"https://[yourcompany.com](<http://yourcompany.com/>)"` serves as a proxy for actual package registry and is not a host of the package.
{% endhint %}

Your Maven artifacts will continue to be hosted at Maven Central / Github or any other repository that you originally configured. Savvy users can always directly pull from the original package hub without anything breaking.

When a mvn dependency:get command is executed with the new domain-specific command, the request is redirected (307 redirect) on to the original registry for package download.

Reo.dev can map multiple packages to multiple registries. Each package will need a unique URL on "[yourcompany.com](http://yourcompany.com/)" which maps to the correct package repository.

Example:

`yoursoftware/version1 -> <https://yourcompany.com/yoursoftware/version1`>

`yoursoftware/version2 -> <https://yourcompany.com/yoursoftware/version2`>

`yoursoftware/betasoftware/version08 -> <https://yourcompany.com/yoursoftware/betasoftware/version08`>

Since this redirection service and the URL (https\://[yourcompany.com/YourSoftware](http://yourcompany.com/YourSoftware)) is maintained by Reo.dev, you will now get far richer insights on the user downloading your software, just as if you were hosting it yourself.

You will get:

| **Information**                                   | **Description**                                                                                      |
| ------------------------------------------------- | ---------------------------------------------------------------------------------------------------- |
| IP Level De-anonymization                         | De-anonymized accounts that have downloaded your Maven artifact derived from their IP address        |
| Company-level aggregation of Repository downloads | We aggregate Maven downloads across an identified organization to create picture of adoption levels. |

### Final Flow Summary

<table data-header-hidden><thead><tr><th width="77.765625"></th><th></th></tr></thead><tbody><tr><td><strong>Step</strong></td><td><strong>Description</strong></td></tr><tr><td>1</td><td>User runs mvn with <a href="https://yourcompany.com">https://yourcompany.com</a></td></tr><tr><td>2</td><td>Request hits Maven endpoint of <a href="https://yourcompany.com">https://yourcompany.com</a></td></tr><tr><td>3</td><td>Request is proxied to reo.dev</td></tr><tr><td>4</td><td>reo.dev issues a 307 redirect to actual registry</td></tr><tr><td>5</td><td>Maven CLI downloads artifact from registry</td></tr></tbody></table>

The redirection system ensures that while you gain enhanced visibility into who is downloading your packages, the actual downloads continue to happen directly from the original registries, maintaining performance and reliability.

### Configuration Setup

Once you configure the Reo redirection system, your users will have the option to use the new URL to pull Maven artifacts. Update your documentation and Gtihub release notes to reflect the new URL.

💡 **Note**: Your Maven artifacts will continue to be hosted at Maven Central / Github or any other repository that you originally configured. Savvy users can always directly pull from the original package hub without anything breaking.

### Certificate Setup for HTTPS

To enable secure access, a TLS certificate for your custom domain (e.g., [yourcompany.com](http://yourcompany.com/)) is required.

**Issue a TLS Certificate:** This certificate can be created yourself or by [reo.dev](http://reo.dev/) for you. Get a TLS certificate from a trusted provider. Let's Encrypt offers free certificates, Amazon provides them through ACM if you use AWS, or you can purchase one from any established certificate company.

**Update DNS & Install the Certificate:** If reo.dev servers handles traffic or redirects for the domain ([yourcompany.com](http://yourcompany.com/)), DNS records for that domain would need to point to reo.dev servers.&#x20;

The TLS certificate would also need to be installed on reo.dev servers. It's important to note that only the [yourcompany.com](http://yourcompany.com/) domain requires the certificate - no other domains in the setup need certification. While the certificate can be issued and installed by either by you or reo.dev, it must be from a trusted source that client systems will recognize and accept.


# Helm

With Reo.dev, you can now identify and monitor downloads of your open-source repositories through Docker and Helm. This short guide will walk you through how this works and how you can set it up.

#### How open-source Docker Images and Kubernetes Charts are downloaded <a href="#how-open-source-docker-images-and-kubernetes-charts-are-downloaded" id="how-open-source-docker-images-and-kubernetes-charts-are-downloaded"></a>

Developers who want to install your OSS package through a docker image will typically execute a command like this:

```
docker pull YourSoftware/version1
```

When this command is executed, the developer's system will download the docker image of your software hosted on Docker Hub.

Since Docker Hub is maintained by Docker, you will normally get only limited, aggregated analytics of pulls of your Docker image → such as aggregate counts of image pulls, origin countries of pull requests, aggregation of cloud services initiating a pull and domain classification (business, ISP, education) etc.

You will not get download-specific information, or the ability to de-anonymize docker pulls at user or organization level.

The use of Helm commands works in a similar manner → with the commands pulling Kubernetes charts from registries, and you as a publisher only getting aggregate statistics on download and usage.

This level of detail isn’t useful to GTM motions as it does not identify the actual company or developer initiating the pull.

#### Reo.dev Docker / Helm Redirection <a href="#reo.dev-docker-helm-redirection" id="reo.dev-docker-helm-redirection"></a>

​[Reo.dev](http://reo.dev/) uses a redirection system for docker and Helm commands helps you achieve this enhanced visibility. Here's how:Reo creates a redirection layer that sits in front of your Open Source Software packages - whether they're on Docker, GitHub, GitLab or anywhere else.\ <br>

<figure><img src="/files/uIEayh57pFrPNQLFlWgK" alt=""><figcaption></figcaption></figure>

Users then replace the default pull command:\ <br>

```
docker pull YourSoftware/version1
//OR
helm install yoursoftware-chart oci://registry-1.docker.io/charts/yoursoftware-chart
```

with a domain-specific command:

```
docker pull yourcompany.com/YourSoftware/version1
//OR
helm install yoursoftware-chart oci://yourcompany.com/charts/yoursoftware-chart
```

\
💡 **Note**: “[yourcompany.com](http://yourcompany.com)” serves as a proxy for actual package registry and is not a host of the package.

Your docker images will continue to be hosted at Docker Hub / Github or any other repository that you originally configured. Savvy users can always directly pull from the original package hub without anything breaking.

When a docker pull / helm install command is executed with the new domain-specific command, the request is redirected (307 redirect) on to the original registry for package download.

[Reo.dev](http://Reo.dev) can map multiple packages to multiple registries. Each package will need a unique URL on “[yourcompany.com](http://yourcompany.com)” which maps to the correct package repository.

Example:<br>

```
yoursoftware/version1 -> yourcompany.com/yoursoftware/version1
yoursoftware/version2 -> yourcompany.com/yoursoftware/version2
yoursoftware/betasoftware/version08 -> yourcompany.com/yoursoftware/betasoftware/version08
```

Since this redirection service and the URL ([yourcompany.com/YourSoftware](http://yourcompany.com/YourSoftware)) is maintained by Reo.dev, you will now get far richer insights on the user downloading your software, just as if you were hosting it yourself.

You will get:

| Information                                       | Description                                                                                                         |
| ------------------------------------------------- | ------------------------------------------------------------------------------------------------------------------- |
| IP Level De-anonymization                         | De-anonymized developers who have downloaded your Docker image / Helm chart derived from their IP address           |
| Company-level aggregation of Repository downloads | We aggregate Docker Pulls and Helm installs across an identified organization to create picture of adoption levels. |

#### Final Flow Summary <a href="#final-flow-summary" id="final-flow-summary"></a>

| Step | Description                                          |
| ---- | ---------------------------------------------------- |
| 1    | User runs docker/helm with yourcompany.com           |
| 2    | Request hits Docker/Helm endpoint of yourcompany.com |
| 3    | Request is proxied to reo.dev                        |
| 4    | reo.dev issues a 307 redirect to actual registry     |
| 5    | Docker/Helm CLI downloads image/chart from registry  |

The redirection system ensures that while you gain enhanced visibility into who is downloading your packages, the actual downloads continue to happen directly from the original registries, maintaining performance and reliability.

#### Configuration Setup <a href="#configuration-setup" id="configuration-setup"></a>

Once you configure the Reo redirection system, your users will have the option to use the new URL to pull docker images. Update your documentation and Gtihub release notes to reflect the new URL.

> 💡 **Note**: Your docker images will continue to be hosted at Docker Hub / Github or any other repository that you originally configured. Savvy users can always directly pull from the original package hub without anything breaking.

#### Certificate Setup for HTTPS <a href="#certificate-setup-for-https" id="certificate-setup-for-https"></a>

To enable secure access, a TLS certificate for your custom domain (e.g., [yourcompany.com](http://yourcompany.com/)) is required.\
\
**Issue a TLS Certificate:** This certificate can be created yourself or by [reo.dev](http://reo.dev/) for you. Get a TLS certificate from a trusted provider. Let's Encrypt offers free certificates, Amazon provides them through ACM if you use AWS, or you can purchase one from any established certificate company.\
\
**Update DNS & Install the Certificate:** If [reo.dev](http://reo.dev/) servers handles traffic or redirects for the domain ([yourcompany.com](http://yourcompany.com/)), DNS records for that domain would need to point to reo.dev servers. The TLS certificate wold also need to be installed on reo.dev servers.It's important to note that only the [yourcompany.com](http://yourcompany.com/) domain requires the certificate - no other domains in the setup need certification. While the certificate can be issued and installed by either by you or reo.dev, it must be from a trusted source that client systems will recognize and accept.​​


# How to Integrate Product / Authenticated MCP with Reo.Dev

This guide explains how to integrate an **authenticated MCP server** (e.g. your product MCP, sitting behind OAuth or login) with Reo.Dev using the **MCP Intent Gateway**. The integration is lightweight, non-intrusive, and requires no changes to developer workflows beyond embedding our SDK in your codebase.

{% hint style="info" %}
**Looking for the open / docs MCP integration?** If your MCP is public and not behind authentication, see the existing [**How to integrate Docs MCP Gateway with Reo.Dev**](https://docs.reo.dev/integrations/how-to-integrate-mcp-gateway-with-reo.dev) guide.
{% endhint %}

***

### **Overview**

<figure><img src="/files/fcF70fA4n26YLbupreY1" alt=""><figcaption></figcaption></figure>

***

### **Quickstart**

#### 1) Installation

{% tabs %}
{% tab title="python" %}

```python
pip install reo-census-mcp
```

* <https://pypi.org/project/reo-census-mcp/>&#x20;
  {% endtab %}

{% tab title="node" %}

```javascript
npm install reo-census-mcp
```

* <https://www.npmjs.com/package/reo-census-mcp>
  {% endtab %}
  {% endtabs %}

{% hint style="info" %}
**Need another language?** Python & npm is supported. Go, and other languages support are next. [**Request an SDK for your stack →**](https://forms.gle/1J8oRcnj5f4UQr7H7). We prioritise by customer demand.
{% endhint %}

***

#### **2) Setup your Reo API key**

Generate a **Product Usage API key** in the Reo.Dev dashboard: [**\[Link\]**](https://web.reo.dev/dashboard/settings/apiKeys)

<figure><img src="/files/Jj7CrlcJMlRjaCVhfLRb" alt=""><figcaption><p>Settings → Configurations → API Keys</p></figcaption></figure>

**Expose it as an environment variable in your codebase. Example:**

```jsx
export REO_API_KEY="your-api-key"
```

***

#### **3) Send data to Reo.Dev**

{% tabs %}
{% tab title="python" %}

```python
from reo_census_mcp import ReoProductUsageLogger

logger = ReoProductUsageLogger(
	activity_type="MCP_TOOL_CALL",
	user_id="\\<USER_EMAIL\\>",
	user_id_type="EMAIL",
	product_id="reoWebApp",
	meta=\\{"prompts": "\\<captured_prompt_text\\>"\\},
)

ok = logger.log_usage()  # non-blocking by default (blocking=False)
```

{% endtab %}

{% tab title="Node" %}

```javascript
import { ReoProductUsageLogger } from "reo-census-mcp";

const logger = new ReoProductUsageLogger({
  activityType: "MCP_TOOL_CALL",
  userId: "<USER_EMAIL>",
  userIdType: "EMAIL",
  productId: "reoWebApp",
  meta: { prompts: "<captured_prompt_text>" },
});

const ok = logger.logUsage(); // non-blocking by default; boolean
```

{% endtab %}
{% endtabs %}

You can send **two activity types**:

* **`MCP_IDENTITY_CAPTURE`** — fire once, at login or first authenticated request, to register the user against your `product_id`.
* **`MCP_TOOL_CALL`** — fire on every MCP tool invocation, with the tool name, arguments, and any custom fields you want to track.

#### **3.1) Example Payloads**

**Identity Capture Sample Payload**

{% tabs %}
{% tab title="python" %}

```python
from reo_census_mcp import ReoProductUsageLogger

logger = ReoProductUsageLogger(
    activity_type="MCP_IDENTITY_CAPTURE",
    user_id="rachel@reo.dev",
    user_id_type="EMAIL",
    product_id="reoWebApp"
)
logger.log_usage()  # non-blocking by defaul
```

{% endtab %}

{% tab title="node" %}

```javascript
import { ReoProductUsageLogger } from "reo-census-mcp";

const logger = new ReoProductUsageLogger({
  activityType: "MCP_IDENTITY_CAPTURE",
  userId: "rachel@reo.dev",
  userIdType: "EMAIL",
  productId: "reoWebApp",
});

logger.logUsage(); // non-blocking by default
```

{% endtab %}
{% endtabs %}

**Tool call sample**

{% tabs %}
{% tab title="python" %}

```python
from reo_census_mcp import ReoProductUsageLogger

logger = ReoProductUsageLogger(
    activity_type="MCP_TOOL_CALL",
    user_id="rachel@reo.dev",
    user_id_type="EMAIL",
    product_id="reoWebApp",
    meta={
        # Required: the MCP tool that was invoked + its arguments
        "tool": "execute_open_data_query",
        "tool_arguments": {
            "query": "WITH recent_new AS (SELECT company_name, company_domain ...)",
            "prompt": "find companies moving to ruby on rails in last 1 month",
        },
        # Optional custom fields — anything you add here surfaces in Reo.Dev
        "mode": "authenticated",
        "duration_ms": 5072.52,
        "reo_mcp_client": True,
    }
)
logger.log_usage()
```

{% endtab %}

{% tab title="node" %}

```javascript
import { ReoProductUsageLogger } from "reo-census-mcp";

const logger = new ReoProductUsageLogger({
  activityType: "MCP_TOOL_CALL",
  userId: "rachel@reo.dev",
  userIdType: "EMAIL",
  productId: "reoWebApp",
  meta: {
    // Required: the MCP tool that was invoked + its arguments
    tool: "execute_open_data_query",
    tool_arguments: {
      query: "WITH recent_new AS (SELECT company_name, company_domain ...)",
      prompt: "find companies moving to ruby on rails in last 1 month",
    },
    // Optional custom fields — anything you add here surfaces in Reo.Dev
    mode: "authenticated",
    duration_ms: 5072.52,
    reo_mcp_client: true,
  },
});

const ok = await logger.logUsage();
```

{% endtab %}
{% endtabs %}

***

#### **3.2) Auto-capture prompts & tool calls (Python)**

{% hint style="info" %}
**Python only for now.** If you build your MCP server with the official [`mcp`](https://pypi.org/project/mcp/) Python library, you can auto-capture every tool call - including the user's original prompt — with a single `instrument()` call at startup. **No per-tool boilerplate, and no need to populate `meta["prompts"]` yourself.** Node support is coming soon.
{% endhint %}

In section 3 you log each call yourself and pass the prompt in `meta` (`meta={"prompts": "<captured_prompt_text>"}`). If your server is built on the official `mcp` Python `Server`, `instrument()` does this for you: it wraps the tool-dispatch path so every `MCP_TOOL_CALL` — tool name, arguments, and the user's original question - is logged automatically.

**Which one should I use?**

| Approach                           | Best for                                                           | Prompt capture                            |
| ---------------------------------- | ------------------------------------------------------------------ | ----------------------------------------- |
| Manual `log_usage()` (section 3)   | Any language or framework; full control over when and what you log | You set `meta["prompts"]` on each call    |
| Auto `instrument()` (this section) | Servers built on the official `mcp` Python library                 | Captured automatically on every tool call |

{% tabs %}
{% tab title="python" %}

```python
import os
from mcp.server.lowlevel import Server
from reo_census_mcp import ReoProductUsageLogger, instrument

logger = ReoProductUsageLogger(
    api_key=os.environ["REO_API_KEY"],   # optional if REO_API_KEY is set in the env
    activity_type="MCP_TOOL_CALL",
    product_id="myMcpServer",
    # Note: no user_id / user_id_type here — identity is resolved
    # per call by get_identity below.
)

# Call BEFORE you create Server(...) or decorate any
# @app.call_tool() / @app.list_tools() handler.
instrument(
    logger=logger,
    # Map your auth context to (user_id, user_id_type) for each call.
    get_identity=lambda name, args: (
        args.get("_user_email", "anonymous"),
        "EMAIL" if args.get("_user_email") else "ANONYMOUS",
    ),
)

app = Server("my-server")

@app.call_tool()
async def call(name, arguments):
    ...  # no telemetry boilerplate — every call is auto-captured
```

{% endtab %}

{% tab title="node" %}

```javascript
// Auto-instrumentation for Node is coming soon.
// For now, log tool calls manually with ReoProductUsageLogger — see section 3.
```

{% endtab %}
{% endtabs %}

***

**How it works**

* **One call at startup.** `instrument()` installs a wrapper around the `mcp` library's tool-dispatch path. Call it once, *before* you instantiate `Server(...)` and *before* you decorate any handler - the tools registered after the wrapper is in place are the ones that get captured.
* **Automatic prompt capture.** Each invocation is logged as an `MCP_TOOL_CALL` with the tool name, its arguments, and the user's original prompt. You no longer set `meta["prompts"]` by hand.
* **Per-call identity.** `get_identity` runs on every invocation and receives `(name, args)` — the tool name and its arguments. Return a `(user_id, user_id_type)` tuple resolved from your auth context (e.g. an email your auth layer injects into the request), and an anonymous fallback when you can't resolve a user. Because identity is resolved here, you don't set `user_id` / `user_id_type` on the logger.
* **Same delivery guarantees.** Calls are non-blocking by default and will not add latency to — or break — your MCP responses.

{% hint style="info" %}
**Still register the user once.** `instrument()` covers `MCP_TOOL_CALL` events only. To register the authenticated user against your `product_id`, fire a one-time **`MCP_IDENTITY_CAPTURE`** at login or first authenticated request — see **3.1) Example Payloads** above.
{% endhint %}

***

#### **4) Constructor parameters**

| **Parameter**   | **Description**                                                                                                                                                                                                                                                                 | **Type** | **Required** | **Allowed values**                                                                                                          |
| --------------- | ------------------------------------------------------------------------------------------------------------------------------------------------------------------------------------------------------------------------------------------------------------------------------- | -------- | ------------ | --------------------------------------------------------------------------------------------------------------------------- |
| `activity_type` | Reo.Dev supports two activity types. **`MCP_IDENTITY_CAPTURE`** registers the authenticated user — fire it during login or on the first authenticated request. **`MCP_TOOL_CALL`** logs the tool the user invoked through your MCP server, along with the prompt and arguments. | string   | Yes          | `"MCP_IDENTITY_CAPTURE"`, `"MCP_TOOL_CALL"`                                                                                 |
| `user_id`       | The authenticated user's identifier (e.g. email address).                                                                                                                                                                                                                       | string   | Yes          | users email(e.g. `rachel@reo.dev`), linkedin(e.g. `https://linkedin.com/in/rachel-smith`) or github id(e.g. `rachel-smith`) |
| `user_id_type`  | Type of the user identifier. Use "EMAIL" when passing an email address. Valid ID types are - `EMAIL`, `LINKEDIN`, `GITHUB`                                                                                                                                                      | string   | Yes          | `EMAIL`, `LINKEDIN` , `GITHUB` based on user\_id entry                                                                      |
| `product_id`    | The product or application identifier registered in the REO platform.                                                                                                                                                                                                           | string   | Yes          | Unique slug kind of name for application                                                                                    |
| `meta.prompts`  | Custom payload. For `MCP_TOOL_CALL`, include `tool` and `tool_arguments` at minimum. Add any custom fields you want to track.                                                                                                                                                   | dict     | No           | JSON payload containing additional metadata of calls being made to MCP took                                                 |
| `blocking`      | When `False` (default), `log_usage()` queues the event and returns immediately. Set `True` only if you need confirmation in-line.                                                                                                                                               | bool     | No           | `True`, `False`                                                                                                             |

***

#### **5) Supported environment variables**

| **Variable**                                 | **Role**                                                                         | **Required** |
| -------------------------------------------- | -------------------------------------------------------------------------------- | ------------ |
| `REO_API_KEY`                                | Auth key for the gateway. Required unless you pass `api_key` to the constructor. | Yes          |
| `REO_CENSUS_MCP_ENDPOINT`                    | Override the default ingest URL (for staging or self-hosted setups).             | No           |
| `REO_PRODUCT_USAGE_USER_AGENT`               | Payload **`user_agent`** fallback                                                | No           |
| `PACKAGE_TRACKER_VERBOSE`                    | Debug prints to **`stderr`**                                                     | No           |
| `PACKAGE_TRACKER_ANALYTICS` / `DO_NOT_TRACK` | Control when to activate or deactivate the package at env level                  | No           |

***

### **Configure Data in Reo.Dev**

Reo.Dev needs a metric definition for each `activity_type` you send so your events are parsed and indexed correctly.

Navigate to **Settings → Configurations → Product Usage Metrics**: [**\[Link\]**](https://web.reo.dev/dashboard/settings/product-usage-metrics)

Create the two metrics below exactly as shown:

<figure><img src="/files/RPEyaqfsudtekQ5SQHRo" alt=""><figcaption><p>Product Usage Metrics screen with <strong><code>MCP_TOOL_CALL</code></strong> and <strong><code>MCP_IDENTITY_CAPTURE</code></strong> configured in Reo.Dev UI.</p></figcaption></figure>

| **Metric name**        | **Mode** | **Meta parameters**                                      |
| ---------------------- | -------- | -------------------------------------------------------- |
| `MCP_TOOL_CALL`        | Single   | `tool` (Text / String), `tool_arguments` (Text / String) |
| `MCP_IDENTITY_CAPTURE` | Single   | —                                                        |

***

### **How to View This Data in Reo.Dev**

Head to the **Activity Timeline** of an account or developer. Under filters, select **Activity Type → Product Usage →** `MCP_TOOL_CALL.`

<figure><img src="/files/78Yh3p9Nn7YwD15zdeQI" alt=""><figcaption></figcaption></figure>

***

### **Troubleshooting**

* **Requests failing?** Verify your routing forwards traffic to the Reo.Dev gateway URL.
* Ensure HTTPS is enabled on your branded MCP endpoint.
* Confirm no auth middleware is blocking proxy requests at the gateway layer — auth should run inside your MCP server, not at the proxy.
* **SDK issues:** confirm `REO_API_KEY` is set in your runtime environment
* SDK calls are non-blocking by design — failures will not break MCP responses, but they are logged. Check your application logs for `reo.mcp-gateway` entries.

For additional help, contact your assigned account manager or write to us at [**support@reo.dev**](mailto:support@reo.dev)**.**

***

### FAQs

**1. What if our SDK language isn't supported?**

We launched with Python & npm. Support for more languages & frameworks is coming soon. [**Request it via this form**](https://forms.gle/1J8oRcnj5f4UQr7H7). We prioritise new SDKs by customer demand.

**2. Where exactly do we call the SDK in our code?**

1. At the entry point of your MCP request handler, after the user's identity is resolved.
2. Entry of tool call

**3. Does the SDK add latency to MCP responses?**

No. It is a non-blocking call and posts to Reo.Dev asynchronously.


# API-based Integration


# Lists API

Custom Lists in Reo.Dev allows Sales and Marketing teams to import, enrich, and segment accounts or developers using a CSV upload. But what if your data changes frequently, or you want to add new entries dynamically, without uploading a new file every time?

That’s where the **Lists API** comes in.

***

### Why Use the Lists API?

Unlike the CSV upload in the UI, which replaces the entire list, the **Lists API lets you add new accounts or developers to an existing list**—without starting from scratch.

**Key Advantage**:

* **Continuously update your lists** with new data.
* Avoid re-uploading or overwriting lists.

**Developer Docs:** <https://developers.reo.dev/#tag/List>

***

#### Where to Get Your API Key

To use the Lists API, your dev team will need a **Product Usage API Key**.

**Steps to find the API Key:**

1. Go to **Settings →Configurations**
2. Click **Configure** under the **API Keys** section.

{% hint style="info" %}
Note: Only users with Admin Role in Reo.Dev can access the API Keys
{% endhint %}

<figure><img src="/files/PvVs0i8SVxSfJsYETEQ3" alt=""><figcaption></figcaption></figure>

3. Copy the key under **Product Usage API**.

<figure><img src="/files/xkA4U6WZur5Jgic5dQJY" alt=""><figcaption></figcaption></figure>

***

### What the API Can Do

The Lists API supports 3 main actions:

| **Action**        | **Description**                                                     |
| ----------------- | ------------------------------------------------------------------- |
| **Create a List** | Set up a new Account or Developer list, define custom columns       |
| **Get All Lists** | Retrieve all existing lists created via API                         |
| **Add to List**   | Append new accounts or developers to a list (key advantage over UI) |

***

#### Share This With Your Tech Team

If you'd like to start using the Lists API to keep your account or developer lists always up-to-date, here’s the full API documentation:

> **🔗 Developer Docs:** <https://developers.reo.dev/#tag/List>

Share this link with your developer team or RevOps engineer to explore implementation.


# Telemetry


# Single Events

If you have an open source offering with call home/telemetry functionality to collect anonymous usage or event data, you can use the **Product Usage API** to share the data with Reo.Dev

From the telemetry data, we should be able to get

* IP address of the system or domain
* Unique user ID
* Activity Details

From the telemetry data, we will be able to enrich the

* IP address or domain and find out the company to which the user belongs
* With the unique user ID, we will aggregate the product usage at a developer level and ultimately map it to the company to which the user(s) are associated

{% hint style="info" %}
**Important Note:** Telemetry Data functionality requires the configuration of relevant metrics in the **Product Usage Settings**. Without this setup, the data cannot be transmitted or processed in the Reo.Dev platform.&#x20;

To ensure proper integration, follow the steps in [How to Configure Product Usage Metrics in Settings](/configurations/product-usage) before proceeding with telemetry data workflows.
{% endhint %}

### API Structure

| **Header**   | **Description**                                         | **Data type** |
| ------------ | ------------------------------------------------------- | ------------- |
| X-API-KEY    | Generated Reo.Dev \<API\_KEY> for authorization.        | string        |
| Content-Type | Request content-type is always set to application/json. | string        |

```
curl --location 'https://ingest.reo.dev/api/product/usage' \
--header 'X-API-KEY: <API_KEY>' \
--header 'Content-Type: application/json' \
--data '{
    "payload": {
		 "activity_type" : "LOGIN_ACTIVITY",
		 "source": "TELEMETRY",        
		 "environment":"PRODUCTION",
        "user_id": "",
        "user_id_type":"",
        "ip_addr": "156.59.87.83",
        "domain":"",
        "event_id": 1231231232,  
        "event_at": 639303296,  
        "product_id": "reoWebApp",
        "user_agent": "Mozilla/5.0 (Macintosh, Intel Mac OS X 10_15_7) 
AppleWebKit/537.36 (KHTML, like Gecko) Chrome/120.0.0.0 Safari/537.36",
        "meta": {"property1":"value1","property2":"value2"}
    }
}'
```

#### **Tenant API Key**

To access your API key, navigate to:

**Settings →Configurations → API Keys → Product Usage API**

{% hint style="info" %}
Note: Only users with Admin Role in Reo.Dev can access the API Keys
{% endhint %}

<figure><img src="/files/jmUQ7JJ4WPZuOYhUOp8F" alt=""><figcaption></figcaption></figure>

| Parameter                                                        | Description                                                                                                                                                                                                                                           | Datatype | Allowed Values                                      | Example                                                                                                                   |
| ---------------------------------------------------------------- | ----------------------------------------------------------------------------------------------------------------------------------------------------------------------------------------------------------------------------------------------------- | -------- | --------------------------------------------------- | ------------------------------------------------------------------------------------------------------------------------- |
| **source (Required)**                                            | Source of the activity.                                                                                                                                                                                                                               | enum     | `TELEMETRY`, `PRODUCT_CLOUD`                        | `"TELEMETRY"`                                                                                                             |
| **activity\_type (Required)**                                    | Usage Metrics of the product. The definition of primary, secondary1 and secondary2 should match with metrics defined in the Reo.Dev settings. Where Source is Telemetry and you do not get any product usage data, activity type can be `"CALL HOME"` | string   | Keys defined in metrics section in Reo.dev UI       | `"CALL HOME"`                                                                                                             |
| **environment (optional)**                                       | Environment where product has been deployed.                                                                                                                                                                                                          | string   |                                                     | `"PRODUCTION"`                                                                                                            |
| **user\_id\_type (optional)**                                    | Type of user ID such as email, Social, LinkedIn, GitHub, Username.                                                                                                                                                                                    | enum     | `EMAIL`, `SOCIAL`, `LINKEDIN`, `GITHUB`, `USERNAME` | `"EMAIL"`                                                                                                                 |
| **user\_id (optional)**                                          | Unique user ID captured for a customer.                                                                                                                                                                                                               | string   |                                                     | `"https://github.com/michaelbevan"`                                                                                       |
| **ip\_addr (mandatory)**                                         | IP address of the system from where the user has logged in.                                                                                                                                                                                           | string   |                                                     | `"192.127.0.0"`                                                                                                           |
| <p><strong>domain</strong><br><strong>(conditional)</strong></p> | domain of the user who has done the event. Either ip\_addr or domain is mandatory.                                                                                                                                                                    | string   |                                                     | `www.reo.dev`                                                                                                             |
| **event\_id (mandatory)**                                        | A unique identifier for the event for Tenant for filter.                                                                                                                                                                                              | string   |                                                     | `193ef456430`                                                                                                             |
| **event\_at (mandatory)**                                        | The time at which the event occurred (Formatted as a UNIX epoch in seconds).                                                                                                                                                                          | integer  |                                                     | `639303296`                                                                                                               |
| **product\_id (Required)**                                       | Unique identifier of your product.                                                                                                                                                                                                                    | string   |                                                     | `"reoWebApp"`                                                                                                             |
| **user\_agent (optional)**                                       | Additional browser properties. This is optional if `user_id` is sent. In case `user_id` is not sent, `user_agent` becomes mandatory.                                                                                                                  | string   |                                                     | `"Mozilla/5.0 (Macintosh, Intel Mac OS X 10_15_7) AppleWebKit/537.36 (KHTML, like Gecko) Chrome/120.0.0.0 Safari/537.36"` |
| **meta (optional)**                                              | Any other parameter that needs to be sent.                                                                                                                                                                                                            | object   |                                                     |                                                                                                                           |

{% hint style="info" %}
Note: For telemetry data, the only accepted source value is "TELEMETRY".
{% endhint %}

### **Sample JSON Request**

```
"payload": {
	"activity_type": "CALL_HOME",
	"source": "TELEMETRY",        
	"environment": "PRODUCTION",
        "user_id": "",
        "user_id_type":"",
        "ip_addr": "156.59.87.83",
        "domain":"",
        "event_id": "193ef456430",  
        "event_at": "639303296",  
        "product_id": "V1.2",
        "user_agent": "Mozilla/5.0 (Macintosh, Intel Mac OS X 10_15_7) AppleWebKit/537.36 (KHTML, like Gecko) Chrome/120.0.0.0 Safari/537.36",
        "meta": {}
    }
```

### **Sample JSON Response \[Success]**

```json
{
    "response_code": "200",
    "response": "Data Uploaded",
    "status": "success"
}
```

### **Sample JSON Response \[Wrong API Key]**

```json
{
    "response_code": 400,
    "response": "Authentication Failure",
    "status": "failure"
}
```


# Aggregated Events

If you have an open source offering with telemetry functionality to collect anonymous usage or event data, you can use the Product Usage API to share aggregated data with Reo.Dev.

**Important**: Either `domain` or `ip_addr` must be provided in the payload - they are conditionally required based on data availability.

From the aggregated telemetry data, we should be able to get:

* IP address of the system OR Domain information (one is required)
* Aggregated usage counts
* Activity Details

From the telemetry data, we will be able to enrich the:

* IP address and find out the company to which the user belongs
* Domain mapping for company association

**Note**: Either `domain` or `ip_addr` must be provided - they are conditionally required based on availability.

With the aggregated data, we will map the product usage at a domain level and ultimately to the company to which the usage is associated.

{% hint style="info" %}
**Important Note:** The Product API integration is fully dependent on the configuration of custom metrics in the **Product Usage Settings**.\
Without these metrics, data sent via the API will not be received or processed in the Reo.Dev platform. Please refer to [How to Configure Product Usage Metrics in Settings](/configurations/product-usage) to ensure your metrics are correctly set up before implementing the Product API.
{% endhint %}

### API Structure

| Header       | Description                                             | Data type |
| ------------ | ------------------------------------------------------- | --------- |
| X-API-KEY    | Generated Reo.Dev `<API_KEY>` for authorization.        | string    |
| Content-Type | Request content-type is always set to application/json. | string    |

```
curl --location 'https://ingest.reo.dev/api/product/aggregateusage' \
--header 'X-API-KEY: <API_KEY>' \
--header 'Content-Type: application/json' \
--data '{
  "payload": {
    "mode": "DOMAIN",
    "activity_type": "secondary23",
    "source": "TELEMETRY",
    "environment": "PRODUCTION",
    "event_id": 1231231232,
    "event_at": 639303296,
    "domain": "",
    "ip_addr": "156.59.87.83",
    "count": 1250,
    "product_id": "reoWebApp",
    "user_agent": "Mozilla/5.0 (Macintosh, Intel Mac OS X 10_15_7) AppleWebKit/537.36 (KHTML, like Gecko) Chrome/120.0.0.0 Safari/537.36",
    "meta": {
      "property1": "value1",
      "property2": "value2"
    }
  }
}'
```

#### **Tenant API Key**

To access your API key, navigate to:

**Settings →Configurations → API Keys → Product Usage API**

{% hint style="info" %}
Note: Only users with Admin Role in Reo.Dev can access the API Keys
{% endhint %}

<figure><img src="/files/NqNJQXlSQUpvho2heXJP" alt=""><figcaption></figcaption></figure>

### Parameters

| Parameter                     | Description                                                                                                                                                | Data Type | Possible Values                               | Example                                                                                                                   |
| ----------------------------- | ---------------------------------------------------------------------------------------------------------------------------------------------------------- | --------- | --------------------------------------------- | ------------------------------------------------------------------------------------------------------------------------- |
| **mode** (Required)           | Aggregation mode for the telemetry data                                                                                                                    | enum      | `DOMAIN`                                      | `"DOMAIN"`                                                                                                                |
| **source** (Required)         | Source of the activity                                                                                                                                     | enum      | `TELEMETRY`                                   | `"TELEMETRY"`                                                                                                             |
| **activity\_type** (Required) | Usage Metrics of the product. The definition of primary, secondary1, secondary2, and secondary23 should match with metrics defined in the Reo.Dev settings | string    | Keys defined in metrics section in Reo.dev UI | `"secondary23"`                                                                                                           |
| **environment** (optional)    | Environment where product has been deployed                                                                                                                | string    |                                               | `"PRODUCTION"`                                                                                                            |
| **count** (mandatory)         | Aggregated count of the telemetry events/usage                                                                                                             | integer   |                                               | `1250`                                                                                                                    |
| **ip\_addr** (conditional)    | IP address of the system from where the telemetry data originated. Required if `domain` is not provided                                                    | string    |                                               | `"156.59.87.83"`                                                                                                          |
| **domain** (conditional)      | Domain associated with the telemetry data. Required if `ip_addr` is not provided                                                                           | string    |                                               | `"reo.dev"`                                                                                                               |
| **event\_id** (optional)      | A unique identifier for the API call                                                                                                                       | string    |                                               | `193ef456430`                                                                                                             |
| **event\_at** (mandatory)     | The time at which the API call was made (Formatted as a UNIX epoch in seconds)                                                                             | integer   |                                               | `639303296`                                                                                                               |
| **product\_id** (Required)    | Unique identifier of your product                                                                                                                          | string    |                                               | `"reoWebApp"`                                                                                                             |
| **user\_agent** (optional)    | Additional browser properties                                                                                                                              | string    |                                               | `"Mozilla/5.0 (Macintosh, Intel Mac OS X 10_15_7) AppleWebKit/537.36 (KHTML, like Gecko) Chrome/120.0.0.0 Safari/537.36"` |
| **meta** (optional)           | Any other parameter that needs to be sent                                                                                                                  | object    |                                               | `{"property1":"value1","property2":"value2"}`                                                                             |

### Sample JSON Request

```
{
  "payload": {
    "mode": "DOMAIN",
    "activity_type": "secondary23",
    "source": "TELEMETRY",
    "environment": "PRODUCTION",
    "event_id": 1231231232,
    "event_at": 639303296,
    "count": 1250,
    "ip_addr": "156.59.87.83",
    "domain": "",
    "product_id": "reoWebApp",
    "user_agent": "Mozilla/5.0 (Macintosh, Intel Mac OS X 10_15_7) AppleWebKit/537.36 (KHTML, like Gecko) Chrome/120.0.0.0 Safari/537.36",
    "meta": {
      "property1": "value1",
      "property2": "value2"
    }
  }
}

```

### Sample JSON Response \[Success]

```
{
    "response_code": "200",
    "response": "Data Uploaded",
    "status": "success"
}

```

### Sample JSON Response \[Wrong API Key]

```
{
  "response_code": 400,
  "response": "Authentication Failure",
  "status": "failure"
}
```


# Custom Product Events API


# Single Events

From the product’s cloud instance, we get the following data

* Unique User ID (email, Social, LinkedIn, GitHub, Username)
* IP Address
* Activity Details
* Login Timestamp

We will be able to enrich the users using

* email ID, GitHub, LinkedIn
* IP Address

and find out the company to which the user belongs to. With the unique user ID, we will aggregate the product usage at a developer level and ultimately map it to the company to which the user(s) are associated.&#x20;

{% hint style="info" %}
**Important Note:** The Product API integration is fully dependent on the configuration of custom metrics in the **Product Usage Settings**.\
Without these metrics, data sent via the API will not be received or processed in the Reo.Dev platform. Please refer to [How to Configure Product Usage Metrics in Settings](/configurations/product-usage) to ensure your metrics are correctly set up before implementing the Product API.
{% endhint %}

### **API Structure**

| **Header**   | **Description**                                         | **Data type** |
| ------------ | ------------------------------------------------------- | ------------- |
| X-API-KEY    | Generated Reo.Dev \<API\_KEY> for authorization.        | string        |
| Content-Type | Request content-type is always set to application/json. | string        |

```
curl --location 'https://ingest.reo.dev/api/product/usage' \
--header 'X-API-KEY: <API_KEY>' \
--header 'Content-Type: application/json' \
--data '{
    "payload": {
	"activity_type": "LOGIN_ACTIVITY",
	"source": "PRODUCT_CLOUD",        
	"environment": "PRODUCTION",
        "user_id": "https://www.linkedin.com/in/userid",
        "user_id_type":"LINKEDIN",
        "ip_addr": "156.59.87.83",
        "event_id": 1231231232,  
        "event_at": 639303296,  
        "product_id": "reoWebApp",
        "user_agent": "Mozilla/5.0 (Macintosh, Intel Mac OS X 10_15_7) 
AppleWebKit/537.36 (KHTML, like Gecko) Chrome/120.0.0.0 Safari/537.36",
        "meta": {"property1":"value1","property2":"value2"}
    }
}'
```

### **Tenant API Key**

To access your API key, navigate to:

**Settings → Configurations → API Keys → Product Usage API**

{% hint style="info" %}
Note: Only users with Admin Role in Reo.Dev can access the API Keys
{% endhint %}

<figure><img src="/files/RoRmPhZH60qtiWvzGly0" alt=""><figcaption></figcaption></figure>

| Parameter                      | Description                                                                                                                                                                                               | Datatype | Allowed Values                                      | Example                                                             |
| ------------------------------ | --------------------------------------------------------------------------------------------------------------------------------------------------------------------------------------------------------- | -------- | --------------------------------------------------- | ------------------------------------------------------------------- |
| **source (Required)**          | Source of the activity.                                                                                                                                                                                   | enum     | `PRODUCT_CLOUD`                                     | `"PRODUCT_CLOUD"`                                                   |
| **activity\_type (Required)**  | Usage Metrics of the product. The definition of primary, secondary1 and secondary2 should match with metrics defined in the Reo.Dev settings. If no data is available, activity type can be `"CALL HOME"` | string   | Keys defined in metrics                             | `"API KEY GENERATED"`                                               |
| **environment (optional)**     | Environment where product has been deployed.                                                                                                                                                              | string   | ​                                                   | `"production"`                                                      |
| **user\_id\_type (mandatory)** | Type of user ID such as email, Social, LinkedIn, GitHub, Username.                                                                                                                                        | enum     | `EMAIL`, `SOCIAL`, `LINKEDIN`, `GITHUB`, `USERNAME` | `"EMAIL"`                                                           |
| **user\_id (mandatory)**       | Unique user ID captured for a customer.                                                                                                                                                                   | string   | ​                                                   | `"michaelbevan"`                                                    |
| **ip\_addr (optional)**        | IP address of the system from where the user has logged in.                                                                                                                                               | string   | ​                                                   | `"192.127.0.0"`                                                     |
| **event\_id (optional)**       | A unique identifier for the event for Tenant for filter.                                                                                                                                                  | string   | ​                                                   | `193ef456430`                                                       |
| **event\_at (mandatory)**      | The time at which the event occurred (Formatted as a UNIX epoch in seconds).                                                                                                                              | integer  | ​                                                   | `639303296`                                                         |
| **product\_id (Required)**     | Unique identifier of your product.                                                                                                                                                                        | string   | ​                                                   | `"reoWebApp"`                                                       |
| **user\_agent (optional)**     | Additional browser properties.                                                                                                                                                                            | string   | ​                                                   | `"Mozilla/5.0 (Macintosh, Intel Mac OS X 10_15_7)...Safari/537.36"` |
| **meta (optional)**            | Any other parameter that needs to be sent.                                                                                                                                                                | object   | ​                                                   | ​                                                                   |

### **Sample JSON Request**

```
"payload": {
	"activity_type": "LOGIN_ACTIVITY",
	"source": "PRODUCT_CLOUD",        
	"environment": "PRODUCTION",
        "user_id": "https://www.linkedin.com/in/userid",
        "user_id_type":"LINKEDIN",
        "ip_addr": "156.59.87.83",
        "event_id": 1231231232,  
        "event_at": 639303296,  
        "product_id": "reoWebApp",
        "user_agent": "Mozilla/5.0 (Macintosh, Intel Mac OS X 10_15_7) 
AppleWebKit/537.36 (KHTML, like Gecko) Chrome/120.0.0.0 Safari/537.36",
        "meta": {"property1":"value1","property2":"value2"}
    }
```

### **Sample JSON Response \[Success]**

```json
{
    "response_code": "200",
    "response": "Data Uploaded",
    "status": "success"
}
```

### **Sample JSON Response \[Wrong API Key]**

```json
{
    "response_code": 400,
    "response": "Authentication Failure",
    "status": "failure"
}
```


# Aggregated Events

From the product's cloud instance, we get aggregated usage data that provides consolidated metrics for better insights into product usage patterns. This API enables ingestion of aggregated product data with two distinct modes:

**Domain Mode**: Aggregate usage data at the company level.

**User Mode**: Aggregate usage data at the individual user level.&#x20;

{% hint style="info" %}
**Important Note:** The Product API integration is fully dependent on the configuration of custom metrics in the **Product Usage Settings**.\
Without these metrics, data sent via the API will not be received or processed in the Reo.Dev platform. Please refer to [How to Configure Product Usage Metrics in Settings](/configurations/product-usage) to ensure your metrics are correctly set up before implementing the Product API.
{% endhint %}

### API Structure

| Header       | Description                                             | Data type |
| ------------ | ------------------------------------------------------- | --------- |
| X-API-KEY    | Generated Reo.Dev `<API_KEY>` for authorization.        | string    |
| Content-Type | Request content-type is always set to application/json. | string    |

**Endpoint**: [`https://ingest.reo.dev/api/product/aggregateusage`](https://ingest.reo.dev/api/product/aggregateusage)

**Method**: `POST`

**Content-Type**: `application/json`

### Domain Mode Example

```
curl --location 'https://ingest.reo.dev/api/product/aggregateusage' \
--header 'X-API-KEY: <API_KEY>' \
--header 'Content-Type: application/json' \
--data '{
  "payload": {
    "mode": "DOMAIN",
    "activity_type": "DEMO_LOGIN",
    "source": "PRODUCT_CLOUD",
    "environment": "PRODUCTION",
    "event_id": 1231231232,
    "event_at": 639303296,
    "user_id": "",
    "user_id_type": "",
    "count": 1250,
    "domain": "reo.dev",
    "ip_addr": "",
    "product_id": "reoWebApp",
    "user_agent": "Mozilla/5.0 (Macintosh, Intel Mac OS X 10_15_7) AppleWebKit/537.36 (KHTML, like Gecko) Chrome/120.0.0.0 Safari/537.36",
    "meta": {
      "property1": "value1",
      "property2": "value2"
    }
  }
}'

```

### User Mode Example

```
curl --location 'https://ingest.reo.dev/api/product/aggregateusage' \
--header 'X-API-KEY: <API_KEY>' \
--header 'Content-Type: application/json' \
--data '{
  "payload": {
    "mode": "USER",
    "activity_type": "probe",
    "source": "PRODUCT_CLOUD",
    "environment": "PRODUCTION",
    "event_id": 1231231232,
    "event_at": 639303296,
    "user_id": "brian@reo.dev",
    "user_id_type": "EMAIL",
    "count": 40,
    "domain": "",
    "ip_addr": "",
    "product_id": "reoWebApp",
    "user_agent": "Mozilla/5.0 (Macintosh, Intel Mac OS X 10_15_7) AppleWebKit/537.36 (KHTML, like Gecko) Chrome/120.0.0.0 Safari/537.36",
    "meta": {
      "property1": "value1",
      "property2": "value2"
    }
  }
}'

```

### Tenant API Key

To access your API key, navigate to: **Settings →Configurations → API Keys → Product Usage API**

Note: Only users with Admin Role in Reo.Dev can access the API Keys

### Parameters

| Parameter                                      | Description                                                                                                                                 | Data Type | Possible Values                                     | Example                                                             |
| ---------------------------------------------- | ------------------------------------------------------------------------------------------------------------------------------------------- | --------- | --------------------------------------------------- | ------------------------------------------------------------------- |
| **mode** (Required)                            | Aggregation mode for the data                                                                                                               | enum      | `DOMAIN`, `USER`                                    | `"DOMAIN"`                                                          |
| **source** (Required)                          | Source of the activity                                                                                                                      | enum      | `PRODUCT_CLOUD`                                     | `"PRODUCT_CLOUD"`                                                   |
| **activity\_type** (Required)                  | Usage Metrics of the product. The definition of primary, secondary1, secondary2, should match with metrics defined in the Reo.Dev settings. | string    | Keys defined in metrics                             | `"LOGIN_ACTIVITY"`                                                  |
| **environment** (optional)                     | Environment where product has been deployed                                                                                                 | string    |                                                     | `"PRODUCTION"`                                                      |
| **user\_id\_type** (mandatory)                 | Type of user ID such as email, Social, LinkedIn, GitHub, Username                                                                           | enum      | `EMAIL`, `SOCIAL`, `LINKEDIN`, `GITHUB`, `USERNAME` | `"EMAIL"`                                                           |
| **user\_id** (mandatory)                       | Unique user ID captured for a customer                                                                                                      | string    |                                                     | `"brian@reo.dev"`                                                   |
| **count** (mandatory)                          | Aggregated count of the activity/usage                                                                                                      | integer   |                                                     | `1250`                                                              |
| <p><strong>ip\_addr</strong><br>(optional)</p> | IP address of the system from where the user has logged in.                                                                                 | string    |                                                     | `"192.127.0.0”`                                                     |
| **domain** (optional)                          | Domain associated with the user or activity                                                                                                 | string    |                                                     | `"reo.dev"`                                                         |
| **event\_id** (optional)                       | A unique identifier for this API call                                                                                                       | string    |                                                     | `1231231232`                                                        |
| **event\_at** (mandatory)                      | The time at which this API request was triggered (Formatted as a UNIX epoch in seconds)                                                     | integer   |                                                     | `639303296`                                                         |
| **product\_id** (Required)                     | Unique identifier of your product                                                                                                           | string    |                                                     | `"reoWebApp"`                                                       |
| **user\_agent** (optional)                     | Additional browser properties                                                                                                               | string    |                                                     | `"Mozilla/5.0 (Macintosh, Intel Mac OS X 10_15_7)...Safari/537.36"` |
| **meta** (optional)                            | Any other parameter that needs to be sent                                                                                                   | object    |                                                     | `{"property1":"value1","property2":"value2"}`                       |

### Sample JSON Request (Domain Mode)

```
{
  "payload": {
    "mode": "DOMAIN",
    "activity_type": "secondary23",
    "source": "PRODUCT_CLOUD",
    "environment": "PRODUCTION",
    "event_id": 1231231232,
    "event_at": 639303296,
    "user_id": "",
    "user_id_type": "",
    "count": 1250,
    "domain": "www.reo.dev",
    "ip_addr": "",
    "product_id": "reoWebApp",
    "user_agent": "Mozilla/5.0 (Macintosh, Intel Mac OS X 10_15_7) AppleWebKit/537.36 (KHTML, like Gecko) Chrome/120.0.0.0 Safari/537.36",
    "meta": {
      "property1": "value1",
      "property2": "value2"
    }
  }
}

```

### Sample JSON Request (User Mode)

<pre><code><strong>{
</strong>  "payload": {
    "mode": "USER",
    "activity_type": "LOGIN_ACTIVITY",
    "source": "PRODUCT_CLOUD",
    "environment": "PRODUCTION",
    "event_id": 1231231232,
    "event_at": 639303296,
    "user_id": "brian@reo.dev",
    "user_id_type": "EMAIL",
    "count": 1250,
    "domain": "",
    "ip_addr": "",
    "product_id": "reoWebApp",
    "user_agent": "Mozilla/5.0 (Macintosh, Intel Mac OS X 10_15_7) AppleWebKit/537.36 (KHTML, like Gecko) Chrome/120.0.0.0 Safari/537.36",
    "meta": {
      "property1": "value1",
      "property2": "value2"
    }
  }
}

</code></pre>

### Sample JSON Response \[Success]

```
{
  "response_code": "200",
  "response": "Aggregated Data Uploaded",
  "status": "success"
}

```

### Sample JSON Response \[Wrong API Key]

```
{
  "response_code": 400,
  "response": "Authentication Failure",
  "status": "failure"
}

```

### Sample JSON Response \[Invalid Mode]

```
{
  "response_code": 400,
  "response": "Invalid mode. Supported modes: DOMAIN, USER",
  "status": "failure"
}
```


# Website Visitor Insights


# Website Visitor Identification

#### **What is Website Visitor Identification?**

A significant % of website traffic are digital "ghosts". They’re visiting key pages, documentations - but not filling up any forms. But that doesn’t rule out the fact that they might be potential leads you don’t know about. That’s where Website Visitor Identification comes in - turning anonymous website visitors into de-anonymized developers.

While traditional analytics tell you *what* happened (page views, session duration, bounce rates), website visitor identification reveals *who's* behind those interactions. It's the difference between knowing "someone from San Francisco spent 12 minutes on our pricing page" and discovering "Sarah Chen, Senior Engineering Manager at a Series B fintech startup, explored your API documentation and pricing—twice this week."

So instead of seeing traffic only identified by source, you gain visibility into the actual identified developers browsing your website/documentations.

#### **Why is Website De-anonymization a key part of your GTM engine?**

From a passive source to an active lead generation and prioritzation engine -Website Visitor Identification changes the game by de-anonymizing website visitors while they're in-market, not after they're deep into their evaluation and maybe already chosen a competitor.

* **Capture hidden pipeline** - When you’re able to identify website visitors - you’re no longer waiting for leads to come to you. You’re pro-actively engaging developers that might be potential prospects.
* **Perfectly timed, contextual outreach** - Because you get the full context on which pages the prospect visited - your sales teams can reference this into their outreach instead of shooting out generic/cold emails.
* **Find high-intent prospects before your competitors do** - By identifying website visitors early on in their evaluation process, you get first-mover advantage in building relationships with prospects competitors can't even see.

Every developer who checks out your documentation, every decision-maker who downloads your whitepaper, every prospect who's clearly in research mode but hasn't filled out any first-party forms yet —they're all visible now.

There are 2 types of website visitor identification you can set up on Reo.Dev: <br>

1. [Basic Website Visitor Identification ](https://docs.reo.dev/integrations/input-sources/website-visitor-insights/website-visitor-identification/basic-website-visitor-identification)
2. [Enhanced Website Visitor Identification ](https://docs.reo.dev/integrations/input-sources/website-visitor-insights/website-visitor-identification/enhanced-website-visitor-identification)


# Basic Website Visitor Identification

#### **How does website visitor identification work?**

Reo.Dev’s Website Visitor Identification leverages a sophisticated **browser fingerprinting technique** and a **network of trusted third-party data providers** to de-anonymize website visitors.

Here’s how this unfolds:

* **High-Quality Developer Data**: Reo.Dev partners with reputable data providers to access a reliable database of developer profiles. This ensures that you’re identifying the most accurate, relevant people with higher confidence, without relying on outdated or generic data.
* **Browser Fingerprinting**: As visitors explore your site—whether they're reviewing documentation, checking out features, or engaging with specific content— we use browser fingerprinting (a technology widely adopted by sales intent tools - 6sense, Warmly, Vector, etc.) - to collect unique identifiers from their interaction. These data points are then matched against the trusted the developer data from our data-providers in real-time. If there’s a match, the developer is immediately identified, and you get to see exactly who is behind the visit.
* **Compliance & Security**: We prioritize privacy and security by ensuring:
  * We automatically exclude EU + UK - based visitors to ensure GDPR compliance
  * No personal contact information is exposed without proper consent
  * Visitors maintain control over their data through opt-out mechanisms

### **Configuring Website Visitor Identification on Reo.Dev**

Here’s a step-by-step breakdown on how you can control whether you want to enable or disable website visitor identification.

1. Website Visitor Identification is disabled by default for all customers.
2. Enabling/Disabling website visitor identification is accessible only to users with ‘ADMIN’ role on Reo.Dev

**Step 1:** Go to Settings > Integrations

<figure><img src="/files/bzvLf40xi80q5UYQbwwP" alt=""><figcaption></figcaption></figure>

**Step 2:** Next, click on configure under the ' **Basic Website Visitor Identification'** card

<figure><img src="/files/9N0OgqEK8d3RfQqUzNMy" alt=""><figcaption></figcaption></figure>

**Step 3:** Here you will see 2 options:

1. **Enable Identification** **(Recommended)**: Enabling this means you can view/access website and doc visitors even though they haven’t yet filled out any first party forms.

<figure><img src="/files/KxfAKCYqldwH817XhpN0" alt=""><figcaption></figcaption></figure>

*Note: Any visitors from the EU/UK region are automatically excluded in compliance with GDPR. .*

Once you’ve enabled identification - you can view the identified developer profiles in the following sections on Reo.Dev:

1. Developer Section
2. Buyer Section
3. Account → Active Developers
4. Account —> Activity Timeline
5. Account → Prospects → Buyers
6. Account → Prospects → Developers

This gives sales and marketing teams immediate visibility into high-value anonymous traffic.

2. **Disable Identification:** At anytime you can choose to disable website visitor identification by clicking on the ‘disable identification’ option. This ensures that you only see website/doc visitors who have filled out your 1st party forms.

<figure><img src="/files/TRY1bAhLfkuu3iSDYofG" alt=""><figcaption></figcaption></figure>

Once you disable this:

* All existing identified contacts (who have not filled out any forms) are removed from your interface.&#x20;

**Note:** In case you re-enable this feature you will be able to see these previously identified contacts again.

* Contact limits used by identified visitors are credited back to your account
* The feature can be re-enabled at any time through the same settings section


# Enhanced Website Visitor Identification

#### How does enhanced website visitor identification work?

Reo.Dev’s enhanced website visitor identification works by capturing interaction-level signals when a visitor lands on your website/documentation/forms through a tracking script. These signals are then securely processed and matched against a network of trusted external data partners and enrichment partners to identify the visitor. When a confident match is found, the visitor’s identity is returned and surfaced in Reo along with their activity context. This approach helps improve coverage and match rates while maintaining strict standards around privacy and data handling.

With the enhanced website visitor identification - you can identify upto 40% more anonymous visitors. Identification rates depend on the quality and volume of your website traffic. Higher-intent traffic (e.g. ICP accounts, repeat visitors, engaged sessions) generally results in stronger match rates. We also filter out junk/irrelevant (non-tech) profiles.&#x20;

#### **Configuring Enhanced Website Visitor Identification on Reo.Dev**

You can enable enhanced website visitor identification across your website, documentations & forms.

Note: [Basic website visitor identification](https://docs.reo.dev/integrations/input-sources/website-visitor-insights/website-visitor-identification/basic-website-visitor-identification) must be enabled to enable enhanced website visitor identification

**Enabling Enhanced Website Visitor Identification**

Step 1: Go to Settings > Integrations > Developer Insights

<figure><img src="/files/6Ew1X6RXziEkUxw90gGi" alt=""><figcaption></figcaption></figure>

Step 2: Click on settings icon for website, documentation or forms (wherever you want to enable enhanced website visitor identification).

<figure><img src="/files/4y92O0rqgpY3ukLzZzuP" alt=""><figcaption></figcaption></figure>

Step 3: Under Install tracking pixel - turn on the enhanced website visitor identification toggle

<figure><img src="/files/6qR7PBrBLaesBwFV769B" alt=""><figcaption></figcaption></figure>

Step 4: Copy past the new tracking code in the of your website/documentation/form.

<figure><img src="/files/MMqztgcwvEj401m6Faar" alt=""><figcaption></figcaption></figure>

**Disabling Enhanced Website Visitor Identification**

To disable enhanced website visitor identificaiton:

1. Turn off the ‘Enhanced Visitor Identification’ toggle
2. Once disabled, **copy the standard tracking code** that is provided and paste it in the header of your website/documentation/form

Follow the exact same steps for enabling/disabling enhanced website visitor identification across your documentations and forms.

**FAQs**

**1. Why is this toggle disabled?**

This feature may not be included in your current plan. Please reach out to your Account Manager to learn more.

**2. How can I access the leads identified through this feature?**

You can request a report by contacting support at **<support@reo.dev>.**

**3. If I disable the beacon, do I need to update the pixel?**

Yes, you will need to update your pixel after disabling the beacon.<br>

4. **Are all identified leads show? If not, why don’t I see a particular lead on Reo**

Not all identified leads are displayed. Reo filters out junk profiles (eg non-technical profiles) to ensure you're only seeing high-quality, relevant leads.&#x20;


# RB2B

[**RB2B**](https://www.rb2b.com/) by [**Retention.com**](https://docs.reo.dev/integrations/input-sources/website-visitor-insights/Retention.com) platform focused on helping B2B businesses improve lead capture, engagement, and conversion. It’s specifically designed to enhance B2B marketing and sales processes by turning anonymous website visitors into identifiable leads.

Developers often anonymously visit website to check out your technical docs, pricing pages, or other website assets.

With Reo.Dev's integration with RB2B, we can triangulate page visits in our system with the page visit alert sent by RB2B to denaonymize more developers in Reo.Dev.

***

<figure><img src="/files/sCUrkJ5flIuZgg8gcFpS" alt=""><figcaption></figcaption></figure>

#### On Average, Our Customers See a 13.83% Lift in De-anonymized Profiles captured in RB2B

We recently analyzed data from customers who integrated RB2B with Reo.Dev. Instead of focusing on absolute lead volumes — which can vary widely by traffic, audience, and content — we focused on what really matters: **the percentage lift in identifiable developer profiles**.

Across these accounts, the average enrichment lift was **13.83%**.

In simple terms, this means that by connecting RB2B with Reo.Dev, customers were able to identify nearly **14% more developer profiles** — complete with verified business emails or LinkedIn profile URLs — that would have otherwise remained anonymous.

{% hint style="info" %}
**Note:** This average is based on historical data from customers who connected RB2B to Reo.Dev. Actual results may vary depending on traffic quality, volume, and engagement patterns — but the lift is real, and meaningful.
{% endhint %}

***

#### How Do We De-anonymize These Profiles?

1. When you receive a website visitor alert from RB2B in your Slack channel, we analyze the message and, based on the page visit details, match the profile with an existing anonymous developer in our system.
2. This triangulation allows you to de-anonymize the developer and access their entire activity history.
3. For instance, if a developer visits a documentation page and performs actions like package manager installation or Docker pulls, we previously recorded these activities under a ReoID due to anonymity. However, with the Reo.Dev <> RB2B integration, you can now de-anonymize that developer and view their complete activity history.

***

**Privacy Policy Updation**

{% hint style="info" %}
We recommend that you update your privacy policy when you start using our service. For more on information about this please visit.

[Updating your Privacy Policy](https://support.rb2b.com/en/articles/8795972-updating-your-privacy-policy)
{% endhint %}

***

### Install Rb2b script on your docs and company website pages

**Step 1:** Login to your RB2B account

**Step 2:** Click on **Script** on the Nav Bar.

![](https://usercontent.us.prod.clueso.io/d06f019c-da0b-4d5b-9fdd-9630e7fd5d0f/b613a8ec-f329-4ede-980d-631b5ee063d4/86c039f7-5b1b-4825-bb14-d3bb68068d5b/images/6fba4105-5f12-40a7-a72c-5452d4380307.png)

**Step 3:** Click on **View Script**.

![](https://usercontent.us.prod.clueso.io/d06f019c-da0b-4d5b-9fdd-9630e7fd5d0f/b613a8ec-f329-4ede-980d-631b5ee063d4/86c039f7-5b1b-4825-bb14-d3bb68068d5b/images/599e0427-3a10-4e7a-92b3-00ace3337bde.png)

**Step 4:** Click on **View & Install** script in the “view html code” section.

![](https://usercontent.us.prod.clueso.io/d06f019c-da0b-4d5b-9fdd-9630e7fd5d0f/b613a8ec-f329-4ede-980d-631b5ee063d4/86c039f7-5b1b-4825-bb14-d3bb68068d5b/images/b93053a5-ce20-4ce9-8a95-a12bd2973405.png)

{% hint style="info" %}
**Note:**

* Please ensure that RB2B script in installed on all your documentation pages and company website
* Test RB2B script on website. test it by using the “Test Script on Website” button.
  {% endhint %}

### **Integrate RB2B with Reo.Dev**

**Step 1:** Log into your Reo.Dev admin account.

**Step 2:** Head to **Integrations** on the Nav Bar and then click **Connect** for RB2B under Website Visitor Insights.

![](/files/k2pYz5xCZqW3aZ4GRDjD)

**Step 3:** Check the confirmation boxes and click **Next**.

![](/files/aiR8nPjXS6hHKpglmA5b)

### Connecting Slack

**Step 1**: Click **Connect** under Connect Slack

![](/files/SAoDqv6IU2I4I7bpmywO)

\
**Step 2**: Click **Allow.**

<figure><img src="/files/ai9oiabBhxmcR774UZHT" alt=""><figcaption></figcaption></figure>

#### **Slack RB2B Integration Permissions**

For analyzing Slack alerts and triangulating page visit activities, we require **view permissions**:

**Content and Info About You**

* View information about your identity

**Content and Info About Channels & Conversations**

* View messages and other content in your **public channels**
* View basic information about **public channels** in your workspace

**Step 3:** Once the Slack connection is established, select the **public Slack channel** where you currently receive **RB2B alerts**.

<figure><img src="/files/mBKyqtFUVUV1eiyBKg70" alt=""><figcaption></figcaption></figure>

This step allows Reo.Dev to read alert data from that specific channel, triangulate it with developer activity already captured in Reo.Dev, and de-anonymize identified profiles.

Once selected, click **Save** to complete the mapping.

![](/files/tBIOM8rye7sjKZbGYhuM)

For our integration to function correctly, users must configure RB2B's Slack alerts. Follow this guide to set it up.

<https://support.rb2b.com/en/articles/8913193-setup-guide-slack>

{% hint style="info" %}
**Note:** You'll need to be a **Slack Workspace admin** to set up this integration.
{% endhint %}


# Vector

[Reo.Dev](http://Reo.Dev)’s Integration with Vector helps identify more de-anonymized developers.

When you receive a website visitor alert from Vector in your Slack channel, we analyze the message and based on the page visit details, match the profile with an existing anonymous developer in our system.

This triangulation allows you to de-anonymize developers and access their entire activity history.

For instance, if a developer visits a documentation page and performs actions like package manager installation or Docker pulls, we previously recorded these activities under a ReoID due to anonymity. However, with the [Reo.Dev](http://Reo.Dev) and Vector integration, you can now de-anonymize that developer and view their complete activity history.

{% hint style="info" %}
**Pre-requisities:**

* Please ensure that the Vector pixel is installed on all your documentation pages and company website.
* Only users with ‘Admin’ role on [Reo.Dev](http://Reo.Dev) can configure this integration.&#x20;
  {% endhint %}

### **Integrate Vector with Reo.Dev**

**Step 1:** Head to the **Integrations** section. Under **Websitor Visitor Insights**, click on '**Connect'** for Vector.

<figure><img src="/files/F07lgP8oUNUIXU5spZou" alt=""><figcaption></figcaption></figure>

**Step 2:** Confirm Vector site pixel installation:

a. Confirm that the Vector site pixel is installed on my website & documentation pages.

b. Confirm that slack alerts for “All Visitors” segment from Vector is turned on. [Here’s a guide on Vector <> Slack Integration.](https://learn.vector.co/articles/3253377020-slack-integration-guide)

<figure><img src="/files/I1bTNvtNW6WtRpXlaIhv" alt=""><figcaption></figcaption></figure>

**Step 3: Connect Slack:**

a. Click on **Connect** under Connect Slack.

<figure><img src="/files/e01EpXDUjLEvfbKiSp4u" alt=""><figcaption></figcaption></figure>

b. Click on **Allow.**

<figure><img src="/files/H1C9cKTQfTsK9VO9azr4" alt=""><figcaption></figcaption></figure>

For analyzing Slack alerts and triangulating page visit activities, we require **view permissions as shown in the above image.**&#x20;

**Step 4:** Once Slack is connected, select the **Slack channel** where you receive notifications from Vector.

This step allows Reo.Dev to read alert data only from that specific channel, triangulate it with developer activity already captured in Reo.Dev, and de-anonymize identified profiles.

Once done, click on **Save**.&#x20;

<figure><img src="/files/J6i1fjdb2nARTezvJi5i" alt=""><figcaption></figcaption></figure>

{% hint style="warning" %}
**Note:**&#x20;

* Reo.Dev enriches developer profiles with details like Name, Company Name, email address and more using the LinkedIn URL identified by Vector. You can access these developers directly on Reo.Dev’s dashboard. However, in cases where a LinkedIn profile identified by Vector cannot be verified, it will not be enriched or displayed on the Reo.Dev dashboard.
* Only those leads surfaced by Vector *after* the Vector integration is set up on Reo.Dev will be enriched and visible on Reo.Dev's dashboard.&#x20;
  {% endhint %}

#### **FAQs**

1. **How much enrichment can I expect from the Vector and Reo.Dev Integration?**

You can expect a noticeable uplift in your total de-anonymized traffic once Vector is connected with Reo.Dev. With our RB2B integration, we've seen anywhere between **10–15% increase in identified visitors**. We’re still collecting more data to establish exact benchmarks for Vector Integration, reason being:&#x20;

* Not all profiles that come in via Vector will be de-anonymized because there may be some notifications where the LinkedIn URL is missing or LI URL points to a profile that does not exist.
* There could be some irrelevant profiles that do show up. There is one level of filtering that we have where we remove those profiles and we don't add them into the de-anonymization. This is something that is always in progress. As and when we see irrelevant profiles coming, we keep on adding those rules to maintain clean, high quality data.
* The way the integration works - We triangulate contacts identified by Vector or RB2B with an FID on Reo by matching the timestamps of notifications from RB2B or Vector with the timestamps recorded for corresponding activities by our JavaScript.

  In the case of RB2B, we already have sufficient historical data to determine the reasonable time range between an RB2B notification and Reo’s capture of that activity, allowing us to confidently handle triangulation.

  For Vector, we’re still in the data collection phase — once enough activity is captured, we’ll be able to accurately predict the expected enrichment uplift.

2. **When Vector shares a LinkedIn ID, how does Reo.Dev map that LinkedIn ID to an existing contact in Reo.Dev?**

When Vector provides a LinkedIn ID, there are three possible mapping scenarios in Reo:

* **Mapped to an already de-anonymized FID -** This is a direct match. If the same activity captured by Vector is also tracked by Reo’s JavaScript, we link them. In this case, Reo’s JS remains the source of truth for activity data.
* **Mapped to an anonymous FID (and it's perfect match/successful triangulation) -** We will only take the LinkedIn ID from the Vector notification and enrich the FID. The activity from Vector notification will not be a part of the enrichment, as that activity would already be tracked by our JS and updated against the FID.
* **No matching FID found -** If the LinkedIn profile doesn’t match any existing FID, we create a new de-anonymized developer profile using the LinkedIn data from Vector and associate it with the single activity detected by Vector.

3. **When will I start seeing this data on Reo.Dev?**&#x20;

You’ll start seeing data in Reo.Dev after **24 hours of setting up the integration.**


# Owned Communities


# LinkedIn

Reo.Dev’s LinkedIn integration allows you to effortlessly track comments, reactions, and reposts from your company's Linkedin page.

This enables you to quickly identify which accounts or developers are most active, analyze your most popular posts, and gain insights into what resonates most with your audience.

Let's look at how you can connect your company's LinkedIn page with Reo.Dev

{% hint style="info" %}
Please note that only users with **admin role** access in **Reo.Dev** can setup this integration.
{% endhint %}

**Step 1**: Head to **Integrations**. Click **Connect** on the LinkedIn card under the **Owned Communities** Section.

![](/files/ROnAGk2qdOVbU39WwobV)

**Step 2**: To authenticate the LinkedIn connection, add your Linkedin's page Admin URL

How to find Admin URL:

1\. Login to LinkedIn

2\. Go to your Company Page

3\. Click 'View as Admin' button

4\. Copy Admin page URL

![](/files/OHHAOlkhwuFJupzkenxd)

**Step 3**: Click **Authenticate.**

<figure><img src="/files/z2m4l8EkOG9uv3Nv8ajk" alt=""><figcaption></figcaption></figure>

**Step 4:** Click **Allow** to share the required permissions with Reo.Dev.

<figure><img src="/files/b8pmYBo5qjE37yklCEzj" alt=""><figcaption></figcaption></figure>

**Step 5:** Your LinkedIn App is successfully connected!

<figure><img src="/files/Kf8WCPqo8RQh0pLx2Qiq" alt="" width="375"><figcaption></figcaption></figure>

You can create an Account or Developer Segment based on LinkedIn reactions.

![](/files/AftSMLDDWGMZ1oKOlYCV)

![](/files/e6zbepKsniwQ2fqWOhGc)

You can also filter the activity timeline based on LinkedIn interactions.

![](/files/9Yj5pD3Wk5gL9Iu7ZaN4)


# Discord

Reo.Dev’s Discord Integration enables you to seamlessly monitor activities like posts, reactions, replies, within your Discord community.

Below is a step-by-step guide to connecting your Discord Server with Reo.Dev.

{% hint style="info" %}
**Before You Begin:**&#x20;

Please note that only users with **admin access** to both the Discord Community and **Reo.Dev** can set up this integration.
{% endhint %}

### **Step 1: Setting up Discord Integration on Reo.Dev**

1. Head to **‘Integrations**’ section. Click on **Owned Communities.**
2. Click on **‘Connect’** under the Discord.&#x20;

<figure><img src="/files/RDucC35m6fAoGc2i5g4b" alt=""><figcaption></figcaption></figure>

### **Step 2: Authenticate your Discord Community**

1. After you click on connect, you will be directed to the login page of your Discord Community. Ensure that you’re logged in as an admin.
2. Select the server you want to connect.
3. Click **Authorize** to grant Reo.Dev the necessary permissions to access your Discord Community.
4. Once authorized, you will be redirected back to Reo.Dev and you will see a **success message** confirming that your Discord Community is connected.

### Step 3: Import Channels

1. After successfully connecting Discord to [Reo.Dev](http://Reo.Dev) - you can select the specific channels you want to import into Reo.Dev and monitor the activities on. By default last 6 months of conversations data will be imported.

<figure><img src="/files/9RJOsrWY3NPvCUHwIYpb" alt=""><figcaption></figcaption></figure>

{% hint style="info" %}
Note: By default all channels are selected. De-select any you don’t want to import.
{% endhint %}

2. Once done, click on ‘Import.’ Once all the channels are imported successfully - you will be able to see a success message.

<figure><img src="/files/vm5pVPUUnPTLvUyDSCF8" alt=""><figcaption></figcaption></figure>

{% hint style="warning" %}
Note: In case you don’t see your channels, follow the below steps:

* Navigate to the channel you want to import on **Discord**
* Go to the settings for that specific channel
* Within Permissions (located on the left sidebar), click **Add member or roles**
* Select the **Community Verification bot** (the one with the green check) under members and click **Done**
* Under **Advanced permissions**, ensure that \[View channel] and \[Read message history] are marked as ✅
  {% endhint %}

### Step 4: Manage Channels

Any new channels created after the initial setup will be visible in the Discord settings page on Reo.Dev. You can select these channels and import it into Reo.Dev to start tracking conversations.&#x20;

<figure><img src="/files/5urnsBzRbbCiQVhGNrhu" alt=""><figcaption></figcaption></figure>

### **Tracking Discord Activities:**

Once the setup is done, you can start monitoring your discord community activity directly from Reo.Dev.

1. Click on **‘Conversations’** section under tools.

<figure><img src="/files/miD8AeixxZKllQFOXxHq" alt=""><figcaption></figcaption></figure>

2. Click on the **Discord Tab**. Here you can see all the conversations across your channels.

<figure><img src="/files/S3tCcQk8CkGqu9b7eW5O" alt=""><figcaption></figcaption></figure>

There are a bunch of filters you can use to surface relevant conversations.

<figure><img src="/files/nVAni5H4oL7mLSeTNrdk" alt=""><figcaption></figcaption></figure>

<figure><img src="/files/mxpoyM3XQYR7mneL8HR9" alt=""><figcaption></figcaption></figure>

3. **Add labels to conversations.** Labels help you categorize posts. For eg you can create different labels for posts related to a bug fix, or a specific feature - so it’s easier for you to filter out conversations around those.

* Click the **label icon** on a conversation.
* Click on **'create'** to add a new label.
* Later, use the **Labels filter** to view posts under specific categories.

<figure><img src="/files/lAZ1sGxI5fWrsaADhbMG" alt=""><figcaption></figcaption></figure>

4. **View user details:** Within a conversation tab - hover over the username to instantly view age, last activity date and the number of posts/replies/reactions.

<figure><img src="/files/bCcOYi5FfDd03lc3QI9a" alt=""><figcaption></figcaption></figure>

5. **View conversations on your discord channel:** Click on any post to view the entire conversation in your discord channel.

✅ **That’s it!** Your Discord community is now connected to Reo.Dev — enabling you to monitor, analyze, and engage with your community more effectively.


# Slack

Slack-owned communities are one of the sources Reo uses to identify and understand developer activity across your ecosystem.\
\
When developers engage with your owned Slack community, Reo can help deanonymize that activity, map developers to the right companies, and connect their Slack engagement with other signals such as website visits, docs activity, product usage, GitHub activity, and more.

{% hint style="info" %}
Note: Only users with Admin Role can Integrate Slack.&#x20;
{% endhint %}

**Step 1:** Go to Integrations > Find the Slack Card under Owned Communities and click on Connect.

<figure><img src="/files/49W4ujMRnIOIyx11QlkE" alt=""><figcaption></figcaption></figure>

**Step 2:** Enter your workspace URL and click **Continue**.

<figure><img src="https://usercontent.us.prod.clueso.io/d06f019c-da0b-4d5b-9fdd-9630e7fd5d0f/224d6650-0c84-4500-8aee-3acdf481eb80/80667b30-c64c-4275-8115-bacae1086548/images/621b3bf8-acbd-46b0-b126-0811a91cc0f5.png" alt=""><figcaption></figcaption></figure>

**Step 3:** This will take you to the authorization page. Click **Allow**.

<figure><img src="/files/m3Raccsb9GETj51c3Fxt" alt=""><figcaption></figcaption></figure>

And you’re connected!

You can view all Slack activity in the Insights page, Activity Timeline, and Developer Profile. You can also use Slack activity as a filter in Segments to identify developers or accounts that have taken specific actions in your Slack community.


# Open Communities

Open Communities is a key part of our social listening capabilities, allowing users to track conversations across various developer-focused communities and gain actionable insights. This article will guide you through the feature, its configurations, and best practices.

***

### Supported Communities

Reo.Dev currently tracks open conversations in the following platforms:

* **Reddit**
* **Stack Exchange**
* **Slack** (only public channels)
* **Hacker News**
* **Dev.to**
* **Product Hunt**

{% hint style="info" %}
**Note:** Only open communities are tracked. Gated or invite-only communities, regardless of platform, are excluded. This ensures that only relevant, publicly available developer conversations are included in the insights.
{% endhint %}

***

### Feature Overview

1. Configure open community through:\
   **Integrations -> Open Communities -> Connect** (under specific community card).

<figure><img src="/files/BJmCy5K8vJxqgrf6jZl5" alt=""><figcaption></figcaption></figure>

2. To set up and manage keywords to track specific topics or discussions, click the **Gear** icon on the community card.<br>

<figure><img src="/files/MUy9RRfbniLNzQDNS06R" alt=""><figcaption></figcaption></figure>

\
3\. Add Keywords of interest and click **Save**.

<figure><img src="/files/P4tXeFDYeF7t7Qw39akq" alt=""><figcaption></figcaption></figure>

To access the mentions of Keywords from different communities, head to **Conversations**.

![](/files/dEDMeKeVrqyafA2qrmGT)

#### Workflow

The recommended setup flow is as follows:

1. **Integrations**: Connect all relevant community platforms.
2. **Settings**: Configure keywords for tracking conversations.
3. **Conversations Tab**: View and act upon the tracked results.

***

### Access and Permissions

#### Admin Role

* Can add, edit, or delete keywords.
* Has full access to connect platforms and manage settings.

#### User Role

* Can view conversation results.
* Can apply filters but cannot manage keywords or connect platforms.

***

### Setting Up Open Communities

#### 1. Accessing the Feature

* Navigate to the **Integrations** panel.
* Locate the **Open Communities** section.

#### 2. Connecting Platforms

* Click **Configure** under the Open Communities box.
* Select platforms from the available list and click **Connect**.

#### 3. Configuring Keywords

* Navigate to **Settings** and locate the **Keywords** section.
* Add keywords to track conversations. At any given time, users can track up to **5 keywords**.
* Enable or disable keywords as needed to ensure only five are active.

#### 4. Viewing Conversations

* Go to the **Conversations** tab to view results for the configured keywords.
* Use filters for **Keywords** and **Communities** to refine results.

***

### Best Practices for Keyword Configuration

Developer-focused companies can optimize Open Communities by tracking keywords that reflect their brand, product offerings, and customer conversations. For example, consider how a company like **Postman** might approach this to understand better the utility of keyword tracking and how to apply it effectively.

For example, Postman might focus on the following keywords:

1. **Postman** - To monitor brand mentions across platforms.
2. **API testing** - To track conversations around core use cases.
3. **Postman alternatives** - To stay updated on competitive analysis.
4. **GraphQL API** - To follow discussions on advanced API technologies.
5. **Newman CLI** - To track mentions of their command-line tool.

These keywords provide insights into their product’s perception, usage, and market positioning.

***

| **Keyword Type**  | **Example**   | **Explanation**                                  |
| ----------------- | ------------- | ------------------------------------------------ |
| **Exact Match**   | Postman       | Tracks mentions of "Postman" across platforms.   |
| **Phrase Search** | "API testing" | Tracks the entire phrase "API testing."          |
| **Wildcards**     | Graph\*       | Tracks variations like "GraphQL" or "Graph API." |

**Tips:**

* Use one-word keywords for brand monitoring.
* Review keyword configurations periodically to align with product updates and market trends.

***

### Results Display and Filters

#### Conversation Cards

Each result is displayed as a card, showing:

* The community name and post title.
* A preview of the post (note: the preview text may not contain the tracked keyword).
* The keyword matched.
* Date of post
* A button link to view the entire conversation/thread.

![](https://usercontent.us.prod.clueso.io/d06f019c-da0b-4d5b-9fdd-9630e7fd5d0f/79970153-db84-4643-aa3d-620905988462/94e0d77b-32cb-4543-abad-c3c4e542408f/images/f5e8599b-6944-4ce6-bdf2-3b997e11351b.png)

#### Filters

Use the following filters to refine results:

1. **Keywords**: Filter by specific keywords.
2. **Community Platforms**: Focus on one or more platforms.

![](/files/a2OWeOqycGeALvwePu5y)

***

### FAQs

<details>

<summary>Who can manage keywords?</summary>

Only Admin users can add, edit, or delete keywords.

</details>

<details>

<summary>Why is the keyword not appearing in the preview?</summary>

The preview shows the initial lines of the post. To see the full context, click the "View Conversation" button.

</details>

<details>

<summary>Can I choose specific communities to track?</summary>

No. Reo.Dev automatically tracks relevant open developer communities for all supported platforms.

</details>

<details>

<summary>What are the keyword configuration limits?</summary>

* A maximum of 5 active keywords can be tracked at any time.
* Keywords can be toggled on or off for tracking.

</details>


# Output Integrations


# CRM


# HubSpot

Integrating HubSpot with Reo.Dev enables seamless two-way data sync, empowering your teams to map and leverage custom account lifecycle and deal stages to drive actionable insights. With this integration, you can read lifecycle stages for contacts and accounts, map custom CRM fields, and sync developer and account insights directly into HubSpot.

Requirements:

* You must be admin of Reo.Dev app
* You must be an admin of your HubSpot CRM instance

### Connect HubSpot

**Step 1**: Go to Settings > Integrations&#x20;

<figure><img src="/files/EWUDCXGwlPQbxOxQ9yn3" alt=""><figcaption></figcaption></figure>

**Step 2:** Go to Output Integrations > CRM > Click on Connect on the Hubspot Card.

<figure><img src="/files/HETXEd6nkVLSVt8CXFX7" alt=""><figcaption></figcaption></figure>

**Step 3**: You will be redirected to the Authorization flow. Select your HubSpot account and click **Choose Account**.

![](https://usercontent.us.prod.clueso.io/d06f019c-da0b-4d5b-9fdd-9630e7fd5d0f/a66e57fb-1700-455b-92e0-656fd3a6d464/7a571c99-c8f9-476d-b553-073fa51d5963/images/96e66c81-ce6f-439e-997d-eb67f7e3170f.png)

**Step 4:** Review the requested scope and click **Connect App.**

**Note:** Reo.Dev will request access to read and write contacts and companies and read and edit contact and company properties.

![](https://usercontent.us.prod.clueso.io/d06f019c-da0b-4d5b-9fdd-9630e7fd5d0f/a66e57fb-1700-455b-92e0-656fd3a6d464/7a571c99-c8f9-476d-b553-073fa51d5963/images/c15b06ae-25e9-4f01-b35c-060ab56a8896.png)

{% hint style="info" %}
In case you have already connected HubSpot app, you will need to Update the HubSpot App permissions. Instead of Connect CTA you will get Update option.
{% endhint %}

And your HubSpot instance will be integrated with Reo.Dev. Click on Continue to configure export and sync settings on Reo.&#x20;

<figure><img src="/files/5Kmd0YJLMmJL4EZzY3Sq" alt=""><figcaption></figcaption></figure>

### HubSpot Export Settings

After the HubSpot App is connected, you will be redirected to HubSpot Settings screen to configure the Export and Sync settings.

<figure><img src="/files/Kq1SNezDBrzusJceNOLX" alt=""><figcaption></figcaption></figure>

There are two options to Export data from Reo.Dev

1. **Accounts**

   You can select Accounts if you want to only export accounts from Reo.Dev to HubSpot.
2. **Accounts and Contacts**

   You can select Accounts and Contacts if you want to only export accounts from Reo.Dev to HubSpot. Under Accounts and Contacts, you have an option to sync contacts associated with an account automatically or manually. To sync it automatically, turn on the toggle 'Automatically sync contacts associated with an account'. In this case, all developers tied to a synced account get pushed to CRM even if they don’t match a Reo segment. So Contacts can be synced to HubSpot in two ways:

* **Via Reo segments** **→** Contacts synced this way will have a **Segment** value.
* **Via account association ->** All developers linked to an account are pushed to HubSpot — even if they don’t match a Reo segment. These contacts will have **activity and company data**, but **no segment value.**&#x20;

### HubSpot Field Mapping

Map all the fields from Reo.Dev that you want to send to HubSpot and update existing Accounts and Contacts. This mapping will be used to create new accounts and contacts in HubSpot. You can also select which fields should be updated in HubSpot whenever there is any change in Reo.Dev.

Please note that when we export data from Reo.Dev, we check if the company or contact exists in the HubSpot record or not. If the record is present, we update the corresponding fields based on the mapping preference selected by you and in case the record is not present, we create a new records.

We use the following fields as unique identifiers to prevent duplication:

* Accounts → Company Domain Name
* Contact → email ID

### **Accounts Field Mapping**

We have provision to export following fields for Accounts object to HubSpot.

| **Reo.Dev Field**             | **HubSpot Field**                     |
| ----------------------------- | ------------------------------------- |
| Company Name                  | Company Name                          |
| Company Domain                | Company Domain Name                   |
| Country                       | Country/Region                        |
| State                         | State                                 |
| City                          | City                                  |
| Employee Range                | Employee Range                        |
| Annual Revenue                | Annual Revenue                        |
| Founded In                    | Year Founded                          |
| Last Activity Date            | REO: Last Activity Date               |
| LinkedIn Company Page         | LinkedIn Company Page                 |
| REO Customer Fit Score        | REO: Customer Fit                     |
| REO Developer Activity Score  | REO: Developer Activity Score         |
| REO: Activity Score (Numeric) | REO: Activity Score (Numeric)         |
| REO Segment Name              | REO: Segment Name                     |
| REO Account Link              | REO: Account Link                     |
| REO Account Summary           | REO: Account Summary                  |
| REO Tags                      | REO: Account Tags                     |
| REO: Audience Name            | REO: Audiences                        |
| REO: Preferred Technologies   | reo\_preferred\_technologies\_summary |
| REO: Dev Funnel               | reo\_dev\_funnel                      |
| REO: Account Agents Tags      | reo\_agents\_summary                  |
| REO: Industry                 | reo\_industry                         |

* **Company Domain** is a mandatory field and is already mapped.
* Fields with prefix REO are automatically created in HubSpot and mapped to corresponding Reo.Dev field.
* For Rest of the fields you can map the corresponding field in HubSpot from the dropdown. If you select Auto Overwrite checkbox, then we will overwrite the existing data in HubSpot during creation and sync operations.

{% hint style="info" %}
**Recommendation:** Fields with prefix REO should always have Auto-Overwrite checkbox as TRUE.
{% endhint %}

### Contacts Field Mapping

We have provision to export following fields for Contacts object to HubSpot.

| **Reo.Dev Field**             | **HubSpot Field**                   |
| ----------------------------- | ----------------------------------- |
| First Name                    | First Name                          |
| Last Name                     | Last Name                           |
| Business Email ID\*           | Email                               |
| Company Website               | Website URL                         |
| Designation                   | Job Title                           |
| Country                       | Country/Region                      |
| State                         | State                               |
| City                          | City                                |
| LinkedIn ID                   | REO: Linked In Profile              |
| Last Activity Date            | REO: Last Activity Date             |
| REO: Developer Summary        | REO: Developer Summary              |
| REO: Segment Name             | REO: Developer Segment Name         |
| REO: Tags                     | REO: Developer Tags                 |
| REO: Activity Score (Numeric) | REO: Activity Score (Numeric)       |
| REO: Audience Name            | REO: Audiences                      |
| REO: Developer Link           | reo\_contact\_link                  |
| REO: GitHub                   | reo\_contact\_github                |
| REO: First Activity Date      | reo\_contact\_first\_activity\_date |
| REO: Contact Agents Summary   | reo\_agents\_summary                |

* **Business email ID** is a mandatory field and is already mapped. We fetch the Business email ID of the developers from third part enrichment service providers.
* In addition to the Business Email ID, **Personal Email IDs** will also be synced **if collected through first-party sources**, including:
  * Signup Forms on your website or documentation pages
  * Product login or signup forms.
* In the Reo.Dev UI, when users hover over the email icon on a profile, if a Personal Email has been enriched and mapped to that profile, it will be displayed alongside the Work Email.
* Fields with prefix REO are automatically created in HubSpot and mapped to corresponding Reo.Dev field.
* For Rest of the fields you can map the corresponding field in HubSpot from the dropdown. If you select Auto Overwrite checkbox, then we will overwrite the existing data in HubSpot during creation and sync operations.

***

### **How Reo.Dev Handles Multiple Email Records in HubSpot**

For each **unique email ID** we treat it as a **separate contact record** in HubSpot. Depending on whether an email already exists in the CRM, the contact is either **updated or created** as per the following scenarios:

| **Scenario**                                      | **Action in HubSpot**                                                          |
| ------------------------------------------------- | ------------------------------------------------------------------------------ |
| **One Email ID exists in CRM**                    | Update existing contact with latest REO data                                   |
| **One Email ID does not exist in CRM**            | Create a new contact record                                                    |
| **Two Email IDs → First exists, second does not** | Update existing contact for first email, create a new contact for second email |
| **Two Email IDs → Neither exists**                | Create two separate contact records (one for each email)                       |
| **Two Email IDs → Both exist in CRM**             | Update both contacts separately with latest REO data                           |

***

### Send developers only with LinkedIn ID to Hubspot CRM&#x20;

You can send contacts with only LinkedIn IDs to Hubspot CRM. If the email ID is not available for a developer, Reo will match contacts by the LinkedIn profile to avoid duplicates and create/update contacts.&#x20;

To enable this, click on the LinkedIn tab under Contacts - Field Mapping in Field Mapping section

<figure><img src="/files/IbpMTHCAe9pZYHyH1gAq" alt=""><figcaption></figcaption></figure>

Next, select your custom LinkedIn profile field to map the contacts. And in case you are using the custom field created by Reo as the preferred field for mapping the LinkedIn profile - then choose REO:LinkedIn Profile as the field from the drop-down.&#x20;

Note: This mapping will be used to create new contacts with only LinkedIn ID in the CRM

<figure><img src="/files/0XxjuxLl6MT8cERuCzr0" alt=""><figcaption></figcaption></figure>

Once done, click on save.&#x20;

{% hint style="info" %}

### Quick Note on how this works:&#x20;

**Scenario 1: If LinkedIn Profile Mapping is not present:**

* Only developers with a valid email ID (business or First party) are created/updated in CRM
* LinkedIn profile is updated to REO: LinkedIn Profile field

**Scenario 2: If LinkedIn Mapping is present:**

* **In case, email and LinkedIn ID are both available:**&#x20;
  * Sync is done using only the email ID of the developer
* **In case, only Email is available**
  * Sync is done using the email ID of the developer
* **In case, only LinkedIn is available**

  The System checks for the LinkedIn ID present in Reo in the LinkedIn profile field mapping

  * If the LinkedIn ID is found
    * Developer is synced to the existing profile
  * If the LinkedIn ID is not found
    * A new contact is created in Hubspot with the LinkedIn ID as the unique identifier. From the next sync, the same contact is updated
      {% endhint %}

### **Do We Delete Data from Your CRM?**

Reo.Dev does **not delete any data** from your connected HubSpot CRM instance with Reo.Dev — with the **only exception being occasional cleanups** of records that were originally created by Reo.Dev.

These cleanups are **rare and limited strictly to Reo.Dev-originated data**, and are performed to maintain data accuracy and reliability. For example, if a developer contact's work email becomes invalid (e.g., they’ve switched jobs), and a new valid email is identified, Reo.Dev may update or clean up the outdated email to ensure your CRM reflects the most current information.

Rest assured, no third-party or manually added CRM data is ever deleted by Reo.Dev.

***

### **What Happens When a Contact is Updated?**

* If an email already exists in HubSpot, Reo.Dev **updates the mapped fields** (as configured in CRM settings) with the latest developer data.
* Updates **do not overwrite existing CRM data outside the mapped REO fields**.

***

### **How New Contact Records Are Linked to the Same Company/Account**

When Reo.Dev creates new contacts, all the captured data—including the **Company Website (Domain Name)**, job title, LinkedIn profile, and other mapped fields—remains the same across contact records associated with the same company.

**This ensures that:**

* You can easily identify multiple contacts belonging to the same organization in HubSpot.
* Company-wide insights remain consistent, regardless of whether contacts have different email IDs.
* Your CRM data stays structured and organized, preventing fragmented company records.

By maintaining consistent company-level details, Reo.Dev enables seamless account-based contact tracking, helping sales and marketing teams engage with all relevant stakeholders.

{% hint style="info" %}
**Recommendation:** Fields with prefix REO should always have Auto-Overwrite checkbox as TRUE.
{% endhint %}

***

### **Send Tags to Your CRM**

You can now send **Account Tags** and **Developer Tags** directly to your CRM. These tags are fully customizable and provide quick context and insights on already enriched data.

**Why it matters:**\
Tags make it easy to:

* Identify key account traits or developer activities at a glance.
* Segment and prioritize accounts more effectively.
* Provide your sales team with richer, actionable insights to drive better conversations.

**Want to learn more?**\
Check out our [Tags Handbook](https://www.reo.dev/tags-handbook) — a comprehensive guide to tagging and segmenting developers in Reo.Dev. It includes **15+ use case examples** designed to help DevTools GTM teams prospect smarter, increase pipeline, and close deals faster.

***

#### CRM to Revenue: Data In Playbooks

* [Revive Cold Opportunities in your CRM Using Developer Activity Signals](https://www.reo.dev/playbook/revive-cold-opportunities-in-your-crm-using-developer-activity-signals)
* [Monitor Dev Activity in your assigned CRM accounts](https://www.reo.dev/playbook/monitor-dev-activity-in-your-assigned-crm-accounts)
* [Detect Deal Stalls Early: Monitor & Act on Active CRM Opportunities](https://www.reo.dev/playbook/detect-deal-stalls-early-monitor-act-on-active-crm-opportunities)

**Explore the Playbooks Now** → [View All](https://www.reo.dev/playbook-collection/crm)

***

#### CRM to Revenue: Data Out Playbooks

* [Sync Reo.Dev Segments to HubSpot & Run LinkedIn Ads](https://www.reo.dev/playbook/sync-reo-dev-segments-to-hubspot-run-linkedin-ads)
* [Sync High-Intent Accounts to HubSpot & Auto-Assign to Your Sales Team](https://www.reo.dev/playbook/sync-high-intent-accounts-to-hubspot-auto-assign-to-your-sales-team)
* [Sync Reo.Dev Tags Intel to HubSpot & Automate Emails](https://www.reo.dev/playbook/sync-reo-dev-tags-intel-to-hubspot-automate-contextual-emails)
* [Create Custom HubSpot Views with Reo.Dev Intel](https://www.reo.dev/playbook/create-custom-hubspot-views-with-reo-dev-intel)

**Explore the Playbooks Now** → [View All](https://www.reo.dev/playbook-collection/reo-hubspot-workflows)

***

### **User Settings**

You can manage permissions for your team by defining specific users who can send data to HubSpot.

Click on **Configure** in User Settings.

<figure><img src="/files/KIM671EgssJXwsnVd2LI" alt=""><figcaption></figcaption></figure>

You will be redirected to Users Section. You can turn on the toggle button in the CRM access column to allow specific users to send data to HubSpot.

<figure><img src="/files/3RbcEcDiNvNJjlQA1u5L" alt=""><figcaption></figcaption></figure>

#### Export and Sync Frequency

Users will have options to send:

* **Segments to HubSpot**

  User can create a segment and click on **Send to HubSpot**
* **Accounts to HubSpot**

  User can select an account(s) from the Account list and **Send to HubSpot**
* **Developers to HubSpot**

  If Manual contact sync is selected for contacts, users can select developer(s) from the developer tab under Account Details screen and Send to HubSpot

In case of Accounts and Developer, the export happens in real time and HubSpot icon will appear against the record on UI immediately but for segments it may take some time depending on the size of segment.

Once the Accounts and Developers are exported, Reo.Dev will sync data back to HubSpot on a daily basis.

All the accounts and developers that have been synced with HubSpot, will have a HubSpot Icon next to the name.

***

### Map and Tag Custom CRM Account and Deal Stages

#### **Map Account Stages**

Select the "Stages" subtab in the Account - Field Mapping section

<figure><img src="/files/l9iSlTgFmPisXHd7p6Xh" alt=""><figcaption></figcaption></figure>

Choose a **Custom Account CRM** field to map as the **Account Lifecycle Stage**.

{% hint style="info" %}
**Note:** Only fields classified as **"Picklist"** in your CRM are available for selection.
{% endhint %}

<figure><img src="/files/5DijFxU6ch44tDixuZzD" alt=""><figcaption></figcaption></figure>

Pick all Custom CRM Account Stages you want to define as **"Customer"** in **Reo.Dev**. Multiple stages can be mapped as "Customer" to fit your sales cycle. For example, classify accounts by product line (Cloud vs. Open Source) or customer size (Enterprise vs. SMB).

<figure><img src="/files/9vtpeYRqVcBLR1VwHKoR" alt=""><figcaption></figcaption></figure>

**Save the Configuration**

After mapping, click **Save**.

<figure><img src="/files/fG9fu0OEcwN3O4V1jJwO" alt=""><figcaption></figcaption></figure>

{% hint style="info" %}
**Note:** Backend updates are applied immediately, but changes in the UI reflecting the new mappings will take up to **24 hours** to refresh.
{% endhint %}

#### **Map Deal Stages**

<figure><img src="/files/1xJtpQT9qeT7IOE9Tss5" alt=""><figcaption></figcaption></figure>

Select a **Pipeline** from the dropdown, as HubSpot supports custom pipelines tied to deal stages.

<figure><img src="/files/LYzJ3CyleHNjEyJi9Tsk" alt=""><figcaption></figcaption></figure>

**Next,** select the corresponding deal stage field for the selected pipeline.

<figure><img src="/files/lCakzumNtjEBBcphxXg3" alt=""><figcaption></figcaption></figure>

**Save the Configuration**

After mapping, click **Save.**

![](https://usercontent.us.prod.clueso.io/d06f019c-da0b-4d5b-9fdd-9630e7fd5d0f/a66e57fb-1700-455b-92e0-656fd3a6d464/7a571c99-c8f9-476d-b553-073fa51d5963/images/7163eaad-f5f9-4036-ab2e-a5e64753ee19.png)

{% hint style="info" %}
**Note:** Backend updates are applied immediately, but changes in the UI reflecting the new mappings will take up to **24 hours** to refresh.
{% endhint %}

### **Learn More About Custom CRM Stages**

To dive deeper into setting up and leveraging **Custom CRM Account and Deal Stages**, refer to our detailed [Custom CRM Stages](/accounts/custom-crm-stages) guide for step-by-step guidance, use cases, and advanced tips to maximize the value of your Hubspot CRM integration with Reo.Dev.

***

### **Disconnect HubSpot**

You can disconnect HubSpot from the Integrations section

1. **Open Reo.Dev**
2. Navigate to **Integrations → CRM** and click Configure
3. Under HubSpot and click Disconnect at the top right corner

{% hint style="danger" %}
Please note that all the field mappings and user permissions will be lost.
{% endhint %}


# Salesforce

Integration with Salesforce allows Reo.Dev to send data to Salesforce as well as read lifecycle stage for contacts and accounts in Salesforce. You can connect your Salesforce App with Reo.Dev from the Integrations section.

Requirements

* You must be admin of Reo.Dev app
* You must be an admin of your Salesforce CRM instance

### Create Custom fields in Salesforce

Before we begin the Salesforce integration, we should create the following fields in Salesforce in Accounts, Contacts and Leads object respectively.

{% hint style="info" %}
**Important Note:**\
When creating the fields in Salesforce, ensure that:

* **Field Names** must be written in **lowercase**. If not, the fields will not map correctly during integration.
* Follow the specified structure and naming conventions outlined below to avoid integration errors. We recommend **copy-pasting** the values from the table directly below.
  {% endhint %}

### **Accounts**

<table><thead><tr><th>Data Type</th><th>Field Label</th><th width="146.80078125">Field Name</th><th>Values</th><th width="90.30078125">Required</th><th width="78.5">Default</th></tr></thead><tbody><tr><td>Date</td><td>REO: Last Activity Date</td><td>reo_account_last_activity_date</td><td>-</td><td>Yes</td><td>-</td></tr><tr><td>Picklist</td><td>REO: Customer Fit Score</td><td>reo_customer_fit</td><td>STRONG, MODERATE, WEAK</td><td>Yes</td><td>-</td></tr><tr><td>Picklist</td><td>REO: Developer Activity Score</td><td>reo_developer_activity_score</td><td>HIGH, MEDIUM, LOW</td><td>Yes</td><td>-</td></tr><tr><td>Text Area (Rich)</td><td>REO: Segment Name</td><td>reo_segments_list</td><td>-</td><td>Yes</td><td>-</td></tr><tr><td>URL</td><td>REO: Account Link</td><td>reo_account_link</td><td>-</td><td>Yes</td><td>-</td></tr><tr><td>Text Area (Rich)</td><td>REO: Account Summary</td><td>reo_company_summary</td><td>-</td><td>Yes</td><td>-</td></tr><tr><td>URL</td><td>REO: LinkedIn Company Page</td><td>reo_account_linkedin</td><td>-</td><td>Yes</td><td>-</td></tr><tr><td>Text Area (Rich)</td><td>REO: Account Tag Summary</td><td>reo_tag_summary</td><td>-</td><td>Yes</td><td>-</td></tr><tr><td>Number</td><td>REO: Activity Score</td><td>reo_activity_score</td><td>-</td><td>Yes</td><td>-</td></tr><tr><td>Text Area (Rich)</td><td>REO: Audience Name</td><td>reo_audiences_list</td><td>-</td><td>Yes</td><td>-</td></tr><tr><td>Text</td><td>REO: COMPANY SOURCE</td><td>reo_company_source</td><td>-</td><td>No</td><td>-</td></tr><tr><td>Date</td><td>REO: COMPANY CREATED AT</td><td>reo_company_created_at</td><td>-</td><td>No</td><td>-</td></tr><tr><td>Date</td><td>REO: COMPANY UPDATED AT</td><td>reo_company_updated_at</td><td>-</td><td>No</td><td>-</td></tr><tr><td>Text Area (Rich)</td><td>REO: Tech Functions</td><td>reo_tech_functions_summary</td><td>-</td><td>Yes</td><td>-</td></tr><tr><td>Text Area (Rich)</td><td>REO: Preferred Technologies</td><td>reo_preferred_technologies_summary</td><td></td><td></td><td></td></tr><tr><td>Text</td><td>REO: Dev Funnel</td><td>reo_dev_funnel</td><td></td><td></td><td></td></tr><tr><td>Text Area (Rich)</td><td>REO: Account Agents Tags</td><td>reo_agents_summary</td><td></td><td></td><td></td></tr><tr><td>Text</td><td>REO: Industry</td><td>reo_industry</td><td></td><td></td><td></td></tr></tbody></table>

{% hint style="info" %}
We recommend **copying and pasting** the values directly from the table above during field creation.
{% endhint %}

**Contacts**

<table><thead><tr><th width="117.5">Data Type</th><th width="170.765625">Field Label</th><th width="199.71875">Field Name</th><th width="75.7890625">Values</th><th>Required</th><th width="75.65625">Default</th></tr></thead><tbody><tr><td>Date</td><td>REO: Last Activity Date</td><td>reo_contact_last_activity_date</td><td>-</td><td>Yes</td><td>-</td></tr><tr><td>Text Area (Rich)</td><td>REO: Developer Summary</td><td>reo_contacts_summary</td><td>-</td><td>Yes</td><td>-</td></tr><tr><td>URL</td><td>REO: LinkedIn Profile</td><td>reo_dev_social_linkedin_link</td><td>-</td><td>Yes</td><td>-</td></tr><tr><td>Text Area (Rich)</td><td>REO: Developer Segment Name</td><td>reo_developer_segments_list</td><td>-</td><td>Yes</td><td>-</td></tr><tr><td>Text Area (Rich)</td><td>REO: Contact Tag Summary</td><td>reo_tag_summary</td><td>-</td><td>Yes</td><td>-</td></tr><tr><td>Number</td><td>REO: Activity Score</td><td>reo_activity_score</td><td>-</td><td>Yes</td><td>-</td></tr><tr><td>Text Area (Rich)</td><td>REO: Audience Name</td><td>reo_audiences_list</td><td>-</td><td>Yes</td><td>-</td></tr><tr><td>Text</td><td>REO: CONTACT SOURCE</td><td>reo_contacts_source</td><td>-</td><td>No</td><td>-</td></tr><tr><td>Date</td><td>REO: CONTACT CREATED AT</td><td>reo_contacts_created_at</td><td>-</td><td>No</td><td>-</td></tr><tr><td>Date</td><td>REO: CONTACT UPDATED AT</td><td>reo_contacts_updated_at</td><td>-</td><td>No</td><td>-</td></tr><tr><td>URL</td><td>REO: Developer Link</td><td>reo_contact_link</td><td></td><td></td><td></td></tr><tr><td>Text</td><td>REO: GitHub</td><td>reo_contact_github</td><td></td><td></td><td></td></tr><tr><td>Text</td><td>REO: First Activity Date</td><td>reo_contact_first_activity_date</td><td></td><td></td><td></td></tr><tr><td>Text Area (Rich)</td><td>REO: Contact Agents Summary</td><td>reo_agents_summary</td><td></td><td></td><td></td></tr></tbody></table>

{% hint style="info" %}
We recommend **copying and pasting** the values directly from the table above during field creation.
{% endhint %}

### **Leads**

<table><thead><tr><th>Data Type</th><th width="180.6015625">Field Label</th><th width="177.890625">Field Name</th><th width="78.82421875">Values</th><th width="89.5546875">Required</th><th width="90.90625">Default</th></tr></thead><tbody><tr><td>Date</td><td>REO: Last Activity Date</td><td>reo_leads_last_activity_date</td><td>-</td><td>Yes</td><td>-</td></tr><tr><td>Text Area (Rich)</td><td>REO: Developer Summary</td><td>reo_leads_summary</td><td>-</td><td>Yes</td><td>-</td></tr><tr><td>URL</td><td>REO: LinkedIn Profile</td><td>reo_leads_social_linkedin_link</td><td>-</td><td>Yes</td><td>-</td></tr><tr><td>Text Area (Rich)</td><td>REO: Developer Segment Name</td><td>reo_leads_segments_list</td><td>-</td><td>Yes</td><td>-</td></tr><tr><td>Text Area (Rich)</td><td>REO: Contact Tag Summary</td><td>reo_leads_tag_summary</td><td>-</td><td>Yes</td><td>-</td></tr><tr><td>Number</td><td>REO: Activity Score</td><td>reo_activity_score</td><td>-</td><td>Yes</td><td>-</td></tr><tr><td>Text Area (Rich)</td><td>REO: Audience Name</td><td>reo_audiences_list</td><td>-</td><td>Yes</td><td>-</td></tr><tr><td>Text</td><td>REO: LEAD SOURCE</td><td>reo_leads_source</td><td>-</td><td>No</td><td>-</td></tr><tr><td>Date</td><td>REO: LEADS CREATED AT</td><td>reo_leads_created_at</td><td>-</td><td>No</td><td>-</td></tr><tr><td>Date</td><td>REO: LEAD UPDATED AT</td><td>reo_leads_updated_at</td><td>-</td><td>No</td><td>-</td></tr><tr><td>URL</td><td>REO: Developer Link</td><td>reo_leads_link</td><td></td><td></td><td></td></tr><tr><td>Text</td><td>REO: GitHub</td><td>reo_leads_github</td><td></td><td></td><td></td></tr><tr><td>Text</td><td>REO: First Activity Date</td><td>reo_leads_first_activity_date</td><td></td><td></td><td></td></tr><tr><td>Text Area (Rich)</td><td>REO: Leads Agents Summary</td><td>reo_leads_agents_summary</td><td></td><td></td><td></td></tr></tbody></table>

{% hint style="info" %}
We recommend **copying and pasting** the values directly from the table above during field creation.
{% endhint %}

### Connect Salesforce

**Step 1**: Navigate to Settings -> **Integrations**&#x20;

<figure><img src="/files/ANTWhZdCtwAcDNnJAB3x" alt=""><figcaption></figcaption></figure>

**Step 2:** Go to > Output Integrations > CRM and click on **Connect** in the Salesforce card.&#x20;

**Step 3:** You will be redirected to the Authorization flow of Salesforce wherein you will need to provide your Salesforce Admin credentials. After that you will need to select the Salesforce App to connect and provide permission to Reo.Dev app to access Salesforce.

![](https://usercontent.us.prod.clueso.io/d06f019c-da0b-4d5b-9fdd-9630e7fd5d0f/3e6e4bbf-4dc8-4234-844a-43af088d81dc/84057b6b-dec8-4df5-9f2f-3069a3bc27e5/images/dddd5741-738e-44a8-960c-788dd0cc9a90.png)

### Salesforce Export settings

After the Salesforce App is connected, you will be redirected to Salesforce settings screen to configure the Export and Sync settings.

<figure><img src="/files/wH1JHYbNrRFhJ36dc6zd" alt=""><figcaption></figcaption></figure>

There are two options to Export data from Reo.Dev:

1. **Accounts**

   You can select Accounts if you want to only export accounts from Reo.Dev to Salesforce.
2. **Accounts and Contacts**

   You can select Accounts and Contacts if you want to only export accounts from Reo.Dev to Salesforce. Under Accounts and Contacts, you have an option to sync contacts associated with an account automatically or manually. If you select manually, the users will have need to select contacts from the developers tab for each account and click on **Send to Salesforce.**

### Salesforce Field Mapping

Map all the fields from Reo.Dev that you want to send to Salesforce and update existing Accounts, Contacts and Leads. This mapping will be used to create new accounts, contacts and leads in Salesforce. You can also select which fields should be updated in Salesforce whenever there is any change in Reo.Dev

Please note that when we export data from Reo.Dev, we check if the company or contact exists in the Salesforce record or not. If the record is present, we update the corresponding fields based on the mapping preference selected by you and in case the record is not present, we create a new record.

We use the following fields as unique identifiers to prevent duplication:

* Accounts → Company Domain Name
* Contact → email ID

### **Accounts Field Mapping**

We have provision to export the following fields for the Accounts object to Salesforce.

| **Reo.Dev Field**            | **Salesforce Field**          |
| ---------------------------- | ----------------------------- |
| Company Name                 | Company Name                  |
| Company Domain               | Company Domain Name           |
| Country                      | Country/Region                |
| State                        | State                         |
| City                         | City                          |
| Employee Range               | Employee Range                |
| Annual Revenue               | Annual Revenue                |
| Founded In                   | Year Founded                  |
| Last Activity Date           | REO: Last Activity Date       |
| LinkedIn Company Page        | LinkedIn Company Page         |
| REO Customer Fit Score       | REO: Customer Fit             |
| REO Developer Activity Score | REO: Developer Activity Score |
| REO: Activity Score          | REO: Activity Score           |
| REO Segment Name             | REO: Segment Name             |
| REO Account Link             | REO: Account Link             |
| REO Account Summary          | REO: Account Summary          |
| REO Tags                     | REO: Account Tags             |
| REO: Company Audience        | REO: Audience Name            |
|                              |                               |

* **Company Domain** is a mandatory field and is already mapped.
* Fields with the prefix REO are automatically created in Salesforce and mapped to the corresponding Reo.Dev field.
* For the Rest of the fields, you can map the corresponding field in Salesforce from the dropdown. If you select the Auto Overwrite checkbox, then we will overwrite the existing data in Salesforce during creation and sync operations.

{% hint style="success" %}
**Recommendation:** Fields with the prefix REO should always have the Auto-Overwrite checkbox as TRUE.
{% endhint %}

### **Contacts Field Mapping**

**Step 1:** Select the **target object.**

Reo.Dev has one Contact type but since Salesforce has two Objects - Leads and Contacts, you can select the object where the Reo.Dev contact should be created.

<figure><img src="/files/SdNL3jUkbPjJ5xch8adC" alt=""><figcaption></figcaption></figure>

**Step 2: Map fields**

You’ll see 2 tabs here - mapping for leads object and mapping for contact object.

If you select leads as the target object —> you will need to provide mapping for both leads and contacts object.

If you select contact as the target object —> The mapping with leads tab is automatically disabled and you need to provide the mapping only for the contacts object.

{% hint style="info" %}
**Note:** Once a lead is converted into a contact on Salesforce then Reo.Dev will no longer treat that record as a lead. Instead, Reo.Dev will update the contact record directly and not create a duplicate lead for the same developer.
{% endhint %}

We have provision to export the following fields for Contacts and Leads object to Salesforce.

### **For Contact object:**

| **Reo.Dev Field**      | **Salesforce Field**        |
| ---------------------- | --------------------------- |
| First Name             | First Name                  |
| Last Name              | Last Name                   |
| Business Email ID\*    | Email                       |
| Company Website        | Website URL                 |
| Designation            | Job Title                   |
| Country                | Country/Region              |
| State                  | State                       |
| City                   | City                        |
| LinkedIn ID            | REO: Linked In Profile      |
| Last Activity Date     | REO: Last Activity Date     |
| REO: Developer Summary | REO: Developer Summary      |
| REO: Segment Name      | REO: Developer Segment Name |
| REO: Tags              | REO: Developer Tags         |
| REO: Activity Score    | REO: Activity Score         |
| REO: Audience Name     | REO: Audiences List         |

### **For Lead Object:**

| **Reo.Dev Field**      | **Salesforce Field**        |
| ---------------------- | --------------------------- |
| First Name             | First Name                  |
| Last Name              | Last Name                   |
| Business Email ID\*    | Email                       |
| Company Website        | Website URL                 |
| Designation            | Job Title                   |
| Country                | Country/Region              |
| State                  | State                       |
| City                   | City                        |
| LinkedIn ID            | REO: Linked In Profile      |
| Last Activity Date     | REO: Last Activity Date     |
| REO: Developer Summary | REO: Developer Summary      |
| REO: Segment Name      | REO: Developer Segment Name |
| REO: Tags              | REO: Developer Tags         |
| REO: Activity Score    | REO: Activity Score         |
| REO: Audience Name     | REO: Audiences List         |

{% hint style="warning" %}
**Note:** If the admin changes the preferred target object in the future, all existing mappings and settings will be lost. However, any data previously sent to the CRM will remain as-is and will not be updated. Once the new setting is applied, all future data will be sent to the newly selected object.
{% endhint %}

* **Business email ID** is a mandatory field and is already mapped. We fetch the Business email ID of the developers from third part enrichment service providers.
* In addition to the Business Email ID, **Personal Email IDs** will also be synced **if collected through first-party sources**, including:
  * Signup Forms on your website or documentation pages
  * Product login or signup forms.
* In the Reo.Dev UI, when users hover over the email icon on a profile, if a Personal Email has been enriched and mapped to that profile, it will be displayed alongside the Work Email.
* Fields with the prefix REO are automatically created in Salesforce and mapped to the corresponding Reo.Dev field
* For the Rest of the fields, you can map the corresponding field in Salesforce from the dropdown. If you select the Auto Overwrite checkbox, then we will overwrite the existing data in Salesforce during the creation and sync operations.

***

### **How Reo.Dev Handles Multiple Email Records in Salesforce**

For each **unique email ID** we treat it as a **separate record** in Salesforce. Depending on whether an email already exists in the CRM, the record is either **updated or created** as per the following scenarios:

| **Scenario**                                      | **Action in Salesforce**                                                       |
| ------------------------------------------------- | ------------------------------------------------------------------------------ |
| **One Email ID exists in CRM**                    | Update existing contact with latest REO data                                   |
| **One Email ID does not exist in CRM**            | Create a new contact record                                                    |
| **Two Email IDs → First exists, second does not** | Update existing contact for first email, create a new contact for second email |
| **Two Email IDs → Neither exists**                | Create two separate contact records (one for each email)                       |
| **Two Email IDs → Both exist in CRM**             | Update both contacts separately with latest REO data                           |

***

### Send developers only with LinkedIn ID to CRM&#x20;

You can send contacts/leads with only LinkedIn IDs to Salesforce. If the email ID is not available for a developer, Reo will match contacts/leads by the LinkedIn profile to avoid duplicates and create/update contacts and leads.&#x20;

To enable this, click on the LinkedIn tab under contacts - Field Mapping

<figure><img src="/files/F36ZcDr7uRdnGKwpvnT8" alt=""><figcaption></figcaption></figure>

Next, select your custom LinkedIn profile field to map the contacts and leads. And in case you are using the custom field created by Reo as the preferred field for mapping the LinkedIn profile - then choose REO:LinkedIn Profile as the field from the drop-down.&#x20;

{% hint style="info" %}
Note: You will need to map this field for both contacts and leads if you've chosen Leads as the target object.&#x20;
{% endhint %}

<figure><img src="/files/oedLCNR0BkdmHEmnMbyZ" alt=""><figcaption></figcaption></figure>

Once done, click on save.&#x20;

{% hint style="info" %}

### Quick Note on how this works:&#x20;

**Scenario 1: If LinkedIn Profile Mapping is not present:**

* Only developers with a valid email ID (business or First party) are created/updated in CRM
* LinkedIn profile is updated to REO: LinkedIn Profile field

**Scenario 2: If LinkedIn Mapping is present:**

* **In case, email and LinkedIn ID are both available:**&#x20;
  * Sync is done using only the email ID of the developer
* **In case, only Email is available**
  * Sync is done using the email ID of the developer
* **In case, only LinkedIn is available**

  The System checks for the LinkedIn ID present in Reo in the LinkedIn profile field mapping

  * If the LinkedIn ID is found
    * Developer is synced to the existing profile
  * If the LinkedIn ID is not found
    * A new contact is created in Hubspot with the LinkedIn ID as the unique identifier. From the next sync, the same contact is updated
      {% endhint %}

***

### **Do We Delete Data from Your CRM?**

Reo.Dev does **not delete any data** from your connected Salesforce CRM instance with Reo.Dev — with the **only exception being occasional cleanups** of records that were originally created by Reo.Dev.

These cleanups are **rare and limited strictly to Reo.Dev-originated data**, and are performed to maintain data accuracy and reliability. For example, if a developer contact's work email becomes invalid (e.g., they’ve switched jobs), and a new valid email is identified, Reo.Dev may update or clean up the outdated email to ensure your CRM reflects the most current information.

Rest assured, no third-party or manually added CRM data is ever deleted by Reo.Dev.

***

#### **What Happens When a Contact is Updated?**

* If an email already exists in Salesforce, Reo.Dev **updates the mapped fields** (as configured in CRM settings) with the latest developer data.
* Updates **do not overwrite existing CRM data outside the mapped REO fields**.

***

### **How New Contact Records Are Linked to the Same Company/Account**

When Reo.Dev creates new contacts, all the captured data—including the **Company Website (Domain Name)**, job title, LinkedIn profile, and other mapped fields—remains the same across contact records associated with the same company.

**This ensures that:**

* You can easily identify multiple contacts belonging to the same organization in Salesforce.
* Company-wide insights remain consistent, regardless of whether contacts have different email IDs.
* Your CRM data stays structured and organized, preventing fragmented company records.

By maintaining consistent company-level details, Reo.Dev enables seamless account-based contact tracking, helping sales and marketing teams engage with all relevant stakeholders.

***

{% hint style="success" %}
**Note:** Fields with the prefix REO should always have the Auto-Overwrite checkbox as **TRUE.**
{% endhint %}

### **Send Tags to Your CRM**

You can now send **Account Tags** and **Developer Tags** directly to your CRM. These tags are fully customizable and provide quick context and insights on already enriched data.

**Why it matters:**\
Tags make it easy to:

* Identify key account traits or developer activities at a glance.
* Segment and prioritize accounts more effectively.
* Provide your sales team with richer, actionable insights to drive better conversations.

**Want to learn more?**\
Check out our [Tags Handbook](https://www.reo.dev/tags-handbook) — a comprehensive guide to tagging and segmenting developers in Reo.Dev. It includes **15+ use case examples** designed to help DevTools GTM teams prospect smarter, increase pipeline, and close deals faster.

***

#### CRM to Revenue Playbooks

* [Revive Cold Opportunities in your CRM Using Developer Activity Signals](https://www.reo.dev/playbook/revive-cold-opportunities-in-your-crm-using-developer-activity-signals)
* [Monitor Dev Activity in your assigned CRM accounts](https://www.reo.dev/playbook/monitor-dev-activity-in-your-assigned-crm-accounts)
* [Detect Deal Stalls Early: Monitor & Act on Active CRM Opportunities](https://www.reo.dev/playbook/detect-deal-stalls-early-monitor-act-on-active-crm-opportunities)

**Explore the Playbooks Now** → [View All](https://www.reo.dev/playbook-collection/crm)

***

### User Settings

You can manage permissions for your team by defining specific users who can send data to Salesforce.

Click on **Configure** in User Settings.

<figure><img src="/files/GKFpUpqu4os6hW0Bq03m" alt=""><figcaption></figcaption></figure>

You will be redirected to Users Section. You can turn on the toggle button in the CRM access column to allow specific users to send data to HubSpot.

<figure><img src="/files/9yg4pwcJHFiCbdZnp0Cz" alt=""><figcaption></figcaption></figure>

### **Export and Sync Frequency**

Users will have options to send:

* **Segments to Salesforce**

  Users can create a segment and click on **Send to Salesforce.**
* **Accounts to Salesforce**

  Users can select an account(s) from the Account list and **Send to Salesforce.**
* **Developers to Salesforce**

  If Manual contact sync is selected for contacts, users can select developer(s) from the developer tab under Account Details screen and **Send to Salesforce.**

In the case of Accounts and Developer, the export happens in real-time and the Salesforce icon will appear against the record on UI immediately but for segments, it may take some time depending on the size of the segment.

Once the Accounts and Developers are exported, Reo.Dev will sync data back to Salesforce daily. All the accounts and developers that have been synced with Salesforce, will have a Salesforce Icon next to the name.

***

### Map and Tag Custom CRM Account and Deal Stages

**Map Account Stages**

Select the **"Stages"** subtab in the Account Mapping section.

<figure><img src="/files/tk3avJfeaDoId6NzHvQH" alt=""><figcaption></figcaption></figure>

Choose a **Custom Account CRM** field to map as the **Account Lifecycle Stage**.

{% hint style="info" %}
**Note:** Only fields classified as **"Picklist"** in your CRM are available for selection.
{% endhint %}

<figure><img src="/files/PKf022YJkQyCDw8I4IZB" alt=""><figcaption></figcaption></figure>

Pick all Custom CRM Account Stages you want to define as **"Customer"** in **Reo.Dev**. Multiple stages can be mapped as "Customer" to fit your sales cycle. For example, classify accounts by product line (Cloud vs. Open Source) or customer size (Enterprise vs. SMB).

<figure><img src="/files/BpUSj1dGSC1H4bUjT4vW" alt=""><figcaption></figcaption></figure>

**Save the Configuration**

After mapping, click **Save**.

{% hint style="info" %}
**Note:** Backend updates are applied immediately, but changes in the UI reflecting the new mappings will take up to **24 hours** to refresh.
{% endhint %}

**Map Opportunity Stages**

<figure><img src="/files/Zg1gIPPMFakIXwlmRkqc" alt=""><figcaption></figcaption></figure>

Select the custom deal/opportunity stage field from your Salesforce CRM.

{% hint style="info" %}
**Note:** Only fields classified as **"Picklist"** in your CRM are available for selection.
{% endhint %}

<figure><img src="/files/LTl1g64mfWwkMW142vPw" alt=""><figcaption></figcaption></figure>

**Save the Configuration**

After mapping, click **Save.**

{% hint style="info" %}
**Note:** Backend updates are applied immediately, but changes in the UI reflecting the new mappings will take up to **24 hours** to refresh.
{% endhint %}

#### Learn More About Custom CRM Stages

To dive deeper into setting up and leveraging **Custom CRM Account and Opportunity Stages**, refer to our detailed [Custom CRM Stages](/accounts/custom-crm-stages) guide for step-by-step guidance, use cases, and advanced tips to maximize the value of your Salesforce CRM integration with Reo.Dev.

***

### Disconnect Salesforce

You can disconnect Salesforce from the Integrations section:

1. Navigate to **Integrations → CRM** and click **Configure**
2. Under **Salesforce** and click on Disconnect at the top right corner

{% hint style="info" %}
Please note that all the field mappings and user permissions will be lost.
{% endhint %}


# Salesforce

Integration with Salesforce allows Reo.Dev to send data to Salesforce as well as read lifecycle stage for contacts and accounts in Salesforce. You can connect your Salesforce App with Reo.Dev from the Integrations section.

Requirements

* You must be admin of Reo.Dev app
* You must be an admin of your Salesforce CRM instance

### Create Custom fields in Salesforce

Before we begin the Salesforce integration, we should create the following fields in Salesforce in Accounts, Contacts and Leads object respectively.

{% hint style="info" %}
**Important Note:**\
When creating the fields in Salesforce, ensure that:

* **Field Names** must be written in **lowercase**. If not, the fields will not map correctly during integration.
* Follow the specified structure and naming conventions outlined below to avoid integration errors. We recommend **copy-pasting** the values from the table directly below.
  {% endhint %}

### **Accounts**

<table><thead><tr><th>Data Type</th><th>Field Label</th><th>Field Name</th><th>Values</th><th width="90.30078125">Required</th><th width="78.5">Default</th></tr></thead><tbody><tr><td>Date</td><td>REO: Last Activity Date</td><td>reo_account_last_activity_date</td><td>-</td><td>Yes</td><td>-</td></tr><tr><td>Picklist</td><td>REO: Customer Fit Score</td><td>reo_customer_fit</td><td>STRONG, MODERATE, WEAK</td><td>Yes</td><td>-</td></tr><tr><td>Picklist</td><td>REO: Developer Activity Score</td><td>reo_developer_activity_score</td><td>HIGH, MEDIUM, LOW</td><td>Yes</td><td>-</td></tr><tr><td>Text Area (Rich)</td><td>REO: Segment Name</td><td>reo_segments_list</td><td>-</td><td>Yes</td><td>-</td></tr><tr><td>URL</td><td>REO: Account Link</td><td>reo_account_link</td><td>-</td><td>Yes</td><td>-</td></tr><tr><td>Text Area (Rich)</td><td>REO: Account Summary</td><td>reo_company_summary</td><td>-</td><td>Yes</td><td>-</td></tr><tr><td>URL</td><td>REO: LinkedIn Company Page</td><td>reo_account_linkedin</td><td>-</td><td>Yes</td><td>-</td></tr><tr><td>Text Area (Rich)</td><td>REO: Account Tag Summary</td><td>reo_tag_summary</td><td>-</td><td>Yes</td><td>-</td></tr><tr><td>Number</td><td>REO: Activity Score</td><td>reo_activity_score</td><td>-</td><td>Yes</td><td>-</td></tr><tr><td>Text Area (Rich)</td><td>REO: Audience Name</td><td>reo_audiences_list</td><td>-</td><td>Yes</td><td>-</td></tr><tr><td>Text</td><td>REO: COMPANY SOURCE</td><td>reo_company_source</td><td>-</td><td>No</td><td>-</td></tr><tr><td>Date</td><td>REO: COMPANY CREATED AT</td><td>reo_company_created_at</td><td>-</td><td>No</td><td>-</td></tr><tr><td>Date</td><td>REO: COMPANY UPDATED AT</td><td>reo_company_updated_at</td><td>-</td><td>No</td><td>-</td></tr></tbody></table>

{% hint style="info" %}
We recommend **copying and pasting** the values directly from the table above during field creation.
{% endhint %}

**Contacts**

<table><thead><tr><th width="117.5">Data Type</th><th width="170.765625">Field Label</th><th width="199.71875">Field Name</th><th width="75.7890625">Values</th><th>Required</th><th width="75.65625">Default</th></tr></thead><tbody><tr><td>Date</td><td>REO: Last Activity Date</td><td>reo_contact_last_activity_date</td><td>-</td><td>Yes</td><td>-</td></tr><tr><td>Text Area (Rich)</td><td>REO: Developer Summary</td><td>reo_contacts_summary</td><td>-</td><td>Yes</td><td>-</td></tr><tr><td>URL</td><td>REO: LinkedIn Profile</td><td>reo_dev_social_linkedin_link</td><td>-</td><td>Yes</td><td>-</td></tr><tr><td>Text Area (Rich)</td><td>REO: Developer Segment Name</td><td>reo_developer_segments_list</td><td>-</td><td>Yes</td><td>-</td></tr><tr><td>Text Area (Rich)</td><td>REO: Contact Tag Summary</td><td>reo_tag_summary</td><td>-</td><td>Yes</td><td>-</td></tr><tr><td>Number</td><td>REO: Activity Score</td><td>reo_activity_score</td><td>-</td><td>Yes</td><td>-</td></tr><tr><td>Text Area (Rich)</td><td>REO: Audience Name</td><td>reo_audiences_list</td><td>-</td><td>Yes</td><td>-</td></tr><tr><td>Text</td><td>REO: CONTACT SOURCE</td><td>reo_contacts_source</td><td>-</td><td>No</td><td>-</td></tr><tr><td>Date</td><td>REO: CONTACT CREATED AT</td><td>reo_contacts_created_at</td><td>-</td><td>No</td><td>-</td></tr><tr><td>Date</td><td>REO: CONTACT UPDATED AT</td><td>reo_contacts_updated_at</td><td>-</td><td>No</td><td>-</td></tr></tbody></table>

{% hint style="info" %}
We recommend **copying and pasting** the values directly from the table above during field creation.
{% endhint %}

### **Leads**

<table><thead><tr><th>Data Type</th><th width="180.6015625">Field Label</th><th width="177.890625">Field Name</th><th width="78.82421875">Values</th><th width="89.5546875">Required</th><th width="90.90625">Default</th></tr></thead><tbody><tr><td>Date</td><td>REO: Last Activity Date</td><td>reo_leads_last_activity_date</td><td>-</td><td>Yes</td><td>-</td></tr><tr><td>Text Area (Rich)</td><td>REO: Developer Summary</td><td>reo_leads_summary</td><td>-</td><td>Yes</td><td>-</td></tr><tr><td>URL</td><td>REO: LinkedIn Profile</td><td>reo_leads_social_linkedin_link</td><td>-</td><td>Yes</td><td>-</td></tr><tr><td>Text Area (Rich)</td><td>REO: Developer Segment Name</td><td>reo_leads_segments_list</td><td>-</td><td>Yes</td><td>-</td></tr><tr><td>Text Area (Rich)</td><td>REO: Contact Tag Summary</td><td>reo_leads_tag_summary</td><td>-</td><td>Yes</td><td>-</td></tr><tr><td>Number</td><td>REO: Activity Score</td><td>reo_activity_score</td><td>-</td><td>Yes</td><td>-</td></tr><tr><td>Text Area (Rich)</td><td>REO: Audience Name</td><td>reo_audiences_list</td><td>-</td><td>Yes</td><td>-</td></tr><tr><td>Text</td><td>REO: LEAD SOURCE</td><td>reo_leads_source</td><td>-</td><td>No</td><td>-</td></tr><tr><td>Date</td><td>REO: LEADS CREATED AT</td><td>reo_leads_created_at</td><td>-</td><td>No</td><td>-</td></tr><tr><td>Date</td><td>REO: LEAD UPDATED AT</td><td>reo_leads_updated_at</td><td>-</td><td>No</td><td>-</td></tr></tbody></table>

{% hint style="info" %}
We recommend **copying and pasting** the values directly from the table above during field creation.
{% endhint %}

### Connect Salesforce

**Step 1**: Navigate to **Integrations → CRM** and click **Configure.**

<figure><img src="/files/fYCaFPVoMU91jGUKqTOV" alt=""><figcaption></figcaption></figure>

**Step 2: Click Connect** under **Salesforce.**

![](https://usercontent.us.prod.clueso.io/d06f019c-da0b-4d5b-9fdd-9630e7fd5d0f/3e6e4bbf-4dc8-4234-844a-43af088d81dc/84057b6b-dec8-4df5-9f2f-3069a3bc27e5/images/3d812495-605f-469a-860b-be0a1b58992f.png)

**Step 3:** You will be redirected to the Authorization flow of Salesforce wherein you will need to provide your Salesforce Admin credentials. After that you will need to select the Salesforce App to connect and provide permission to Reo.Dev app to access Salesforce.

![](https://usercontent.us.prod.clueso.io/d06f019c-da0b-4d5b-9fdd-9630e7fd5d0f/3e6e4bbf-4dc8-4234-844a-43af088d81dc/84057b6b-dec8-4df5-9f2f-3069a3bc27e5/images/dddd5741-738e-44a8-960c-788dd0cc9a90.png)

### Salesforce Export settings

After the Salesforce App is connected, you will be redirected to Salesforce settings screen to configure the Export and Sync settings.

![](https://usercontent.us.prod.clueso.io/d06f019c-da0b-4d5b-9fdd-9630e7fd5d0f/3e6e4bbf-4dc8-4234-844a-43af088d81dc/84057b6b-dec8-4df5-9f2f-3069a3bc27e5/images/5f2a70e1-fe47-401e-af15-5539a7248020.png)

There are two options to Export data from Reo.Dev:

1. **Accounts**

   You can select Accounts if you want to only export accounts from Reo.Dev to Salesforce.
2. **Accounts and Contacts**

   You can select Accounts and Contacts if you want to only export accounts from Reo.Dev to Salesforce. Under Accounts and Contacts, you have an option to sync contacts associated with an account automatically or manually. If you select manually, the users will have need to select contacts from the developers tab for each account and click on **Send to Salesforce.**

### Salesforce Field Mapping

Map all the fields from Reo.Dev that you want to send to Salesforce and update existing Accounts, Contacts and Leads. This mapping will be used to create new accounts, contacts and leads in Salesforce. You can also select which fields should be updated in Salesforce whenever there is any change in Reo.Dev

Please note that when we export data from Reo.Dev, we check if the company or contact exists in the Salesforce record or not. If the record is present, we update the corresponding fields based on the mapping preference selected by you and in case the record is not present, we create a new record.

We use the following fields as unique identifiers to prevent duplication:

* Accounts → Company Domain Name
* Contact → email ID

### **Accounts Field Mapping**

We have provision to export the following fields for the Accounts object to Salesforce.

| **Reo.Dev Field**            | **Salesforce Field**          |
| ---------------------------- | ----------------------------- |
| Company Name                 | Company Name                  |
| Company Domain               | Company Domain Name           |
| Country                      | Country/Region                |
| State                        | State                         |
| City                         | City                          |
| Employee Range               | Employee Range                |
| Annual Revenue               | Annual Revenue                |
| Founded In                   | Year Founded                  |
| Last Activity Date           | REO: Last Activity Date       |
| LinkedIn Company Page        | LinkedIn Company Page         |
| REO Customer Fit Score       | REO: Customer Fit             |
| REO Developer Activity Score | REO: Developer Activity Score |
| REO: Activity Score          | REO: Activity Score           |
| REO Segment Name             | REO: Segment Name             |
| REO Account Link             | REO: Account Link             |
| REO Account Summary          | REO: Account Summary          |
| REO Tags                     | REO: Account Tags             |
| REO: Company Audience        | REO: Audience Name            |

* **Company Domain** is a mandatory field and is already mapped.
* Fields with the prefix REO are automatically created in Salesforce and mapped to the corresponding Reo.Dev field.
* For the Rest of the fields, you can map the corresponding field in Salesforce from the dropdown. If you select the Auto Overwrite checkbox, then we will overwrite the existing data in Salesforce during creation and sync operations.

{% hint style="success" %}
**Recommendation:** Fields with the prefix REO should always have the Auto-Overwrite checkbox as TRUE.
{% endhint %}

### **Contacts Field Mapping**

**Step 1:** Select the **target object.**

Reo.Dev has one Contact type but since Salesforce has two Objects - Leads and Contacts, you can select the object where the Reo.Dev contact should be created.

![](https://usercontent.us.prod.clueso.io/d06f019c-da0b-4d5b-9fdd-9630e7fd5d0f/3e6e4bbf-4dc8-4234-844a-43af088d81dc/84057b6b-dec8-4df5-9f2f-3069a3bc27e5/images/39609b4c-4a45-495e-93fc-f2dd3d22b0f5.png)

**Step 2: Map fields**

You’ll see 2 tabs here - mapping for leads object and mapping for contact object.

If you select leads as the target object —> you will need to provide mapping for both leads and contacts object.

If you select contact as the target object —> The mapping with leads tab is automatically disabled and you need to provide the mapping only for the contacts object.

{% hint style="info" %}
**Note:** Once a lead is converted into a contact on Salesforce then Reo.Dev will no longer treat that record as a lead. Instead, Reo.Dev will update the contact record directly and not create a duplicate lead for the same developer.
{% endhint %}

We have provision to export the following fields for Contacts and Leads object to Salesforce.

### **For Contact object:**

| **Reo.Dev Field**      | **Salesforce Field**        |
| ---------------------- | --------------------------- |
| First Name             | First Name                  |
| Last Name              | Last Name                   |
| Business Email ID\*    | Email                       |
| Company Website        | Website URL                 |
| Designation            | Job Title                   |
| Country                | Country/Region              |
| State                  | State                       |
| City                   | City                        |
| LinkedIn ID            | REO: Linked In Profile      |
| Last Activity Date     | REO: Last Activity Date     |
| REO: Developer Summary | REO: Developer Summary      |
| REO: Segment Name      | REO: Developer Segment Name |
| REO: Tags              | REO: Developer Tags         |
| REO: Activity Score    | REO: Activity Score         |
| REO: Audience Name     | REO: Audiences List         |

### **For Lead Object:**

| **Reo.Dev Field**      | **Salesforce Field**        |
| ---------------------- | --------------------------- |
| First Name             | First Name                  |
| Last Name              | Last Name                   |
| Business Email ID\*    | Email                       |
| Company Website        | Website URL                 |
| Designation            | Job Title                   |
| Country                | Country/Region              |
| State                  | State                       |
| City                   | City                        |
| LinkedIn ID            | REO: Linked In Profile      |
| Last Activity Date     | REO: Last Activity Date     |
| REO: Developer Summary | REO: Developer Summary      |
| REO: Segment Name      | REO: Developer Segment Name |
| REO: Tags              | REO: Developer Tags         |
| REO: Activity Score    | REO: Activity Score         |
| REO: Audience Name     | REO: Audiences List         |

{% hint style="warning" %}
**Note:** If the admin changes the preferred target object in the future, all existing mappings and settings will be lost. However, any data previously sent to the CRM will remain as-is and will not be updated. Once the new setting is applied, all future data will be sent to the newly selected object.
{% endhint %}

* **Business email ID** is a mandatory field and is already mapped. We fetch the Business email ID of the developers from third part enrichment service providers.
* In addition to the Business Email ID, **Personal Email IDs** will also be synced **if collected through first-party sources**, including:
  * Signup Forms on your website or documentation pages
  * Product login or signup forms.
* In the Reo.Dev UI, when users hover over the email icon on a profile, if a Personal Email has been enriched and mapped to that profile, it will be displayed alongside the Work Email.
* Fields with the prefix REO are automatically created in Salesforce and mapped to the corresponding Reo.Dev field
* For the Rest of the fields, you can map the corresponding field in Salesforce from the dropdown. If you select the Auto Overwrite checkbox, then we will overwrite the existing data in Salesforce during the creation and sync operations.

***

### **How Reo.Dev Handles Multiple Email Records in Salesforce**

For each **unique email ID** we treat it as a **separate record** in Salesforce. Depending on whether an email already exists in the CRM, the record is either **updated or created** as per the following scenarios:

| **Scenario**                                      | **Action in Salesforce**                                                       |
| ------------------------------------------------- | ------------------------------------------------------------------------------ |
| **One Email ID exists in CRM**                    | Update existing contact with latest REO data                                   |
| **One Email ID does not exist in CRM**            | Create a new contact record                                                    |
| **Two Email IDs → First exists, second does not** | Update existing contact for first email, create a new contact for second email |
| **Two Email IDs → Neither exists**                | Create two separate contact records (one for each email)                       |
| **Two Email IDs → Both exist in CRM**             | Update both contacts separately with latest REO data                           |

***

### Send developers only with LinkedIn ID to CRM&#x20;

You can send contacts/leads with only LinkedIn IDs to Salesforce. If the email ID is not available for a developer, Reo will match contacts/leads by the LinkedIn profile to avoid duplicates and create/update contacts and leads.&#x20;

To enable this, click on the LinkedIn tab under contacts in Field Mapping.&#x20;

<figure><img src="/files/uh29gh0c75nnKIUnqTMj" alt=""><figcaption></figcaption></figure>

Next, select your custom LinkedIn profile field to map the contacts and leads. And in case you are using the custom field created by Reo as the preferred field for mapping the LinkedIn profile - then choose REO:LinkedIn Profile as the field from the drop-down.&#x20;

{% hint style="info" %}
Note: You will need to map this field for both contacts and leads
{% endhint %}

<figure><img src="/files/bX68fxSnMe843T1F5NaG" alt=""><figcaption></figcaption></figure>

Once done, click on save.&#x20;

{% hint style="info" %}

### Quick Note on how this works:&#x20;

**Scenario 1: If LinkedIn Profile Mapping is not present:**

* Only developers with a valid email ID (business or First party) are created/updated in CRM
* LinkedIn profile is updated to REO: LinkedIn Profile field

**Scenario 2: If LinkedIn Mapping is present:**

* **In case, email and LinkedIn ID are both available:**&#x20;
  * Sync is done using only the email ID of the developer
* **In case, only Email is available**
  * Sync is done using the email ID of the developer
* **In case, only LinkedIn is available**

  The System checks for the LinkedIn ID present in Reo in the LinkedIn profile field mapping

  * If the LinkedIn ID is found
    * Developer is synced to the existing profile
  * If the LinkedIn ID is not found
    * A new contact is created in Hubspot with the LinkedIn ID as the unique identifier. From the next sync, the same contact is updated
      {% endhint %}

***

### **Do We Delete Data from Your CRM?**

Reo.Dev does **not delete any data** from your connected Salesforce CRM instance with Reo.Dev — with the **only exception being occasional cleanups** of records that were originally created by Reo.Dev.

These cleanups are **rare and limited strictly to Reo.Dev-originated data**, and are performed to maintain data accuracy and reliability. For example, if a developer contact's work email becomes invalid (e.g., they’ve switched jobs), and a new valid email is identified, Reo.Dev may update or clean up the outdated email to ensure your CRM reflects the most current information.

Rest assured, no third-party or manually added CRM data is ever deleted by Reo.Dev.

***

#### **What Happens When a Contact is Updated?**

* If an email already exists in Salesforce, Reo.Dev **updates the mapped fields** (as configured in CRM settings) with the latest developer data.
* Updates **do not overwrite existing CRM data outside the mapped REO fields**.

***

### **How New Contact Records Are Linked to the Same Company/Account**

When Reo.Dev creates new contacts, all the captured data—including the **Company Website (Domain Name)**, job title, LinkedIn profile, and other mapped fields—remains the same across contact records associated with the same company.

**This ensures that:**

* You can easily identify multiple contacts belonging to the same organization in Salesforce.
* Company-wide insights remain consistent, regardless of whether contacts have different email IDs.
* Your CRM data stays structured and organized, preventing fragmented company records.

By maintaining consistent company-level details, Reo.Dev enables seamless account-based contact tracking, helping sales and marketing teams engage with all relevant stakeholders.

***

{% hint style="success" %}
**Note:** Fields with the prefix REO should always have the Auto-Overwrite checkbox as **TRUE.**
{% endhint %}

### **Send Tags to Your CRM**

You can now send **Account Tags** and **Developer Tags** directly to your CRM. These tags are fully customizable and provide quick context and insights on already enriched data.

**Why it matters:**\
Tags make it easy to:

* Identify key account traits or developer activities at a glance.
* Segment and prioritize accounts more effectively.
* Provide your sales team with richer, actionable insights to drive better conversations.

**Want to learn more?**\
Check out our [Tags Handbook](https://www.reo.dev/tags-handbook) — a comprehensive guide to tagging and segmenting developers in Reo.Dev. It includes **15+ use case examples** designed to help DevTools GTM teams prospect smarter, increase pipeline, and close deals faster.

***

#### CRM to Revenue Playbooks

* [Revive Cold Opportunities in your CRM Using Developer Activity Signals](https://www.reo.dev/playbook/revive-cold-opportunities-in-your-crm-using-developer-activity-signals)
* [Monitor Dev Activity in your assigned CRM accounts](https://www.reo.dev/playbook/monitor-dev-activity-in-your-assigned-crm-accounts)
* [Detect Deal Stalls Early: Monitor & Act on Active CRM Opportunities](https://www.reo.dev/playbook/detect-deal-stalls-early-monitor-act-on-active-crm-opportunities)

**Explore the Playbooks Now** → [View All](https://www.reo.dev/playbook-collection/crm)

***

### User Settings

You can manage permissions for your team by defining specific users who can send data to Salesforce.

Click on **Configure** in User Settings.

You will be redirected to User Management Section. You can mark the toggle button as active for all the users who can send data to CRM.

![](https://usercontent.us.prod.clueso.io/d06f019c-da0b-4d5b-9fdd-9630e7fd5d0f/3e6e4bbf-4dc8-4234-844a-43af088d81dc/84057b6b-dec8-4df5-9f2f-3069a3bc27e5/images/dad959b1-e0bc-4b02-b8e1-9cedc3c6aa70.png)

### Export and Sync Frequency

Users will have options to send:

* **Segments to Salesforce**

  Users can create a segment and click on **Send to Salesforce.**
* **Accounts to Salesforce**

  Users can select an account(s) from the Account list and **Send to Salesforce.**
* **Developers to Salesforce**

  If Manual contact sync is selected for contacts, users can select developer(s) from the developer tab under Account Details screen and **Send to Salesforce.**

In the case of Accounts and Developer, the export happens in real-time and the Salesforce icon will appear against the record on UI immediately but for segments, it may take some time depending on the size of the segment.

Once the Accounts and Developers are exported, Reo.Dev will sync data back to Salesforce daily. All the accounts and developers that have been synced with Salesforce, will have a Salesforce Icon next to the name.

***

### Map and Tag Custom CRM Account and Deal Stages

**Map Account Stages**

Select the **"Stages"** subtab in the Account Mapping section.

![](https://usercontent.us.prod.clueso.io/d06f019c-da0b-4d5b-9fdd-9630e7fd5d0f/3e6e4bbf-4dc8-4234-844a-43af088d81dc/84057b6b-dec8-4df5-9f2f-3069a3bc27e5/images/ab861a47-4219-43df-b5ce-aba7cbc36a4c.png)

Choose a **Custom Account CRM** field to map as the **Account Lifecycle Stage**.

{% hint style="info" %}
**Note:** Only fields classified as **"Picklist"** in your CRM are available for selection.
{% endhint %}

![](https://usercontent.us.prod.clueso.io/d06f019c-da0b-4d5b-9fdd-9630e7fd5d0f/3e6e4bbf-4dc8-4234-844a-43af088d81dc/84057b6b-dec8-4df5-9f2f-3069a3bc27e5/images/107bd08a-a475-4659-ad53-1adbb647453f.png)

Pick all Custom CRM Account Stages you want to define as **"Customer"** in **Reo.Dev**. Multiple stages can be mapped as "Customer" to fit your sales cycle. For example, classify accounts by product line (Cloud vs. Open Source) or customer size (Enterprise vs. SMB).

![](https://usercontent.us.prod.clueso.io/d06f019c-da0b-4d5b-9fdd-9630e7fd5d0f/3e6e4bbf-4dc8-4234-844a-43af088d81dc/84057b6b-dec8-4df5-9f2f-3069a3bc27e5/images/6aaf7cea-63f3-4019-8c7a-b43ec85748fe.png)

**Save the Configuration**

After mapping, click **Save**.

{% hint style="info" %}
**Note:** Backend updates are applied immediately, but changes in the UI reflecting the new mappings will take up to **24 hours** to refresh.
{% endhint %}

**Map Opportunity Stages**

![](https://usercontent.us.prod.clueso.io/d06f019c-da0b-4d5b-9fdd-9630e7fd5d0f/3e6e4bbf-4dc8-4234-844a-43af088d81dc/84057b6b-dec8-4df5-9f2f-3069a3bc27e5/images/825c5cf0-6ef9-43fb-a618-38ecd710a78a.png)

Select the custom deal/opportunity stage field from your Salesforce CRM.

{% hint style="info" %}
**Note:** Only fields classified as **"Picklist"** in your CRM are available for selection.
{% endhint %}

![](https://usercontent.us.prod.clueso.io/d06f019c-da0b-4d5b-9fdd-9630e7fd5d0f/3e6e4bbf-4dc8-4234-844a-43af088d81dc/84057b6b-dec8-4df5-9f2f-3069a3bc27e5/images/346db521-ce5f-4fdc-9c97-ce99cea1ea9e.png)

**Save the Configuration**

After mapping, click **Save.**

{% hint style="info" %}
**Note:** Backend updates are applied immediately, but changes in the UI reflecting the new mappings will take up to **24 hours** to refresh.
{% endhint %}

#### Learn More About Custom CRM Stages

To dive deeper into setting up and leveraging **Custom CRM Account and Opportunity Stages**, refer to our detailed [Custom CRM Stages](/accounts/custom-crm-stages) guide for step-by-step guidance, use cases, and advanced tips to maximize the value of your Salesforce CRM integration with Reo.Dev.

***

### Disconnect Salesforce

You can disconnect Salesforce from the Integrations section:

1. Navigate to **Integrations → CRM** and click **Configure**
2. Under **Salesforce** and click on Disconnect at the top right corner

{% hint style="info" %}
Please note that all the field mappings and user permissions will be lost.
{% endhint %}


# Attio

This article outlines how you can connect your Attio CRM with Reo.Dev.

With the Reo.Dev and Attio integration, your GTM teams can access all Reo developer and account intelligence data—directly inside Attio. You can seamlessly sync contacts, accounts, segments, and audiences, and send qualified leads straight to your CRM. By unifying product and revenue insights in one place, your team gets a complete, actionable view of growth activity.

Requirements:

* You must be admin of Reo.Dev app
* You must be an admin of your Attio CRM instance

### Connect Attio

**Step 1**: Navigate to **Setting** → **Integrations** → **CRM**&#x20;

<figure><img src="/files/V6rUKVaKZmDKsYxDassJ" alt=""><figcaption></figcaption></figure>

**Step 2**: Go to Output Integrations > CRM > Click on Connect on the Attio Card.&#x20;

<figure><img src="/files/9Yj9lquxGQ3RNdKBbNXg" alt=""><figcaption></figcaption></figure>

**Step 3**: You will be redirected to the Authorization flow. Review the permissions and click **Confirm**.

<figure><img src="/files/C1F2r4JHdx5sAL4N7gX3" alt=""><figcaption></figcaption></figure>

And your Attio instance will be integrated with Reo.Dev. Click on Continue to further configure export and sync Settings on Reo.&#x20;

<figure><img src="/files/Y6ja1B5P2vWHCG18SpYL" alt=""><figcaption></figcaption></figure>

### **Attio Export Settings**

After the Attio App is connected, you will be redirected to Attio Settings screen on [Reo.Dev](http://Reo.Dev) to configure the Export and Sync settings.

<figure><img src="/files/QsxkhUFQYs0QQpzagYCc" alt=""><figcaption></figcaption></figure>

There are two options to Export data from Reo.Dev:

* **Accounts:** You can select Accounts if you want to only export accounts from Reo.Dev to Attio.
* **Accounts and Contacts**

  You can select Accounts and Contacts if you want to only export accounts from Reo.Dev to Attio. Under Accounts and Contacts, you have an option to sync contacts associated with an account automatically or manually. If you select manually, the users will have need to select contacts from the developers tab for each accounts and click on **Send to Attio.**

### **Attio Field Mapping**

Map all the fields from Reo.Dev that you want to send to Attio and update existing Accounts and Contacts. This mapping will be used to create new accounts and contacts in Attio. You can also select which fields should be updated in Attio whenever there is any change in Reo.Dev.

Please note that when we export data from Reo.Dev, we check if the company or contact exists in the Attio record or not. If the record is present, we update the corresponding fields based on the mapping preference selected by you and in case the record is not present, we create a new records.

We use the following fields as unique identifiers to prevent duplication:

Accounts → Company Domain Name

* Accounts → Company Domain Name

Contact → email ID

* Contact → email ID

### **Accounts Field Mapping**

We have provision to export following fields for Accounts object to Attio.

<table><thead><tr><th width="374.5035400390625">Reo.Dev Field</th><th>Attio Field</th></tr></thead><tbody><tr><td>Company Name*</td><td>Name</td></tr><tr><td>Company Domain*</td><td>Domain</td></tr><tr><td>Location</td><td>Primary Location</td></tr><tr><td>Employee Range</td><td>Employee Range</td></tr><tr><td>Annual Revenue</td><td>Estimated ARR</td></tr><tr><td>Founded In</td><td>Foundation date</td></tr><tr><td>Last Activity Date*</td><td>Reo: Last Activity Date</td></tr><tr><td>LinkedIn Company Page</td><td>linkedin_company_page</td></tr><tr><td>REO Customer Fit Score*</td><td>REO: Customer Fit</td></tr><tr><td>REO Developer Activity Score*</td><td>REO: Developer Activity Score</td></tr><tr><td>REO: Segment Name*</td><td>REO: Segment Name</td></tr><tr><td>REO Account Link*</td><td>REO Account Link</td></tr><tr><td>REO: Account Summary*</td><td>REO: Account Summary</td></tr><tr><td>REO: Tags*</td><td>REO: Tags</td></tr><tr><td>REO: Activity Score (Numeric)*</td><td>REO: Activity Score (Numeric)</td></tr><tr><td>REO: Company Audience*</td><td>REO: Audience</td></tr><tr><td>REO: Preferred Technologies</td><td>REO: Preferred Technologies</td></tr><tr><td>REO: Dev Funnel</td><td>REO: Dev Funnel</td></tr><tr><td>REO: Account Agents Tags</td><td>REO: Account Agents Tags</td></tr><tr><td>REO: Industry</td><td>REO: Industry</td></tr></tbody></table>

* **Company Domain** is a mandatory field and is already mapped.
* Fields with prefix REO are automatically created in Attio and mapped to corresponding Reo.Dev field.
* For Rest of the fields you can map the corresponding field in Attio from the dropdown. If you select Auto Overwrite checkbox, then we will overwrite the existing data in Attio during creation and sync operations.

{% hint style="info" %}
Recommendation: Fields with prefix REO should always have Auto-Overwrite checkbox as TRUE.
{% endhint %}

Quick Note here: Attio does not provide default lifecycle stages, so account stages (e.g., Pipeline, Discovery) cannot be identified. If you've created a custom field (e.g., 'Lifecycle Stage'), you can select that and Reo will automatically create all the corresponding stages from the selected field.

<figure><img src="/files/9V4adb2lpeqNP9j6raI0" alt=""><figcaption></figcaption></figure>

You can learn more about Reo's Account Lifecycle Stages [here](https://docs.reo.dev/accounts/account-lifecycle-stage).&#x20;

### **Contacts Field Mapping**

We have provision to export following fields for Contacts object to Attio.

| Reo.Dev Field                   | Attio Field                   |
| ------------------------------- | ----------------------------- |
| Full Name                       | Name                          |
| Business Email ID\*             | Email address                 |
| Designation                     | Job Title                     |
| Location                        | Primary location              |
| LinkedIn ID\*                   | REO: Linked In Profile        |
| Last Activity Date\*            | REO: Last Activity Date       |
| REO: Developer Summary\*        | REO: Developer Summary        |
| REO: Segment Name\*             | REO: Developer Segment Name   |
| REO: Tags\*                     | REO: Developer Tags           |
| REO: Activity Score (Numeric)\* | REO: Activity Score (Numeric) |
| REO: Audience Name\*            | REO: Audiences                |
| REO: Developer Link             | REO: Developer Link           |
| REO: GitHub                     | REO: GitHub                   |
| REO: First Activity Date        | REO: First Activity Date      |
| REO: Contact Agents Summary     | REO: Contact Agents Summary   |

**Business email ID** is a mandatory field and is already mapped. We fetch the Business email ID of the developers from third part enrichment service providers.

In addition to the Business Email ID, **Personal Email IDs** will also be synced **if collected through first-party sources**, including:

* Signup Forms on your website or documentation pages
* Product login or signup forms.

In the Reo.Dev UI, when users hover over the email icon on a profile, if a Personal Email has been enriched and mapped to that profile, it will be displayed alongside the Work Email.

Fields with prefix REO are automatically created in Attio and mapped to corresponding Reo.Dev field.

For Rest of the fields you can map the corresponding field in Attio from the dropdown. If you select Auto Overwrite checkbox, then we will overwrite the existing data in Attio during creation and sync operations.

### **How Reo.Dev Handles Multiple Email Records in Attio**

For each **unique email ID** we treat it as a **separate contact record** in Attio. Depending on whether an email already exists in the CRM, the contact is either **updated or created** as per the following scenarios:

| Scenario                                      |                                                                                |
| --------------------------------------------- | ------------------------------------------------------------------------------ |
| One Email ID exists in CRM                    | Update existing contact with latest REO data                                   |
| One Email ID does not exist in CRM            | Create a new contact record                                                    |
| Two Email IDs → First exists, second does not | Update existing contact for first email, create a new contact for second email |
| Two Email IDs → Neither exists                | Create two separate contact records (one for each email)                       |
| Two Email IDs → Both exist in CRM             | Update both contacts separately with latest REO data                           |

These cleanups are **rare and limited strictly to Reo.Dev-originated data**, and are performed to maintain data accuracy and reliability. For example, if a developer contact's work email becomes invalid (e.g., they’ve switched jobs), and a new valid email is identified, Reo.Dev may update or clean up the outdated email to ensure your CRM reflects the most current information.

Rest assured, no third-party or manually added CRM data is ever deleted by Reo.Dev.

***

### **What Happens When a Contact is Updated?**

* If an email already exists in Attio, Reo.Dev **updates the mapped fields** (as configured in CRM settings) with the latest developer data.
* Updates **do not overwrite existing CRM data outside the mapped REO fields**.

***

### **How New Contact Records Are Linked to the Same Company/Account**

When Reo.Dev creates new contacts, all the captured data—including the **Company Website (Domain Name)**, job title, LinkedIn profile, and other mapped fields—remains the same across contact records associated with the same company.

**This ensures that:**

* You can easily identify multiple contacts belonging to the same organization in Attio.
* Company-wide insights remain consistent, regardless of whether contacts have different email IDs.
* Your CRM data stays structured and organized, preventing fragmented company records.

By maintaining consistent company-level details, Reo.Dev enables seamless account-based contact tracking, helping sales and marketing teams engage with all relevant stakeholders.

{% hint style="info" %}
**Recommendation:** Fields with prefix REO should always have Auto-Overwrite checkbox as TRUE.
{% endhint %}

***

### **Send Tags to Your CRM**

You can now send **Account Tags** and **Developer Tags** directly to your CRM. These tags are fully customizable and provide quick context and insights on already enriched data.

**Why it matters:**\
Tags make it easy to:

* Identify key account traits or developer activities at a glance.
* Segment and prioritize accounts more effectively.
* Provide your sales team with richer, actionable insights to drive better conversations.<br>

**Want to learn more?**\
Check out our [Tags Handbook](https://www.reo.dev/tags-handbook) — a comprehensive guide to tagging and segmenting developers in Reo.Dev. It includes **15+ use case examples** designed to help DevTools GTM teams prospect smarter, increase pipeline, and close deals faster.

***

#### CRM to Revenue: Data In Playbooks

* [Revive Cold Opportunities in your CRM Using Developer Activity Signals](https://www.reo.dev/playbook/revive-cold-opportunities-in-your-crm-using-developer-activity-signals)
* [Monitor Dev Activity in your assigned CRM accounts](https://www.reo.dev/playbook/monitor-dev-activity-in-your-assigned-crm-accounts)
* [Detect Deal Stalls Early: Monitor & Act on Active CRM Opportunities](https://www.reo.dev/playbook/detect-deal-stalls-early-monitor-act-on-active-crm-opportunities)

**Explore the Playbooks Now** → [View All](https://www.reo.dev/playbook-collection/crm)

***

### **User Settings**

You can manage permissions for your team by defining specific users who can send data to HubSpot.

Click on **Configure** in User Settings.

<figure><img src="/files/xMtzKOSWrwlFIZ7stq4a" alt=""><figcaption></figcaption></figure>

You will be redirected to Users Section. You can turn on the toggle button in the CRM access column to allow specific users to send data to HubSpot.

<figure><img src="/files/MKIwWaCdnoJRhA7YDoDX" alt=""><figcaption></figcaption></figure>

### Export and Sync Frequency

Users will have options to send:

* **Segments to Attio**

  User can create a segment and click on **Send to Attio**
* **Accounts to Attio**

  User can select an account(s) from the Account list and **Send to Attio**
* **Developers to Attio**

  If Manual contact sync is selected for contacts, users can select developer(s) from the developer tab under Account Details screen and Send to Attio<br>

In case of Accounts and Developer, the export happens in real time and Attio icon will appear against the record on UI immediately but for segments it may take some time depending on the size of segment.

Once the Accounts and Developers are exported, Reo.Dev will sync data back to Attio on a daily basis.

All the accounts and developers that have been synced with Attio, will have a Attio Icon next to the name.&#x20;

***

### **Disconnect Attio**

You can disconnect Attio from the Integrations section

1. **Open Reo.Dev**
2. Navigate to **Integrations → CRM** and click Configure
3. Under Attio and click Disconnect at the top right corner

{% hint style="danger" %}
Please note that all the field mappings and user permissions will be lost.
{% endhint %}


---

[Next Page](/llms-full.txt/1)